If you would like to read the other parts in this article series please go to:

Introduction
In the first two parts of this multipart series on what’s new and improved in the TMG Beta 2 firewall, we covered features exposed in the Monitoring, Firewall Policy and Web Access Policy nodes. In this, part 3 of the series, we’ll cover what’s available in the E-mail Policy, Intrusion Prevention System, and Remote Access Policy (VPN) notes.
E-mail Policy
One of the most significant improvements in the TMG Beta 2 firewall is the addition of the e-mail protection feature. ISA had a history of providing some level of SMTP protection, such as that included with the SMTP filter and SMTP Message Screener. The SMTP Message Screener was included with the ISA 2004 firewall, but was dropped with the ISA 2006 firewall, in anticipation of a more comprehensive e-mail protection solution that would be part of the upcoming TMG firewall.
It was worth the wait. With the TMG Beta 2 firewall, you have comprehensive e-mail protection, enabled by both the Exchange Edge server and Forefront Security for Exchange. These two components work in concern to provide robust anti-spam and anti-malware protection. And what is especially nice about integrating these two products into the TMG Beta 2 firewall is that the complexities of configuration are abstracted away from the Forefront and Exchange consoles and bubbled up into the TMG Beta 2 firewall console.
I guarantee, you are going to like it.
There is one downside to the e-mail protection feature. With earlier versions of the TMG firewall (prior to Beta 2), the Exchange Edge component was installed with the TMG installation. Because of some licensing issues, you now need to install the Exchange Edge component before you install TMG. In a later article I will go through a detailed explanation of what you need to do to enable comprehensive e-mail protection with TMG and how to configure it in detail.
Let us get started with the E-Mail Policy node. Click on the node in the left pane of the TMG firewall console.
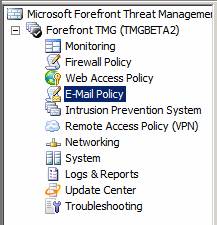
Figure 1
This exposes the middle pane of the console. At the top of the middle pane you will see the status of several features. Before you configure the SMTP protection feature, you will see the following in the status pane at the top of the middle pane of the TMG firewall console:
- SMTP Protection: Disabled
- Signature Updates: Enabled
- Exchange Edge Subscription: Disabled
- Virus and Content Filtering: Disabled
- Spam Filtering: Disabled
- Licenses: Valid until 4/4/2010
Note:
For the Beta 2 release of the TMG firewall, the Edge Subscription feature does not work. If you’re working with the Beta 2, do not try to enable Edge Subscription.
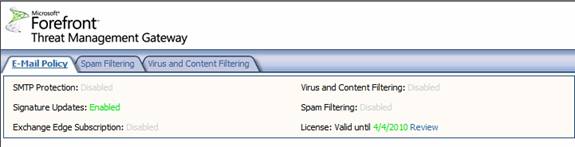
Figure 2
Let us see what the SMTP setup process is like. In the right pane of the TMG firewall console, click the Configure Server to Server Mail Protection link.
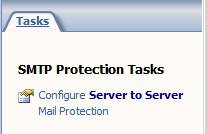
Figure 3
This brings up the Welcome to the E-mail Protection Wizard page. Click Next.
Figure 4
On the Internal Mail Servers Configuration page, you specify internal mail servers and SMTP domains for which you want to accept incoming mail.
In the Please configure your internal servers section, click the Add button. This brings up the Computer dialog box. In the Computer dialog box, enter a name for the SMTP server. Note that this can be an Exchange Hub Transport server, or any other inbound SMTP server, such as an inbound SMTP relay. The point I want to make is that you don’t have to use Exchange as the internal SMTP server.
Enter the IP address of the internal SMTP server in the Computer IP Address text box, and then enter a description of this machine in the Description (optional) text box. Click OK. While it looks like this creates a Computer object that you can reuse for other rules, that is not the case. This object is available only to the SMTP protection feature.
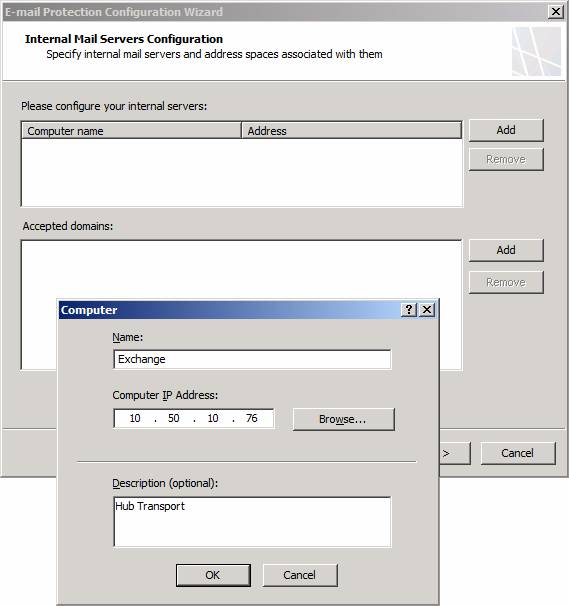
Figure 5
In the Accepted domains section, click the Add button. In the Add Address space dialog box, enter a name for an e-mail domain for which you want to accept incoming mail. You can add multiple domains if you want to accept mail for multiple domains. Incoming mail sent to domains that are not included in this list will be rejected by the TMG firewall’s SMTP protection mechanisms (as part of the Exchange Edge component). Click OK to save the domain.
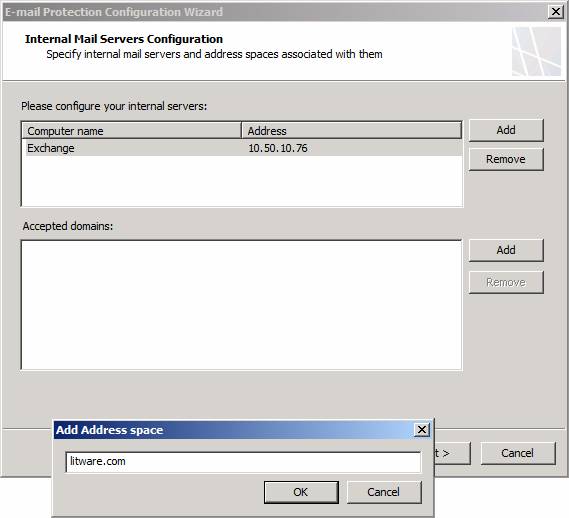
Figure 6
Click Next on the Internal Mail Servers Configuration page.
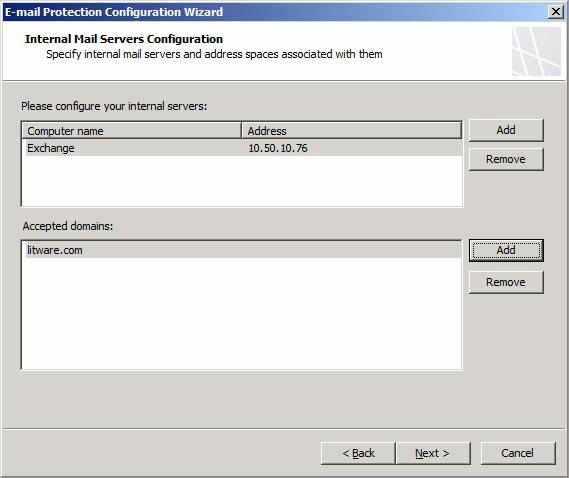
Figure 7
On the Internal Listeners Configuration page, select the network on which you want the TMG firewall to accept outbound mail from your internal SMTP server. In most cases (but not all, as each deployment has its own characteristics), this will be default Internal Network, which appears in the graphic as Internal.
If you have multiple IP addresses bound to the interface, you can select the IP address that you want to use, as seen in the Internal Network Listener IP Selection dialog box.
Click Next.
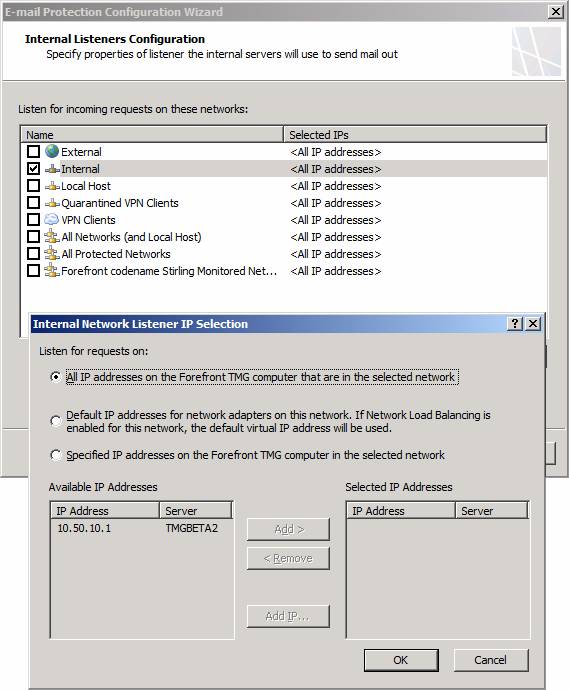
Figure 8
On the External Mail Routing Configuration dialog box, in the Specify FQDN the listener associated with the server will provide in response to HELO or EHLO text box, enter the name you want the TMG firewall to use in the HELO or EHLO responses. This is an important setting, as you need this name to be returned on a reverse DNS lookup for the IP address on the external interface of the ISA firewall that is accepting the connection. While this is not a technical requirement, it will help avoid problems with certain implementations of anti-spam solutions in use on the Internet.
In the Please configure how your organization will receive mail from Internet section, select the Network on which the incoming mail will be received. In most cases (but again, not all, since each implementation will vary), this will be the default External Network. If you have multiple IP addresses on the external interface, you can select the specific IP address, as seen in the figure below.
Click Next.
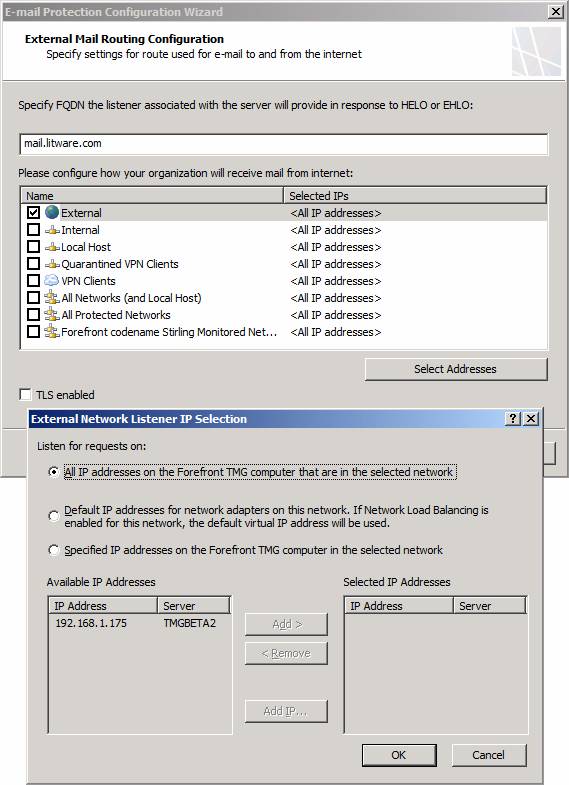
Figure 9
On the Mail Protection Configuration page, put checkmarks in the Enable Anti-Spam Features and Enable Anti-Virus Features checkboxes. As the checkboxes imply, enabling these selections turns on the anti-spam and anti-virus capabilities in Exchange Edge and Forefront Security for Exchange.
Click Next.
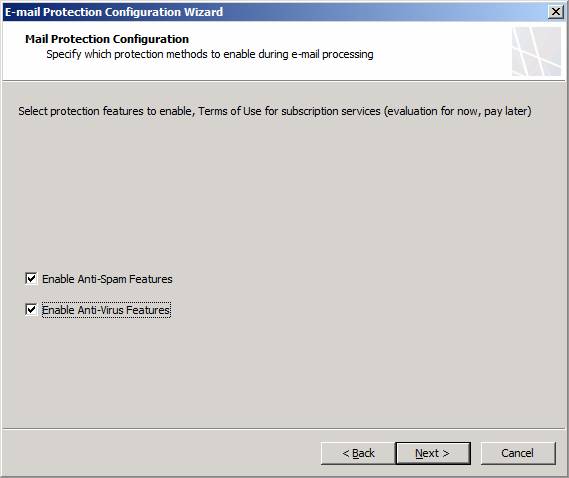
Figure 10
Review the information on the Completing the Server to Server E-mail Protection Wizard page and click Finish.

Figure 11
Notice that after you click Finish, a Microsoft Forefront Threat Management Gateway Beta dialog box will appear informing you that system policy rule for SMTP should be enabled, and that it will enable them for you if you click Yes. You should click yes, so that System Policy Rules can be enabled that allow external SMTP servers to send mail to the Local Host Network and internal SMTP Server can send mail to the Local Host Network.
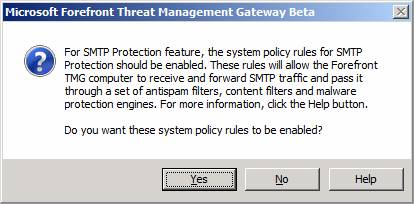
Figure 12
Click Apply to save the changes and update the firewall policy. Click OK in the Saving Configuration Changes dialog box.
After you apply the changes, you will see that the status section in the E-mail Policy tab in the middle pane of the console has changed, showing the following settings:
- SMTP Protection: Enabled
- Signature Updates: Enabled
- Exchange Edge Subscription: Disabled
- Virus and Content Filtering: Enabled
- Spam Filtering: Enabled
- License: 4/4/2010
You will also see under the status pane a list of Internal_Mail_Servers and Internet_Mail_Servers. If you click on either one of those, you will see detailed settings regarding incoming and outbound SMTP configurations.
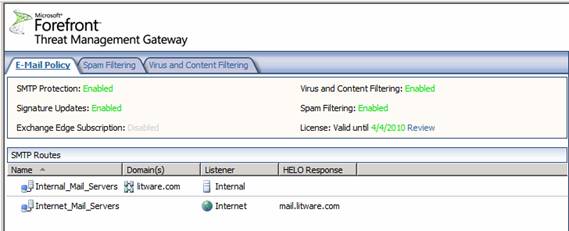
Figure 13
Click on the Spam Filtering tab. Here you see the available spam filtering options. These include:
- IP Allow List
- IP Allow List Providers
- IP Block List
- IP Block List Providers
- Content Filtering
- Recipient Filtering
- Sender Filtering
- Sender ID
- Sender Reputation
In a later article I’ll go through each of this options with you.
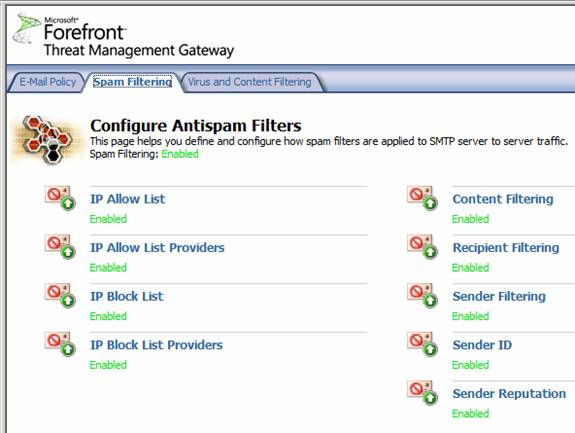
Figure 14
On the Virus and Content Filtering page, you have three options:
- File Filtering
- Antivirus
- Message Body Filtering
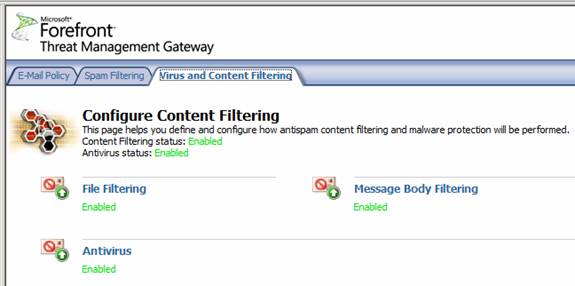
Figure 15
As you can see from this high level overview of the SMTP protection feature, the TMG firewall provides a very robust platform for protecting your e-mail infrastructure. And it does this without having to deploy a second machine dedicated to e-mail hygiene, giving you centralized configuration and reduced power consumption. Say goodbye to that Barracuda box!
Intrusion Prevention System
Another new and major improvement included in the TMG Beta 2 firewall is the Intrusion Prevention System, which goes by the name of Network Inspection System or NIS. This new feature is based on GAPA, the Generic Application Protocol Analyzer. GAPA is able to intercept network traffic and look for suspicious communications based on signatures. Signatures used by NIS are based on exploits described in Microsoft security bulletins, as you can see in the figure below.
The NIS IPS is a major advance for the TMG firewall. In previous incarnations of the ISA firewall, we had a very rudimentary IDS/IPS based on well known network level exploits. While that feature set is still included in the TMG Beta 2 firewall, the NIS is much more powerful and provides a more comprehensive protection.
Click on the Intrusion Prevention System node in the left pane of the console and you will see what appears in the figure below in the middle pane. This is a list of exploits that NIS will protect you against. Notice that you can group these exploits based on a number of parameters. These include:
- Attention Required
- Response
- Business Impact
- Category
- Data Published
- Severity
- Fidelity
- Protocol
- Status
- None

Figure 16
In the right pane of the console, you’ll see a number of new options related to this feature.
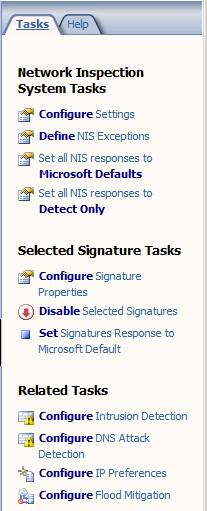
Figure 17
When you click the Define NIS Exceptions link, you will see the dialog box seen in the figure below. Here you can enter a network entity that is excluded from NIS scanning. If there are sites that you implicitly trust, you would enter them here.

Figure 18
When you click the Set All NIS Responses to Microsoft Defaults, you will see what appears in the figure below. When you select this option, you enable the TMG firewall to use the Microsoft recommended default action, which might be either block or detect. These default actions are part of the signature that Microsoft provides for the particular exploit.
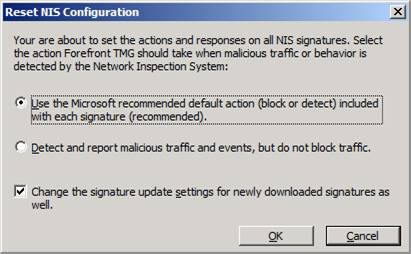
Figure 19
When you click the Set All NIS Responses to Detect Only, you enable the TMG firewall to only detect and report on malicious traffic and events that are detected by the NIS. The TMG firewall will not block the traffic.
Note:
For both options, you have the option enable the Change the signature update settings for newly downloaded signatures as well. This enforces the NIS response policy for new signatures, which might override the default setting on the signature itself.
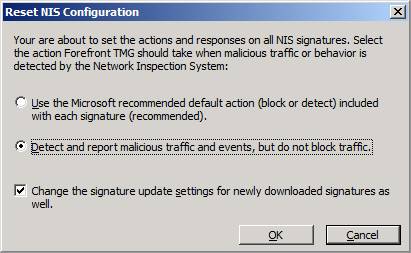
Figure 20
When you double click on one of the signature, you can see interesting details about what that signature is detecting, as seen in the figure below. In the details of the signature, you can see the details of the exploit and the configuration for the signature, either Microsoft recommended or Custom. If you select custom, then you can enable or disable the signature, and if you enable it, you can choose either Detect only or Block.
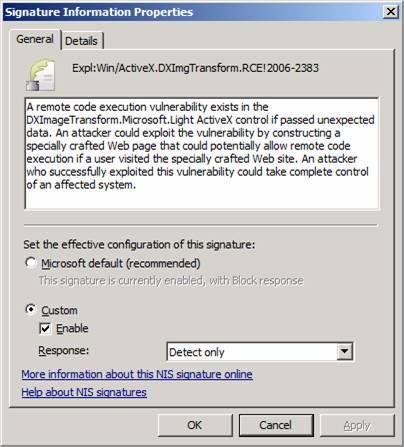
Figure 21
On the Details tab you can see even more information about the signature, as seen in the figure below. Details include:
- Affected Applications
- Business Impact
- Category
- CVE Numbers
- Date Published
- Default Response
- Default Status
- Fidelity
- Protocol
- Related Bulletins
- Severity
- Vendor
In addition, you can add your own Administrator Notes.
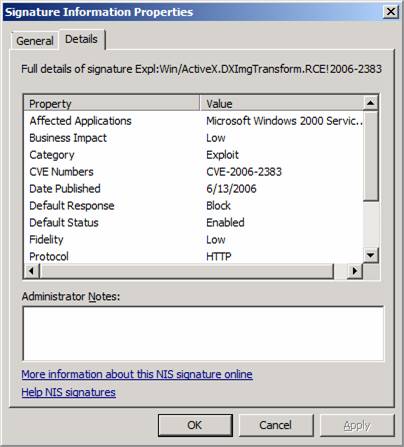
Figure 22
Remote Access Policy (VPN)
The Remote Access Policy (VPN) node is the replacement for the Virtual Private Networking (VPN) node we saw in previous versions of the firewall. You will see very few changes to the VPN networking features.
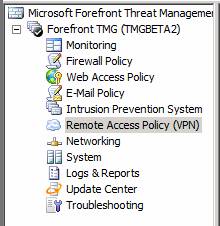
Figure 23
The only visible change at this time is support for NAP in the VPN Quarantine feature. However, there is no documentation at this time on how to make this feature work, so I can not give you much insight into how NAP is integrated into the Quarantine feature. Hopefully, it will be easier to implement than the old Quarantine feature, which was more of a platform for VPN Quarantine than an actual feature that the firewall administrator could use out of the box.
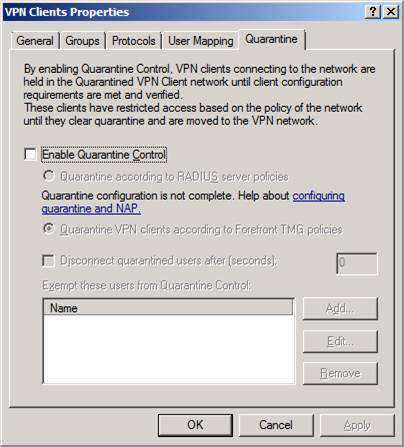
Figure 24
There is a possibility that SSTP will be integrated into this solution. If it is, I hope the TMG team will consider all the aspects required to get it working, including an interface that helps us manage the certificates used by the SSTP VPN server and publishing the CRL. If you have not worked with SSTP, you know that managing the SSTP certificates can be a real bear, and any investments the TMG team puts in this direction will be highly appreciated by the TMG firewall community. I think we would even put our money together and buy David Cross a bouquet of flowers and a fruit basket 🙂
Summary
In this, part 3 of our series on what is new and improved in the TMG Beta 2 firewall, we went over the options in the E-mail Policy, Intrusion Prevention System and Remote Access Policy (VPN) nodes. We went into a bit more detail in the SMTP protection section since this is a very compelling addition to the TMG firewall and significantly increases the value that the TMG firewall provides, compared to previous iterations of the firewall. The IDS feature also represents a major advance in the firewall’s IDS/IPS capabilities and finally instantiates a real network intrusion and prevention system that has the potential of being a game changer, as NIS signature could protect you in a way that no other firewall in the market can, since Microsoft has access to these signatures before anyone else. The VPN features are essentially unchanged, except for the suggestion that NAP is integrated.
In the next article we will finish up the series with the Networking, System, Logs and Reports, Update Center and Troubleshooting sections. See you then! –Tom.
If you would like to read the other parts in this article series please go to:


