Microsoft has long said that its preferred tool for Windows Server management is PowerShell. It should therefore come as no surprise that Microsoft provides a way of attaching to Azure through PowerShell. Doing so allows administrators to manage Azure resources through the same management tool that is used to manage on-premises resources. This is especially helpful for those who need to script bulk management operations, such as the creation of multiple Azure virtual machines.
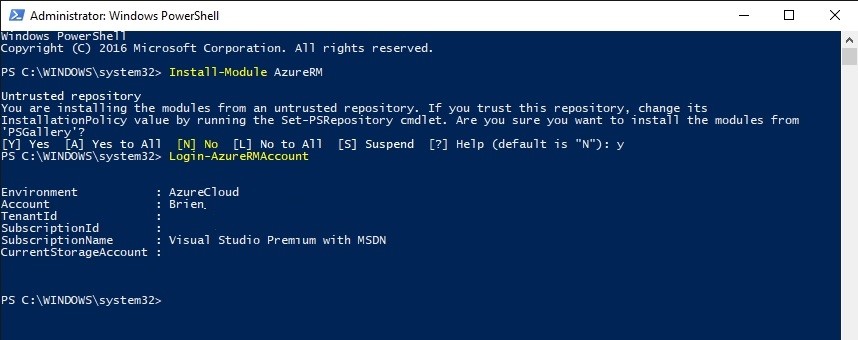
The first step in accessing Azure through PowerShell is to download Microsoft Azure PowerShell. It is also possible to install the package directly through PowerShell. To do so, open an elevated PowerShell session, and enter the following commands:
Install-Module AzureRM
Login-AzureRMAccount
Upon entering these commands, you will be prompted to enter the authentication credentials for your Azure subscription. Upon doing so, PowerShell will confirm that it is connected to Azure. This confirmation will look a lot like what you see in the figure below, except that I have blocked out the more sensitive information within the screen capture.
Before I go on, I need to point out that Azure has something of a split personality. As of now, Microsoft makes available the “new” Azure portal and the classic Azure portal. The important thing to understand is that these two portals are not just two different GUIs for Azure. They actually connect to two different environments. A VM that is created within the classic portal will not show up in the new Azure portal and vice versa.
With that in mind, take another look at the commands that we used to connect to Azure. We installed a module called AzureRM. The module was not called Azure. Similarly, the login command referenced AzureRMAccount, not Azure account. The reason for this is that these commands are targeted against the new Azure portal. If you need to connect PowerShell to the classic Azure portal instead, then you would use these commands:
Install-Module Azure
Add-AzureAccount
Since Microsoft is slowly phasing out the classic Azure portal, this article will be based solely on the new Azure portal.
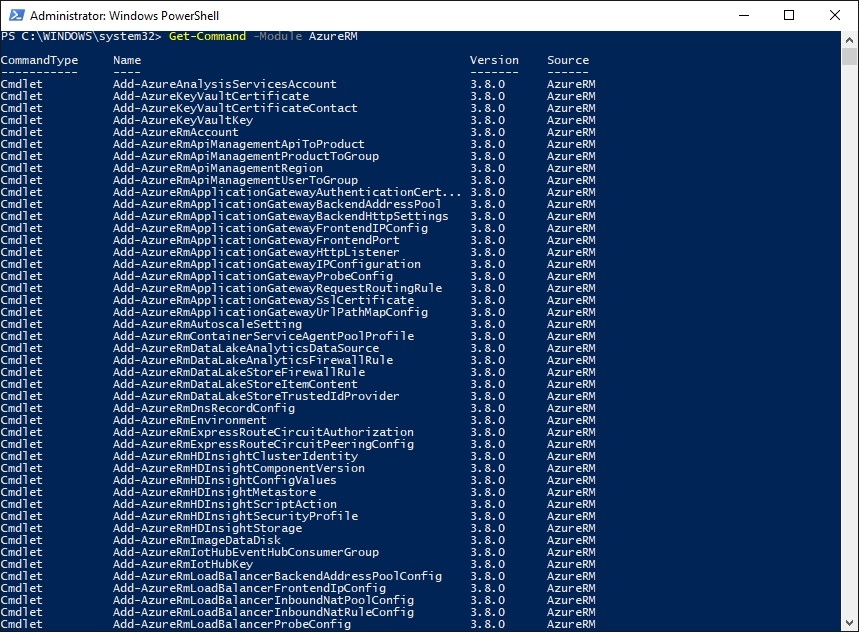
So with that said, the first thing that I recommend doing if you haven’t connected to Azure from PowerShell before, is take a look at some of the cmdlets that are available to you. You can see a full list of the cmdlets that are included in the AzureRM module by entering this command:
Get-Command -Module AzureRM
You can see the types of information that this command returns in the figure below. Keep in mind that the figure only shows a small fraction of the available cmdlets. The list of cmdlets within the AzureRM module is actually quite long.
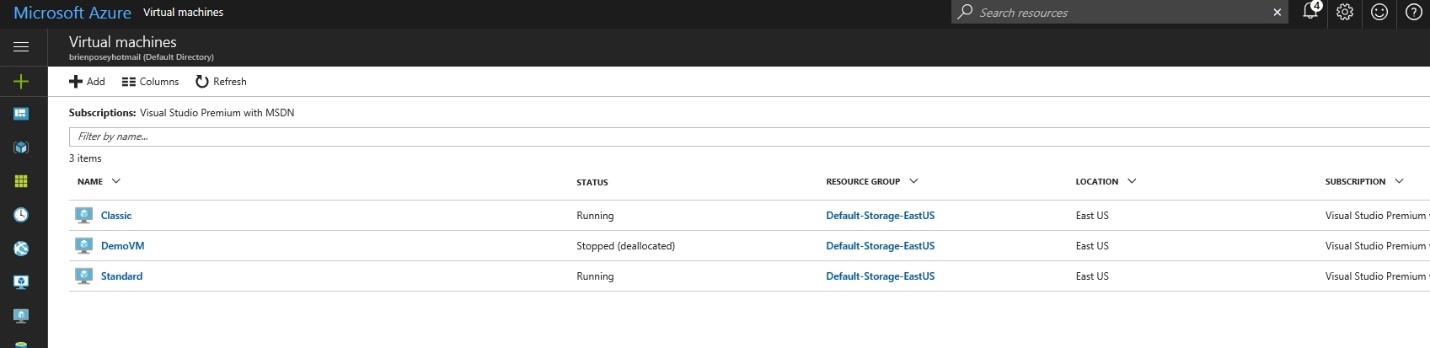
It isn’t exactly a secret that Azure is made up of a wide variety of services. However, most real-world Azure users seem to start out by creating some Azure virtual machines. That being the case, I want to show you how to access your Azure VMs through PowerShell.
If you look at the figure below, you can see that I currently have three Azure VMs.
If you want to see the same information in PowerShell, you can simply enter the Get-AzureRMVM cmdlet. Once again, be sure to include the RM within the command. You can see the output below:
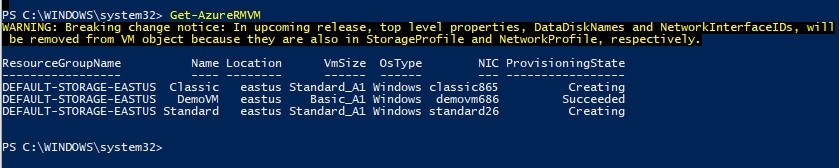
Of course, there is much more to a VM than the information that is shown in the screen capture above. So what if we want to dig a little bit deeper? Let’s take a closer look at the virtual machine named DemoVM. To do so, I would enter the following command:
Get-AzureRMVM DemoVM -ResourceGroup DEFAULT-STORAGE-EASTUS -Name DemoVM
Here is what the output looks like:
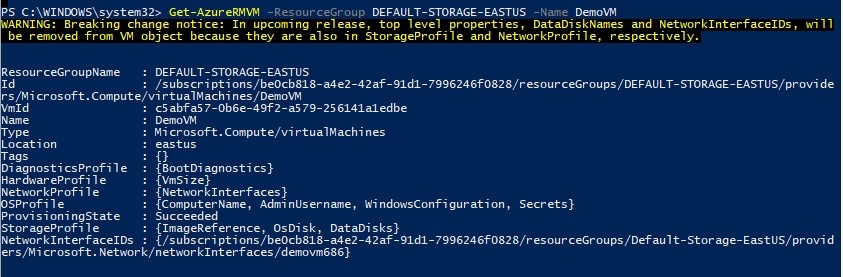
As you can see, retrieving information related to an Azure VM works a little bit differently than retrieving information about a Hyper-V VM. In a Hyper-V environment, you can simply type the Get-VM cmdlet, followed by the name of the virtual machine. If the virtual machine resides on Azure, however, you will have to provide both the VM name and the resource group name.
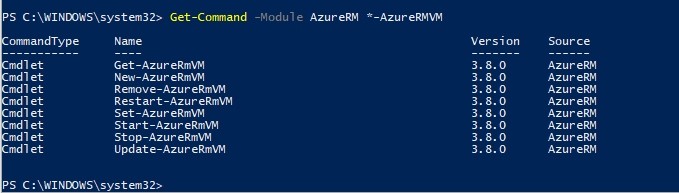
Earlier I showed you how to view an unabridged list of all of the cmdlets within the AzureRM module. But what if you only want to see the cmdlets that are related to Azure virtual machines? You can narrow things down by using this command:
Get-Command -Module AzureRM *-AzureRMVM
As you can see in the figure below, there are only eight cmdlets related to AzureRMVM. These cmdlets can be used to view, create, remove, start, stop, restart, and update Azure VMs.
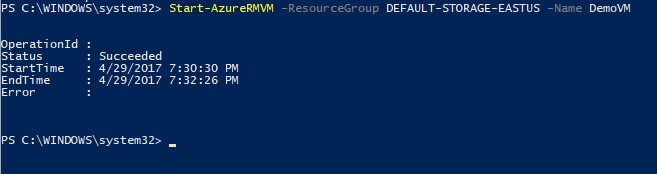
If, for example, I wanted to start the DemoVM, I could do so by entering the following command:
Start-AzureRMVM -ResourceGroup DEFAULT-STORAGE-EASTUS -Name DemoVM
Here is what happens when I run the command:
I can just as easily stop the VM by typing this command:
Stop-AzureRMVM -ResourceGroup DEFAULT-STORAGE-EASTUS -Name DemoVM
Some caveats
As you can see, Microsoft makes it easy to connect PowerShell to Azure. In fact, it only takes two commands to make the connection. Even so, using PowerShell to manage Azure does take some getting used to. Many familiar PowerShell cmdlets do not work in Azure. In many cases, Microsoft has created Azure specific versions of these cmdlets that have names that are somewhat similar to that of the PowerShell cmdlets that are used to perform similar functions on premises. Often times, however, it will prove to be impossible to substitute Azure PowerShell cmdlets for normal PowerShell cmdlets in an existing script, because of differences in the command syntax.


