If you would like to be notified when Neil Hobson releases the next article in this series please sign up to the MSExchange.org Real Time Article Update Newsletter.
Introduction
Just about every company that has implemented any version of Exchange over the years has setup and managed access to shared email addresses. In this article, I’m going to specifically refer to shared email addresses using an example that most administrators can likely relate to and that’s the case where a company wishes to have a common email address such as [email protected], [email protected], [email protected] and so on. In this article we’ll concentrate on some of the various methods available for creating a shared email address using the address [email protected].
Usually a company requires multiple users the ability to be able to access email that is sent to a generic address such as [email protected]. Ensuring that multiple users can access the emails sent to this address is obviously the main requirement, but quite often the ability for multiple users to be able to reply to this email is also required. Furthermore, thereis often the requirement where the replies must be seen as coming from an individual user’s email address rather than the generic [email protected]. In this article we’ll look at various ways to achieve these requirements. You’ll note that I’ve used the term email address in this article rather than a term such as a shared mailbox, since an email address can be assigned to something other than a mailbox as you’ll soon see.
In our example scenario, the target address is [email protected] as we’ve already mentioned. There will be a total of three users that need access to emails sent to this address, namely Ann, Bob and Carol. So let’s get going and look at the first of a couple of methods for achieving this access to a shared email address; we’ll look at the second method in part two of this article.
Distribution Lists
The first method that may be considered is the distribution list method. With this method, it’s possible to create a distribution list, assign it the [email protected] email address and then add Ann, Bob and Carol as members of the distribution list. When someone external to the company sends an email to [email protected] or an internal user selects the Info distribution group from the Global Address List (GAL), a copy of the email is delivered to Ann, Bob and Carol. Let’s look at how this is set up in Exchange 2007.
The first thing to do is to create the distribution list. Here’s how to do this using the Exchange Management Console:
- Run the Exchange Management Console, navigate to Recipient Configuration and locate the Distribution Group node.
- Right-click Distribution Group and choose New Distribution Group… from the context menu or choose the menu option with the same name from the Action pane.
- At the Introduction screen of the New Distribution Group wizard, ensure the New group option is enabled and then click the Next button.
- On the Group Information screen, choose a Group type of Distribution since we do not need a security group at this time. Give the group a suitable name in the Name field and you’ll see that the Name (pre-Windows 2000) and Alias fields are also populated accordingly. In my example I’ve called the group Info as you can see from Figure 1.
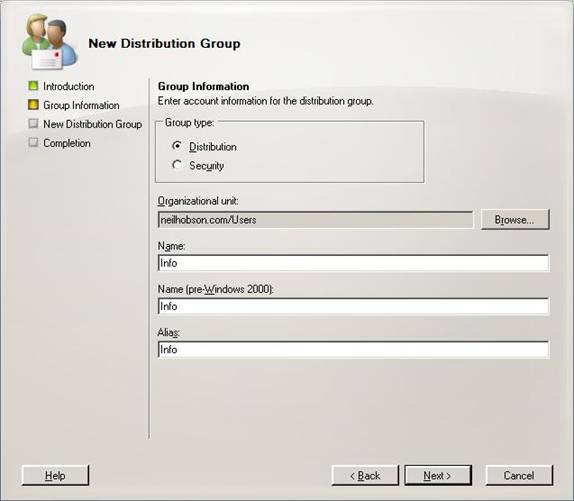
Figure 1: Creating a Distribution Group Using the Exchange Management Console
- Once Next has been clicked on the Group Information screen, the New Distribution Group screen is displayed which gives you a configuration summary. Assuming you’re happy with the configuration, click the New button to create the group.
I had already configured my Exchange 2007 Accepted Domains and E-mail Address Policies settings to ensure that the primary SMTP address generated for the new group would receive a neilhobson.com domain name. By using an Alias field of Info as shown in Figure 1, the default SMTP address for this new group is already set to [email protected].
Once the group has been created, bring up the properties of the group in the Exchange Management Console and go to the Members tab. Here you can click the Add button to add Ann, Bob and Carol as members of the group. This is shown in Figure 2.
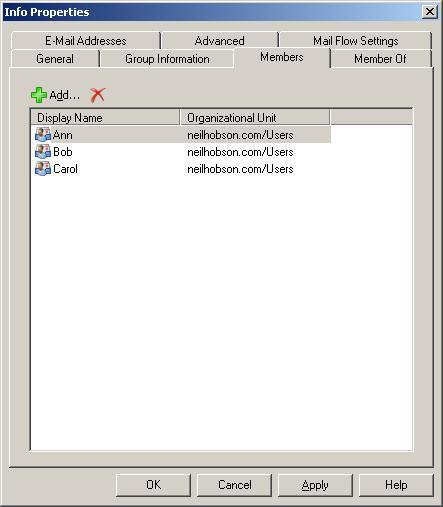
Figure 2: Adding Members to the Distribution Group
When anyone sends an email message to the Info distribution group, Ann, Bob and Carol all receive a copy. The problem with this approach is that the members of the distribution group cannot be sure who is dealing with the request as they all get their own copy of the message. This means that all copies of the message are initially marked as unread as you’d expect but if Bob, for example, reads his copy of the message, Ann and Carol’s copy remains unread. Additionally, if Bob replies to the message, Ann and Carol would not get to see the reply that is sent. One way around this is to ensure that all members of the group use the Reply All functionality of Outlook or Outlook Web Access (OWA) but of course this also means that any external recipient gets to see all the members of the group unless the Blind Carbon Copy (BCC) option is used of course. Additionally, this method requires that the members of the group remember to use the Reply All feature in the first place so user education will be a key factor here. This method will most likely work with distribution groups that contain a small number of members as larger groups could cause significant messaging activity when the Reply All function is used.
Also, the reply will, by default, appear to come from the actual user address. For example, if Ann replies to a message, that message is sent from Ann’s account and therefore the recipient will see the address of [email protected]. In other words, the message is not sent from the distribution group’s email address of [email protected]. To get around that issue, the members of the group can be given permission to send as the Info distribution group. To do this, use the Exchange Management Shell cmdlet Add-ADPermission as shown in the following example:
Add-ADPermission Info –User “neilhobson\ann” –ExtendedRights “send as”
The outcome of this cmdlet is shown below in Figure 3.
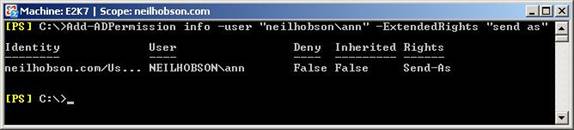
Figure 3: Results of the Add-ADPermission cmdlet
The cmdlet itself should be fairly self-explanatory as it quite clearly gives the account NEILHOBSON\Ann the “send as” right against the identity Info, namely the distribution group’s alias. Once this has been done, Ann can use the From field in Outlook to send as the distribution group. This is shown below in Figure 4.
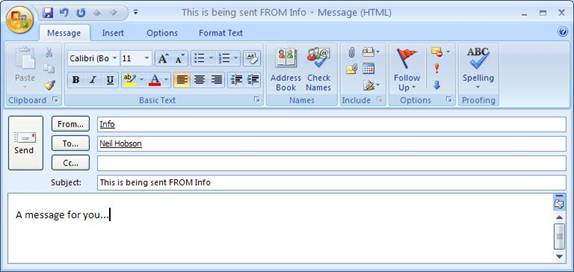
Figure 4: Using the From Field in Outlook
Of course, without this permission being granted you’d expect that Exchange 2007 will enforce security and ensure that Ann will not be able to send as the distribution group. Of course, that is the case as you can see in Figure 5. The delivery failure message is quite clear as to what the problem is.

Figure 5: Delivery Failure Message
Summary
Here in part one of this two-part article we’ve looked at a common method for allowing access to a shared email address, namely the method of creating a distribution group with the relevant SMTP address attached to it. You can then allow individual users to receive email sent to this address and respond by sending as the shared email address. In the second part of this article we’ll cover accessing a shared mailbox that has the relevant SMTP address defined on it.
If you would like to be notified when Neil Hobson releases the next article in this series please sign up to the MSExchange.org Real Time Article Update Newsletter.


