Migration has become an integral part of IT operations today. As an admin, you may have to move resources from one project to another, migrate objects as a part of a corporate strategy, and more. All this means you’re constantly doing migrations in one form or another. The good news though is migration is easy when you use Microsoft’s Active Directory because of a tool called Active Directory Migration Tool, or ADMT in short. This tool comes with a ton of options and wizards to help you migrate across domains and forests within just a few minutes.
What is the Active Directory Migration Tool?
The Active Directory Migration Tool helps to migrate objects and restructure tasks in an Active Directory environment. It is used for migrating between domains in the same forest (intraforest) or across different forests (interforest).
Prerequisites for installing Active Directory Migration Tool
To install the Active Directory Migration Tool, you need the following system requirements:
- Windows Server 2008, Windows Server 2008 R2, Windows Server 2012, Windows Server 2012 R2, and Windows 2016
- Active Directory Migration Tool doesn’t work when computers are a read-only domain controller or when they are a part of a server core configuration.
- The source and the target domain should run only on one of the supported operating systems.
- You need a SQL server database instance for ADMT to store data. You can either install it on your own machine or create an instance from an existing database in your network.
How to install Active Directory Migration Tool
 Installing ADMT is a fairly easy process. Here is a step-by-step guide to installing it.
- Remove all previous versions of ADMT.
- Download the Active Directory migration tool from Microsoft’s site. Navigate to the downloaded folder and double-click on admtsetup32.exe.
- Read through the instructions and click “next” when you’re done.
- Accept the license terms and conditions.
- In the next step, you have the option to be a part of Microsoft’s “customer experience improvement program.” Select the “join” radio button if you want to send your hardware configuration information to improve ADMT. Else, select the “I do not want to join” radio button and click “next.”
- In the following screen, provide the database instance. If you’re using a local server, specify it in the format “.\.”. For example, you can input “.\.SQLSERVER”. On the other hand, if you’re using an instance of your network database, use the format “\.”
- When you click “next,” the wizard will take a few minutes to configure your components and install them.
- Once the installation is done, note the log path and installation directories. Finally, click “finish.”
With this, your ADMT installation is complete and you’re all set to use it.
How to use Active Directory Migration Tool
You can migrate users, groups, computers, managed server accounts, and all other objects on AD FS using the ADMT console, command line, or VBScript.
Let’s see some of the basic migration examples using the ADMT console.
Intraforest migration using Active Directory Migration Tool
Create a checklist
Before starting the migration process, here’s a list of things to do.
- As a first step, understand the structure of your forest. Check out your root domain, child domain, and tree domain, and see how they’re structured. Since they’re all part of the same forest, they’ll most likely have a two-way trust by default.
- Determine which objects you want to move, the source of these objects, and the destination where you want to move them.
- Consider creating a table to document the domain objects you plan to move. Include the source, destination, and even a status column for your reference.
- ADMT doesn’t come with any built-in test options. So develop a test plan and make sure you test each object during and after the migration process.
- Check the membership and credentials of each object before you migrate
- ADMT migration is not reversible. The only way to move objects from the destination back to the source is to do another migration process. This can be cumbersome and long, so have a rollback plan in place.
- Inform all users who will be affected by this migration. Follow your organization’s protocol and send clear communication ahead of time.
Once you’ve taken care of these premigration tasks, start the migration process.
Migration for limited objects
If you want to migrate only a small number of objects, use the ADMT console to manually select the objects, and migrate them.
To do that…
- Log in with your ADMT credentials on the target or parent domain, where ADMT is already installed.
- Navigate to the “Active Directory Migration Tool” folder, right-click on it, and select “user account migration wizard.”
- When the wizard opens, click the “next” button.
- In the next screen, give the NetBIOS or DNS name of the source and target domains, and click “next.”
- Then, choose the “select users from domain” radio button

- In the next screen, click the “add” button. This will open a dialog box where you can browse through user accounts and select the users you want to migrate.
- Once you’re done, click the “OK” button and the dialog box will close. Check if the main window has all the user accounts you selected. Click “next.”
- Select the target organizational unit for the selected users and click “next.”
- In this screen, check “translate roaming profiles” and “update user rights” checkboxes. You may get warnings here. Simply ignore them and click “next.”
- The next screen is conflict management settings. It’s best to select “do not migrate source object if a conflict is detected in the domain” as it makes conflict resolution easy for you. Click “next.”
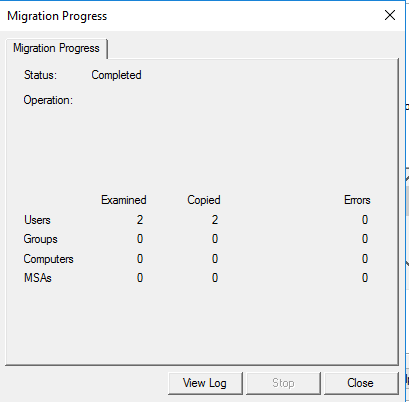
- This is the last screen, so check the details and click “finish.” Wait for the wizard to complete the migration. You’ll get a prompt in case of errors; otherwise you’ll see a summary of the migration process.
Open the target domain and verify if the users are migrated.
Migration for a large number of objects
While it was easy to migrate a few objects manually, it can get cumbersome to select hundreds of objects. So, to migrate more than a handful of objects, it’s best to include them in a file and upload the same to the wizard.
The first few steps are similar to the above-mentioned migration process. However, instead of choosing the “select users from domain” radio button, choose “read objects from an include file.” Browse, add the include file, and continue with the wizard. The process is similar to migrating individual user accounts. Once you’re done with the wizard, click “finish.”
Migration of groups
To migrate entire groups from source to destination, start with the “Active Directory Migration Tool” directory. Right-click and select “group account migration wizard.”
- In this wizard, give the NetBIOS or DNS name of the source and target domains.
- Next, choose “select groups from domain” option if you want to migrate only a few groups. In case of large groups, select “read objects from an include file.”
- For the first option, manually choose from the list of groups. In the case of the second option, upload the include file with the names of all the groups you want to migrate.
- Select the target organizational unit for the migrating groups.
- Do not make any selection in the “group options” screen. Simply click “next.”
- In the “conflict management” screen, choose “do not migrate source object if a conflict is detected in the target domain.”
- Finally, check your information, click “finish” and wait for the wizard to complete the migration. You’ll get a summary of the migration process.
Migration of workstations or member servers
If you want to migrate workstations or member servers, the process is fairly the same. The only change is choose “computer migration wizard” from the right-click menu instead of “group account migration wizard.” The wizard will be the same until you select the organizational unit for the migrating workstations or member states.

After that, follow these steps.
- You’ll get a “translate objects” screen, and here check “local groups” and “user rights.”
- In the next screen, choose “replace” radio button and click “next.”/li>
- Accept the default value of five minutes and click “next.”
- The next screen is “object property exclusion.” Make no changes here, and simply click “next.”/li>
- In the “conflict management” screen, choose “do not migrate source object if a conflict is detected in the target domain.”
- Finally, check your information, click “finish,” and wait for the wizard to complete the migration. You’ll get a summary of the migration process.
That’s how you migrate different objects within the same forest. Active Directory’s wizards take care of much of the work, so you can channel your time for the more difficult tasks.
In the next article, we’ll talk about how you can migrate objects across forests. In most cases, you’ll do this migration when one company has taken over another and the resources have to be moved to the new company. Obviously, that’s a much longer process, so see you in the next part.


This is very limited help because is mentions nothing about domain rights and trusts which are required on source and destiantion.
does the users of the source domain automatically get the target domain name after migration?
for example if source domain is “@source.com” and target domain is “@target.com
when [email protected] is migrated to the target domain, does the is it going to be [email protected]?
This mechanism only outline the migration but no clear picture for detailed migration in Inter forest migration it must be more elaborated to explain real time migration
Dear microsft plz clarify the clear setup of migration tool bcz its not able to understand after migration can u clear that ,and one more thing plz provide best examples of migration tool with pictures.
I think this is a great article. Please keep them coming! the more detail the better but this is a great start and I can figure out the rest (or most of it) if someone cannot figure the rest (or most of it) then they should not be attempting something like this.