Management can be a hassle in a multi-hypervisor environment because of the need to use multiple management tools. One way to simplify the process is to link your vCenter Server to System Center Virtual Machine Manager. Doing so doesn’t negate the need for vCenter, but it will let you perform some common management tasks from within the Virtual Machine Manager Console.
For the purposes of this article, I am using System Center 2016 Virtual Machine Manager, and vCenter 5.5. The versions of vCenter that are supported vary depending on which version of System Center you are using, so it’s a good idea to check Microsoft’s requirements before attempting to tie the two environments together.
Setup process
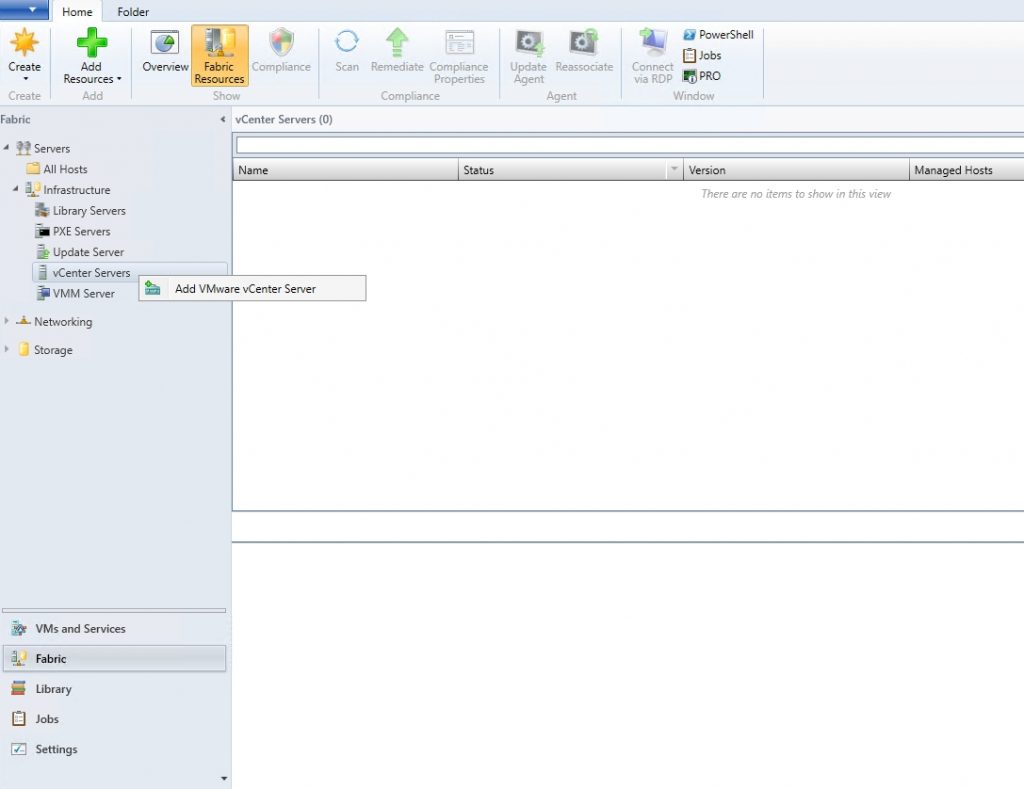
Begin the process by opening the Virtual Machine Manager Console and then going to the Fabric workspace. Next, navigate through the console tree to Servers | Infrastructure | vCenter Servers. Now, right click on the vCenter Servers container and choose the Add VMware vCenter Server option from the shortcut menu, as shown in the figure below.
At this point, Virtual Machine Manager will display the Add VMware vCenter Server dialog box. As you might expect, populating this dialog box is a relatively straightforward process, but there are a couple of things that you will need to consider.
Enter the name
The first thing that you will need to enter is the name of your vCenter Server. If you look at the image below, you will notice that Microsoft really doesn’t provide any descriptive text as to what you are supposed to enter for the computer name. However, the next line provides a clue. The default port value of 443 indicates that VMM will attempt to communicate with the specified server using the HTTPS protocol.
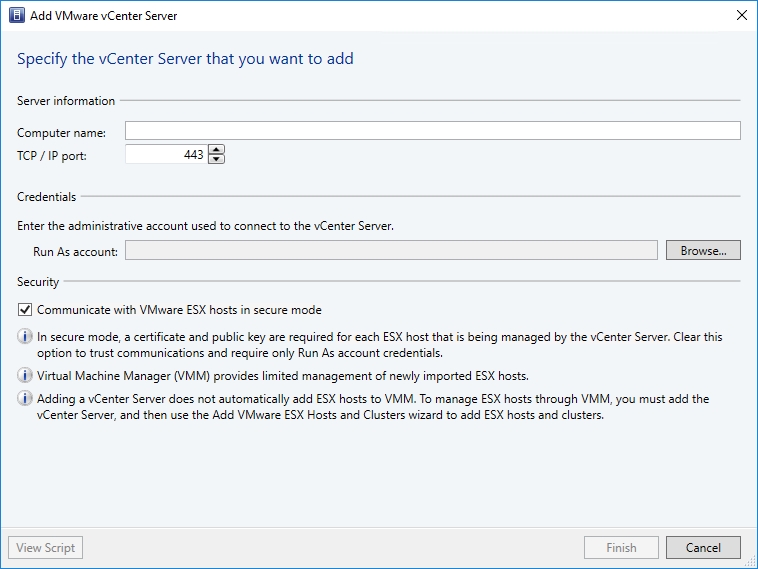
In my case, I opted to enter an IP address instead of a computer name. You can use an IP address, a NetBIOS name, or a fully qualified domain name.
The next thing that you will need to do is to specify a Run As account. This is one of the steps where it is easy to make a mistake.
In case you are not familiar with the concept of a Run As account, it is simply a privileged account that acts on the administrator’s behalf when the administrator performs administrative tasks within Virtual Machine Manager. If you have been using Virtual Machine Manager to manage your Hyper-V environment, then you no doubt already have a Run As account in place. The problem, however, is that your existing Run As account may not be suitable for use with vCenter Server.
If you look back at the previous screen capture, you will see that the Credentials section tells you to enter the administrative account used to connect to the vCenter Server. As such, you are going to need to create a Run As account that contains the credentials that are used to authenticate into your vSphere environment.
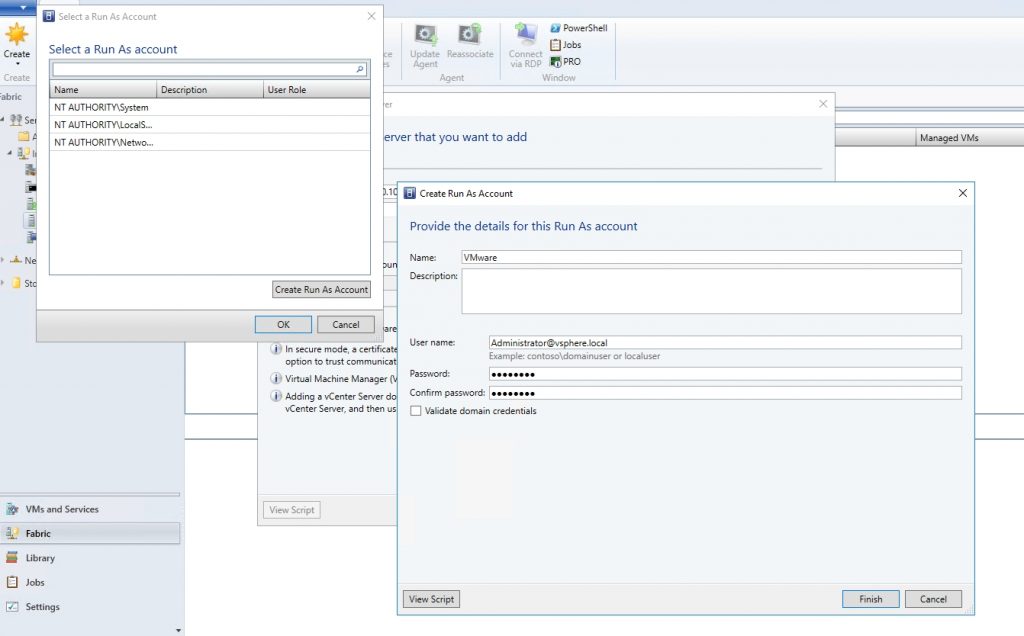
The good news is that you don’t have to cancel out of the wizard to create a Run As account. If you click the Browse button, you will be taken to a screen that prompts you to select a Run As account. However, this screen also contains a button that you can use to create a brand new Run As account.
Go ahead and click on the Create Run As Account button, and then enter a name for your new account, and a set of credentials that can be used to log into the VMware environment. You can see what this screen looks like in the image below.
Unfortunately, simply creating a VMware RunAs account isn’t sufficient. If you were to complete the wizard right now, then the process of adding the vCenter Server to Virtual Machine Manager would fail (or at least it would if your environment is set up like mine). That being the case, we need to enable Active Directory authentication for vCenter.
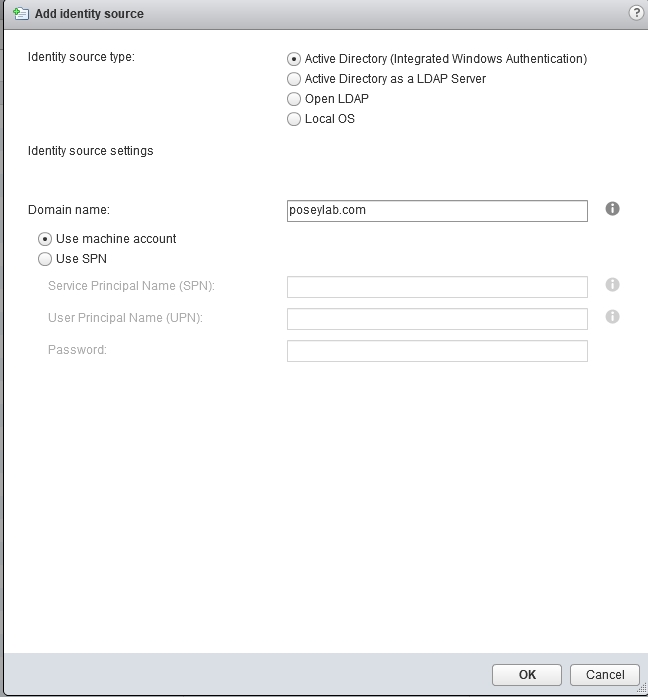
To do so, log into vCenter and click on Administration, and then click on the Configuration container, found in the Single Sign-On section. Now, go to the Identity Sources tab, and click on the green addition sign icon. This will cause the Web console to open the Add Identity Source dialog box. At this point, you will need to select the Active Directory option and provide the name of the domain if it has not already been entered automatically. You can see what this looks like in the image below.
Returning to Virtual Machine Manager console and the Add VMware vCenter Server dialog box, the last thing that you will need to do is to select or deselect the checkbox for communicating with VMware ESX hosts in secure mode. Using secure mode is always a good idea, but keep in mind that if you do opt to use secure mode, then each ESX server that is managed by the vCenter server is going to require a certificate and a public key.
Import the vCenter Server certificate
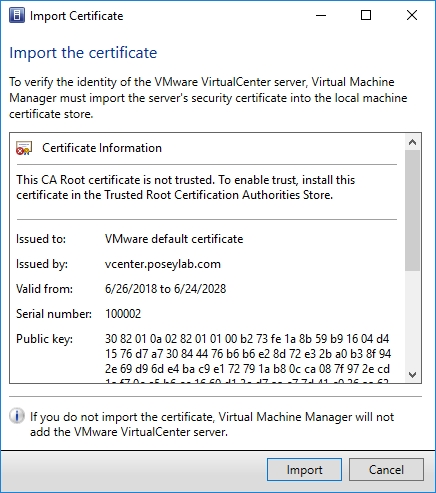
Once you have finished populating the Add VMware vCenter Server dialog box, click Finish. When you do, Virtual Machine Manager will display a dialog box like the one that is shown in the figure below, asking you to import a certificate from the vCenter server. Go ahead and click the Import button to import the certificate. Once the certificate is imported, the Jobs window will open and the vCenter server will be imported.
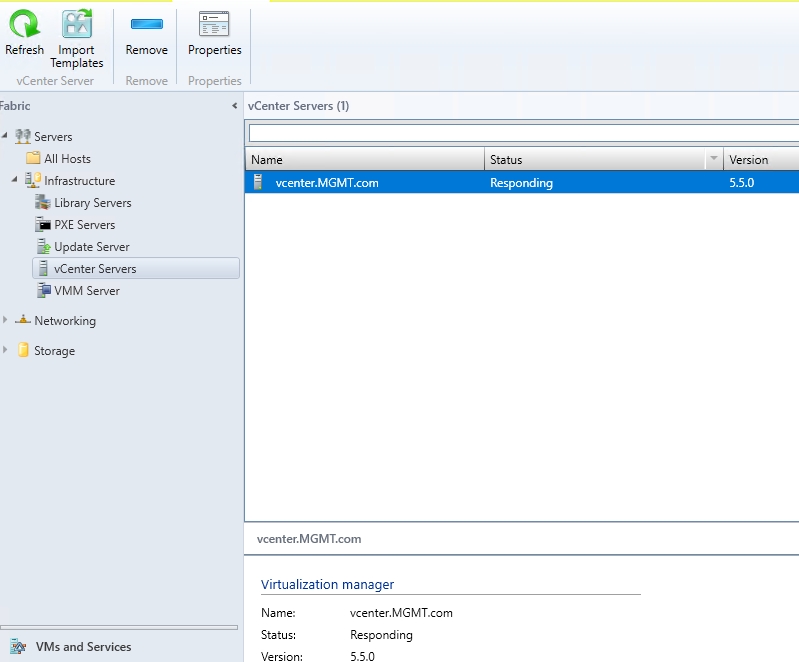
When the process completes, you should see the vCenter server listed within the console’s vCenter Servers container, as shown in the image below.
Last piece of advice
Microsoft makes it relatively easy to add a vCenter Server to System Center Virtual Machine Manager. If you encounter any problems along the way, make sure that the vCenter Server and the Virtual Machine Manager Server are both in the same domain (or at least in trusted domains) and that each server can resolve the other’s fully qualified domain name.
Featured image: Shutterstock


Hi Brien
My Hyper V DC failed, I tried rebuilding from VHD, but now im getting domain controller failed to change state. the operation cannot be performed while the object is in use.
Hi Ricardo,
Try checking any hardware mappings. Make sure that the VM is not configured to use a DVD drive, or any other type of removable media. You should also check to make sure that the virtual hard disks exist at the path specified within the VM’s settings. Every time that I have seen that particular problem occur, it is because the VM is configured to use hardware that it cannot find.
Good luck,
Brien