Azure DevOps is the complete package and management tool to plan and track tasks and teams, version control of your code, automate deployments, testing, documentation, and much more. Sometimes it is overlooked by infrastructure professionals as the primary tool to manage Microsoft Azure. Azure DevOps can be the single location to manage all your subscriptions as infrastructure-as-a-code (IaaC) and save you time and money using an integrated tool with the Microsoft platform.
In this article, we are going to have an organization in Azure DevOps and a single project to manage the entire environment using ARM templates and scripts. Although we are not going into the technical details in this article, we plan to use resource groups to combine all resources of any given project/service workload as a single unit. We are going to have a repo for each application/service, which will match with a resource group.
Defining the process used in your Azure DevOps project
When creating a new project, the cloud administrator has the option to choose what is going to be the process to be used in the Azure Boards. These are the processes available by default: Agile, Basic, CMMI, and Scrum options.
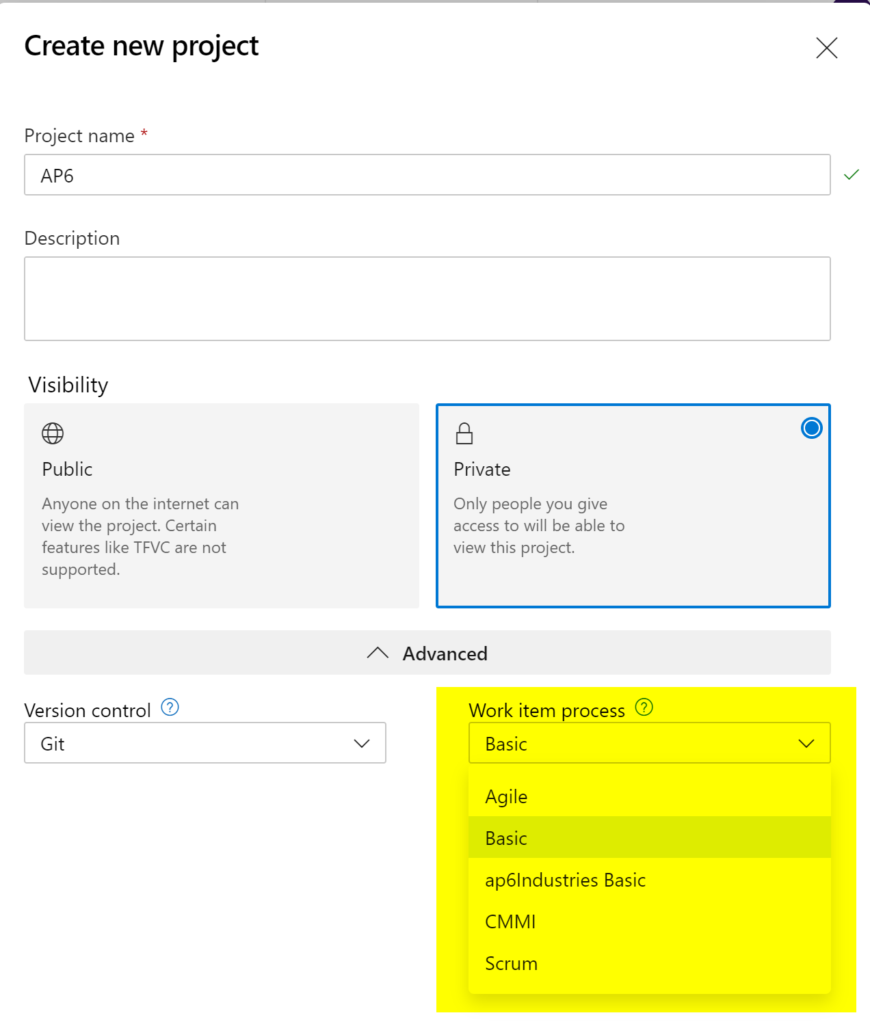
The process will define how the work items and their structure will be available to the project’s team. For example, when using Basic, the work items available are Epic, Issue, and Task. If we select Agile, then we will have these following work items: Epic, Feature, User Story, Task, Bug, and Issue.
Getting started with Azure Boards
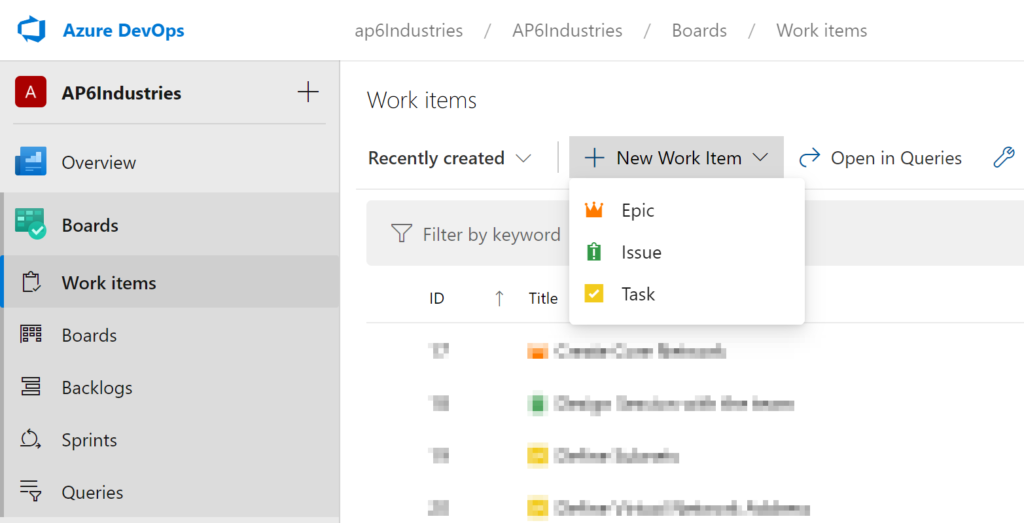
Everything starts with work items (Item 2). We are using the Basic process, so we have three types of work items: Epic, Issue, and Task.
The Epic work item can be used to represent milestones, and an Epic can have multiple issues associated with it. Finally, an issue can contain multiple Tasks related to it. That defines the structure of how you want to label and organize work items using the Basic process.
In our scenario, we are going to create an Epic for Hub-CoreNetwork Deployment, App6 Deployment, and Firewall Deployment. My preference is to use short names for Epics and use that same name as part of the name for the Issue work Item. By doing that, we can understand the hierarchy at a single glance.
For example, we may have different Epics, and a common Issue could be Update documentation/Wiki. It would be hard for me to know which documentation is the Task without looking further into the properties of the Issue. Keep that in mind and see how comfortable you are with your naming convention.
To start creating work items, click on Boards, Work Items. Click on New Work Item and select the desired work item.
The work items are beneficial when you are adding some pressing tasks that need to be addressed. However, there are better and more organized ways to add work items to your team. In the example below, we are creating an Epic that will install Azure Automation on all subscriptions that we have available.
Each work item type has its fields that can be customized based on your requirements, and the out-of-the-box fields allow plenty of interaction with other components (Repos, Pipelines, Wiki), ability to attach documents, review status of every single task, assigns tags, follow, etc.

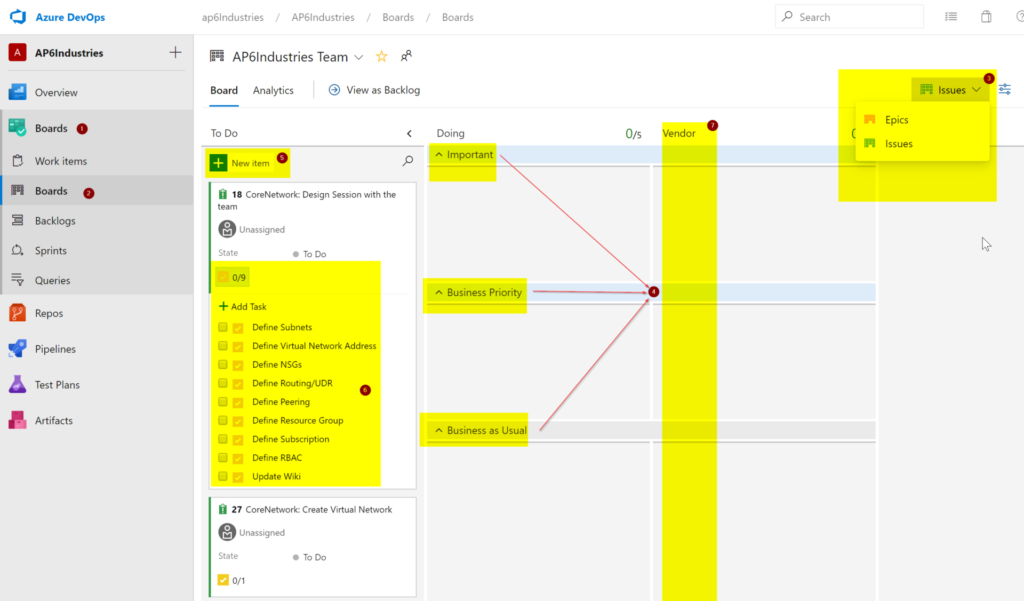
The Boards area has several features, and we are going to do a brief overview of some cool features about this view. First, to get there, click on Boards (Item 1) and then click on Boards (Item 2).
There are two possible views of our work items, which are Epics and Issues. We are going to select Issues (Item 3), and a list of all available Issues will be listed under the To Do column.
The New Item button (Item 5) allows easy creation of Issues (because that is the current view), and we can expand any given Issue and add tasks using the Add Task link (Item 6), which helps when grouping together Issues and Tasks related to it.
In this same view, we can drag and drop the Issues between the columns that we have defined, and that will update the State of the given Issue automatically.
One of the advantages when using Boards over the work items is that the structure of parent and children is done automatically when we open the Issue 18 (CoreNetwork: Design Session with the team, for example).
We will have the related work area of the properties of that Issue with the proper parent (Epic) and child (Tasks) properly configured. You can do similar things with work items. However, it requires more labor to organize the Tasks.

We configured the board slightly differently from the default view. First, we have a column called Vendor (Item 7), and we are going to use that to assign Issues that are assigned to a vendor. The other item is the swimlanes (Item 4), which creates some priority visualization to the team. All Issues should be addressed, but the resource can pick one that is more pressing to the business or overall importance.
To configure swim lanes, click on Settings and then click on the Swimlanes tab and define them there. To set an additional column, click on Columns and make the proper changes. Click on Save and Close to apply the changes.

Working with Backlog and Sprints
At this moment, we have pretty much all our work items being created by either work items or Boards. Make sure that you feel comfortable creating your work items and organizing them the best way that fits your business needs.
To plan what to do, when, who, and how is the utilization of your resources. We need to start organizing, and Azure DevOps makes it easier by using Sprints and Backlogs.
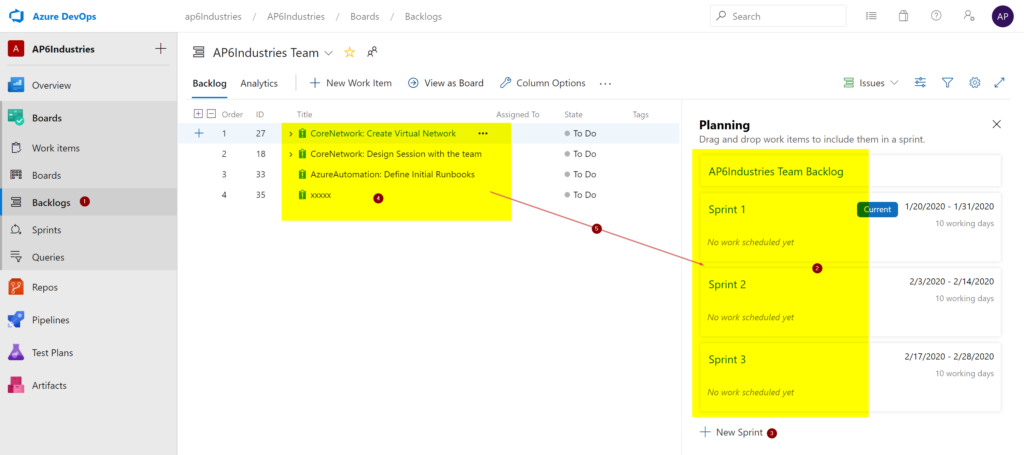
First, let’s go to Backlogs (Item 1), and a list of all Issues (again, you can select the view between Issues and Epic) will be listed (Item 4). On the right side (item 3), we will have a list of all existing Sprints with their start and end dates, we can also create a new sprint by clicking on New Sprint (Item 3).
We can move Issues (including their child Tasks) to any given Sprint by dragging and dropping. The Issues that you see on the left side are the ones that are still located in the Backlog. As soon as we move them to a Sprint, they will be removed from the backlog view and they will be found in the specific Sprint.
To see all issues on any given Sprint, click on it.
Although the Backlogs help a lot to organize tasks, if I can’t see all the work items in their hierarchy it is hard for me to keep track of the structure. It is doable when you have a few items, but when you start having hundreds, it becomes harder to manage.
We can always enable parents on the View Options button, and that is a game-changer.

The results provide a complete view of the structure, having Epic, Issue, and Tasks in a single glance (Item 1). For those Issues not assigned to an Epic, they will show up as unparented Issues.

In the Sprint section, make sure that you are on the Taskboard (Item 1) and the first column on the left we will have the Issues assigned to the current Sprint. We can move the tasks between To Do, Doing, and Done.
The current Sprint is defined in Item 2, and we can use that area to switch among existing Sprints. We also have a small picture with the graphical information on the Burndown Trend. When we have proper tasks configured, including assigned to, the time required to complete the task, activity, and so forth, we can see the Work Details page (we can enable it by clicking on View Options).
The Work Details is a great tool to see how the work for the current Sprint is being distributed among the team and for how much time.

Azure DevOps as your planning and tracking management tool: Only the beginning
We haven’t even scratched the surface on planning and tracking using Azure DevOps as your management tool. There are plenty more features and capabilities available that will not fit in a single article.
Featured image: Shutterstock


