Azure Key Vault should be part of any cloud implementation these days. It improves security on so many levels that it is hard to see a complete solution without relying heavily on the Azure Key Vault. Sometimes I see people asking questions about Key Vault security and resiliency as a service and the traditional “if” scenarios. This article aims to create a simple simulation between the Azure Key Vault and Capt. Destruction — a villain who will try his best to bring down Azure Key Vault with permanent deletion.
When I was a kid, the “Die Hard” movie was a blockbuster. When I saw Bruce Willis fight single-handed against all the bad guys, that was impressive (I gave away my age with this comment), and writing this article, I feel Azure Key Vault is in the same position, where we are going to try several methods to get rid of something stored in our Key Vault. I hope by the end of this article, your trust in Azure Key Vault is the same as in Bruce Willis saving the world against the bad guys.
Key Vault versions
he first thing to understand is that every time we update either a secret, key, or certificate, a new version is created, and the previous version is kept in the Key Vault.
As a simple example, I created a Techgenix-Password secret and changed it three times. For every single version, I can go back and retrieve the information (the password entered) if I have enough permissions to read the secret.
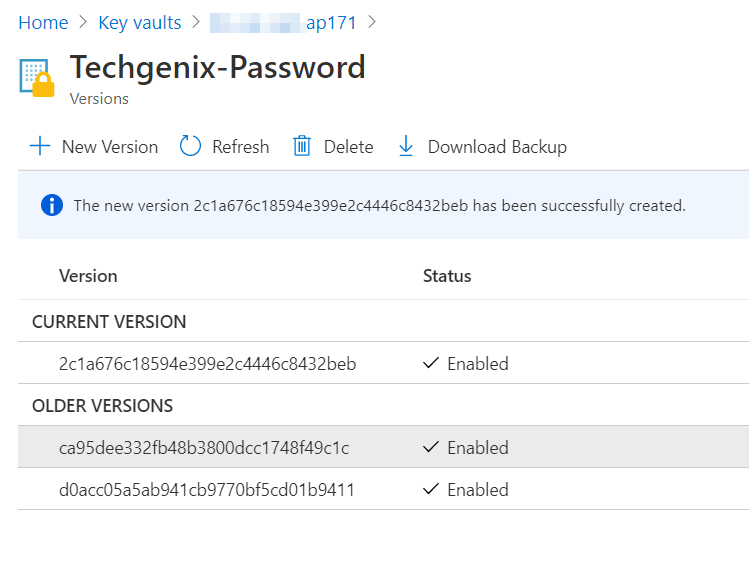
If you try to scramble the data by changing the content, you will have more data, and the previous data will be preserved. Score now: Key Vault 1, Capt. Destruction 0.
Deletion of secrets, keys, and certificates in Azure Key Vault
Fine! If we can’t delete specific versions, let’s delete the whole thing, the entire object (secret, key, or certificate), right? Problem solved — for Capt. Destruction!
We will delete the same Techgenix-Password secret by clicking on Delete and confirming by clicking on Yes.
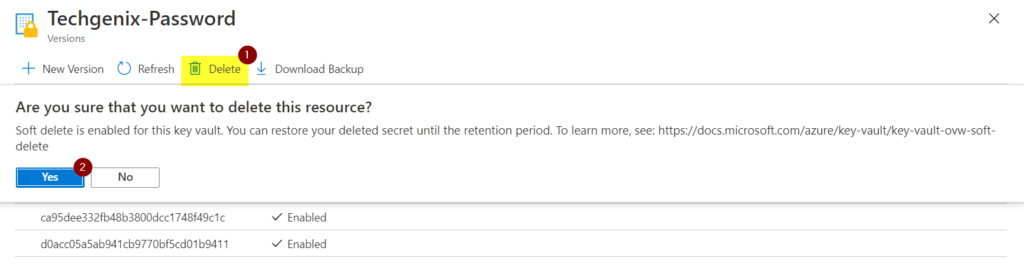
Done, the secret is gone. Can we claim the victory on this one? Not so fast, gunslinger! Back to the main secrets page, click on Managed deleted secrets, and in the new blade that shows a list of all deleted secrets, select the desired secret and click on Recover.
The result will be the secret with all its versions is back from the dead. Sorry, Captain, but the score is now Azure Key Vault 2, Capt. Destruction 0.

Bringing the big guns
Capt. Destruction has been nice, trying to delete politely. Well, when you are down two points, it is better to go up a notch.
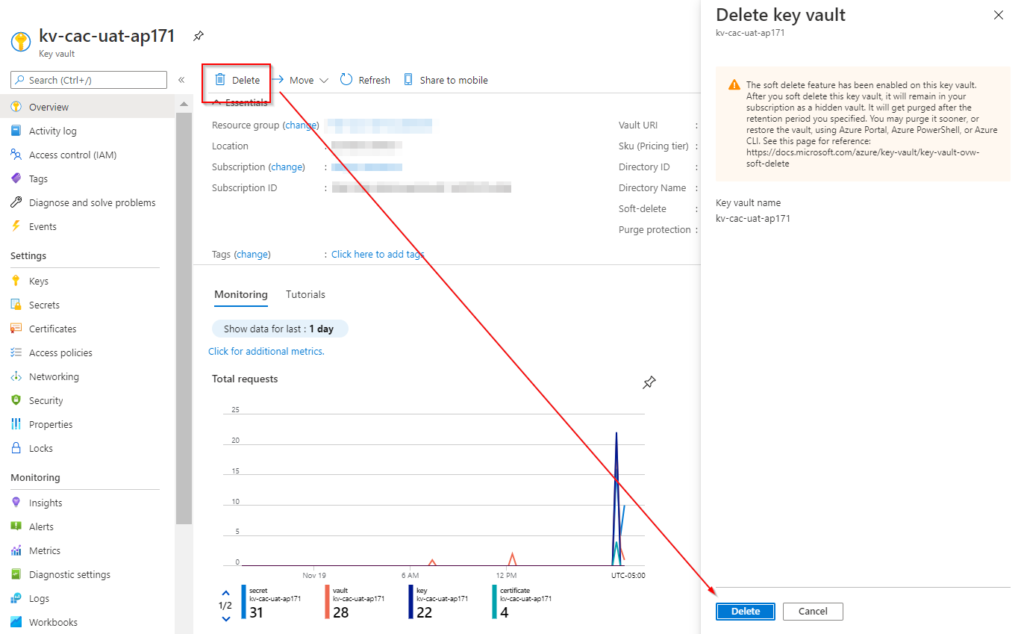
After scrambling the data, deleting the secret, we couldn’t delete the data. Let’s delete the whole thing: The Key Vault!
Yes, victory is ours! Let’s analyze the situation before saying that we have a winner. If we go to the Key Vaults blade, all Key Vaults deleted on the selected subscription will be listed.
To restore the desired Key Vault, select from the list and click on Recover.
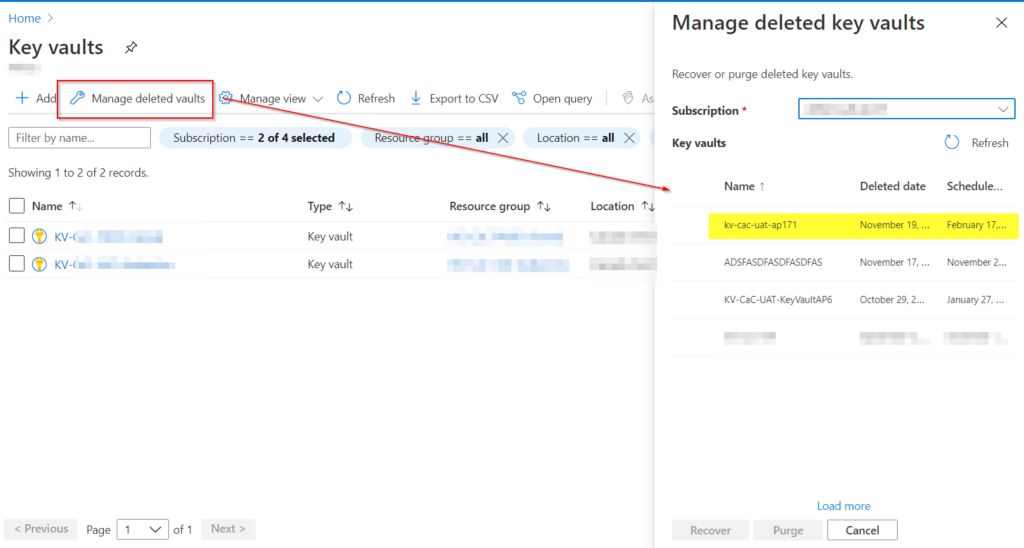
Well, that makes the final score Azure Key Vault 3, Capt. Destruction 0. We have a winner!
Lessons learned
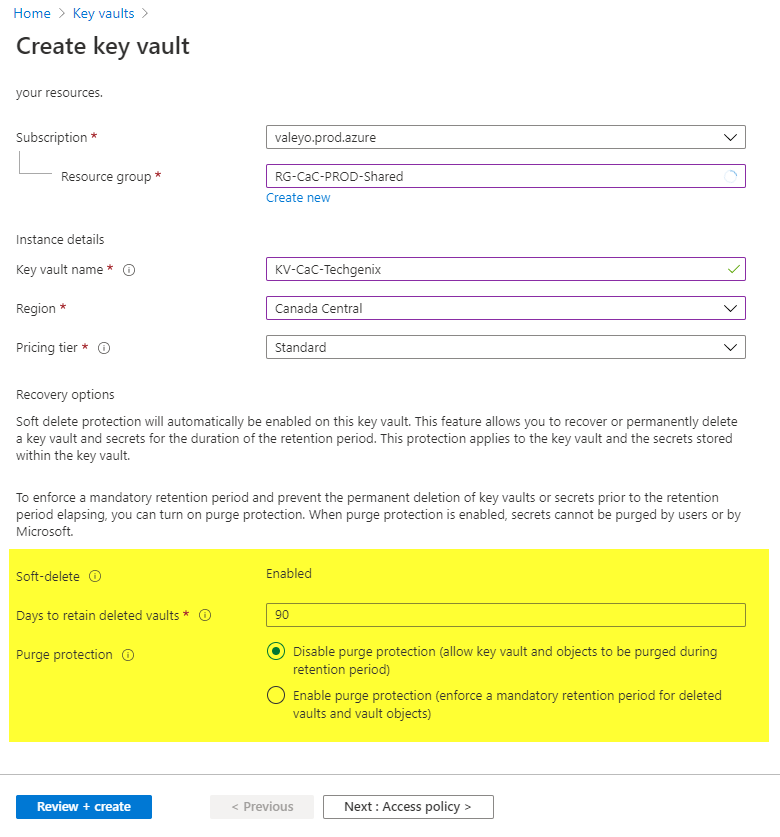
Most of the security features that we explored so far in this article were added automatically during the provisioning of a new Azure Key Vault. By default, the soft delete feature is enabled, meaning that any deletion at the Azure Key Vault level can be restored in 90 days (this limit can be changed to a minimum value of seven days and a maximum value of 90 days).
We can also enable the purge protection. One protects the Key Vault, keys, secrets, and certificates from being deleted. That gave us the edge when dueling against Capt. Destruction during the exercise performed at the beginning of this article.
Using locks
Using soft and purge protection helps to restore from an ugly situation, for sure. However, the Azure Key Vault deletion will create some outages to the application and services using the impacted Key Vault.
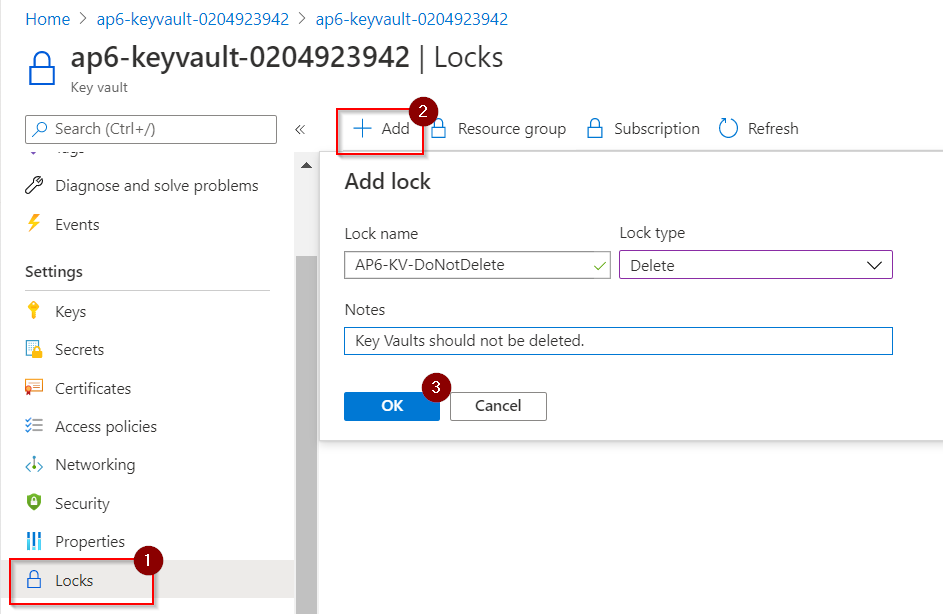
To add another layer of security, the cloud administrator can introduce locks at the Key Vault level. We can use either the portal (as depicted in the image below), Azure PowerShell, Azure CLI, or ARM templates.
The benefit of using locks is that the Key Vault will always be available because any deletion attempt will not go through Azure Resource Manager, and an error message will be displayed.
If you want to implement the lock during the provisioning process through ARM templates, add this statement below to create a lock to your new Azure Key Vault. The only value required is the Key Vault name, which we are getting from the variable v_keyvaultName.
{
“type”: “Microsoft.Authorization/locks”,
“apiVersion”: “2016-09-01”,
“name”: “[concat(‘Lock-’,variables(‘v_keyvaultName’))]”,
“scope”: “[concat(‘Microsoft.KeyVault/vaults/’, variables(‘v_keyvaultName’))]”,
“dependsOn”: [
“[resourceId(‘Microsoft.KeyVault/vaults’, variables(‘v_keyvaultName’))]”
],
“properties”: {
“level”: “CanNotDelete”,
“notes”: “Key Vault should not be deleted.”
}
},
Monitoring the activities
Besides adding security controls to protect against deletion, a best practice is to monitor and be notified when something not planned is occurring.
A simple example that fits this scenario is to add an alert rule in Azure Monitor to send a notification when someone tries to delete an Azure Key Vault. That can give the security and operations team a heads up when someone is trying to delete something important as Azure Key Vault.

Azure Key Vault: Protecting against deletion is just a start
This article covered some of the built-in features when managing Azure Key Vaults that every cloud administrator should be aware of. Knowing those features and their implications will facilitate your discussions with infrastructure, security, and application teams alike.
Featured image: Pixabay


