Azure Site Recovery is a fantastic tool that not only helps in the regular protection of workloads in Azure but also provides business continuity using the replication feature. Azure Site Recovery allows replication of resources located on-premises (Hyper-V, physical and VMware), which helps a lot when transition / migrating VMs between on-premises and Azure Cloud. In this article, we will cover the process to replicate an application running in one of the Azure regions to another region with just a few clicks using Azure Site Recovery and replication feature.
How does the replication process work? I will try my best to explain in a few words. As part of the replication process, which we will cover in this article, an extension is installed on the protected VM, and this extension is responsible for registering the VM with Azure Site Recovery. All data written to the disks of that VM is automatically placed in the local cache storage account. At this point, Azure Site Recovery process the data in the cache storage account and sends to either the target storage account or managed disks, after having the data processed a crash-consistent recovery point is generated every five minutes.
Understanding the scenario used in this article
We are going to use a simple scenario, where we have an application running in a single server in Canada Central region, and we are going to create a disaster recovery site for that application in US East region. The diagram below provides a high-level view of our existent application and the new resources that are going to be placed during this article.

You may be wondering, “Why he is using Canada Central and not Canada East as the disaster recovery site,” am I right? Well, my current subscription (long story) does not allow me to create VMs in Canada East, and that is the reason that we have an unconventional Canada Central replicating to US East region.
Creating Azure Site Recovery resources manually
In the target region, we will create three resource groups to support the replication and keep consistency with the existent environment. The first resource group is going to be designated for the virtual network (VNet), a second just for the application and a third for the site recovery component and its resources.
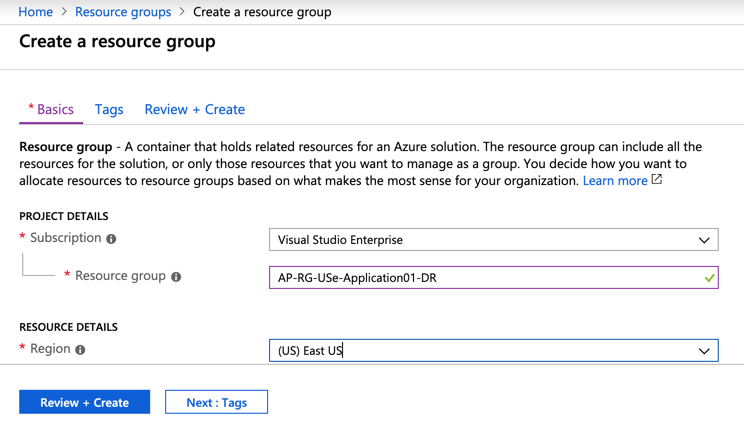
Our first step is to create a resource group located in US East to support the new Azure Site Recovery Vault and the resources to support the environment. Our resource group will be named as AP-RG-USe-Application01-DR, as depicted in the image below.
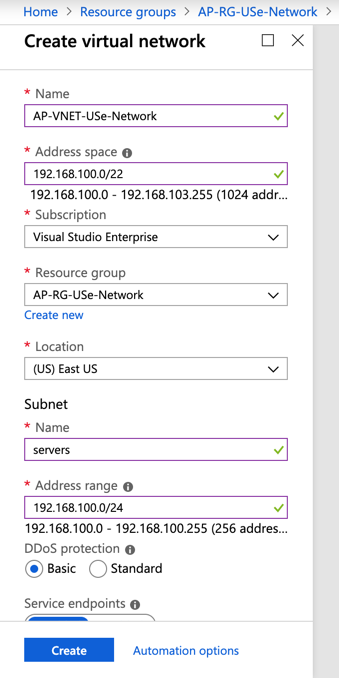
A virtual network must be created per region. Since we are planning to failover to a different region, a new VNet was built in the new region. For this article we created a resource group called AP-RG-USe-Network, and we created a VNet to support all workloads in that region.
Another component is the storage account to be used as a cache by the Azure Site Recovery component, and this object should be created in the source region. We are placing the storage account object in the resource group located in the target (East US). However, the resource itself is located in the source region (Canada Central).
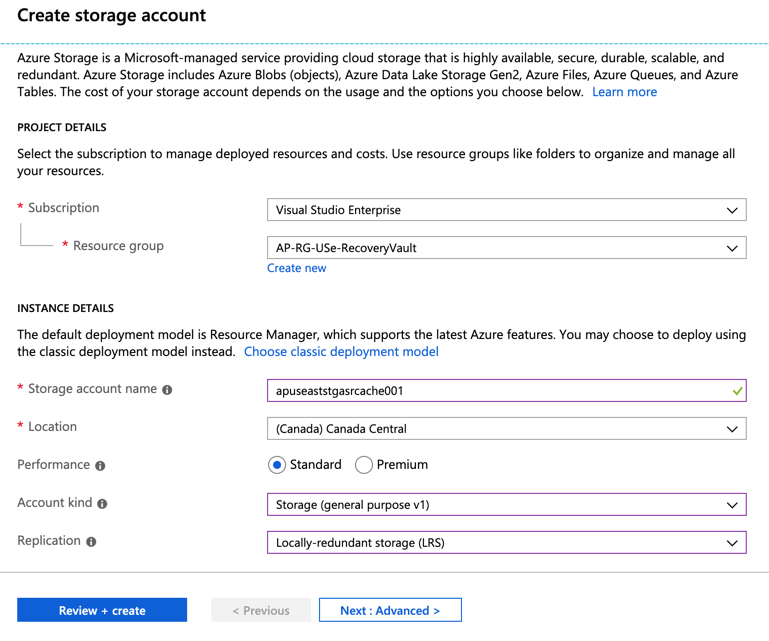
Although the recommendation is to use V2 storage account for virtually anything, the use of V1 is supported and recommended (price-wise) when using replication within Azure Site Recovery.
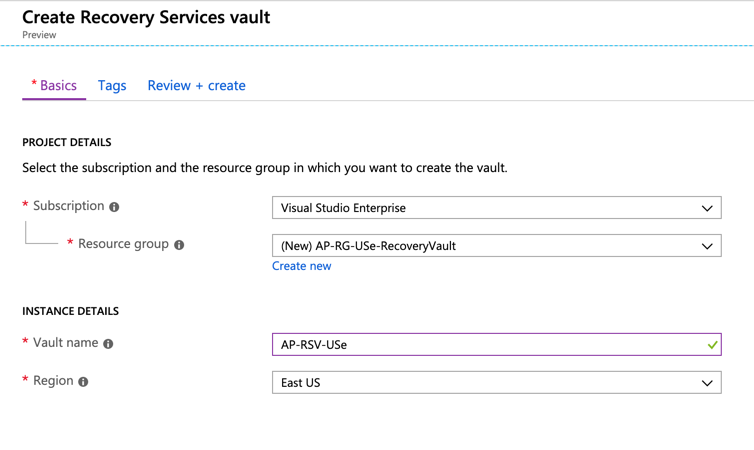
The last step is to create the Azure Site Recovery, and we will notice that none of the resources that we lined up previously are required. Don’t worry: We will use all of them during the process to create our first replica.
Creating the replica of our application
When we create the Recovery Services vault, the solution can be used either for backup or replication (disaster recovery) purposes. In today’s article, we are focusing on creating a replica of our application that is running in Canada Central region.
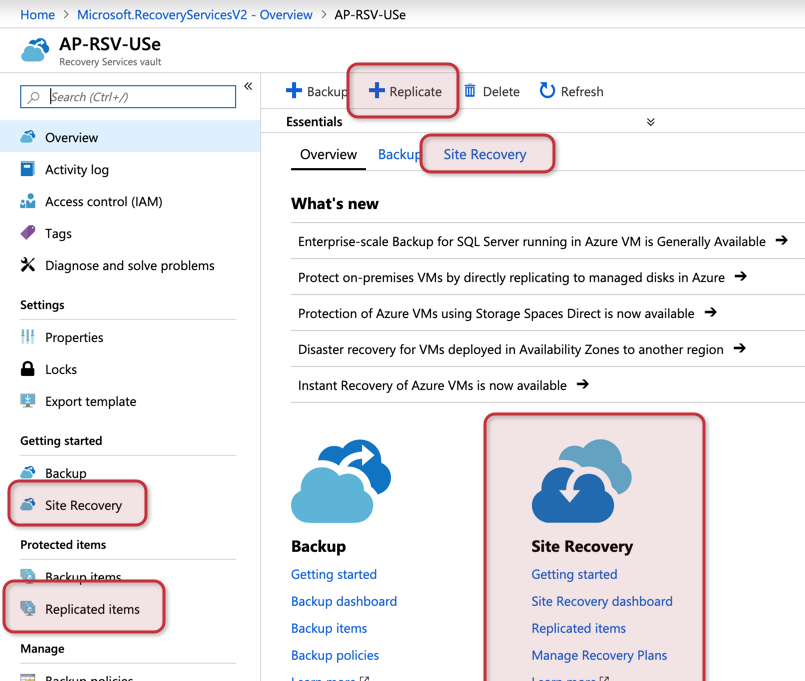
There are a lot of places to start looking for replication in the Recovery Services vault. Usually, the first step is to use Site Recovery link, which is located in the Getting Started section. If you are replicating VMs from on-premises to Azure, a planner will be available. This is a tool that helps to estimate bandwidth, storage, and other requirements.
Since we are replicating within Azure, we can go ahead and hit Replicate in the toolbar, and that will bring us a wizard to complete the replication process.
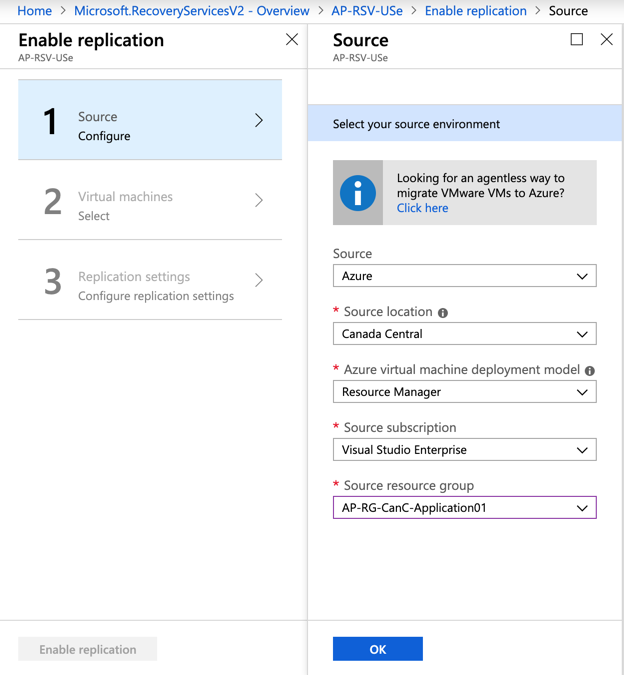
In the Source blade, we need to define Source, which is Azure, region, type of the VM deployment, subscription, and the resource group where the application is being hosted. Click on OK when complete.
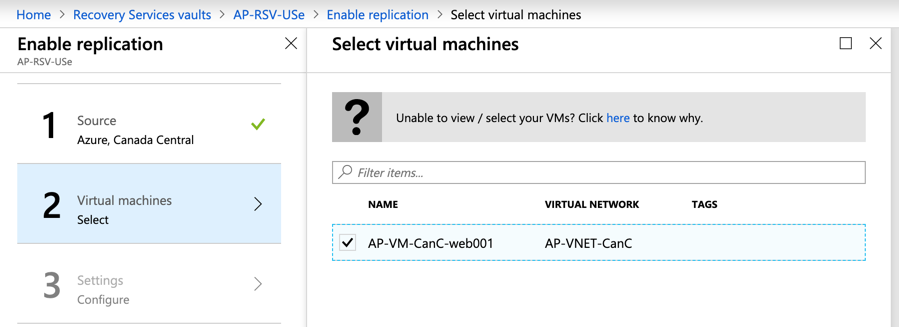
In the Virtual Machines blade, a list of all VMs from that region/resource group selected in the previous step will be listed. Click on the desired ones and click OK.
In the Settings blade, here is where things start to get interesting. First, we need to select the Target location, and we are going to choose East US.
We have the option to select a different subscription as a target. However, we will use a single subscription. The second section allows us to configure key infrastructure components, such as network, resource group, and storage. Click on Customize.
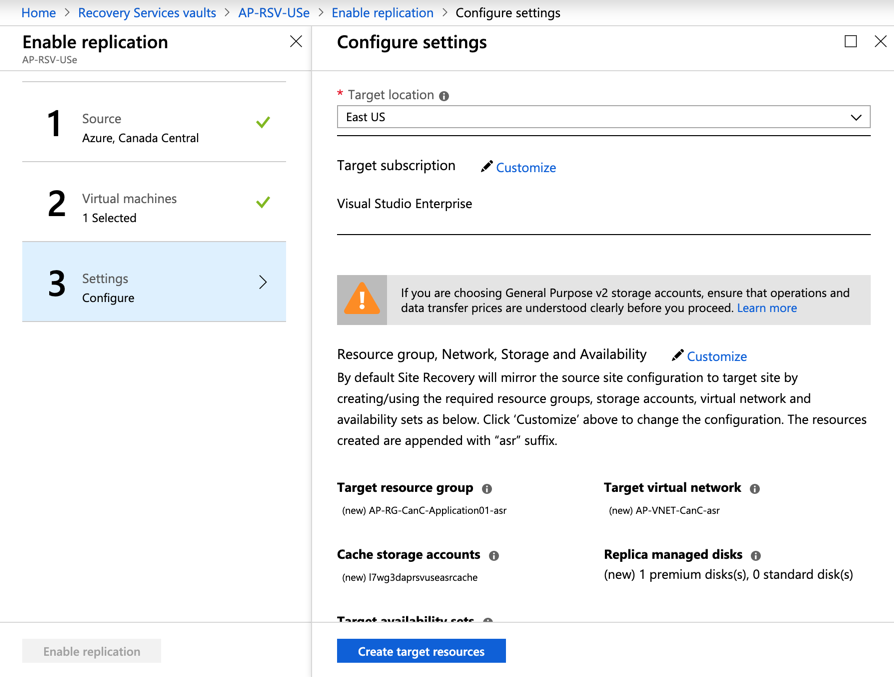
We are going to navigate through the options and select the resources that we have already created (resource group, virtual network, and cache storage). We haven’t created a managed disk, and the wizard will provision the required resource automatically. When done, click OK.
Note: If you haven’t configured a single thing, the wizard would suggest all the settings for you. It wouldn’t be consistent with the naming convention in place, but it will work just fine.

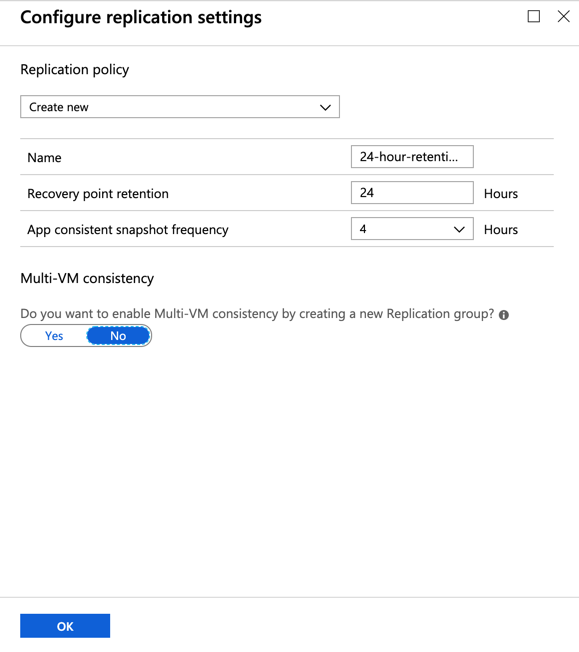
In step 3, click on Customize located beside of Replication Policy. In the new blade, we can configure the name of the replication policy, for how long we will keep the retention, and how frequent the application-consistent snapshot frequency will happen. Click OK when complete.
As we explained at the beginning of the article, it is important to note that crash-consistent backups are done automatically by the service, and they happen every five minutes. The application-consistent backups (more resource-intensive because they use VSS) are configured by default to execute every four hours.
Time to complete the replication and apply the settings that we defined so far. Click on Create target resources, and then on Enable Replication.
Validating the replication process
There are a couple of ways to see the replication. The first one is when selecting Overview, and then using the Site Recovery (Item 1). It will display in numbers how the replication is working. If we go further down on the same page, there is a graphical representation of the replication taking place.
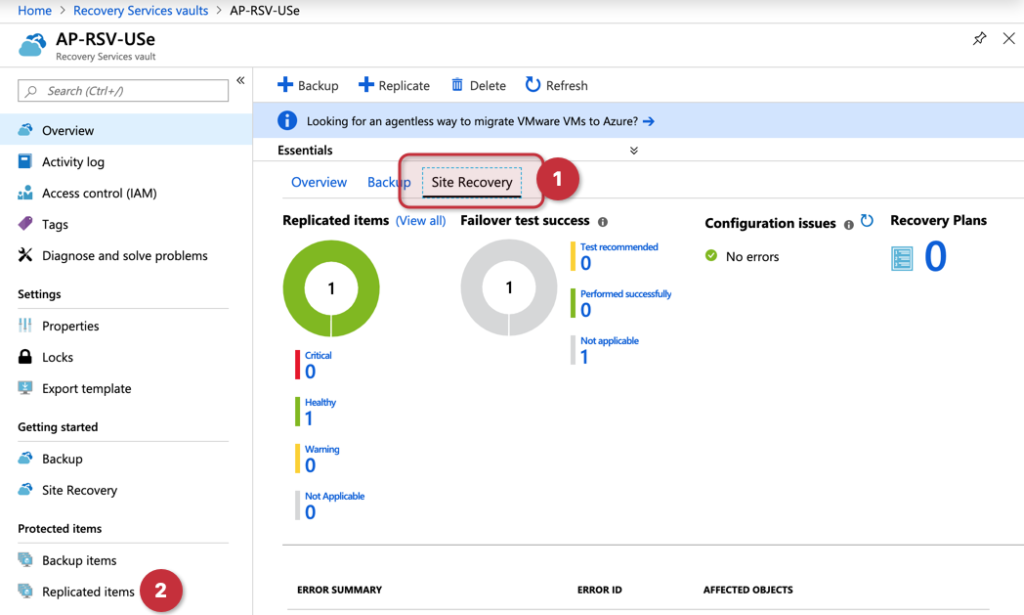
Another method to retrieve information about the replication process of any given workload is when we click on Replicated Items (Item 2 in the image above). A new blade with all the configured replications will be listed. Click on the desired one to retrieve more information.
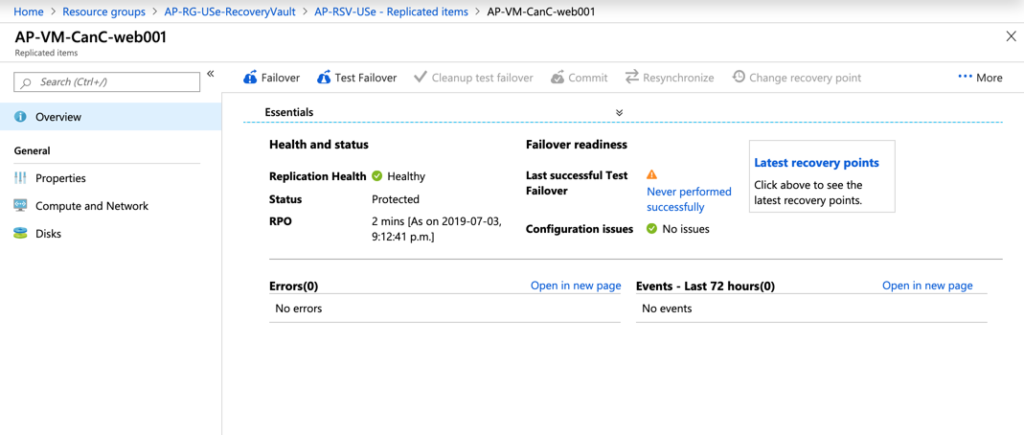
The Overview page of the replication provides a lot of details and links to retrieve further information. We can also use the left side to retrieve specific information about the properties configured for this replication, compute, and network and disks.
It is on the same blade that we can control the failover process, test the failover, and other options that will be available when we start testing the replication. And this is going to be the topic of our next article.
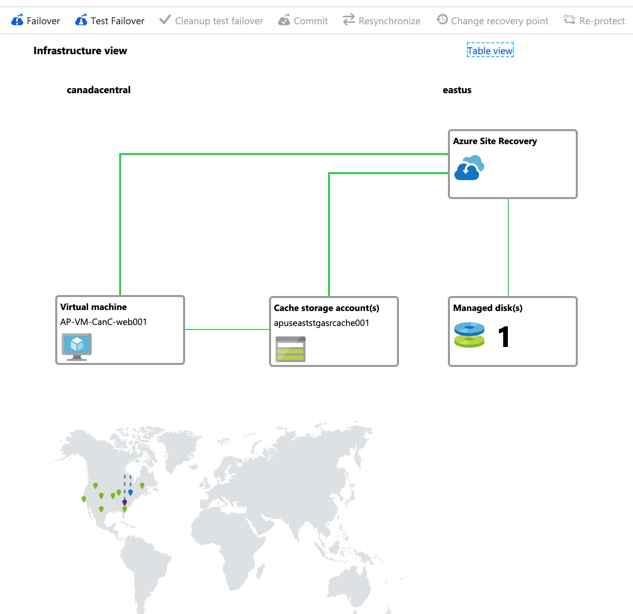
In the same blade, we can go a little further down on the page, and we will have the Infrastructure View, which is the graphical representation of the replication, and the datacenters where the data reside in the globe. Pretty cool, eh?
Featured image: Shutterstock


