If you would like to read the other parts in this article series please go to:
- Bare Metal Restore for Virtual Machines in Hyper-V (Part 1)
- Bare Metal Restore for Virtual Machines in Hyper-V (Part 2)
Introduction
In my previous article, I explained that although my disaster recovery plan worked, I was really unprepared to deal with a situation in which I had to perform a bare metal restore on virtual machines. After the disaster occurred however, I began to look at some ways to improve my ability to restore my servers should a similar disaster strike again.
Being that my primary backup strategy is based on System Center Data Protection Manager, one of the first things that I did was to implement the System Recovery Tool. In case you aren’t familiar with the System Recovery Tool, it is a Data Protection Manager component that is designed to allow you to perform bare metal restores of protected servers (physical or virtual).
As you will recall from my previous article, I was unable to restore my servers from Data Protection Manager initially, because Data Protection Manager requires an agent to be running on the protected computer. If the protected computer has been completely wiped out, then there is no agent. This is exactly the type of situation that the System Restore Tool can help with.
Although you can create a System Restore Tool boot disk for your protected servers, the boot disk alone won’t allow you to recover your servers. You must provision your Data Protection Manager servers to support bare metal recovery before disaster strikes. Otherwise, the System Recovery Tool boot disk will be useless.
I should also tell you that the system recovery tool presents some special challenges in a virtualized environment. The System Recovery Tool boot disk boots the server to a watered down Windows XP environment, which attaches to the network and then establishes connectivity with the System Recovery Tool’s server component. The problem is that the System Recovery Tool does not seem to have been designed with server virtualization in mind, so the boot disk will fail to establish connectivity if you boot it from within a virtual server. Later on, I will show you how to work around that problem.
For now, I want to talk about what you need to do to prepare your Data Protection Manager servers. Before I do however, you may be wondering where you can find the System Recovery Tool.
The System Recovery Tool is included with Data Protection Manager 2007, but it isn’t included on the DPM 2007 installation DVD. It is on a separate disk called the System Recovery Tools Disk. If you do not have this disk, it is available for download on TechNet.
There are two parts to the System Recovery Tool. There is a server component that must be run on either your Data Protection Manager server (if you have a small number of protected machines) or on a dedicated server. There is also a boot disk that connects the failed machine with the recovery server.
Installing the server component is really easy. The biggest consideration that you must take into account is that the server that you choose must have adequate storage space. The System Recovery Tool stores a copy of each protected server’s boot volume and its disk configuration information.
The Boot Client
By far the most difficult part of the process is creating the System Recovery Tool boot client. Actually, it isn’t very difficult to create the boot client once you know how to do it. Having said that, I have to admit that I had an extremely difficult time coming up with a procedure that would work. The reason it was so difficult is because the normal Hyper-V virtual network drivers do not work with the System Recovery Tool. As I later discovered, you must use the Legacy Network Adapter instead.
If you want to create a boot client, the first thing that you have to do is to create a new virtual machine. When you do, go into the new virtual machine’s settings and remove the network adapter, and replace it with a legacy network adapter, as shown in Figure A.

Figure A: Replace the network adapter with a legacy network adapter.
After doing so, install a 32-bit operating system on your new virtual machine. I chose to install the X86 version of Vista with SP2, but you should be able to use any supported operating system so long as it is 32-bit. Once the operating system has been installed, install the Hyper-V integration Services.
When I installed the integration services on Vista, it actually switched my network adapter from a legacy network adapter to a regular virtual network adapter. I had to shut down the virtual machine, go into Settings, remove the virtual network adapter, and add a legacy network adapter. When I booted Vista, my legacy network adapter was detected, and I was able to move forward.
Once my virtual machine recognized the legacy network adapter, I opened the Device Manager and confirmed that the correct device driver was being used. As you can see in Figure B, the network adapter should be listed as Intel 21140-Based PCI Fast Ethernet Adapter (Emulated).
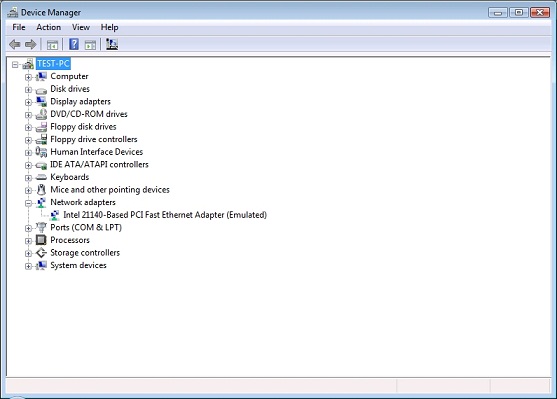
Figure B: The network adapter should be listed as Intel 21140-Based PCI Fast Ethernet Adapter (Emulated).
At this point, right click on the Device Manager’s listing for the emulated network adapter, and choose the Properties command from the resulting shortcut menu. This will cause Windows to display the driver’s properties sheet. Go to the properties sheet’s Driver tab, and then click the Driver Detail button. When you do, Windows will list the path and filename of the device driver for the legacy network adapter, as shown in Figure C.

Figure C: Windows lists the path and filename used by the legacy network adapter.
Create a folder somewhere on your network (it is important that you choose a network location), and then copy the file that is listed to the folder that you create. This is one of three required files. The other files reside in the C:\Windows\INF folder.
Before you will be able to locate the files that you need, you must configure Windows to show hidden files and protected operating system files. After doing so, look for a PNF file and an INF file that match the file that you just copied. For example, the driver file that I copied was named DC21X4M.SYS. Therefore, I searched for files named DC21X4M.PNF and DC21X4M.INF, as shown in Figure D. Once you locate these files, copy them to the same network location as your other driver file.

Figure D: Locate the PNF and INF files that go with your device driver.
Now that all of the necessary driver files are on the network, go to the server that is hosting the System Recovery Tool, and open the Recovery Center console. As you can see in Figure E, the console contains a link that you can use to create a boot client.

Figure E: Click the Create Boot Client link.
When you click on this link, Windows launches a wizard that guides you through the process of creating a boot client. Most of the screens are pretty self-explanatory, so I won’t bore you with all of the steps (most of which only involve clicking Next). At one point during the process however, the wizard asks you if you want to add any additional network drivers. You must click the Add Drivers button, and then specify the location for the files that you copied to the network earlier. After doing so, you should see the legacy network adapter listed within the wizard, as shown in Figure F.

Figure F: The wizard should display the legacy network adapter.
When you complete the wizard, it will produce a disk image file (an ISO file). Use this disk image to create a DVD and you are done.
Using the Boot Client
Under normal circumstances, you can boot a server from the Boot Client DVD, and it will automatically connect to the System Recovery server. If you try to boot one of your virtual machines from the disk that you just made however, you will receive an error message stating that a network adapter cannot be located.
The reason why this happens is because your virtual machine is still configured to use a physical network adapter. You must shut down the virtual machine, go into its settings, and get rid of the virtual network adapter. After doing so, add a legacy network adapter, and make sure that it is connected to the correct virtual switch. Now, boot from the disk that you just made, and you should be able to establish network connectivity, as shown in Figure G.

Figure G: The boot disk is able to connect to the System Recovery server.
Conclusion
After you perform the recovery process, your virtual machine will still be configured to use a legacy network adapter. Before you will be able to use the server that you have recovered, you will have to get rid of the legacy network adapter and replace it with a normal virtual network adapter. It may also be necessary to reconfigure the virtual machine’s TCP/IP settings.
If you would like to read the other parts in this article series please go to:


