Introduction
While you can use a remote MMC to make configuration changes to a Windows Server 2008 Core installation, you can only use a remote MMC once you have already configured the required network and administrative configuration of the Server Core system from the command line first. In this article, you will learn exactly how to do that, step by step.
Configuring Networking on a new Windows 2008 Core Server
Windows Server 2008 Core has no graphical interface. It is very quick and easy to install (for instructions on how to install it, please see: Installing Windows Server 2008 Core). Once you have Server 2008 Core installed and you are at the console command line, you need to make a number of basic networking and administrative configurations to get the server useable on the network and to allow it to be administered remotely.
We will start our configuration at this screen:
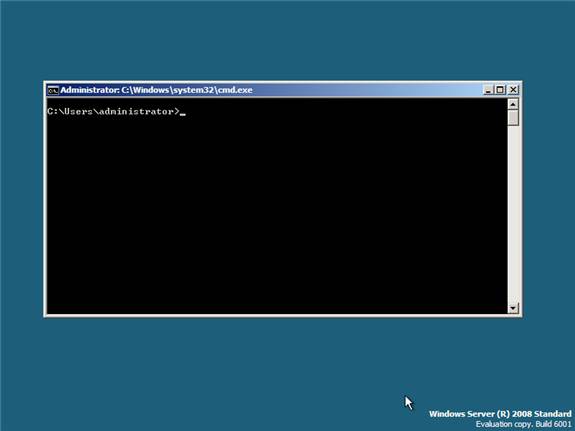
Figure 1: New Windows Server 2008 Core system, where we start our configuration
It is likely you have already configured a new password from the GUI interface but just so that you also know how to do it from the CLI, here is how you use the net user administrator * command:

Figure 2: Configuring a password on the administrator account in Windows Server Core
Next, you need to configure an IP address on the LAN interface to connect the server to the network. To do that, use the netsh interface command. But first, you need to find out the ID of your network card. To do this, type netsh interface ipv4 show interface, like this:

Figure 3: How to find out the ID number for your network card
In our case, we can see that our LAN interface ID is 2 (IDX = 2) so that is what we will use when we configure the next command.
To configure the IP address on the interface, just type:
netsh interface ipv4 set address name=”2” source=static address=192.168.1.233 mask=255.255.255.0 gateway=192.168.1.1
Note:
These IP address settings are just an example, you would fill in your own settings.
Here is what it looks like:

Figure 4: Configuring the network interface with IP address settings
While you would not normally use DHCP to obtain an IP address on a server, you can do so with:
netsh interface ipv4 set address name=”2” source=dhcp
Check your IP address configuration with IPCONFIG to verify that it is correct. Next, configure one or more DNS server entries with the following:
netsh interface ipv4 add dnsserver name=”2” address=192.168.1.180
Again, check that it was configured properly with IPCONFIG /ALL. Here is what it looks like:
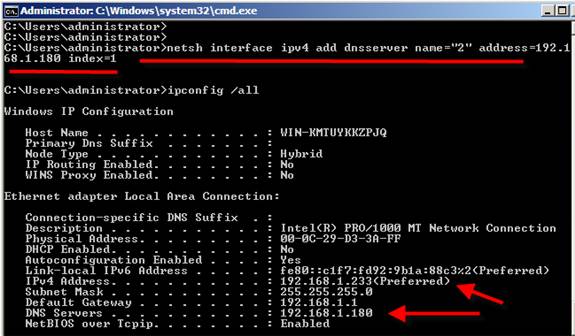
Figure 5: Configuring DNS Server entry with NETSH and verifying with IPCONFIG /ALL
Optionally, you can join the server to the domain. To do this, you will need your computer’s host name. You can see that my computer’s host name is WIN-KMTUYKKZPJQ, in the graphic above. Here is how you do it:
netdom join WIN-KMTUYKKZPJQ /domain:wiredbraincoffee.com /userd:administrator /password:*
Here is what it looks like:

Figure 6: Joining the Core Server to the Domain
Of course, you may want to rename the server from the randomly generated computer name. To do this, type:
netdom renamecomputer WIN-KMTUYKKZPJQ /newname:servercore-1
At this point, you will have to reboot the server. I did this with shutdown /r /t 0. This initiates a shutdown immediately with a restart. After reboot, there are a few other settings that you should configure.
- Find out how long you have left in your license grace period – To do this you will use the Windows software licensing management tool (slmgr.vbs). To find out how much time is left on your license grace period, type cscript c:\windows\system32\slmgr.vbs –xpr, like this:

Figure 7: Find out how much time you have left in your Windows Server 2008 license grace period
- Activate your server – If you did not enter your license key and set your Server Core to automatically activate your license after installation, you will need to activate it before your grace period expires. To do this, type cscript c:\windows\system32\slmgr.vbs –ato
- If you want to see all the slmgr.vbs options, just type cscript slmgr.vbs /?
- Change the Server Time Zone – First set the date and time with the date and time commands. Then, set the time zone with the control timedate.cpl command, like this:
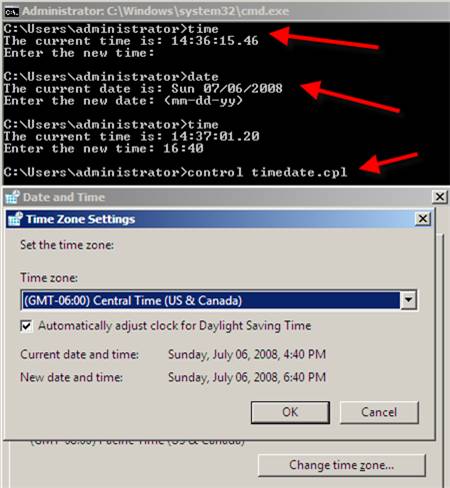
Figure 8: Setting the Server Core Date, Time, and TimeZone
- Enable Remote Management of the Core Server via the MMC – To allow you to remotely administer the Core Server via a remote MMC, you need to open the firewall by typing: netsh advfirewall firewall set rule group=”Remote Administration” new enable=yes
Once you have done this (and have waited a few seconds, it seems, for it to take effect), you can connect to the Server Core system using Computer Manager from a remote server, like this:

Figure 9: Remotely managing a Server Core system with MMC after opening firewall port
As you can see in the graphic, I am connected to the IP address of my Windows Server Core system and I have access to manage it remotely using Computer Management. Now that is so much easier than this command line, isn’t it?
- Enable Remote Management of the Core Server via Remote Desktop (RDP) – if I still want to gain access to the command line but do it remotely, I can allow remote management of the Server Core system via RDP by entering the following command:
cscript C:\windows\system32\scregedit.wsf /ar 0
Then, you can verify it with:
cscript C:\windows\system32\scregedit.wsf /ar /v
Here is what it looks like:

Figure 10: Allowing remote administration via RDP with Windows Server Core
Then, to verify that it works, just point your Remote Desktop utility to the name or IP of the new Server Core system. Here is what it looks like:

Figure 11: A remote desktop connection to a Windows 2008 Server Core system
- Install Server Roles and Features – You will likely want to make your Server Core system offer some role on the network such as offering Windows AD DC services, IIS, FTP, file sharing, print sharing, and much more. To learn how to do this read my article entitled: Using the new Windows Server 2008 Core OCList and OCSetup CLI tools to Add & Remove Server Roles
Where can I find more information on configuring Windows Server 2008 Core?
There are so many more things that you may want to do with your Windows Server 2008 Core system. In my research about Windows Server 2008 Core, I have gathered a list of other excellent Windows Server 2008 Core articles. I suspect that one or more of them will be very helpful in continuing your Server Core configuration:
- Enable Remote Desktop for Server Core
- Promoting Server Core to a Domain Controller
- Using the new Windows Server 2008 Core OCList and OCSetup CLI tools to Add & Remove Server Roles
- Configure Time and Date Settings in Windows 2008 Server Core
- Configuring Windows Server 2008 Server Core Basic Networking Settings
- Installing Active Directory on Windows 2008 Server Core
- Enable Ping Replies from your Windows 2008 Server Core Server
- Installing Windows Server 2008 Core
- Managing Windows 2008 Server Core Local Settings
- Managing Windows 2008 Server Core through RDP
- Managing Windows 2008 Server Core Server Roles
- Remotely Managing Windows 2008 Server Core Firewall
- Remotely Managing Windows 2008 Server Core Settings through MMC Snap-ins
- Remotely Manage Devices in Windows 2008 Server Core
Summary
In this article, you learned how to configure networking on a new Windows 2008 CORE Server from the command line interface. Since Windows Server 2008 Core has no GUI interface, it is imperative that you know how to perform some basic CLI commands to get it activate and manageable on the network. In this article, you learned how to do it, step by step. Good luck with your new Windows Server 2008 Core server!


