Introduction
One of the strengths of the Forefront Threat Management Gateway (TMG) 2010 integrated edge security platform is its ability to integrate tightly with Active Directory. Active Directory integration provides many essential benefits that TMG can leverage to provide a high level of security, including seamless and transparent strong authentication based on Active Directory user and group membership, for both inbound and outbound requests. Active Directory integration also makes installing and managing a Forefront TMG Enterprise implementation much easier. In some instances, most commonly when the TMG firewall is connected directly to the Internet, security administrators may choose not to join the TMG firewall to the domain, a supported deployment model known as “workgroup mode”. Installing Forefront TMG Enterprise in workgroup mode involves some additional steps that I will outline in this article. It also comes with some drawbacks in terms of redundancy, scalability, and feature support which I will describe in detail.
Considerations for Workgroup Deployments
It’s important to understand that in workgroup mode, Forefront TMG functionality is limited in several significant ways. For example:
Enterprise Management Server (EMS) replication is not supported – One of the major drawbacks to workgroup mode deployments is the lack of support for EMS replication. Without replica EMS support, this introduces a significant single point of failure. If the EMS fails and cannot be recovered (either through snapshot or full system restore) the TMG enterprise and all array members will have to be rebuilt from scratch.
Certificates are required for computer authentication – A functional Public Key Infrastructure (PKI) is required to generate the computer certificate used for array member to EMS authentication. Certificates add to the management overhead and overall complexity of the solution.
Local user accounts are required – TMG must be installed and managed using only local accounts. These accounts must also be mirrored on the EMS and on each array member.
Firewall Client support is limited – In workgroup mode, there is only limited support for Forefront TMG firewall clients. Clients with the TMG firewall client installed must also have a mirrored account on each TMG firewall in the array.
Web Proxy authentication options are limited – For web proxy clients, integrated authentication is not supported in workgroup mode. Basic and RADIUS authentication are the only supported option for web proxy authentication in workgroup deployments.
VPN authentication choices are limited – VPN users cannot authenticate using AD accounts or certificates in workgroup mode. Only RADIUS authentication is supported.
HTTPS inspection certificate must be deployed manually – The automatic deployment of the HTTPS inspection trusted root CA certificate to client computers is not supported in workgroup mode deployments.
Configuring Forefront TMG in Workgroup Mode
Before installing Forefront TMG Enterprise in workgroup mode you must first create a local user account on the EMS and each array member. These user accounts should be configured identically, using the same user name and password (preferably long and complex!). This account must be a member of the local administrators group. Next, request a computer certificate from a Certificate Authority (CA). In my lab I’ve installed the Certificate Services role on a Windows Server 2008 R2 server in standalone mode and configured web enrollment (the configuration of a certificate server is outside of the scope of this article). On a management workstation (not the desktop of the EMS or TMG firewalls), open Internet Explorer and browse to the certificate services URL and click Request Certificate.
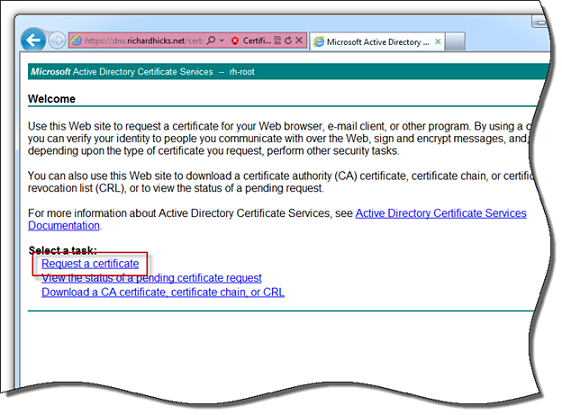
Figure 1
Click Submit an advanced certificate request and then click Create and submit a request to this CA and complete the request form. In the Name field enter the Fully Qualified Domain Name (FQDN) of the EMS server. For the Type of Certificate Needed select Server Authentication Certificate, and under Key Options be sure to use a key size of at least 2048 bits. Select the option to Mark keys as exportable, and then click Submit at the bottom of the page.
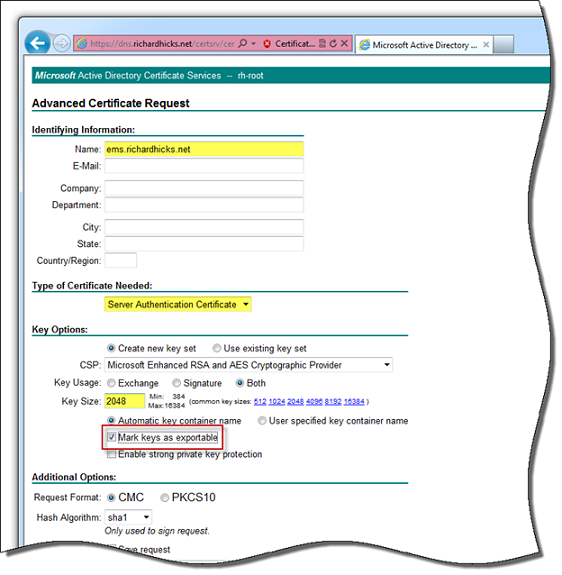
Figure 2
Return to the certificate server’s web enrollment page and click Download a CA certificate, certificate chain, or CRL. Click Download CA certificate and save it to a shared location accessible from the EMS server, or simply copy the file to the EMS server’s desktop.

Figure 3
Once the certificate has been issued, return again to the certificate server’s web enrollment page and click View the status of a pending certificate request, then click the link for the certificate requested previously and choose to Install this certificate.

Figure 4
On the management workstation where the certificate request was made, click Start | Run and enter mmc.exe. Select File | Add Remove Snap-in and select Certificates from the list and click Add. Choose My user account and click Finish and Ok. Expand the Certificates – Current User store and then expand Personal and highlight Certificates. Right-click the certificate for the EMS and choose All Tasks | Export.

Figure 5
Click Next and then select the option Yes, export the private key.
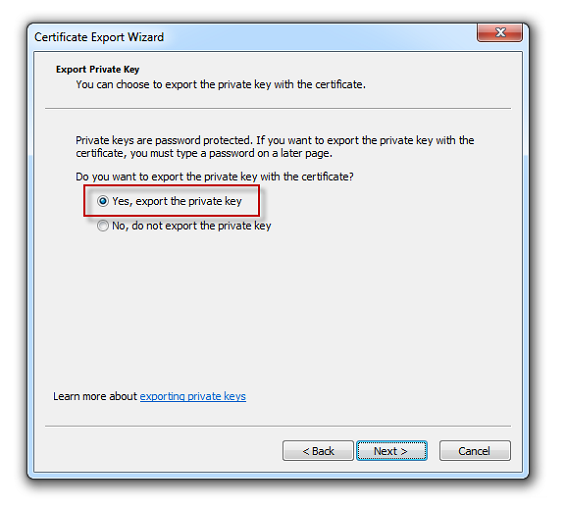
Figure 6
Accept the default export file format which is Personal Information Exchange – PKCS #12 (.PFX). It is strongly recommended that you also choose the option to Delete the private key if the export is successful.

Figure 7
Click Next, then supply a strong password and click Next again. Specify a location to save the file and click Next and Finish.
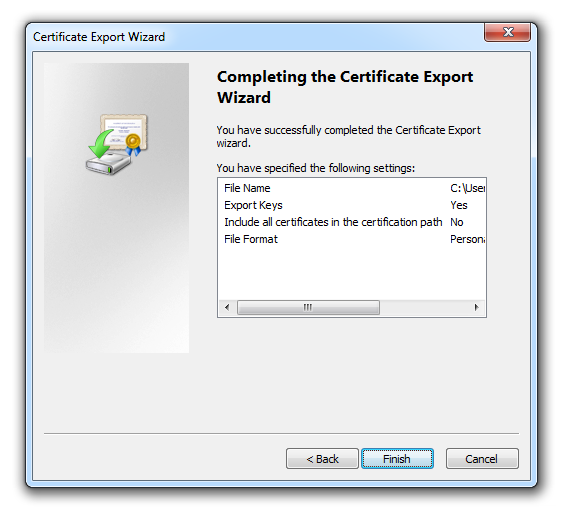
Figure 8
Installing Forefront TMG EMS in Workgroup Mode
Copy the exported computer certificate to the desktop of the EMS server and then begin the Forefront TMG installation as you would normally. When prompted, select the Workgroup deployment option, enter the path to the certificate exported earlier, then provide the password and click Next to proceed with the rest of the installation.

Figure 9
Once the installation has been completed, you’ll find that the installer automatically places the computer certificate in the Personal certificate store of the ISA Storage Control (ISASTGCTRL) service account. You can see the certificate by clicking Start | Run and entering mmc.exe. Select File | Add Remove Snap-in and select Certificates from the list and click Add. Choose Service account on the local computer and choose ISASTGCTRL from the list of service accounts and click Finish and Ok.
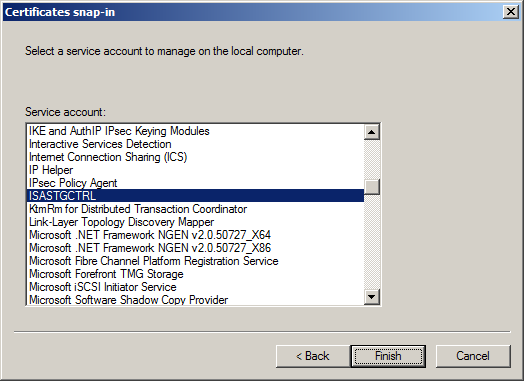
Figure 10
Expand the Certificates – Service (ISASTGCTRL) store and then expand ADAM_ISASTGCTRL\Personal and highlight Certificates. There you will see the computer certificate used for EMS authentication.
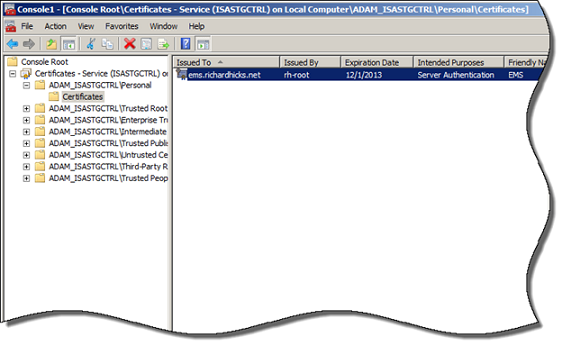
Figure 11
Double-click the certificate and pay special attention to the Issued to field. You will need to specify this exact FQDN when joining array members to the EMS. Confirm that the certificate also includes the private key.
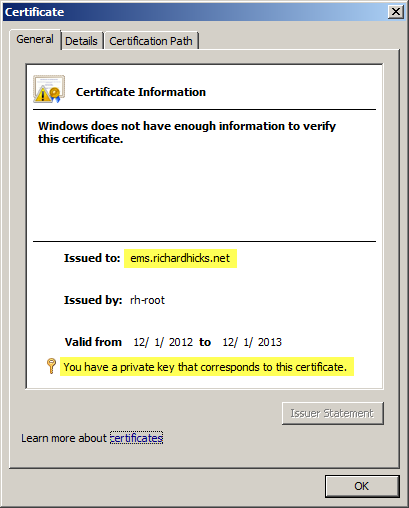
Figure 12
Select the Details tab and verify that the Enhanced Key Usage field indicates Server Authentication. You can safely ignore the warning that Windows does not have enough information to verify this certificate. The EMS does not need to trust the issuer of this certificate. Only the TMG array members are required to trust the issuing CA.

Figure 13
At some point in the future this certificate will expire and need to be updated. To do this properly, download the ISACertTool here. Extract the tool on the EMS server and run the following command:
isacerttool.exe /st <cert_filename> /pswd <password>
More details about how to use isacertool.exe are outlined in the documentation included with the tool.
Adding a Forefront TMG Array Member in Workgroup Mode
Installing Forefront TMG on an array member in workgroup mode is identical to that of a domain-joined system. To avoid any potential issues, I recommend first installing the issuing CA’s root certificate on each array member and verifying connectivity and authentication prior to joining array members to the EMS. To accomplish this, click Start | Run and enter mmc.exe. Select File | Add Remove Snap-in and select Certificates from the list and click Add. Choose Computer account and click Finish and Ok. Expand the Certificates (Local Computer) store and then expand Trusted Root Certification Authorities and highlight Certificates. Right-click in the center window and choose All Tasks and Import. Specify the location of the CA’s root certificate and accept the default option to place all certificates in the Trusted Root Certification Authorities certificate store and then click Finish.

Figure 14
To test connectivity and authentication, on each array member click Start | Run and enter ldp.exe. From the drop-down menu choose Connect and then enter the FQDN of the EMS server. Specify port 2172, select the option to use SSL and click Ok.
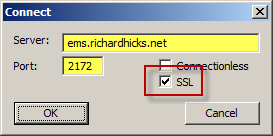
Figure 15
From the drop-down menu choose Bind, accept the defaults and click Ok.
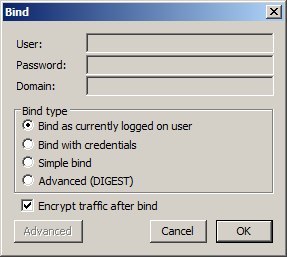
Figure 16
If successful you will see Authenticated as: <host\user>.
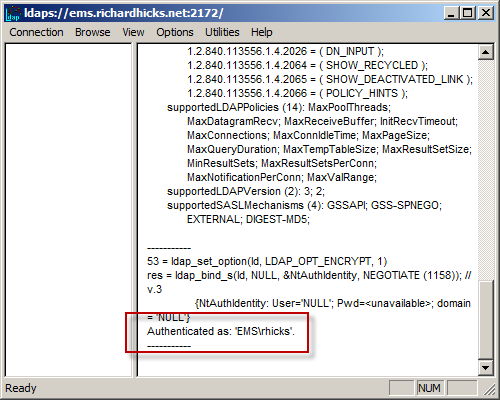
Figure 17
If either step fails, make certain that certificates have been installed correctly (computer certificate on EMS and root certificate on array members). In addition, be certain that name resolution is working correctly with the FQDNs resolving to the correct IP addresses. The FQDN must match the name on the certificate installed on the EMS. You cannot connect via IP address or a single label hostname if the FQDN was specified in the certificate request as I’ve demonstrated here. If there is another firewall between the array member and the EMS, several ports need to be opened to allow connectivity. For more information on which ports to open click here.
Once connectivity and authentication have been confirmed, open the TMG management console and highlight the root node in the navigation tree. In the Tasks pane click Join Array. Select the option to Join an array managed by an EMS server and choose Next.
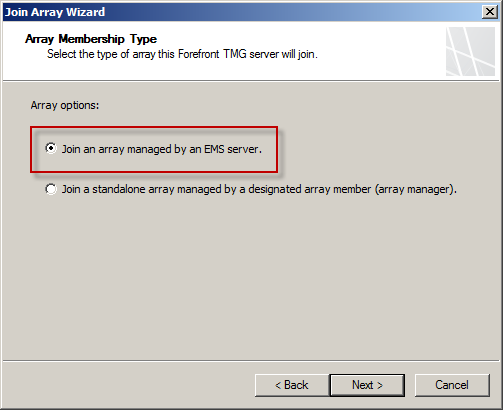
Figure 18
Enter the FQDN for the EMS server and choose Next.

Figure 19
Since the root certificate was installed previously to test connectivity and authentication, choose The root CA certificate is already installed on this server and choose Next and continue joining the array as normal.
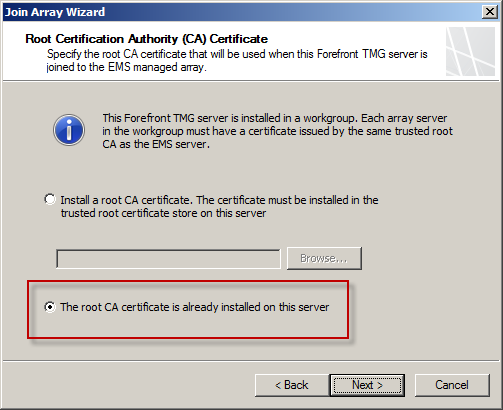
Figure 20
Repeat these steps on each array member as required.
Summary
Deploying Forefront TMG 2010 firewalls in workgroup mode is not a trivial task. However, with careful planning and consideration much of the pain of installing and configuring TMG in this supported mode can be reduced. Some of the limitations imposed by this configuration may be problematic for some. If you need to authenticate web proxy or VPN users with Active Directory, workgroup mode won’t meet your requirements. The biggest single drawback to workgroup mode is the lack of support for replica EMS, which adds a serious single point of failure to the design. Ultimately the choice to deploy TMG in workgroup mode is yours, and should be made with careful consideration to your network design and corporate security policy.


