Microsoft’s System Center Virtual Machine Manager has long included the ability to define a private cloud. A private cloud in Virtual Machine Manager is essentially just a collection of resources that self-service users can use to create their own virtual machines. Even though Virtual Machine Manager makes it simple to create a private cloud, the private cloud is initially just a collection of resources. Before users can perform any sort of self-service provisioning of virtual machines, you will need to create a self-service library share and tell Virtual Machine Manager who is allowed to provision the virtual machines.
In this article, I will show you how to create a self-service library share and attach it to your private cloud. I will also show you how to set up a self-service user role. For this article, however, I am going to assume that your private cloud already exists. If you do not yet have a private cloud, you can easily create one by opening the Virtual Machine Manager console, selecting the VMs and Services workspace, and clicking on the Create Cloud icon found in the toolbar.
Creating a read-only library share
The first thing that you will need to do is to create a read-only library share. This share will act as a repository for the images that self-service users are allowed to deploy. To get started, just create a folder and then use Windows to share the folder in the usual way by right-clicking on the folder and selecting the Properties option from the shortcut menu. Then just select the resulting dialog box’s Sharing tab, click the Share button, and follow the prompts. You can see what this looks like in the screenshot below. Just make sure that the folder that you create is not already in the library share path.

The next thing you will need to do is copy the ApplicationFrameworks folder from your default library share to the new library share you are creating. If your default library share exists in Microsoft’s default location, then you will be able to find the ApplicationFrameworks folder at C:\ProgramData\Virtual Machine Manager Library Files. You can see what this looks like in the screenshot below.

Now it’s time to add your new library share to System Center Virtual Machine Manager. To do so, open the Virtual Machine Manager console and then select the Library workspace. Next, navigate through the console tree to Library Servers | <your library server>. Right-click on your library server and choose the Add Library Shares command from the shortcut menu, as shown below.
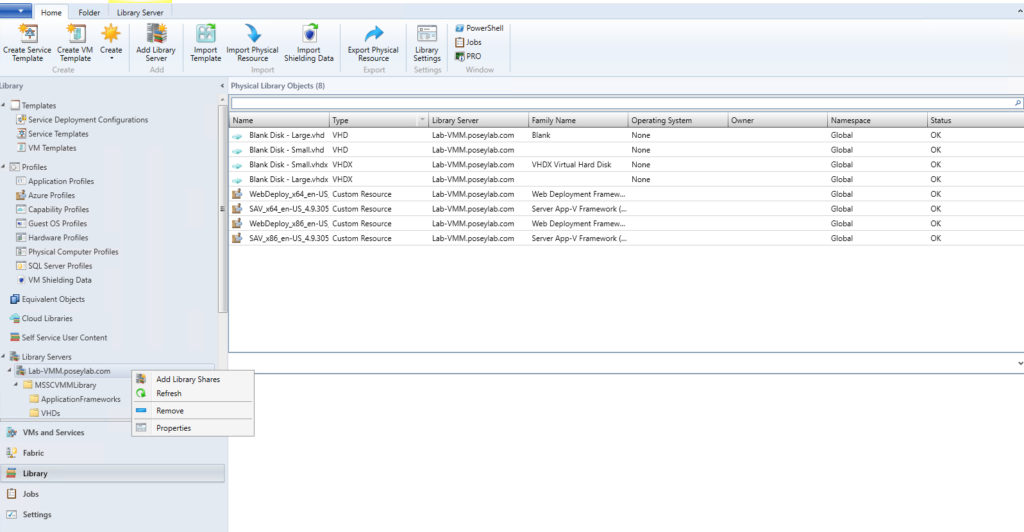
At this point, Virtual Machine Manager will display a dialog box that displays a list of the shares that exist on the server. Select the share that you plan to use for your self-service library, and then click Next. You can see what this looks like below. Click on the Add Library Shares button, and the share will be added.

Now that you have created a library share, it’s time to add it to your private cloud as a read-only share. To do so, go to the VMs and Services workspace. Now, right-click on the private cloud and select the Properties command from the shortcut menu. When the cloud Properties dialog box appears, select the Library tab. Next, click the Add button and select the library share that you want to add to the private cloud, as shown below. Finally, click OK a couple of times, and the library share will be added to the private cloud as a read-only library.

Creating a self-service user role
Now let’s take a look at how to create a self-service user role. This will allow authorized users to create new virtual machines by using the resources that you place into the self-service library (the library won’t initially contain any ISO files or virtual machine images — you will need to add them).
To get started, go to the Settings workspace and then click on the Create User Role icon found on the toolbar. This will cause Virtual Machine Manager to launch the Create User Role Wizard, which you can see below.
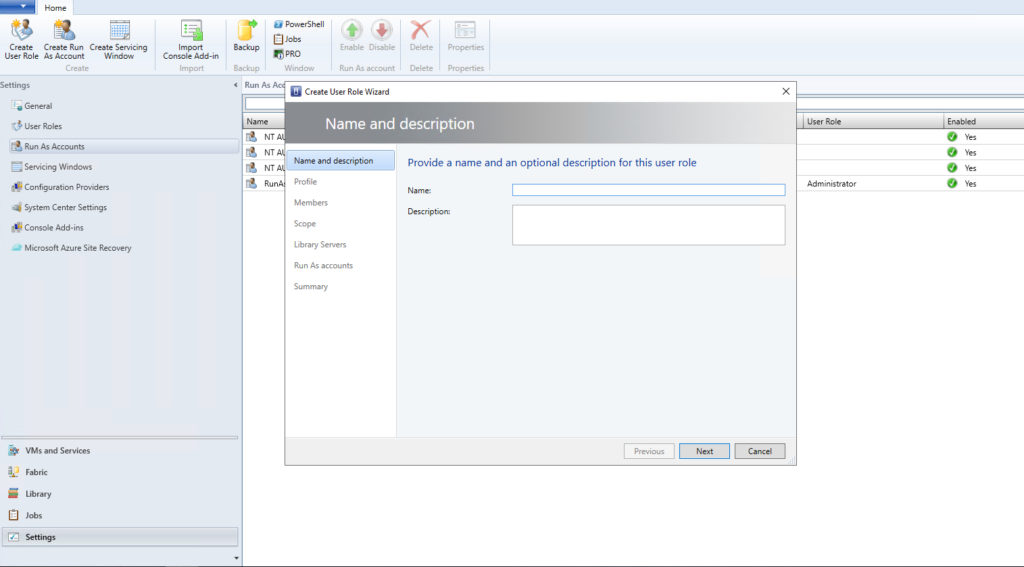
The first thing you will need to do is enter a name for the role you are creating. I recommend calling it Self Service Users or something similar.
Click Next, and you will be prompted to choose a user role profile to associate with the user role you are creating. Choose the Application Administrator (Self Service User) option, and click Next.
The next screen that you will see is the Members screen. Here you will need to click the Add button and then add the groups to whom you want to assign the role.
Click Next, and you will be prompted to choose the private cloud with which you want to associate the role that you are creating. Select your private cloud, as shown below, and click Next.

Click Next, and you will be taken to a screen that allows you to set quotas for your self-service users. It’s important to set quotas in a production environment because quotas will help prevent your users from depleting your Hyper-V environment of resources.
Now, work your way through the wizard’s remaining screens. These screens allow you to specify the networks and resources that self-service users will be able to use and establish permissions for self-service users. When you are done, click Finish, and Virtual Machine Manager’s self-service user role will be created.
Featured image: Shutterstock


