One of the questions that I get asked fairly often is how to create a bootable ISO file for Windows 10. Although the process used to create installation media for some of the previous Windows versions was cumbersome, Microsoft has simplified the process. In this article, I will show you two different methods that you can use to create two different types of bootable ISO files. First, I will show you how to create a Windows 10 installation disk. After that, I am going to show you how to create a bootable Windows PE disk. In both situations, I am going to use the simplest techniques that I can.
Creating a Windows 10 installation disk
Begin the process by going here and clicking on the Download tool now button. (It’s in the Create Windows 10 installation media section.) When prompted, click the Run button. This will cause Windows 10 Setup to start.
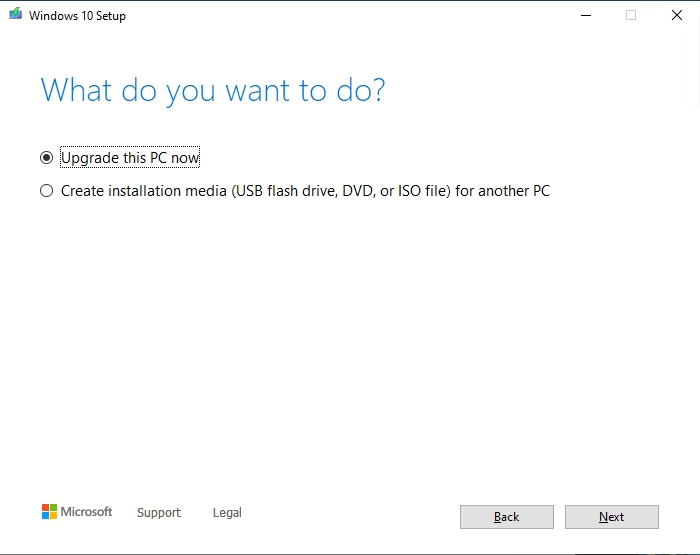
After a few minutes, you will be asked to accept the license agreement. After doing so, you will be taken to a screen that asks you if you want to upgrade the PC or if you would prefer to create installation media. You can see what this screen looks like in the screenshot below. Choose the Create Installation Media (USB Flash Drive, DVD, or ISO File) option and then click Next.
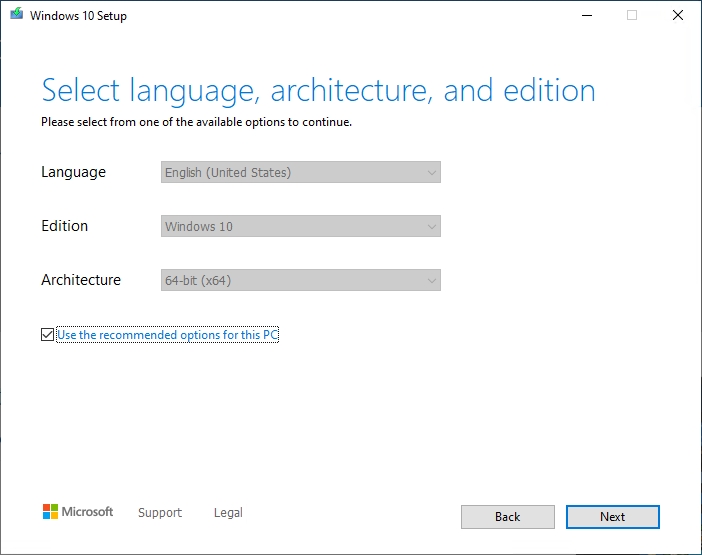
At this point, the Setup program will prompt you to specify your language, the Windows edition, and architecture that you want to use. If you look at the next figure, you can see that there is a checkbox that is selected by default. If you leave this checkbox selected, then your ISO file will inherit its language, edition, and architecture from the PC on which you are running Setup. If you want to choose a different set of options, then deselect the checkbox and make your choice.
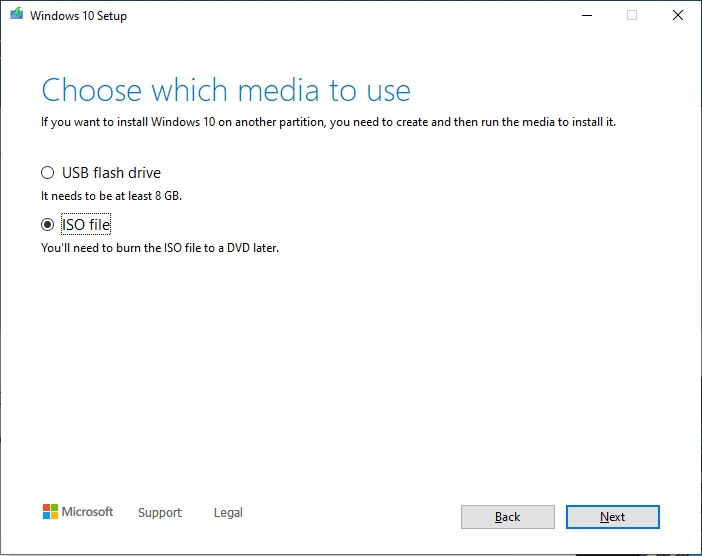
Click Next, and you will be asked if you want to write the installation media to a USB flash drive or if you would prefer to create an ISO file. Since the goal is to make an ISO file, choose the ISO File option, and click Next as shown in the figure below.
Click Next, and you will be prompted for a location in which to save the ISO file. Upon making your selection, Setup will begin downloading and assembling the required files. When the process completes, click Finish.
Creating a Windows PE boot disk
Depending on what you are trying to achieve, it can sometimes be useful to create a Windows PE boot disk rather than a full-blown Windows 10 installation disk. The first step to creating a Windows PE boot disk is to download and install the Windows Assessment and Deployment Kit for Windows 10. You can find this kit here.
When you run the installation wizard for the Windows Assessment and Deployment Kit, the first thing that it will ask you is where you want to install it to. Go with the default option and click Next. Now you will be asked if you wish to participate in the Microsoft Customer Experience Program. Make your selection and click Next. Finally, accept the license agreement, and you will be taken to a screen that asks which components you want to install. Choose the Deployment Tools option and the Windows Preinstallation Environment (Windows PE) option. You can clear all of the other checkboxes, as shown in the figure below. Click Install and Windows will download and install the required components.

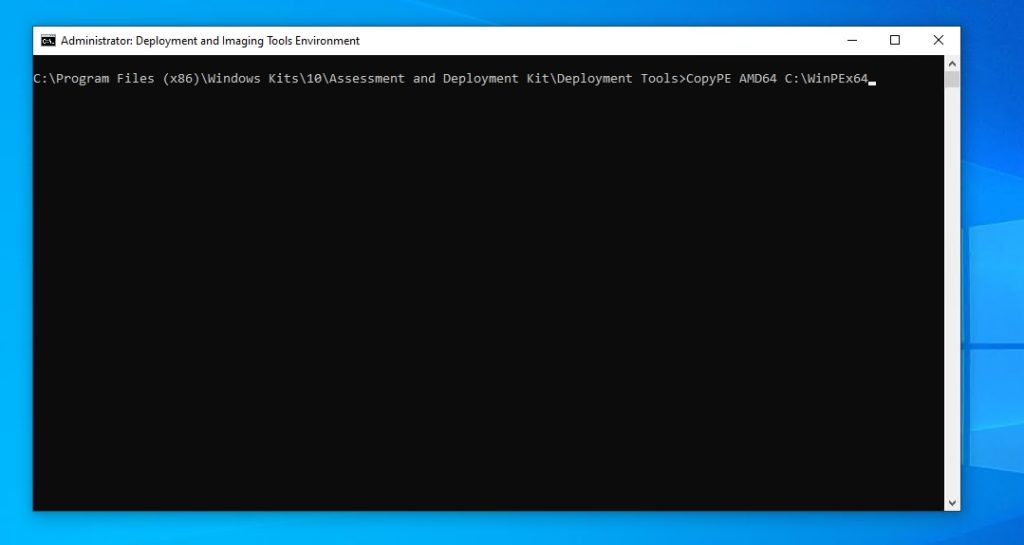
When the deployment process completes, launch the tool by right-clicking the Start menu’s Deployment and Imaging Tools Environment option and choosing the More | Run as Administrator option. This will cause Windows to launch an elevated Command Prompt environment, with the path set to C:\Program Files (x86)\Windows Kits\10\Assessment and Deployment Kit\Deployment Tools. At this point, you will need to enter the following command:
CopyPE AMD64 C:\WinPEx64
You can see what this looks like in the next screenshot.
Windows will now copy all of the necessary files to the C:\WinPEx64 folder. Now, you will need to enter this command into the command prompt window:
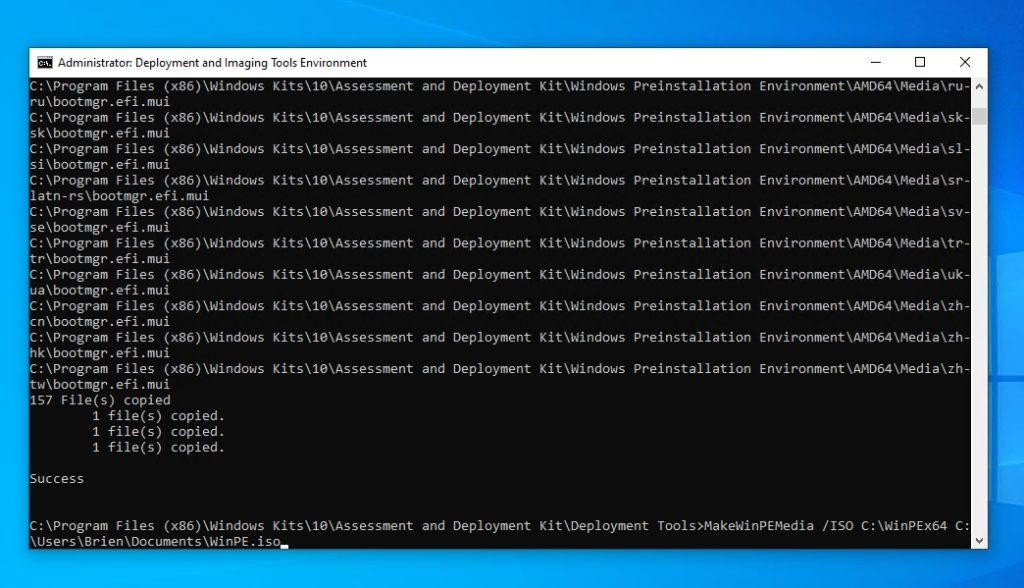
MakeWinPEMedia /ISO C:\WinPEx64 C:\Users\<username>\Documents\WinPE.iso
This command instructs Windows to create a Windows PE ISO file that is based on the system files contained in the C:\WinPEx64 folder. The resulting ISO file will be named WinPE.iso and will be stored in the C:\Users\<Username>\Documents folder. You can name the ISO anything that you want, and you can store it in a location of your choosing. You can see what the command looks like in the figure below.
Because Windows PE is a lightweight environment, it only takes Windows a few seconds to create the ISO file. You can see what the file creation process looks like below.

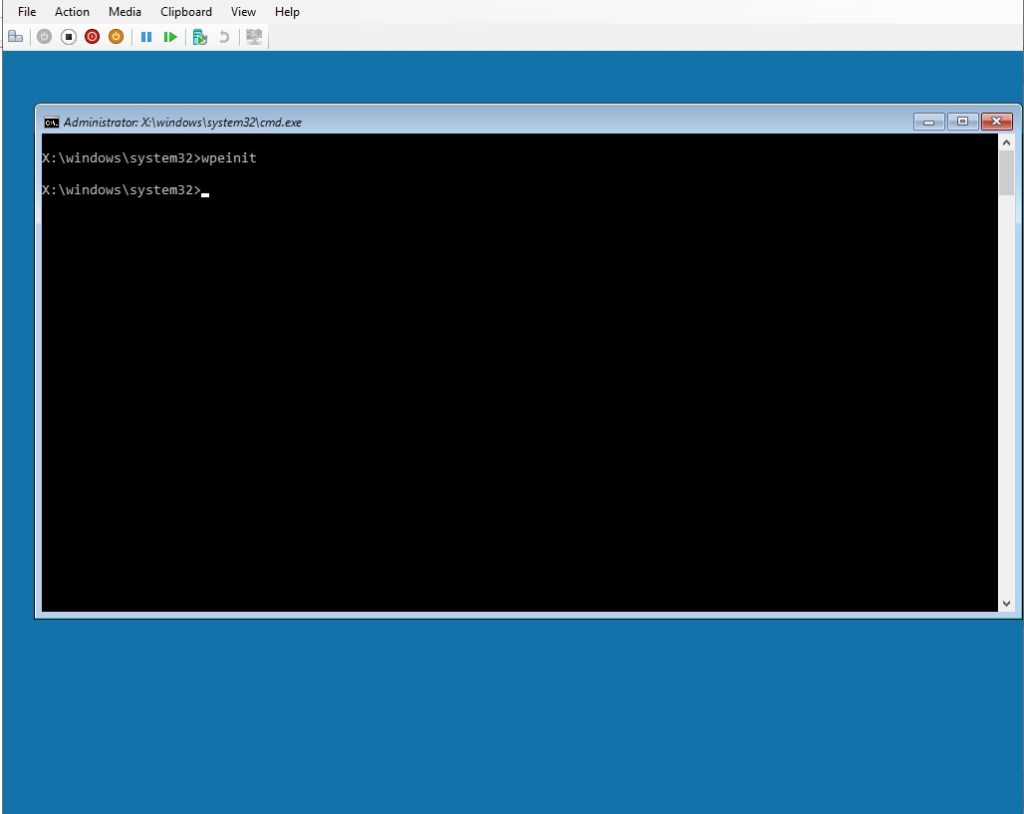
Once you create the Windows PE ISO file, you can use it to boot physical or virtual machines. The virtual machine shown in the next figure was booted using a recently created Windows PE ISO file.
Third-party apps available
Although the Windows 10 installation disk and the Windows PE boot disk that I showed you how to create are both generic, these disks can be combined with other tools to create custom Windows boot images.
It is also worth noting that the techniques that I have demonstrated are not the only techniques that can be used to create bootable ISO files in a Windows environment. Microsoft offers a variety of different tools and techniques, but there are also lightweight and inexpensive third-party tools that you can use to create bootable images. These third-party utilities tend to be most useful if you need to create a bootable USB flash drive, but many such utilities can create ISO files as well.
Featured image: Shutterstock


Hi Brien,
Nice Post! Thank you for sharing this valuable post on creating bootable ISO files for windows 10. You can also add a section like this —> https://bit.ly/createiso . Hope it helps 🙂
Thanks