If you would like to be notified when Claudio Rodrigues releases Customizing the Microsoft RDP Client (Part 2) please sign up to our Real-time article update newsletter.
Probably the first question you are asking yourself is ‘What does he mean by customizing the Microsoft RDP Client and WHY?’. Well the answer to this question is simple. First of all, I like custom things. If I can tweak, change and even break something, I will do it. Just for fun.
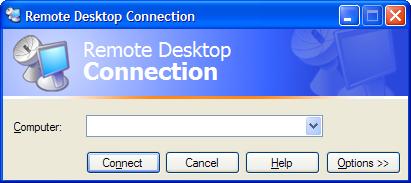
Seriously, the main reason for customizing the now famous ‘Remote Desktop Client’ (Fig. 1) is to change a couple things that can help you in many ways like increasing your Terminal Server security (yes, that is right), reducing support calls/issues and of course, branding another piece of software with your company logo.
Fig. 1
In this first part we will cover how to change the RDP Client interface, showing you the tools to use and how to do it. The next article in this series will cover the security portion I mentioned. So make sure you keep an eye on the website for the second part of this article.
Introduction
As any other ‘hands-on’ article, I must clarify a couple things. If you remember reading any Microsoft knowledge base article where they mention the word ‘registry’, they always state that if you say the word registry ten times in front of a server running Windows when you are facing west, things may happen and your server may go to the cyber-limbo. The same rules/great ideas apply here. You will use tools that let’s say can cause some damage depending where and how you use them. So I am NOT responsible for your actions, acts of God, weather and for the Dutch soccer team being kicked out of the world cup. Do it at your OWN risk.
And ALWAYS have a backup ready in case you make any major mistakes.
The tools
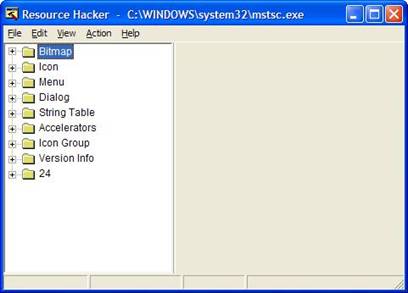
Ok before we start messing things up we must have good tools for that! Choosing the right tool for the job is almost as important as doing the job itself. For this first part all we need is a tool (freeware by the way) called Resource Hacker (Fig. 2). You can download it at:
http://www.angusj.com/resourcehacker/
Fig. 2

Simply download it at the link provided and unzip all files to a folder like ‘Tools\Resource Hacker’.
Doing some work…
Ok, I mentioned we can reduce your support calls and even make your life at work better. ‘HOW?’ you are probably asking yourself now and thinking ‘This dude is full of BS’. Keep reading…
Assuming you got Resource Hacker downloaded and unzipped, simply launch it (double click the ResHacker icon). Now go to FILE | OPEN and browse for ‘MSTSC.EXE’. Usually this file is under WINDOWS\SYSTEM32. If it is not there for you simply search for it on your hard drive.
After opening you should see something like this (Fig. 3):
Fig. 3
Great but what are we going to do here? One of the most common issues with Terminal Services is users disconnecting their sessions. For some unknown reason they do not understand the concept of ‘Start button click’ when running a TS session and for them, ‘closing’ their session means clicking on the upper right corner where the close button (the famous ‘X’) is.
Although you can set timeouts on the TS itself to end disconnected sessions after a while, in some cases this is not enough. Some applications may go crazy when a user disconnects his session and another user tries running it. Or the user disconnects the session and thinks the server will save all his work for him ‘automagically’. Once you set a time out for the disconnected sessions and the user disconnects it, whatever he was doing is gone. Nothing is saved. Nada. Zippo. Ciao.
And of course, after this happens the users WILL call you and ask you why the server did not save his work! Great…
So the first thing we will do is change the behavior of the ‘X’ button, once it is clicked. We will display our own customized message and give no other option to the user other than clicking ‘OK my lord’.
After you open MSTSC.EXE, on the left hand side you will see a folder called ‘Dialog’. Click on the plus sign and it will open other ‘folders’. One has the number 404. Click on its plus sign and you will see something like a gear icon with the 1033 number. Click on 1033 and you will see the window we are looking for (Fig. 4)!
Fig. 4
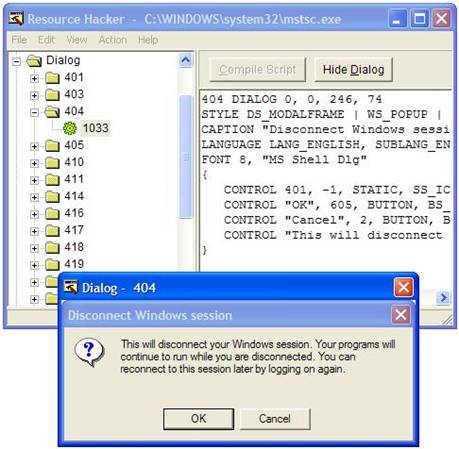
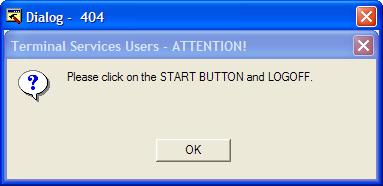
On the right hand side you can see the caption for the two buttons on the screen (OK and Cancel), the caption for the window itself and the text being displayed to the users. To change the window caption for example, click on the RIGHT hand side panel where you see ‘Disconnect Windows session’ and type whatever you want. Let’s change it to ‘Terminal Services Users – ATTENTION!’. After changing the text click on the ‘Compile Script’ button. You will notice the window showing the Dialog 404 now changed its caption! (Fig. 5)
Fig. 5
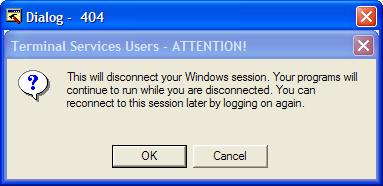
To wrap this up now click where you see ‘This will disconnect…’ and type the message you want. In my case I decided to show ‘Please click on the START BUTTON and LOGOFF.’ Before clicking on ‘Compile Script’, let’s go for the final and dirty trick!
If the users click on the ‘OK’ button, no matter which message we show, the Remote Desktop Client will actually disconnect the session. So the trick here is to simply GET RID of the ‘OK’ button and RENAME the ‘Cancel’ button to ‘OK’! By doing that your users will click on the only button they can see, ‘OK’ that is actually ‘Cancel’ in disguise. 🙂
So the RDP Client will take that as a ‘Cancel’ button click and will simply ignore the ‘X’ button click!
To delete the ‘OK’ button simply click on it and press DELETE. Then click on the ‘Cancel’ button and move it to the center of the window (to look better) and finally where you see Control “Cancel”, change “Cancel” to “OK”. Now click on ‘Compile Script’. Your final window should look like this (Fig. 6).
Fig. 6
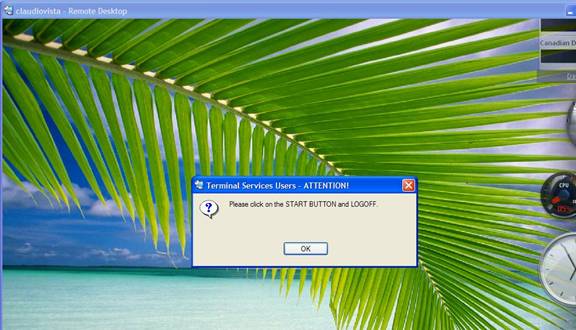
We are almost done. To finish the job, now go to FILE | SAVE AS and save it under SYSTEM32 as ‘MSTSC2.EXE’. You are now done! Close ‘Resource Hacker’ and give your new executable a try! Go to START | RUN and type MSTSC2.EXE. Connect to a TS, logon and try clicking on the close button. Your customized window should show up (Fig. 7).
Fig. 7
Conclusion
Well it is clear to me this is no rocket science, although we just covered the barebones here. With Resource Hacker you can change icons and even the logos you see on the screen when launching the RDP Client. Just be careful of what you do and always remember to save it with a DIFFERENT name.
Of course your next question will be ‘Great! Now I have this executable. But how can I repackage the original MSI or even create a new one to deploy it on all my machines?’. Well this is probably a good topic for another article here.
On the next and final part, we will play with another tool and I will show you how to… Well wait for the next part. And during the meantime, happy hacking.
If you would like to be notified when Claudio Rodrigues releases Customizing the Microsoft RDP Client (Part 2) please sign up to our Real-time article update newsletter.

I can’t find the Dialog 404 in my mstsc files. I checked all of them but none of them have the 404 dialog box. 🙁
Please help.