If you would like to read the other parts in this article series please go to:
- Deploying Lync Server 2010 (Part 7) – Managing Lync Users
- Deploying Lync Server 2010 (Part 8) – Managing User Policies
Publishing the Topology…
This is the final step before installing Lync Server, and since the planning phase was done properly, this section is going to be a piece of cake. Let’s open the Topology Builder and open our current file that we have created earlier on. Then, let’s click on the Publish Topology item that is located in the Toolbox Actions.
On the Publish the topology page, you will find a welcome page warning you about some prerequisites, such as Shared folder and simple URLs definition. Let’s click on Next.
On the Select Management Server page, the wizard gives you the Front End information. Let’s select our first Front-End and click on Next (Figure 01)

Figure 01
On the Publishing wizard complete page, we can check each step performed by the tool during the Topology publishing (Figure 02) and for each step we can see the log files associated with it. The Next Steps section has a link to open a to-do list with the steps left to be done.

Figure 02
After publishing the topology we can already see some differences in the environment, the first one is a couple of folders created in our LyncShare folder (Figure 03) and some data being populated in the RTC Service key inside of the Configuration partition (Figure 04)
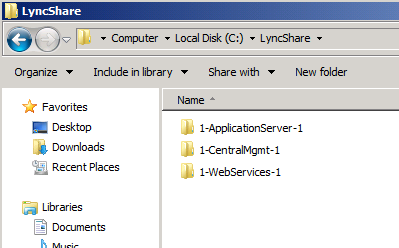
Figure 03
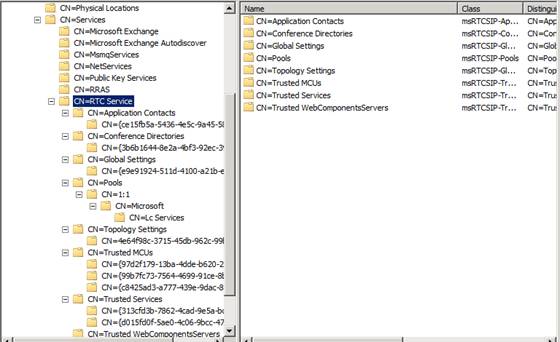
Figure 04
Deploying Lync Server…
It’s time to really start installing Lync Server 2010. Let’s click on Install or Update Lync Server System on the Deployment Wizard main page (Figure 05), and the result will be a list of all steps required to deploy the Lync Server based on the Topology that we have already defined previously in this article series.

Figure 05
In order to configure a local replica of the Configuration Store we have two possible options which are retrieve directly from the Central Management Store or import from a file. The default option is the first one (Figure 06). We are going to use a file only when the server that we are deploying is out of reach from local Lync Server (ex: Edge Server role). Click on Next.
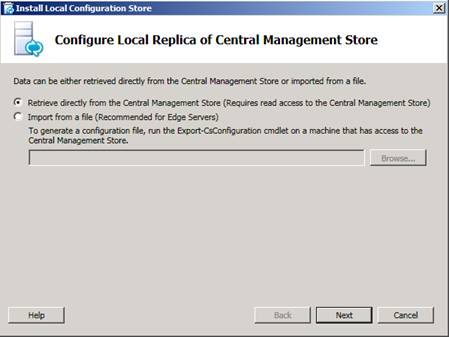
Figure 06
Like any other final screen in the Lync Server deployment we are going to see all cmdlets perform the install and we have the option to see the log files. Click on Finish.
Step 1 is done, now it’s time to install the Lync Server components which are the real Lync Server bits on the local server. The installation is really easy because we have done all the hard work in the previous steps. In order to install the Lync Server bits, let’s click on Run located on the section Step 2: Setup or Remove Lync Server Components, and click on Next and the Finish.
Note:
In some cases the setup installs components that may require a restart and if that happens, text in red will be shown and the Task Status will not show as successful (Figure 07). You may need to restart the server and run the same procedure again.

Figure 07
It’s that easy to deploy Lync Server and the software bits on the server.
Setting up certificates….
Following the list of items to get done in the Lync Server 2010 Deployment Wizard, our next stop is at the certificate section. Click Run and the Certificate Wizard will guide us through the process to request and assign a certificate. In the following steps we will be requesting and assigning a new certificate using our internal Certificate Authority, as follows:
-
The initial page of the Certificate Wizard page shows the current status of the server, let’s start the Request process by clicking on Request (Figure 08)

Figure 08
-
The Certificate Request Wizard will start, on the initial page, just click Next.
-
On the Delayed or Immediate Requests page, we will use our internal Certificate Authority and click on Send the request immediately to an online certification authority and click Next.
-
On the Choose a Certification Authority (CA) page, we can use the CA detected by the wizard on the first option or we can specify one manually. Click Next.
-
On the Certification Authority Account page, we can use a different set of credentials to request the certificate. Since we are running the Certificate Request wizard as an administrator we can leave the default settings and click Next.
-
On the Specify Alternate Certificate Template page, the Lync Server by default uses the Web Server certificate template which is common on all Microsoft Certification Authorities, however if you want to choose a different one you can specify it here. Let’s leave default settings and click Next.
-
On the Name and Security Settings page, we can define a Friendly Name for the certificate and the bit length. In this article series we are going to name this certificate as Front-End AndersonPatricio.org and then click on Mark the certificate’s private key as exportable. This way we can move the certificate around in case we need to. Click Next.
-
On the Organization Information page, fill out your organization information and click Next.
-
On the Geographical Information page, fill out your information and click Next.
-
On the Subject Name / Subject Alternate Names page, we will have all names added automatically to the request and you may have noticed that all those names were defined during the Topology Builder phase of this article series (Figure 09). Click on Next.

Figure 09
-
On the SIP Domain setting on Subject Alternate Names (SANs) page (Figure 10), notice that if a deployment requires automatic logon without using Service entries in DNS or using Lync Phone Edition, then SIP should be checked. If you select the option then FQDN sip.<your-domain-FQDN> will be added to the certificate.

Figure 10
-
On the page Configure Additional Subject Alternate Names, if you are planning any other names for that specific Front-End you can use this page to add additional names to the certificate. Click Next.
-
On the Certificate Request Summary page, a summary of all options chosen so far will be displayed, click on Next.
-
On the Executing Commands page, the results will be displayed and if the Task Status is completed we can click on Next.
Because we are using the internal CA, the Certificate Request will inform us that the certificate was added locally (to the machine service account), and we have the option to move forward and start a new wizard to assign the certificate that was just installed (Figure 11), however leave the default settings and click on Finish.
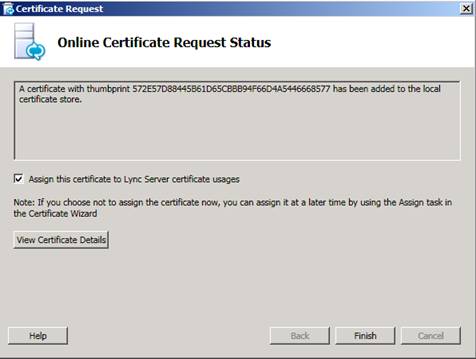
Figure 11
-
On the new Certificate Assignment Wizard page, click Next twice and then Finish. This wizard doesn’t allow us to change any settings. The result will be our new certificate assigned to the new Front-End Server, as shown in Figure 12.

Figure 12
Starting Lync Server 2010 services…
We have already deployed Lync Server 2010 and configured its certificates, now we can start up the services. To do that, just hit the Run button located in the section Step 4: Start Services. In the initial page of the Start Services Wizard click Next and the following window will display all services started. If the Task status: Completed is shown (Figure 13) we are good and we have a Lync Server 2010 up and running!
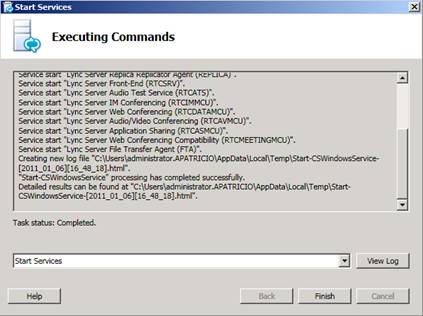
Figure 13
Using the Lync Server 2010 Deployment Wizard, we can click on Step 5 and open the services.msc. All Lync Services start with the word Lync and we can check and validate that all services started properly (Figure 14).

Figure 14
One last thing is to click on the last Run button of the page and select Use Microsoft Update when I check for updates (recommended). This option will allow Windows Updates to check for Lync updates during the regular process, as shown in figure 15.

Figure 15
Conclusion
Finally, we have Lync Server 2010 deployed in our environment but we are not done yet, there is a lot of stuff remaining for this article series. We will be working on some client side, user management, server backup and basic restore, Outlook web App integration and more… so stay tuned.
If you would like to read the other parts in this article series please go to:


