Few things are more annoying to anyone hard at work trying to complete a project than receiving messages nagging the user to install Microsoft Office 365 updates. Fortunately, Microsoft 365 update messages like the one shown in the screenshot below are relatively easy to disable.

The easiest way to keep users from seeing messages like the one shown above is to create a Group Policy setting that disables Microsoft 365 update messages. Before you can do that, you will need to install the Microsoft Office administrative templates if you have not already done so.
Installing the administrative templates
You can download the Microsoft Office administrative templates here. When you get ready to download the template, you will be asked to install the 32-bit version or the 64-bit version. If you will be using the Office Customization Tool, you will need to download the version of the template that matches the version of Office that you are customizing. If, for example, you are going to be customizing the 64-bit version of Office, you will need to download the 64-bit templates. Otherwise, if you are only planning on using the templates in conjunction with the Active Directory (as is the case with what I am about to show you), then either version will work.
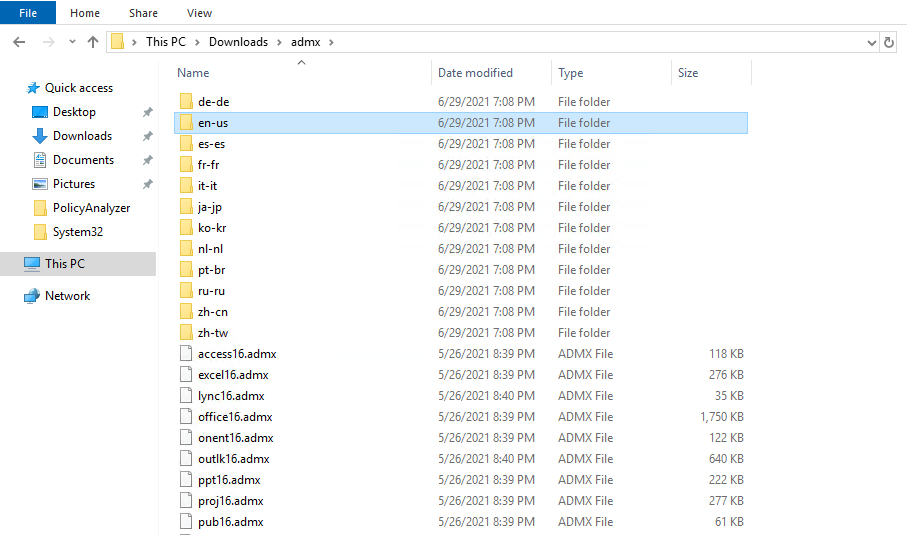
The download consists of a series of ADMX files, each corresponding to a particular Office application. There will also be a series of language-specific folders containing ADML files that supply the language used within the templates. You can see what the template files look like in the following screenshot.
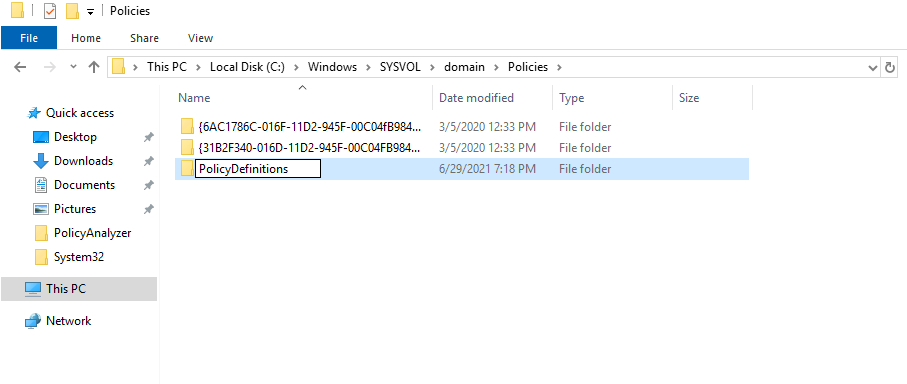
Once you have downloaded and extracted administrative template files, as shown in the screenshot above, you will need to move them to a location where they can be used. Assuming that you are installing the administrative template files on a domain controller, you will need to place the files in the Central Store. Normally, the Central Store is located at %SystemRoot%\sysvol \domain\policies\PolicyDefinitions. This location does not exist by default. To create the Central Store, open File Explorer and navigate to %SystemRoot%\sysvol \domain\policies. You will need to type this location into the window’s address bar to access it. Once you arrive in the Policies folder, you will need to create a subfolder called PolicyDefinitions, as shown in the screenshot below. Be careful to spell PolicyDefinitions correctly or the administrative templates will not work.
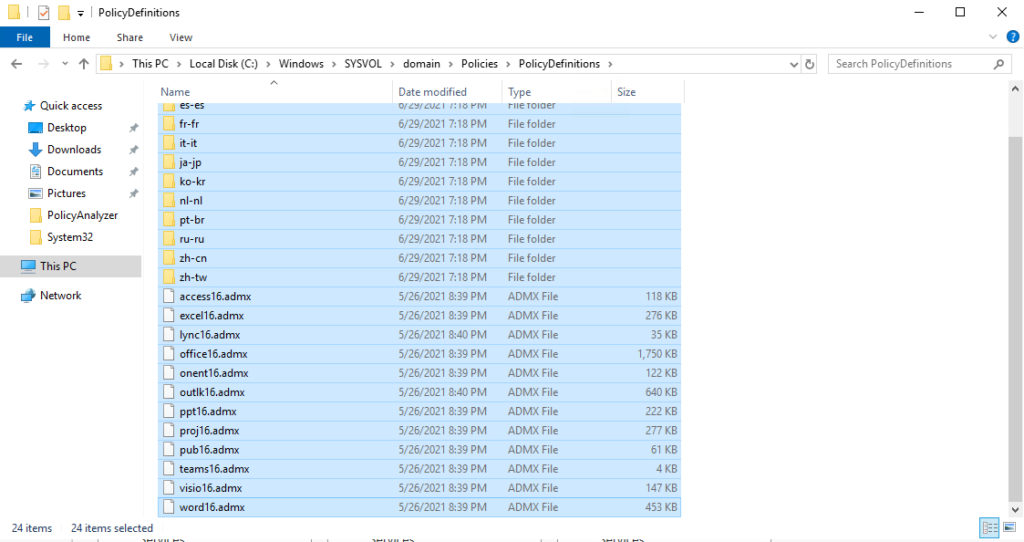
Finally, copy all of the administrative template and localization files you downloaded and extracted earlier into the PolicyDefinitions folder. You can see what this looks like in the screenshot below.
Modifying the Group Policy
Now that the required administrative templates have been installed, you can move forward with implementing Group Policy settings where you can disable Microsoft 365 update messages. The exact procedure you will use will vary depending upon how your Active Directory is structured. For this article, I will assume that you are using the default Active Directory and Group Policy structure.
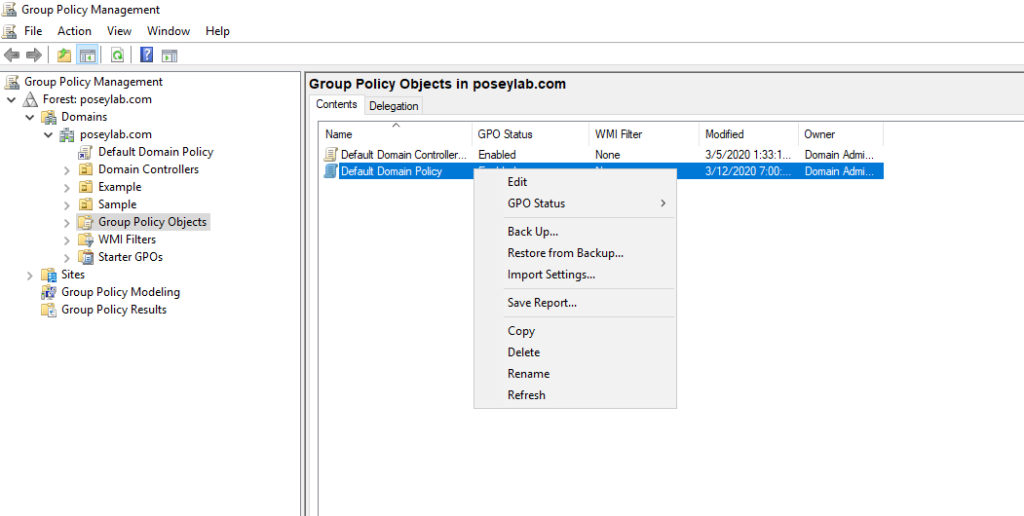
So with that said, open Server Manager on your domain controller and select the Group Policy Management option from the Tools menu. When the Group Policy Management console opens, navigate through the console tree to Group Policy Management | <your forest> | Domains | <your domain> | Group Policy Objects. Now, right-click on the Default Domain Policy, and choose the Edit command from the shortcut menu, as shown below.
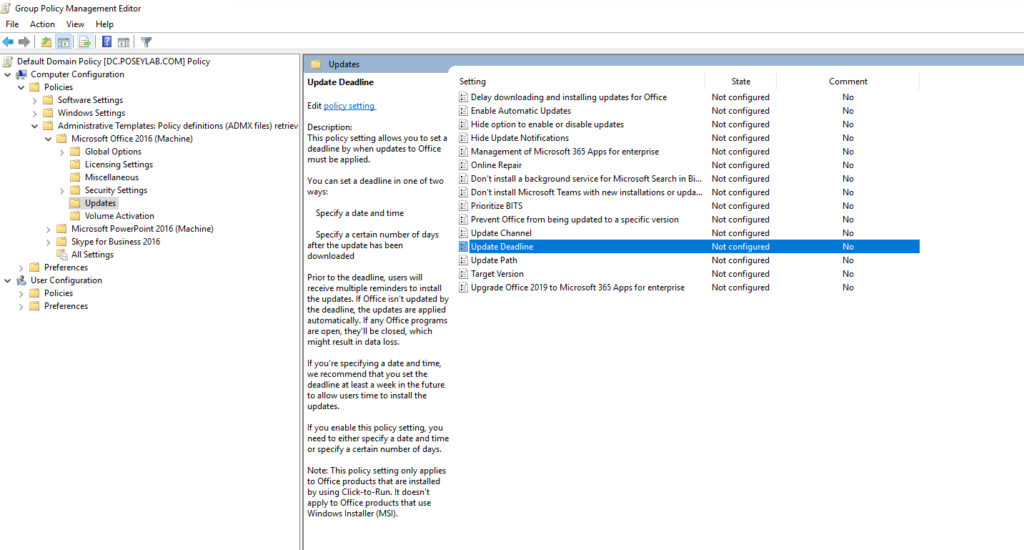
When the Group Policy Management Editor opens, navigate through the console tree to Computer Configuration \ Policies \ Administrative Templates | Microsoft Office 2016 (Machine) \ Updates. If this location does not exist, it means that the administrative templates were not installed correctly.
As you can see in the screenshot below, there are quite a few Group Policy settings associated with the update process for Microsoft Office. If your goal is to prevent users from seeing annoying messages nagging them to install Microsoft Office updates, you will need to enable the Hide Update Notifications setting.
There are two important caveats associated with using this particular Group Policy setting. First, the policy setting only applies to Microsoft Office installations installed by using click to run. If Office was installed using an MSI file, this policy setting will be ignored.
The other thing that you need to know about the Hide Update Notifications setting is that notifications will still be shown as they relate to any update deadlines that you have set. Update deadlines are optional, but they can be used to prevent users from putting off updates indefinitely. You might have noticed in the previous screen capture that there is a Group Policy setting called Update Deadline. If you enable this setting, you will have the option of either specifying a certain date by which the latest updates have to be installed, or you can specify a certain number of days after the update has been downloaded.
You have to be careful when using the Update Deadline Group Policy setting. If a user has not installed an update by the deadline you set, Microsoft Office will automatically install the update on the user’s behalf. In doing so, Office will be closed and then restarted. If the user happens to be working on a document that has not yet been saved, this update process can cause data loss.
Disable Microsoft 365 update messages: Wrapping it all up
By configuring the Hide Update Notifications Group Policy setting, you should be able to keep your users from seeing annoying prompts like the one shown at the beginning of this article. Keep in mind that when you make a change to a Group Policy setting, that change does not go into effect right away. If you want to force a Group Policy setting to go into effect immediately, open a command prompt window on the target system and enter the following command:
GPUpdate /Force
Otherwise, the setting will typically take effect the next time that the user logs in.
Featured image: Shutterstock


Does this remove the “Microsoft 365 View Benefits” button seen in the Systems, System Window at the top of the Window, between the Computer Name and Windows Update button?
Unfortunately, no, unless you upgrade to Windows 11 Pro for Workstations. Or if you have Windows 11 Enterprise version. This is one of Microsoft´s most important features in Windows 11 called “Ads”, so it cannot be removed.