If you would like to read the other parts in this article series please go to:
Introduction
In part 1 of this multi-part article, where I walk you through how to enable forms-based authentication for external and internal Outlook Web App 2010 (OWA 2010) users where Exchange 2010 is published using Forefront TMG 2010, we first had a look at the lab environment used. Then, we changed the authentication method from FBA to basic and integrated authentication on the OWA and ECP virtual directories under the Default Web Site. Lastly, we added an additional IP address to each of the four Exchange 2010 multi-role servers in the environment.
In this part 2, we’ll continue where we left of in part 1. We will begin by creating a new web site on each Exchange 2010 multi-role servers. Then we’ll create and configure a new OWA and ECP virtual directory underneath the new web site. Finally, we’ll change the HTTPS virtual service on each load balancer so that it points to the new IP address assigned to the new web site.
Creating an Additional Web Site in IIS
To create an additional web site on each Exchange 2010 multi-role server, open the “Internet Information Services (IIS) Manager”. Now expand “Server” > “Sites” and the “Default Web Site”.
As can be seen in Figure 1, among other Exchange 2010 specific virtual directories, we have the “ecp” and “owa” virtual directories listed under the Default Web Site.
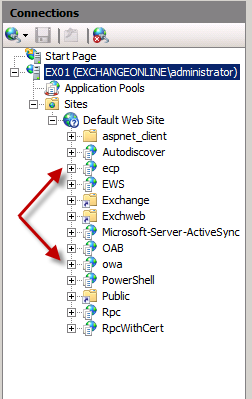
Figure 1: OWA and ECP virtual directories under the Default Web Site
Let’s click ” Bindings” under “Edit Site” in the work pane. Select “https” and click “Edit”. Notice that “IP Address” is set to “All unassigned”. This should not be changed for the Default Web Site since this can break remote PowerShell.

Figure 2: IP address field for the Default Web Site set to All Unassigned
Okay let’s create the new web site. To do so, right-click on “Sites” and select “Add Web Site” in the context menu (Figure 3).
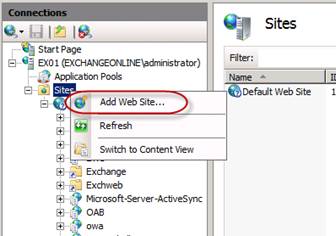
Figure 3: Adding a new Web Site in the Internet Information Services (IIS) Manager
Enter a meaningful site name such as “OWA-ECP-FBA” and specify a physical path such as “c:\inetpub\owa-ecp-fba”. Now under “Binding”, select “HTTPS” and then specify the additional IP address we added to the server in part 1 of this multi-part article. Finally, select the Exchange 2010 UC/SAN Certificate used for the Default Web Site in the SSL certificate drop-down menu.
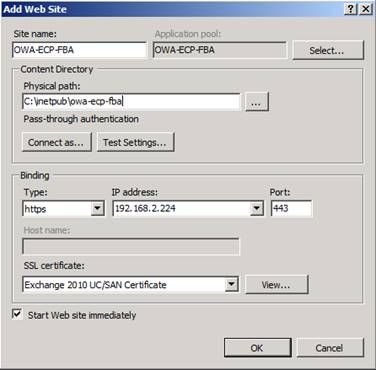
Figure 4: Configuring the new Web Site
When done with the above, click “OK” to create the new web site.
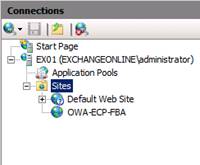
Figure 5: New Web Site listed in the Internet Information Services (IIS) Manager
With the new web site created, we can move over to the Exchange 2010 side of things and create and configure the required OWA and ECP virtual directories.
Note:
The above steps should be performed on all four Exchange 2010 multi-role servers.
Creating the ECP and OWA Virtual Directories
To create a OWA virtual directory underneath the new web site, open the Exchange Management Shell (EMS) and type the following command:
New-OwaVirtualDirectory –Name “owa” –WebSiteName “OWA-ECP-FBA”
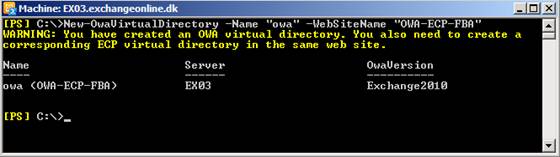
Figure 6: Creating a new OWA virtual directory underneath the new web site
Now let’s list all the OWA virtual directories on the Exchange 2010 multi-role server. In order to do so, type the following command:
Get-OwaVirtualDirectory –Server EX03
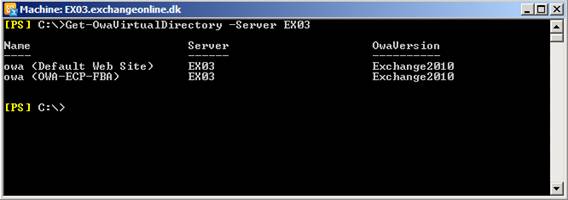
Figure 7: We now have two OWA virtual directories listed
With the OWA virtual directory created, we can move on and create the ECP virtual directory. This is done with a slighty different command and set of parameters:
New-EcpVirtualDirectory –Server EX03 –WebSiteName “OWA-ECP-FBA”
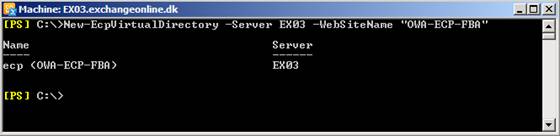
Figure 8: Creating a new ECP virtual directory underneath the new web site
Now let’s list all the ECP virtual directories on the Exchange 2010 multi-role server. In order to do so, type the following command:
Get-EcpVirtualDirectory –Server EX03

Figure 9: We now have two ECP virtual directories listed
Note:
The above steps should be performed on all four Exchange 2010 multi-role servers.
The new OWA and ECP virtual directories can now be seen under the additional web site in the IIS Manager as shown in Figure 10.
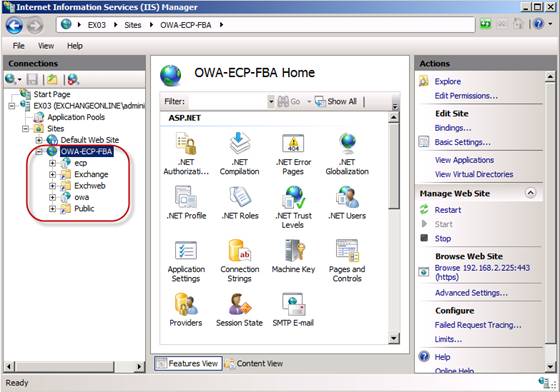
Figure 10: New OWA and ECP virtual directories under the additional Web Site in IIS Manager
Configuring the new OWA and ECP Virtual Directories
Okay, now we need to configure the proper URLs and authentication method for the OWA and ECP virtual directories that we just created under the additional web site. We can of course do so using the EMS which would be the easierst and quickest way to do it if you have multiple Exchange 2010 servers to deal with, but in this article we’ll do so using the EMC.
So launch the EMC on one of the servers, then expand the “Server Configuration” work center, and click on “Client Access”. Select the first server in the result pane, then open the property page for the “OWA-ECP-FBA” virtual directory. As can be seen, both the internal and external URLs fields will be blank by default (Figure 11).
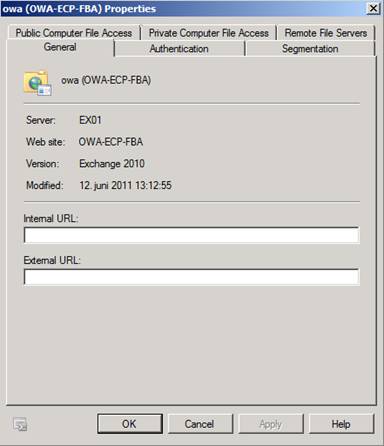
Figure 11: Internal and External URL for the new OWA virtual directory are blank
Since we want internal users to access OWA and ECP using the same namespace (mail.exchangeonline.dk) as the one external users going through Forefront TMG 2010 will use, we will enter “https://mail.exchangeonline.dk/owa“ in the internal URL field as shown in Figure 12.
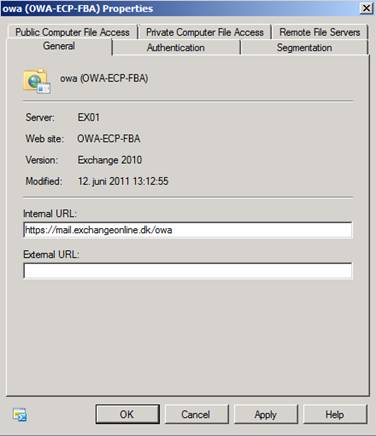
Figure 12: Configuring the Internal URL for the new OWA virtual directory
Click the “Authentication” tab, and then change the authentication type from Basic authentication to forms-based authentication as shown in Figure 13. Click “Apply” then “OK” to exit the property page for the new OWA virtual directory.

Figure 13: Changing the authentication settings for the new OWA virtual directory
Now click on the “Exchange Control Panel” tab and open the property page for the “ecp (OWA-ECP-FBA)” virtual directory.

Figure 14: Opening the property page for the new ECP virtual directory
Under the “General” tab specify “https://mail.exchangeonline.dk/ecp” in the Internal URL field (Figure 15).
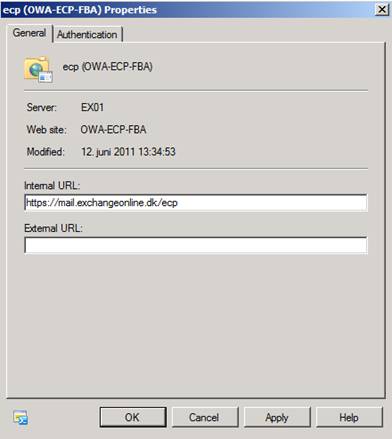
Figure 15: Configuring the Internal URL for the new OWA virtual directory
Note:
The URL we specify in the Internal URL field is the URL that will be populated in the backstage center for internal Outlook 2010 clients connecting via RPC.
Click on the “Authentication” tab and then change the authnetication method to forms-based authentication so that the authentication method match the one set for the new OWA virtual directory. Finally click “Apply” then “OK” to exit the property page for the new ECP virtual directory.
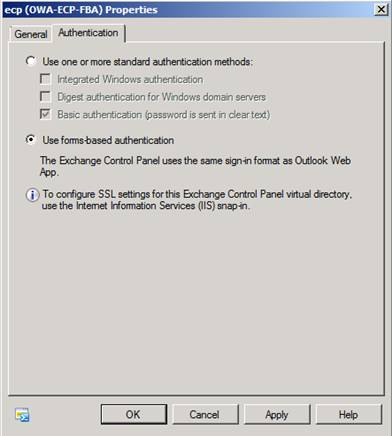
Figure 16: Changing the authentication settings for the new ECP virtual directory
Repeat the above steps for all four multi-role servers, but remember that the URL for the two servers in the failover datacenter should have “https://failover.exchangeonline.dk/owa“ specified in the internal URL for the new OWA virtual directory and “https://failover.exchangeonline.dk/ecp“ specified in the internal URL for the new ECP virtual directory.
We have now configured the new OWA and ECP virtual directories and can move on to changing the target IP addresses for the respective HTTP virtual service on the load balancers.
Changing Target Server IP Addresses on Load Balancer
Since we want to present all internal OWA and ECP users with a FBA logon page when accessing OWA/ECP via the mail.exchangeonline.dk namespace, we now need to change the HTTPS virtual service associated with OWA/ECP on the load balancer solution in each datacenter as it currently points to the IP address associated with the Default Web Site and hence presents the users with integrated Windows or Basic authentication when accessing OWA/ECP.
In Figure 17 and Figure 18, we can see the current configuration for the load balancers.

Figure 17: Current configuration for the load balancer in the primary datacenter

Figure 18: Current configuration for the load balancer in the failover datacenter
For the load balancer in the primary datacenter, we want to change the Exchange HTTPS virtual service to point to the “192.168.2.224” and “192.168.2.225” IP addresses that are associated with the new web site we created in IIS and for the Exchange HTTPS virtual service on the load balancer we want to point them to “192.168.6.224” and “192.168.6.225”.
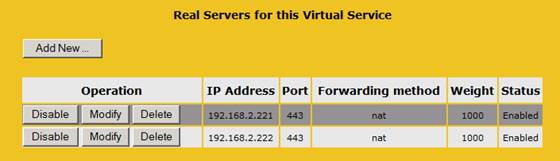
Figure 19: Current target IP addresses
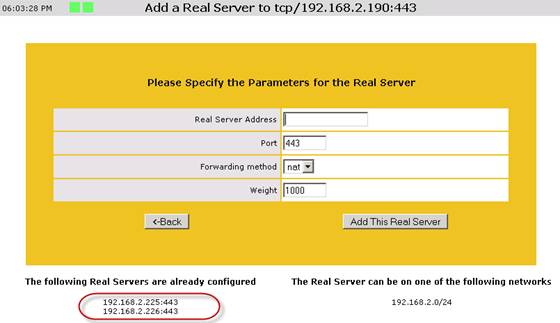
Figure 20: New Target IP Addresses for the Exchange HTTPS Virtual Service on the load balancer in the primary DC
Verifying OWA 2010 Access for Internal Users
With the changes made on the load balancers, let’s now try to access OWA from an internal client using “https://mail.exchangeonline.dk/owa” and https://failover.exchangeonline.dk/owa URLs. When doing so, we should now get the FBA logon page shown in Figure 21.

Figure 21: OWA 2010 FBA Logon Page
Verify that you can logon to a mailbox using username, UPN or “domain\user” depending on which format you selected when you configured forms-based authentication.

Figure 22: OWA 2010
Also try to access the ECP page from within OWA 2010 in order to verify that ECP works as expected.
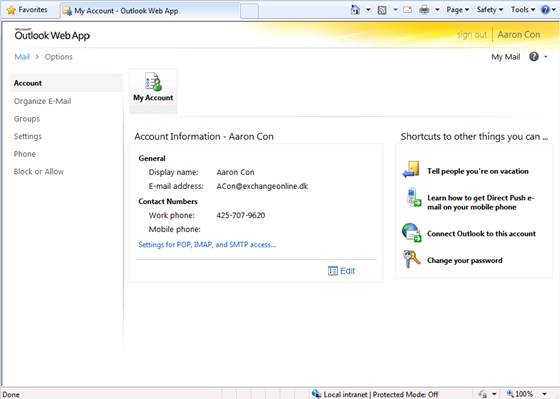
Figure 23: Accessing ECP via OWA 2010
With this part two of this multi-part article ends, but you can look forward to part 3 which will be published in a not so distant future.
If you would like to read the other parts in this article series please go to:


