If you would like to be notified of when Henrik Walther releases the next part in this article series please sign up to our MSExchange.org Real Time Article Update newsletter.
Introduction
I’ve been participating in the Office 365 (and acted a SME buddy for Microsoft customers in the Office 365 TAP) since October 2010 but unfortunately, I haven’t been able or should I say allowed to share Office 365 related information with you my fellow readers. This is because I signed a strict NDA prior to joining the Office 365. But now that Microsoft opened up the gates to Office 365 to pretty much everyone via the public beta that was announced on April 17th, I can finally share the experienced I gained the last approximately 7 months.
So the idea with this multi-part article is to use a similar approach to the one I used back in 2009 when I demystified the Exchange Online offering part of the Business Productivity Online Suite (BPOS) (can be found here). That is I will begin with a short introduction to what Office 365 is and then take you through the signup process plus introduce you to the new Office 365 administrator portal. Then, we’ll focus on the Office 365 package offered to small businesses. That is businesses consisting of up to 25 users. After having delved into the details of the small business offering, we’ll swift over and instead focus on the Office 365 offering targeting large enterprises.
Note:
This multi-part article will not talk about the pros and cons of migrating to Office 365. This is a technical article focusing on demystifying most of the technical details involved with a migration to Office 365.
There’s a lot of stuff to cover so why don’t we get started.
What is Office 365?
I think it’s a good idea to superficially explain what Office 365 really is. In short, you can say Office 365 is BPOS version 2 plus a little more. As some of you know BPOS consists of Exchange Online (Exchange 2007), SharePoint Online (SharePoint 2007), Office Communications Online (Office Communications Server 2007), and Office Live Meeting (Live Meeting 2007).
Office 365 consists of Exchange Online (Exchange 2010), SharePoint Online (SharePoint 2010), Lync Online (Lync 2010), Office Professional Plus and Office Web Apps.
As some of you probably recall, BPOS came in two versions – BPOS Standard and BPOS Dedicated. Office 365 is available in three editions:
- Small Business Office 365 also referred to as plan P1 (more info here)
- Enterprise Office 365 which is split in four so called plans – E1, E2, E3 and E4 (more info here)
- Office 365 for Education also referred to as plan K-12 (more info here)
Figure 1 below compares each of the four plans under the Office 365 Enterprise edition umbrella.
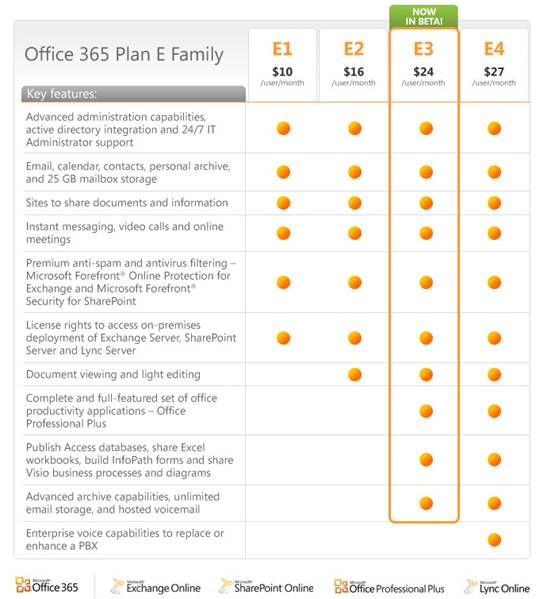
Figure 1: Comparison table of the four plans in the Office 365 Enterprise edition (table source)
When Office 365 reach general availability, it will replace BPOS and all current BPOS customers will at some point be automatically upgraded to Office 365.
For more information about Office 365 Beta and for enrollment in the beta, I recommend checking out the official Office 365 website.
Sign-up and the Microsoft Online Services Portal
So you have been signed up for the beta for what feels like forever and now you finally got the Office 365 Beta welcome mail (Figure 2), that includes a link to the Office 365 Beta registration site.
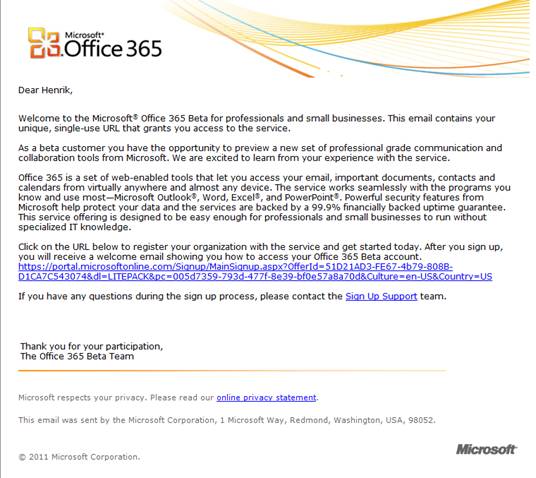
Figure 2: Office 365 Beta Welcome Mail
After you have signed up, you will receive an e-mail similar to the one shown in Figure 3.

Figure 3: Office 365 Beta follow-up mail with sign-in information
As you can see it includes the URL to the Microsoft Online Services portal and the Microsoft Online Services ID for the administrator you specified during the sign-up process. When clicking on the link, we’re taking to the Sign-in page (Figure 4).

Figure 4: Sign-in page to Office 365 Portal
When we have entered our Microsoft Online Services ID and associated password, we’re taken to the Administrator portal shown in Figure 5. As you can see the portal looks very different from the portal in BPOS. In my opinion, the site layout is very simple and logical compared to the one in BPOS.

Figure 5: Office 365 Beta Administration Portal
As you can see in the top of the page we have four sections (a non admin user will obviously only have three):
- Home – User’s main page with links to services, tools to download and other information.
- Outlook – Clicking on Outlook will launch Outlook Web App (OWA).
- Team Site – This links launch the SharePoint based team site if one exist.
- Admin – This is the one shown in Figure 5. Here an admin can manage users, domains, subscriptions, create service requests and check the service health for each service included with Office 365
Creating a New Office 365 User
Out of the box, we can send and receive e-mail messages in Office 365. This is done using the domain.onmicrosoft.com domain which we registered during the signup process. I’ll show you how to add your own domain later in this article, but let’s begin with the basics which is to create a new user.
To do so under “Management” in the left pane, click “Users”. This takes us to the “Users” page. On the “Users” page, click “New User”. On the New User page, we need to specify the name of the user as well as the username we want to assign to this user. We also have the option of specifying additional properties by click “Additional properties”.
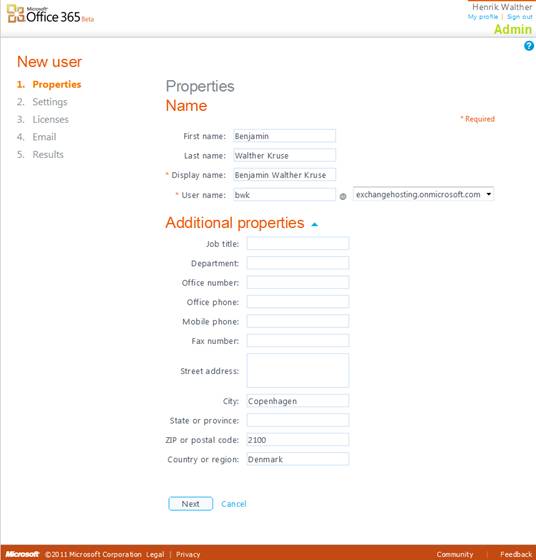
Figure 6: New User page
When clicking “Next” we’re taken to the page where we can assign licenses to the user. With the Small Business Office 365 plan we have the option of enabling Lync Online, SharePoint Online and Exchange Online. By default of three are selected.
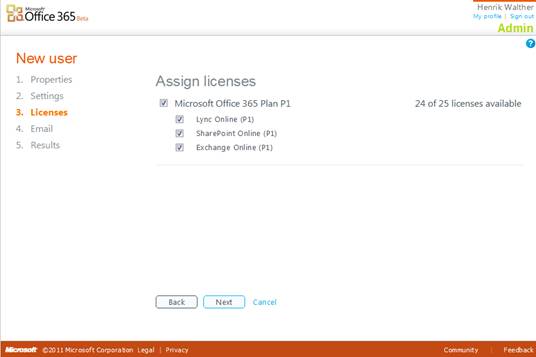
Figure 7: Assigning licenses to a new user
When clicking “Next”, we’re taking to the page where we can specify one or more e-mail addresses that should receive the results.
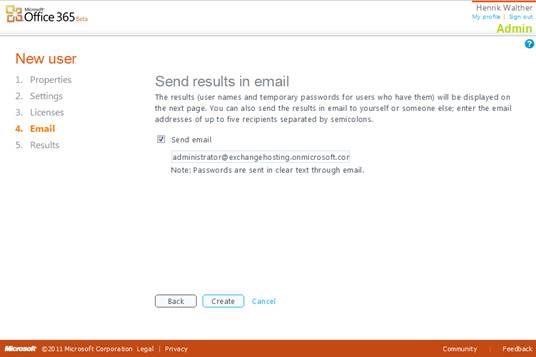
Figure 8: Sending the results of the user creation in an e-mail to up to five recipients
When clicking “Next”, we’re taken to the result page where we can see the username and the temporary password for the user.
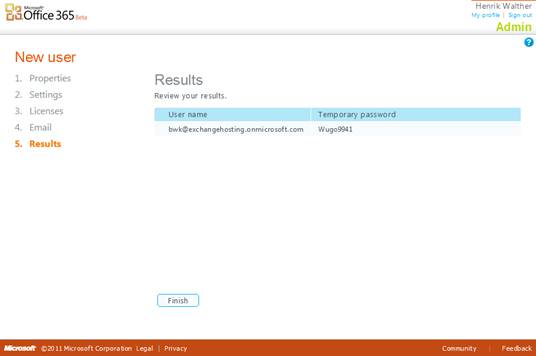
Figure 9: Results page
Clicking “Finish” will take us back to “Users” page.

Figure 10: Users page in the Office 365 Portal
Accessing Exchange Online using the New User
The user will now be able to logon to the Office 365 Portal using the username and password that were send to his current e-mail address. The mail he receives looks similar to the one shown in Figure 11.
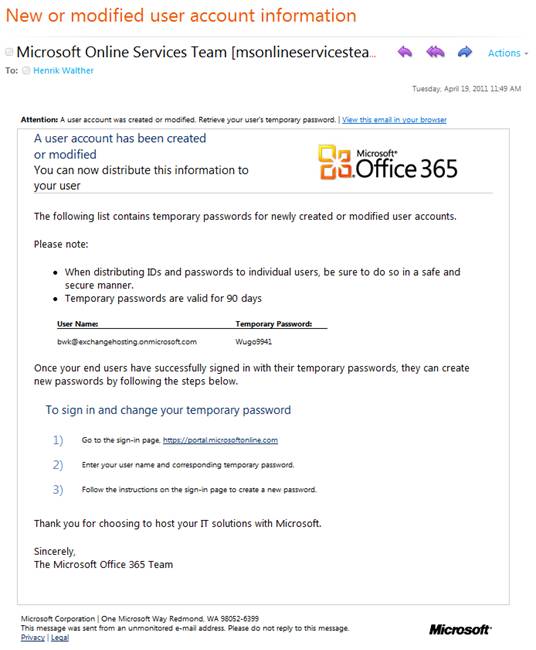
Figure 11: Informal mail sent to specified e-mail addresses
When the user logs on via https://portal.microsoftonline.com, he will first be asked to change the temporary password that was aasigned (Figure 12).

Figure 12: Changing password
We’re taken back to the sign-in page, where we need to enter the new password.
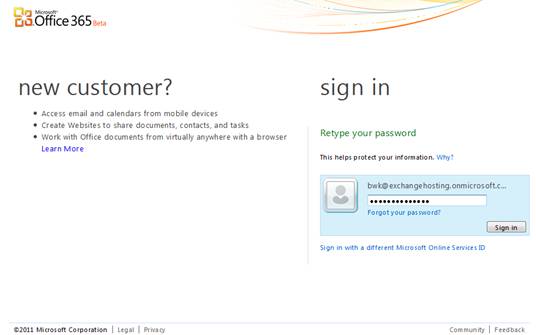
Figure 13: Signing in with the new password
After sign-in we’re taken the User Portal page. From here we can launch OWA, install the Lync client, access shared documents, and access the team site and our public website. As can be seen in Figure 14, the page also contains several useful links (right pane).
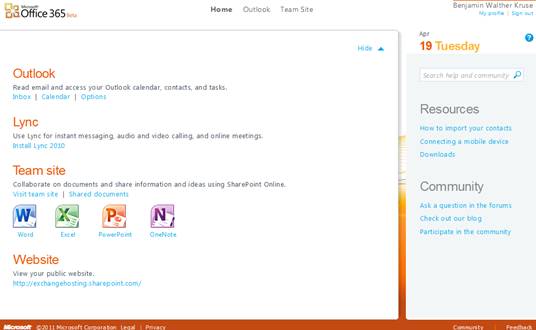
Figure 14: User Portal page
There’s also a “Download” link which we will come back to in just a moment. But let’s first try to access OWA by clicking on the “Outlook” link. Because there’s SSO configured for the different web sites, we don’t have to authenticate in order to access our mailbox using OWA. As can be seen in Figure 15, we’re taken directly to the language and time zone page.

Figure 15: Language and Time zone page
When clicking OK, we get access to our 25GB mailbox. The UI should look familiar to you since it’s OWA 2010 SP1 with some integrate links and a Office 365 theme.
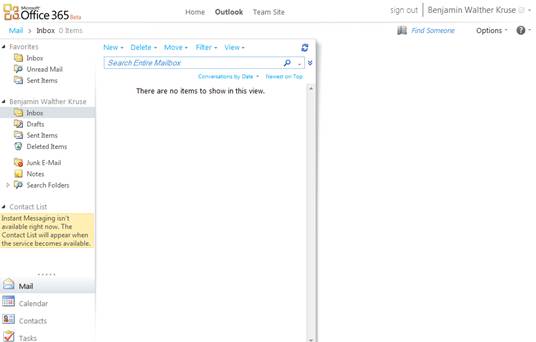
Figure 16: Customized version of OWA 2010 SP1
Under “Options”, you can click “Settings” in order to access the Exchange Control Panel (ECP) where the user can manage all the features that are similar to the on-premise version of Exchange 2010 SP1.
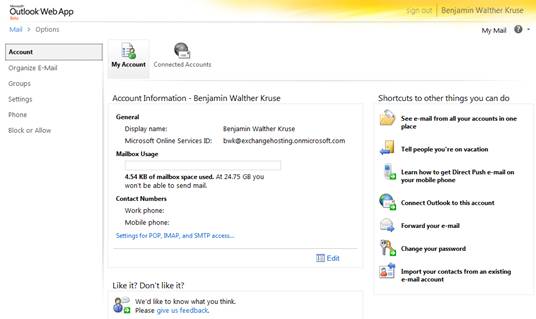
Figure 17: Exchange Control Panel (ECP)
Besides what’s included with the on-premise version of Exchange 2010 SP1, the Exchange Online version included with Office 365 also lets a user connect multiple external accounts to the mailbox as shown in Figure 18.
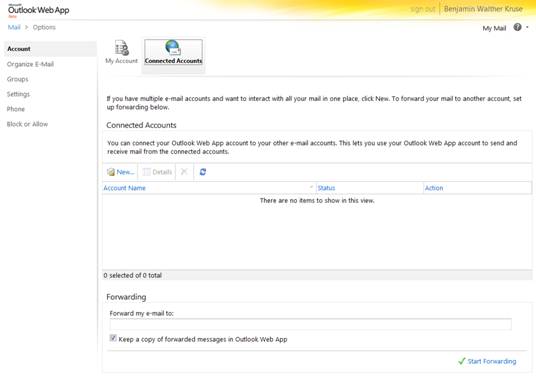
Figure 18: Connecting External Accounts to a mailbox
The user also have the option to import contacts to the mailbox from a CSV file.

Figure 19: Importing Contacts from a CSV file
Let’s look at how a user can access his mailbox using Outlook 2010. The Outlook profile is created using the Outlook autocompletion process where the user specifies his Office 365 e-mail address and password. However before the Outlook profile is created, it’s recommended to download and run the new Office 365 Setup and configuration tool, which can be downloaded via the download page in the user portal.
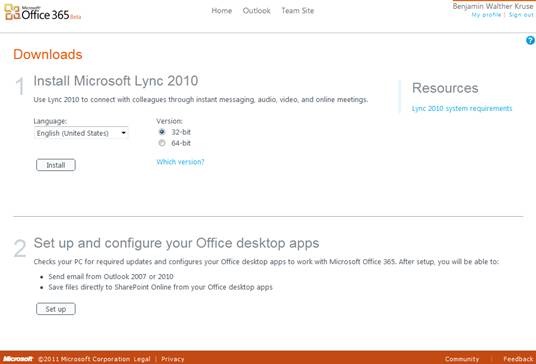
Figure 20: Downloading the Office 365 Setup and Configuration tool
When launching the tool, you will get the security warning shown in Figure 21.
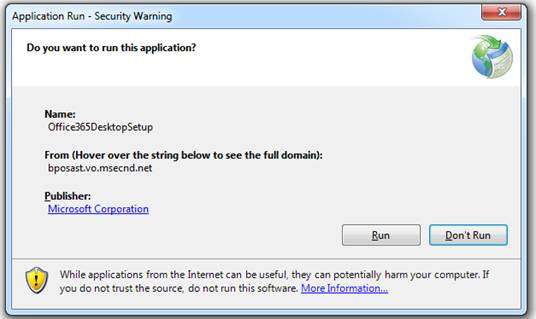
Figure 21: Security Warning
When clicking ”Run”, the we’re asked to login to Micorsoft Online services (Figure 22).

Figure 22: Logging into Microsoft Online Services
Now we can select which applications the tool should prepare.
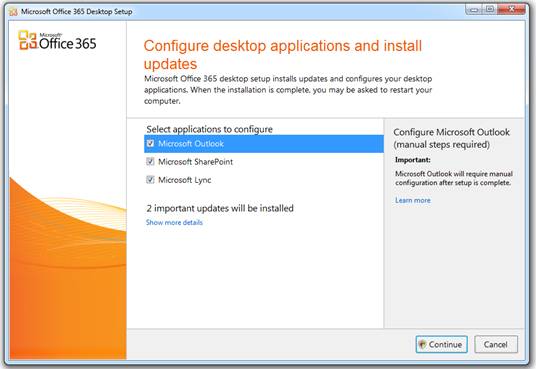
Figure 23: Selecting the applications that should be prepared for Office 365 access
Before the tool will install the updates and configure the desktop application, we need to accept a license agreement.
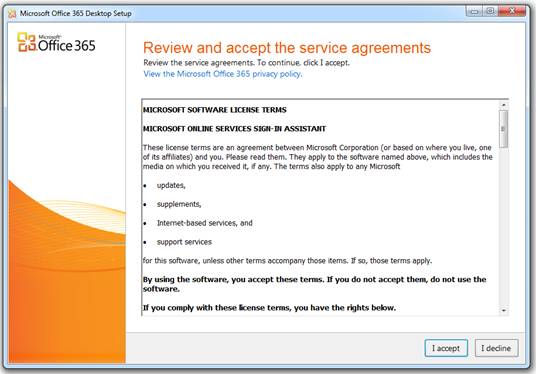
Figure 24: License Agreement
The tool will now prepare the desktop applications. As you can see part of this is to download an Outlook 2010 specific update.
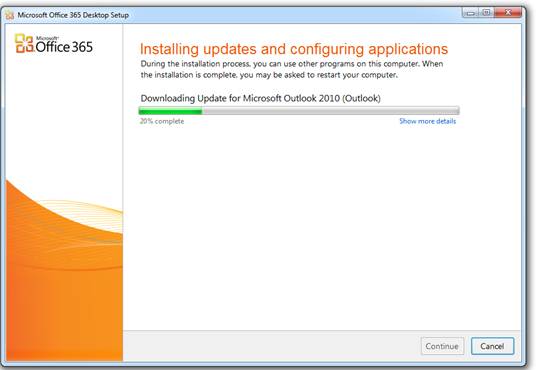
Figure 25: Configuring the Desktop Applications
When the tool finishes, it stress out that manual steps are required in order to configure Outlook 2010.
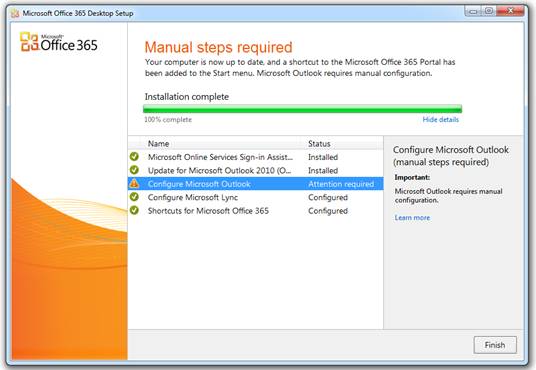
Figure 26: Tool Completed the update and configuration process
Now let’s launch Outlook 2010. We’re asked to enter our name e-mail address and password.
Note:
If adding your existing domain such as domain.com to Office 365, the users will not be required to use the [email protected] e-mail address. We only do so here because we haven’t yet added our domain.

Figure 27: Entering Name, e-mail address and password
After a few seconds the Outlook profile has been created.
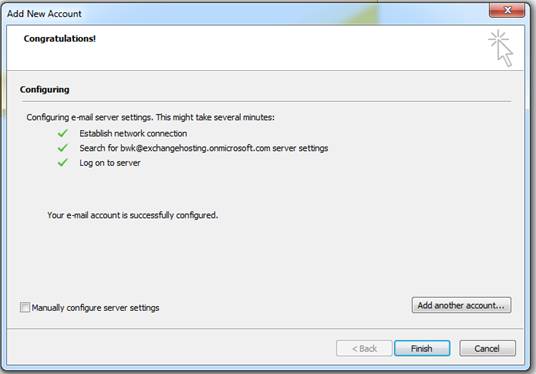
Figure 28: Outlook profile created
Let’s check “Manually configure server settings” so we can see what happened behind the scene.

Figure 29: Outlook profile settings
Let’s also checkout to where the RPC Proxy and MSSTD points to. We do so by clicking “More Settings” >”Connection” > “Exchange Proxy settings”.
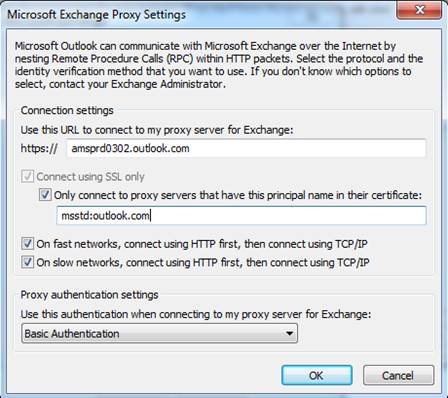
Figure 30: Exchange Proxy Settings
Alright let’s exit the Outlook profile configuration wizard and have Outlook launched.
Figure 31: Launching Outlook 2010 for the first time
And there we are Outlook is now connected to the Office 365 user mailbox.
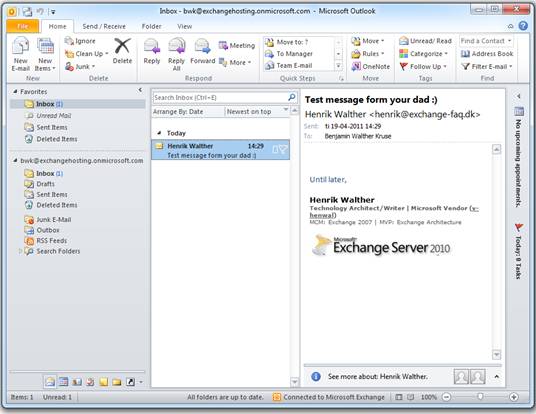
Figure 32: Outlook 2010 connected to our Office 365 mailbox
That was all I had to share with you in this part one of this Office 365 Beta multi-part article. Some of you probably thought this was very basic stuff, but I can assure you only just touched the surface. We’ll dive a lot deeper in upcoming parts. Until then have fun.
If you would like to be notified of when Henrik Walther releases the next part in this article series please sign up to our MSExchange.org Real Time Article Update newsletter.


