In almost every office, it eventually becomes necessary for users to collaborate on documents. In the past, this has often meant that the administrator has to set up a special location for the shared documents and create a special security group made up of the users who will need access to the shared documents. In Windows Vista though, it is possible for users to set up some share points of their own, but in a controlled manner that is unlikely to cause administrative headaches. In this article, I will show you how it works.
Although I’ve always liked Windows XP on the whole, I’ve always found it to be a bit lacking in collaboration features. For example, what happens when a group of users in your company need to collaborate on a document? Assuming that you haven’t set up a special shared folder on a file server, and you don’t have a SharePoint portal set up, the users probably just end up E-mailing the document back and forth. Windows XP does allow you to share folders with other users, but doing so opens a can of worms, so most administrators prevent users from creating file shares on their computers.
In Windows Vista though, the entire file and print sharing mechanism has been completely redesigned in a way that allows users to collaborate on projects, while still allowing administrators to preserve at least some degree of security.
In order to appreciate the way that file sharing works in Windows Vista, you need to understand a little bit about the way that user’s files are stored in Windows XP. Most of you probably already know all about user folders in Windows XP, but I want to briefly discuss them for the benefit of anyone who might not have much Windows XP administration experience.
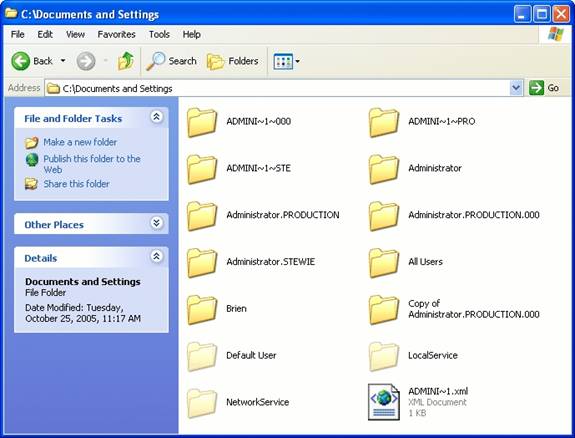
Windows XP is designed to support multiple users. Any time a user logs into a computer that’s running Windows XP, Windows does a quick check to see if that user has logged in before. If the user has never logged into the machine before, then Windows creates a profile for that user, directly on the local hard drive (assuming that folder redirection isn’t being used). By default, user profiles are stored in the C:\Documents and Settings folder. Windows creates a separate folder for each user, with the folder bearing the user’s name. If the user is logging in via a domain account, then the folder’s name is made up of the user’s name, a period, and the domain name. You can see an example of this folder structure in Figure A.
Figure A: The Documents and Settings folder contains a folder for each user who has ever logged into the computer
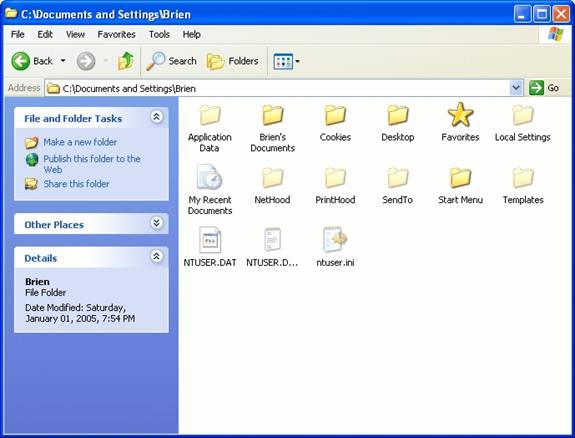
The user’s profile folder’s job is to store all of the user’s documents and settings related to the user’s account (Internet Explorer favorites, Outlook configuration settings, etc.) You can see the contents of a typical user profile folder in Figure B.
Figure B: This is what a user profile folder looks like in Windows XP
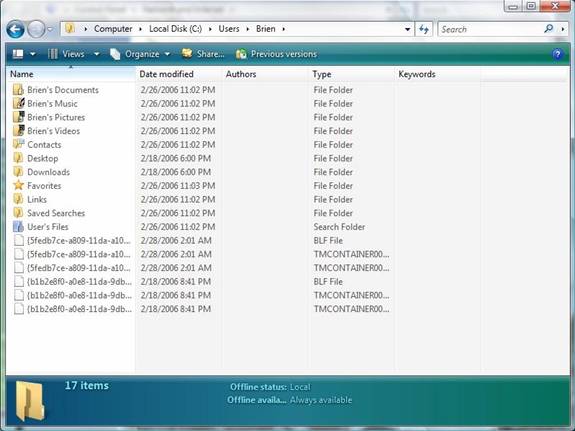
Like Windows XP, Windows Vista is also designed to support multiple users. As such, Vista uses a user profile folder structure that is similar to the one used within Windows XP. There are a few differences that you will notice right off the bat though. For example, the Documents and Settings folder has been renamed to Users. The naming convention for the individual profile folders remains the same, but the structure of the profile itself has changed to reflect Vista’s ability to better index various file types. Figure C shows what a Vista profile folder looks like in comparison to the Windows XP version, shown in Figure B.
Figure C: This is what a profile folder looks like in Windows Vista
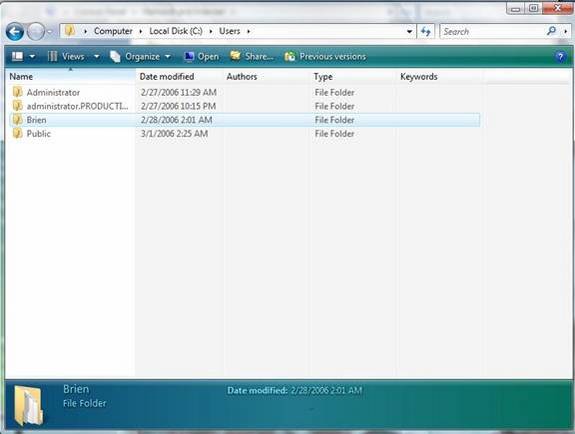
What I really want to show you though is the contents of the Users folder, shown in Figure D. Notice any differences from Figure A? Both Windows XP and Windows Vista have folders for each user profile. However, Vista also includes a Public folder.
Figure D: In addition to the user profile folders, Vista includes a Public folder
The Public folder is designed specifically for file sharing. If a user needs to share a document with others in the organization, they can place that document into the Public folder on their machine. That way users can collaborate on documents without having to actually create shares on their workstations.
Earlier, I mentioned that the new file and print sharing mechanism doesn’t completely throw security out the window. The truth is that the administrator always has control over whether sharing is allowed or not. If you do decide to allow sharing though, you are somewhat at the mercy of the user as far as security is concerned.
To understand what I am talking about, you will need to see the dialog box that allows file and print sharing to be configured. Windows Vista is still in beta testing, so anything can change. For now though, you can access the file and print sharing settings by opening the Control Panel and clicking on the Network and Internet link, followed by the File and Print Sharing link. When you do, you will see the dialog box that’s shown in Figure E.
Figure E: This is Vista’s File and Print Sharing dialog box
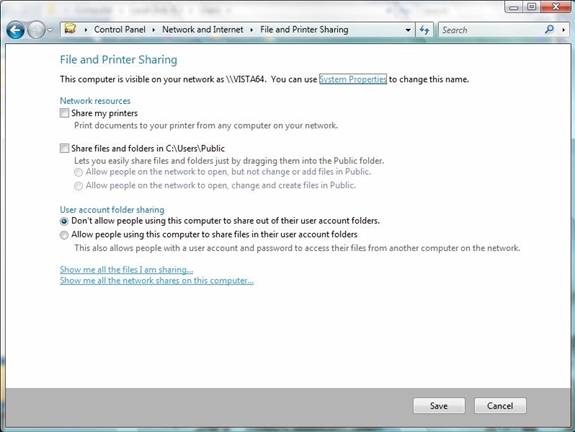
The dialog box shown in Figure E allows you to control the behavior of file and print sharing for the machine. On a larger scale, you would probably want to control these settings via a group policy, but I wanted to show you this dialog box so that you could get a better feel for how the process works.
The first thing that you will probably notice on the dialog box is that it allows you to share your printer. Printer sharing works pretty much the same way that it did in Windows XP, so I don’t want to waste too much time talking about that. Vista’s file sharing capabilities are much more interesting.
I don’t have any documentation on Vista yet, but from what I have been able to observe, users are allowed to share any folder that they have rights to. However, the only folder that the users have full control over by default is their profile folder. This means that a user could share their profile folder, or a sub folder within the profile folder using basically the same method that they used in Windows XP.
As an administrator though, I don’t really like the idea of users sharing some or all of their profile folder. A responsible user may only share a folder containing documents for collaboration, but it is just too easy for a user to share the whole thing. As I already mentioned, a profile folder contains user specific configuration data, which tends to be very sensitive. That being the case, you have the option of either allowing or disallowing users to share their profile folders. Notice in Figure E that the Don’t Allow People Using This Computer To Share Out Their User Account Folder option is selected by default.
So what about the Public folder that I mentioned earlier? Well, if you take a look at Figure E, you will notice that just below the option to share printers, there is a check box that you can enable if you want to share the contents of the machine’s Public folder. Just beneath this check box are two radio buttons that you can use to control network access rights to the folder. This brings up an interesting point about the Public folder. The rights that you apply here apply throughout the Public folder by default. Users can however create sub folders beneath the Public folder and set network access rights to those folders individually.
The last thing that I want to point out is the two links at the bottom of the File and Printer Sharing dialog box. These links allow you to see at a glance which files on the machine are being shared and what shares exist on the machine. I love this feature because it takes the guess work out of working with network shares.
Conclusion
As you can see, file and print sharing works quite a bit differently in Windows Vista than it did in Windows XP. The Public folder feature now gives users a central place for sharing documents without having to involve an administrator.


