Microsoft 365 users have long had the ability to invite external users (people who are not part of the organization) to access various Microsoft 365 resources. For example, users may occasionally need to invite external users to access SharePoint sites. In the past, setting up this type of external access usually meant creating an unlicensed user account for the external user within the Microsoft 365 directory and then sending an invitation to the external user. That user would then log into the Microsoft 365 environment using the provided credentials. However, Azure AD also supports external identities providers such as Google and Facebook, and this can be used for Microsoft 365. This means that an invited user can access Microsoft 365 content using an account that they already have. In case you are wondering, support for external identities is included in the Azure AD free tier.
Microsoft 365 external identities setup
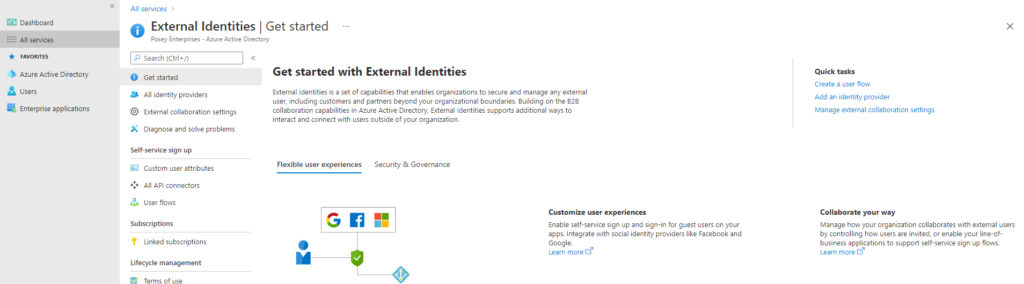
You can find the option for enabling external identities (namely Facebook and Google accounts) by logging into Microsoft 365 with an administrative account. From there, open the Azure Active Directory admin center. Now, go to the All Services page and click on External Identities. This will bring you to the screen shown below.
Click the All Identity Providers tab. This tab, which you can see in the next image, lists the identity providers that Microsoft 365 is already set up to accept. As you can see in the image, the default identity providers include Azure Active Directory, Microsoft Account, and email one-time passcode. There are also links at the top of the page that you can use to add external identities providers, such as Google or Facebook.

Unfortunately, the process of enabling Google- or Facebook-based authentication isn’t as simple as just clicking an icon or selecting a checkbox. You actually have to establish federation between Azure AD and the external provider. This process isn’t overly difficult, but it isn’t exactly intuitive either. That being the case, let’s take a look at how to add support for Gmail accounts.
Configuring Google for Microsoft 365
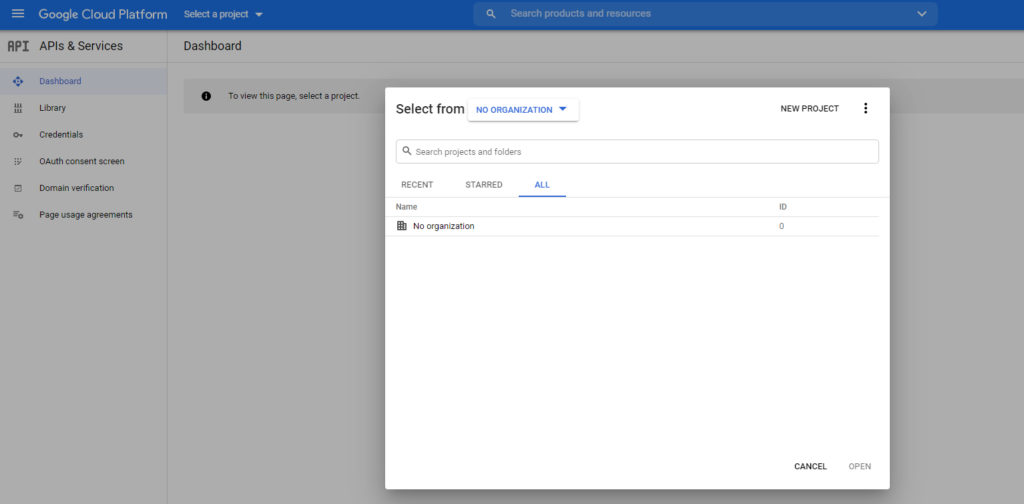
The first thing that you have to do is to configure a Google developer project. To do so, go to the Google Cloud Platform dashboard and then log in using your Google account. Once you have signed in, confirm your country and accept the terms of service. This will bring you to the Google Cloud Platform screen. Click on the Select a Project link (just to the right of the Google Cloud Platform logo). When the Select From dialog box appears, click the New Project link, shown in the next image.
Next, enter a name for the project that you are creating. You can call the project anything that you want, but it’s a good idea to reference Azure AD just so that you can keep track of which project is which. From there, choose your organization and, if necessary, specify a location. When you are done, click the Create button, as shown below.

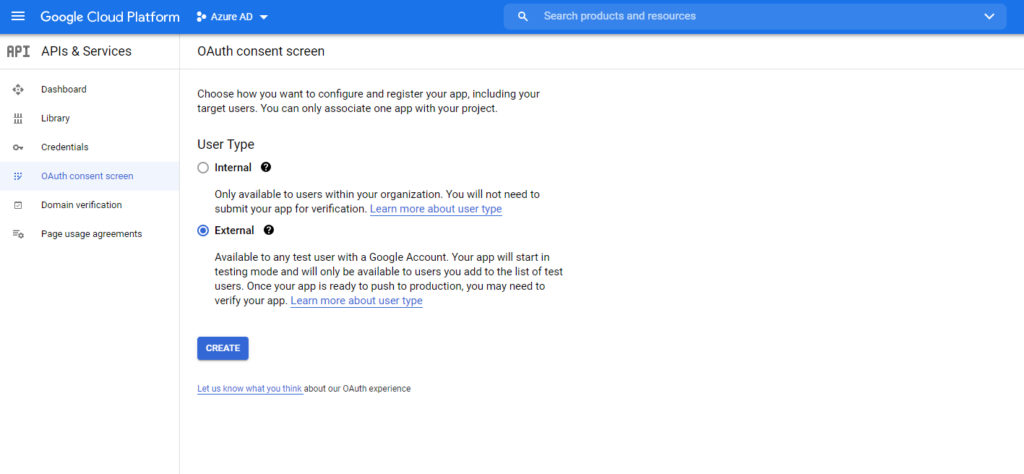
You will now be taken into a screen that lays out all of the details for your project. Click on the APIs and Services tab on the left side of the screen. This will take you to another screen that displays a series of dashboard charts related to APIs and services. Click on the OAuth Consent Screen tab, and then select the External option, shown in the next image. Click the Create button when you are done.
Now, you will be prompted to enter an application name. Just set the application name to match the project name that you entered earlier.

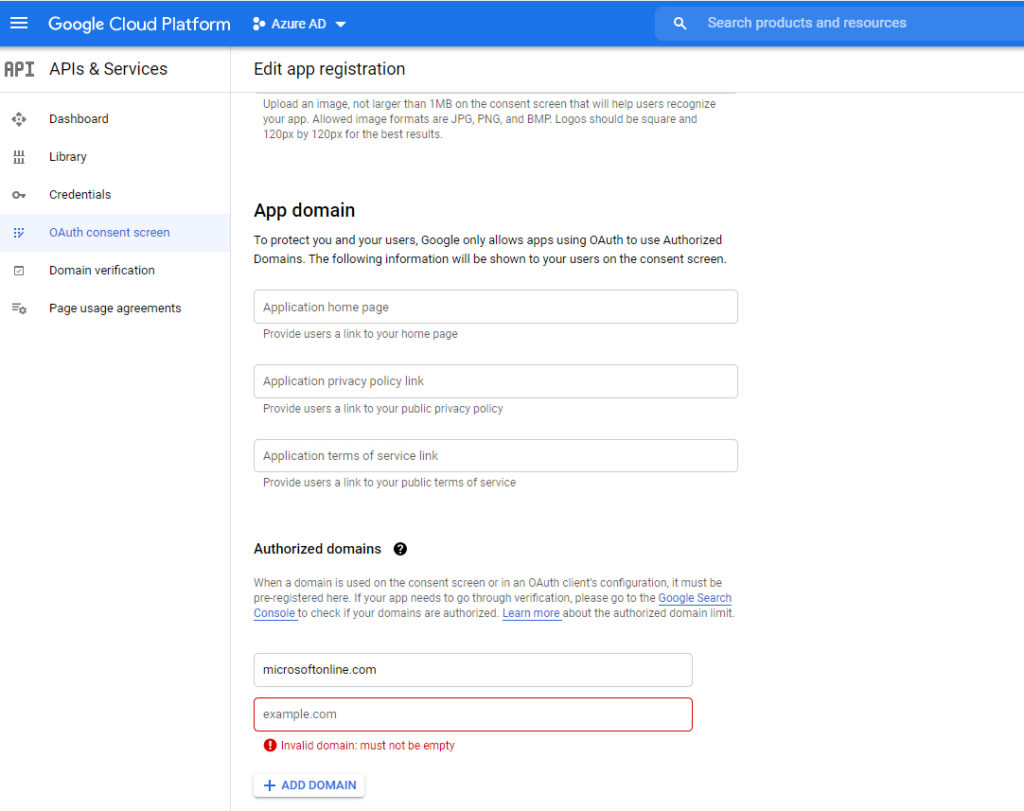
Scroll down a bit and you will see an Authorized Domains section. Click on the Add Domain button and then enter microsoftonline.com as the domain name. Be sure to click Add Domain, followed by Save and Continue when you are done.
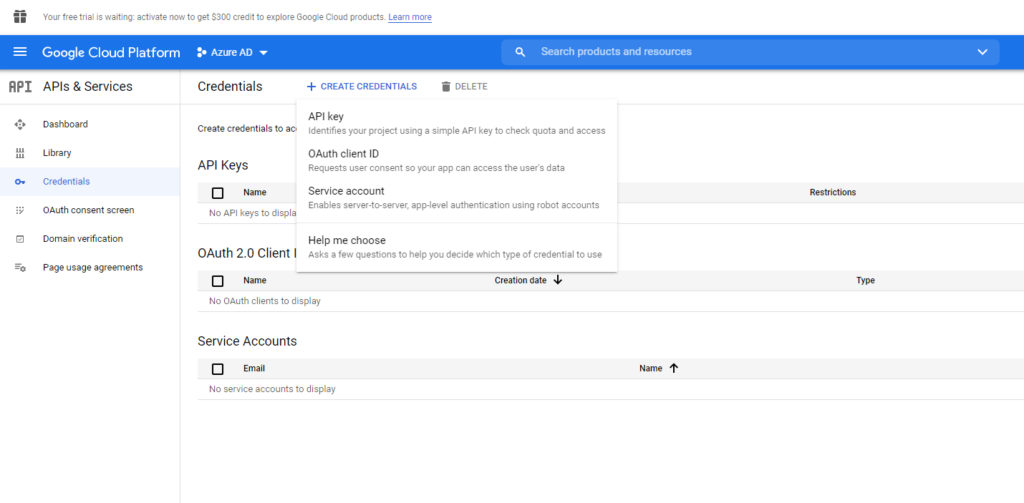
Click Save and Continue a few times to complete the wizard (you may be prompted to enter a developer email address before you can save your work). When you are done, select the Credentials tab. When the Credentials screen appears, click on the Create Credentials link, and then choose the OAuth Client ID option, shown below.
When prompted, select Web Application as the application type and then provide a name for the application. Next, click the Add URI button and then enter the following URLs:
 	https://login.microsoftonline.com
 	https://login.microsoftonline.com/te/<Microsoft 365 tenant ID>/oauth2/authresp
 	https://login.microsoftonline.com/te/<Microsoft 365 tenant name>.onmicrosoft.com/oauth2/authresp
When you are done, click the Create button. Upon doing so, Google will provide you with a client ID and a client secret. Be sure to document these because you will need to enter them into Azure AD in a moment.
Now, go back to the All Identity Providers screen within the Azure Active Directory portal and click the Google link. When you do, you will be prompted to enter the Client ID and the Client Secret that you got from Google. Click the Save button, and Google will be added as an identities provider for Microsoft 365.
Setting up other providers
Although setting up an external identities provider is not overly difficult for Microsoft 365, the process works differently for each identity provider. The steps required to use Facebook as an identity provider, for example, are different from the steps required to use Google. As such, you will likely need access to the identity provider documentation for any federated identity services that you might be planning to use. You can find Microsoft’s documentation (including several different tutorials) at this link.
Featured image: Shutterstock