Every IT department has rules and controls to protect their organizations and employees from online dangers, whether it’s cyberthreats or inappropriate content. But as an IT admin, do you take the same precautions with your children? With the explosion of Internet-connected devices, it is challenging to monitor and limit screen time habits for kids. A survey by the American Academy of Child and Adolescent Psychiatry found kids ages 8-12 spend as much as six hours a day watching or using screens. Teens, meanwhile, spend up to nine hours each day on screens. This figure is frequently exceeded in some households where multiple children have access at once. As parents become increasingly aware of the dangers of screen time and how kids use technology, they’re starting to set up Internet safety rules. Three out of five worry about exposure/access to inappropriate content on their child’s device. At the same time, 40% believe strangers may contact them online through social media sites or email correspondence meant for someone else in a family member (aunts and uncles). However, most have not yet had enough faith to do something about those worries since this process seems so complicated! When the American Academy of Pediatrics recommends that parents select and view online content with their children, it’s often difficult to keep up. But thanks to built-in parental controls, it can be done relatively easily.
There are many benefits to using built-in parental controls that come with your devices. These include setting time limits on how long children can use their devices, setting guidelines for what types of content they can access, and even blocking certain websites altogether. In addition, it’s never too early (or too late) to start teaching kids about online safety. If you’re an IT admin, these same lessons about cybersecurity you drill into employees can and should be imparted to your kids.

How do parental controls work?
There are many different ways to ensure your children can access the Internet safely. In essence, parental controls exist so that you know what kids are doing at all times when it comes to electronics like smartphones or laptops. Even if your kids are not exposed to threats or inappropriate content, it can limit their screen time, which is a good thing.
Some parents use parental controls to restrict the time their children are allowed on devices. Others might decide what sites or content is accessible, who they’re communicating with, and when that should occur during certain hours of the day for an entire week at once using monitoring software such as Net Nanny.
Guide to set up parental controls
Chances are you already have robust protection features on your devices. The rub? You need to activate (and in some cases download) them! Here’s how I do it for the most popular ones:
Android parental controls
Android provides parents with valuable features to monitor their children’s device usage and control it as needed. For example, the free Google Family Link app lets you restrict your kids’ access in two ways: through daily time limits or by limiting individual apps they can use on the phone (without being enrolled for an account).
Google Family Link lets you set more restrictions, such as blocking app downloads and purchases. It also provides a way for parents to find their children’s location in case of emergency or not responding to your emails or texts.

On your kid’s Android device:
- Go to setting > Digital Wellbeing & parental controls > Parental controls.
- Tap get started.
- Select child or teen and tap Next.
- Choose your child’s account.
- Select your account and proceed Next.
- Type in your account’s password and tap Next.
- Type in a password for your kid’s account. Select Agree > Allow.
- When accounts are linked, select Next.
When setting up parental controls for the first time, there is a lot that you will be asked to do. You have two options: either remove apps or manage your Family Link app settings to make it work properly with parental control features on supported devices like tablets and smartphones running Android 4.4 KitKat (or higher). If this sounds too complicated, then don’t change any of these configuration steps; just set things up as they were before so all family members can enjoy an open Internet without restrictions from their parents’ profiles.
How to set up Family Link

Download Family Link from the Google app store. Once installed, go ahead and launch it. Follow these simple steps:
Tap Next at the top when prompted with whether this is a new account login/registration process. If already signed into another Gmail parent account, switch over now. Enter the password if required, then choose between “I’m Ready” if logged in successfully as a parent via another email address or “Sign Up As A Parent.” If none exist, create one using information like first name initial last+middleinitial@gmailcom.
How to control a kid’s device using Family Link

You can keep your child safe with a few easy tips. We’ve bundled together essential features that will protect them and make life easier for all parents. Let’s take a look at what these goodies have in store for you:
- Find their location, so we know where to find our precious cargo when they wander off.
- Playtime is over, or it gets dark outside drastically.
- Place limits on the time spent using specific apps and games (so no more screens after 8 p.m.!), ensuring harmony between kids and parents.
iOS parental controls
Apple’s parental controls in iOS and macOS are like a breath of fresh air. They allow you to set limits for your child. You can also block apps, websites, or even certain content on your device if they misbehave.
The Family Sharing app lets you remotely control your kids’ devices from a single device. It’s useful for parents who want to monitor what their children are doing on the computer or phone without getting another copy of it themselves.
We recommend this as an easy way because there isn’t much need to be hands-on every time they use something new. Just log in to one account and see everything.
Let’s explore more about screen time and each setting.
Limits of communication (only iOS)
This setting allows you to control the communication all day. You can apply these settings on Messages, iCloud contacts, and FaceTime.
Downtime
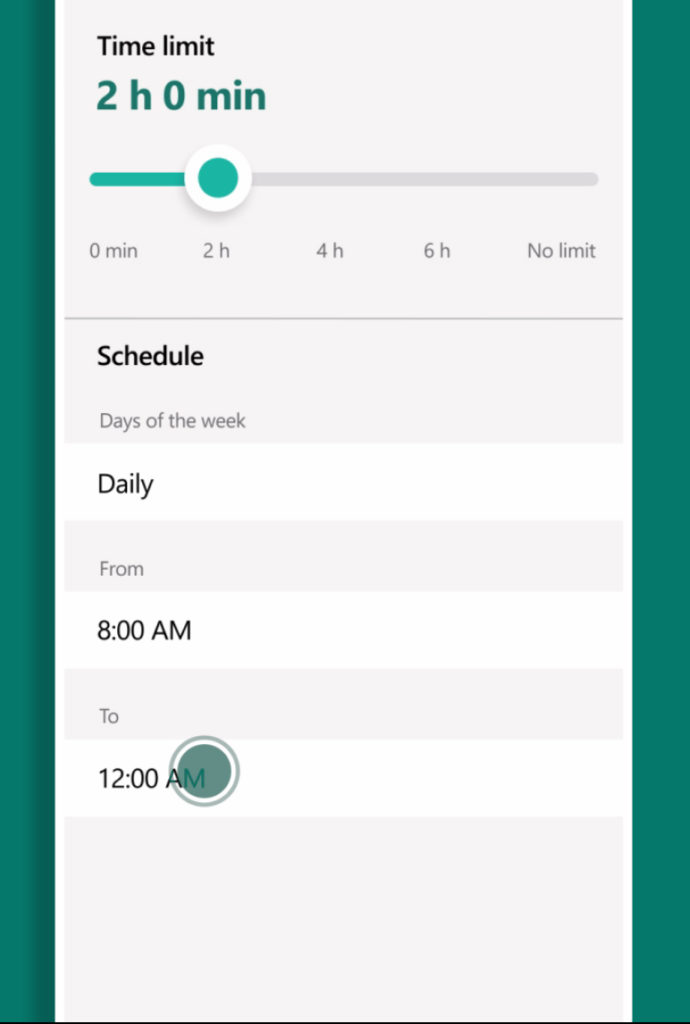
Downtime allows you to schedule daily time away from the device for your child. Most apps and functions are blocked during Downtime, except calls and certain apps you choose to allow.
App Limits
App Limits can help curb your child’s addiction to more harmful apps like TikTok. This new feature will give you control over how much time they are allowed on each app or category of apps for a specific day.
With App Limits in place, we know kids won’t be able to use the distracting applications. In addition, there is often some restriction set when using specific programs that restrict how long someone has access, which curbs their tendency to be hooked into online video games longer than necessary.
Restrictions for content and privacy
This setting allows you to restrict the app purchase and download, block websites, filter content, and alter your child’s privacy settings.
Screen Time setup and use
If you are using Family Sharing, you have to active Screen Time or your kid’s device.
iOS setup

Creating a schedule is the best way to help your children learn how much time they spend on screen. It’s easy! With Family Sharing, you can create an account for the whole family and sync all devices so that everyone gets in on what’s happening with Downtime or App Limits — whichever ones work best for their age group.
When setting up Screen Time, there are two options: Choose whether it’ll just be idle moments away from screens (Downtime), set limits around specific apps like Minecraft, which might lead them into other areas of interest outside gaming — or both. Then pick if this new feature should run automatically without any human intervention whatsoever.
- Go to Settings > Screen Time. Chose a kid’s name if you have Family Sharing on your device.
- Switch On Screen Time > Continue. Tap This Is My Child’s iPhone if you’re not using Family Sharing.
- Now use these settings:
- App Limits: Select the app category to limit the use by your child. Go to Time Amount and tap Set. Now you can choose the time limit and then click on Set App Limit.
- Downtime: Here, you have to set the duration when not to use the phone; now click Set Downtime.
- Next tap Continue.
- Secure the setting with a passcode.
- Re-enter the password.
- If your iOS is 13.4 above, submit your Apple ID and password and tap OK.
Once you’ve customized your settings, tap into each category to restrict iTunes and App Store purchases. You may also want to block mature content depending on the age of your child.
Windows parental controls
Windows 10 and Windows 11 include a free Family Safety app to monitor your children’s digital activities on the device. You can also use this online with Microsoft’s web interface. However, it isn’t as easy-to-control as the home or office settings that are set up specifically for monitoring purposes (i.e., not just general Internet access).
Family Safety setup
- From the Microsoft App Store, download Family Safety.
- Install it and click Get started.
- Log in to your account and tap Next.
- Follow the instructions.
- Select Start using Family Safety.
- Add a family member.
- Submit child’s Microsoft email and tap Next.
- Choose the Member and Invite to the family group.
- Verify your child’s account by clicking Join Now from the email sent to your child’s account.
- Now click Join on the MS page. You need to sign in as your child to accept the invitation.
Before installing Family Safety, a user needs to log in with their child’s Windows account. If they share the same Microsoft login for both parents or guardians on a paired device, it will be sufficient to sign into one of these accounts instead. But if not, there is another option where each person has independent access: setting up Two-Step Verification through “Security Accounts Manager (SAM) Control Panel.”
The Family Safety app is a great way to make sure your kids are safe. In the app, tap into their name and find out how much time they have left for devices or apps and set restrictions like filtering websites that could be inappropriate according to the age group (for example, blocking adult content).
Evading parental controls
Kids are crafty. They’ll find a way around any parental controls you set if they want it that bad enough. Still, luckily, there is an easy solution: Communication! Encourage your child to tell you what they need from the device (for example, playing Minecraft) to avoid having those pesky limits (and arguments) on when/how much game time per day).
It’s hard enough to get your kids (or your employees!) on board with all the rules and regulations that you demand from them. So, it makes sense to explain why you are setting these controls.
You may want to make sure your children know the parental restrictions you’ll set and why it’s essential for their safety. Kids can be very protective about their devices, which means negotiation might be necessary in some cases.
Featured image: Shutterstock


