Welcome to Part 4 of our series on installing and configuring Exchange 2016. (You can check out Part 1, Part 2, and Part 3). In Part 4, we will talk about database availability groups (DAG), and we will be covering the following topics:
- Failover clustering
- Witness servers
- Creating a DAG and adding in member servers
- Managing a DAG
Failover clustering
When you add an Exchange 2016 mailbox server to a DAG, part of the setup is to install failover clustering on the mailbox server. The one thing to note here is that you should not be using Failover Cluster Manager to manage your exchange server — you need to use Exchange 2016 to manage it. If you experience any issues with DAGs, the first place you should start looking at is antivirus and firewalls that may be too restrictive or block communication. Once the mailbox server is added and failover clustering is installed, you should reboot your server so you don’t have any changes pending.
Witness servers
When you create your DAG in Active Directory, you need to configure a witness service and directory. Understand that the witness server and directory are only used when you have an even number of members in your database availability group and this is only for quorum purposes. You need to ensure you follow some requirements for your witness server. A witness server cannot be a member of your database availability group and it must be in the same Active Directory forest. You do not need to provision multiple servers to act as a witness server as one server can be a witness for multiple DAGs. Witness servers also need SMB Port 445 open.
Manage a database availability group
When installing Exchange 2016, you have the option to create an IP-less DAG whereby Exchange 2016 will use 255.255.255.255 and if you open Failover Cluster Manager, you will get a nice error telling you to manage it from PowerShell as seen below. In this example I am running an IP-less DAG in my lab:

If you open up the Exchange Admin Center and you click on Servers on the left and then database availability groups and double click the DAG object, you can go to IP address tab and see the IP of 255.255.255.255 as shown below:
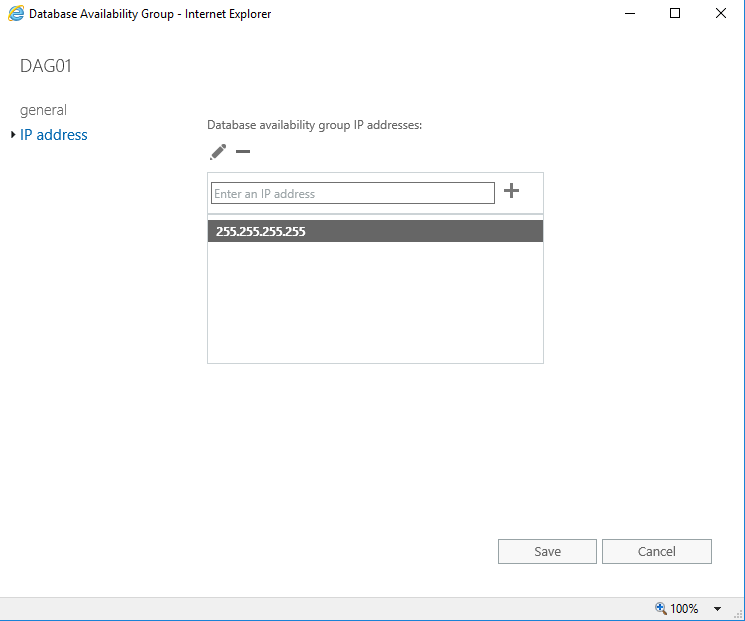
This is all well if you run Exchange 2016 without any other application configuring it from the application layer. If you make use of CloudBlue (Odin), the above won’t work as the agent will report the DAG not available and you will get some long funky error.
To change this from an IP-less DAG to one with an IP, make sure you reserve the IP and add it to DNS and make sure your reverse pointer record is in place so you can ping the DAG. If you go back to the general page of your DAG properties, you can change the witness server and the witness directory and you can view the members as shown below:

If you have limited access to the Exchange Admin Center (EAC) as we spoke about in Part 3 of our Installing Exchange 2016 series, you can view the properties of your DAG using PowerShell as shown below:
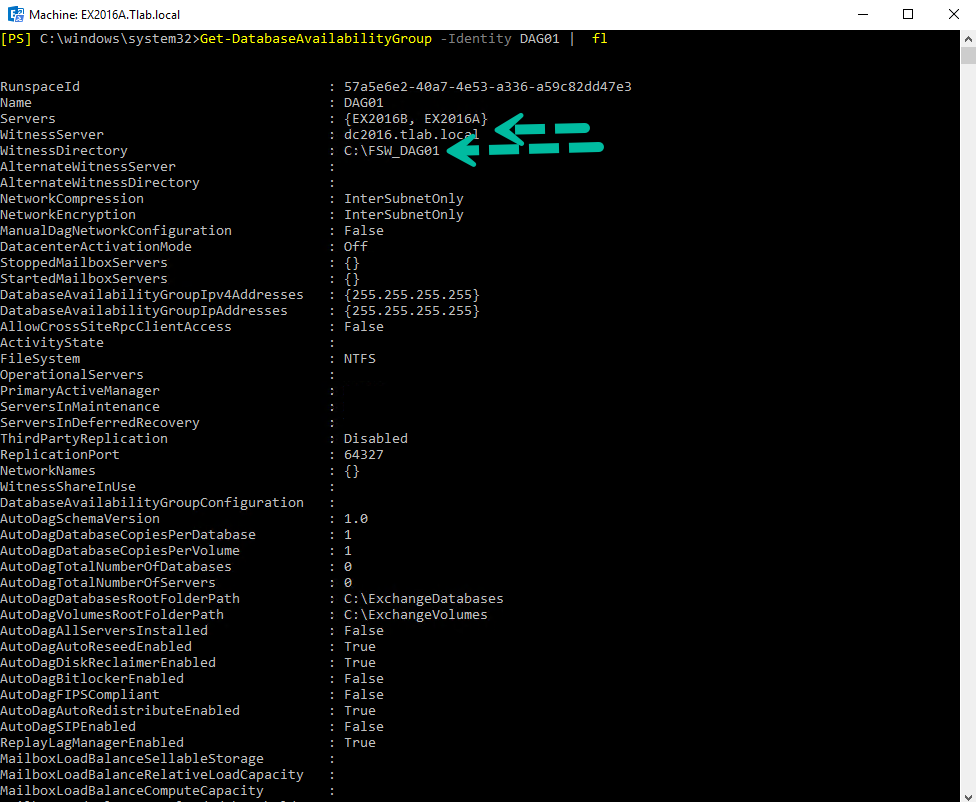
As you can see in the output, you are able to see everything and more about your DAG like you can in the Exchange Admin Center. With PowerShell, you can also add an alternate witness server and directory. As you can see above, the DAG Group IP and IPv4 address is 255.255.255.255.
Take note that you can add a maximum of 16 mailbox servers to your DAG. If you have a large environment this means that you will have a lot of passive copies making your DAG quite resilient.
When it comes to DAG’s and upgrades to newer cumulative updates (CU), please ensure you put the DAG member that you will be upgrading into maintenance mode so that you can upgrade without having databases moving to that node.
If you are backing up your DAG and perhaps using Microsoft Data Protection Manager (DPM), it will be DAG-aware but a big caveat is this: Do not enable circular logging while you have backups running as it will put it in an inconsistent state.
Create a new DAG in Exchange 2016
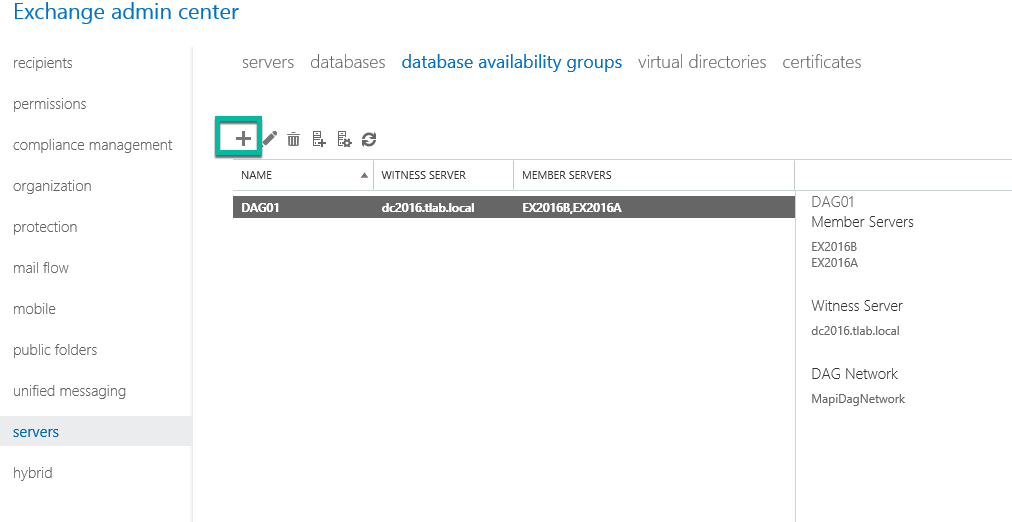
If you open the Exchange Admin Center and navigate to Servers -> Database Availability Groups, you can click the + button as shown below to create a new DAG:
A new window will open and you need to enter the following info in:
- DAG name
- Witness server
- Witness directory
- IP address

Generally, I pre-stage the computer account in Active Directory and ensure that the Exchange Trusted Subsystem has full permission or you can let Exchange handle that for you. You need to ensure that your DNS record is in place as mentioned earlier so when you add the IP it will be pingable.
Take note that depending on the size of your environment, replication might take a bit longer than just have 2x AD servers and 2x Exchange 2016 Servers. Another note is that you cannot add your Exchange 2010 or Exchange 2013 servers to your DAG. Yes, there was a bug that allowed it in the RTM but it does not mean you should try to do this.
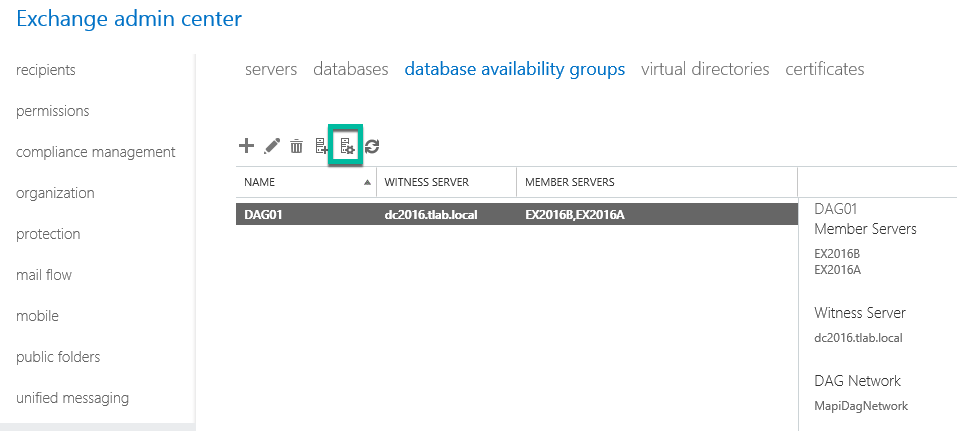
Once your DAG has been created, you can now add members to it. In the same location where you created your DAG you can click the second last icon to manage the members as shown below:
A new window will appear as shown below:
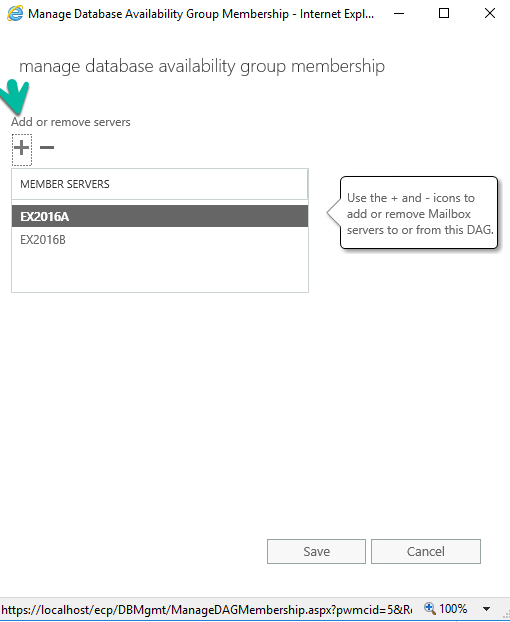
Click the + button to add in your servers to the DAG, another new window will appear to select the servers. If you have an existing DAG in the environment, you will see the servers and what DAG they are part of and you won’t be able to add a member server that is already part of another DAG.

Once you select the server and click the add -> button and then OK, this will bring up a new window and start the installation of Failover Cluster Manager on each node that you added. Once complete you can reboot your server and then manage it in the same place. If you do not want to have Exchange 2016 manage your network, then you need to click the button to create a new network for Exchange 2016 to use.
Now that your DAG is in place you can go and create copies for your databases. Remember that the storage needs to be the same on all your servers. Seeding should be quick as the database is new and small. Again, if you cannot create copies, check that your firewall or AV is not blocking it.
If you want to remove a member server from a DAG, you need to first remove the database copies and allow replication to take place, then you can remove the node from the DAG. Please do not go into Failover Cluster Manager and evict the node. This will only be required if you are recovering a server and could not remove it from the DAG cleanly.
Lastly, to check the status of your DAG, you can run the Get-MailboxDatabaseCopyStatus command to ensure that your DAG is healthy and the catalog is healthy. Below is a sample of what it will look like using PowerShell:

In this example, you can see I have a content index state with a problem.
Featured image: Shutterstock


