In Part 1 and Part 2 of this series, we began our journey on installing Exchange 2016, looking at updates (both security and Windows updates) as well as working with the Exchange Admin Center and working with IIS. Here in Part 3, we will be covering the following tasks:
- Send/receive connectors
- Limiting EAC access
- Databases
Connectors
When you install Exchange 2016, by default you have five receive connectors, but you need to set up your send connector. If you are running in coexistence with Exchange 2010 and Exchange 2013, then the send connector will be there and you can add your Exchange 2016 Server to it. Let’s take a look at the receive connectors and what each one does:
Receive connectors and explanations
| Connector Name | Brief Description | TCP Port |
| Client Frontend <Server> | Accepts connections from authenticated SMTP clients using secure port 587. | 587 |
| Default Frontend <Server> | Accepts anonymous connections from External servers. This is the message entry point into your Exchange environment. | 25 |
| Outbound Proxy Frontend <Server> | Accepts authenticated connections from the Transport Service on other mailbox servers. | 717 |
| Client Proxy <Server> | Accepts authenticated client connections that are proxied from the FE Transport Service | 465 |
| Default <Server> | This connector accepts authenticated connections from FE Transport service, local and external. Transport service on remote mbx servers. | 2525 |
If you want to allow certain applications to send mail then it’s best to create a new receive connector instead of modifying the default connectors. Then, lock it down to that server IP so you don’t cause an open relay.
Send connectors
If you have a new installation, you need to create a send connector so you can send mail to the Internet. You probably have chosen your ISP of choice — maybe you will be routing mail to Mimecast, Symantec, Office 365, or using DNS. Your ISP will provide you with a smart host that you can configure on your send connector. To set up your send connector, follow the steps below:
First, launch the Exchange Admin Center.
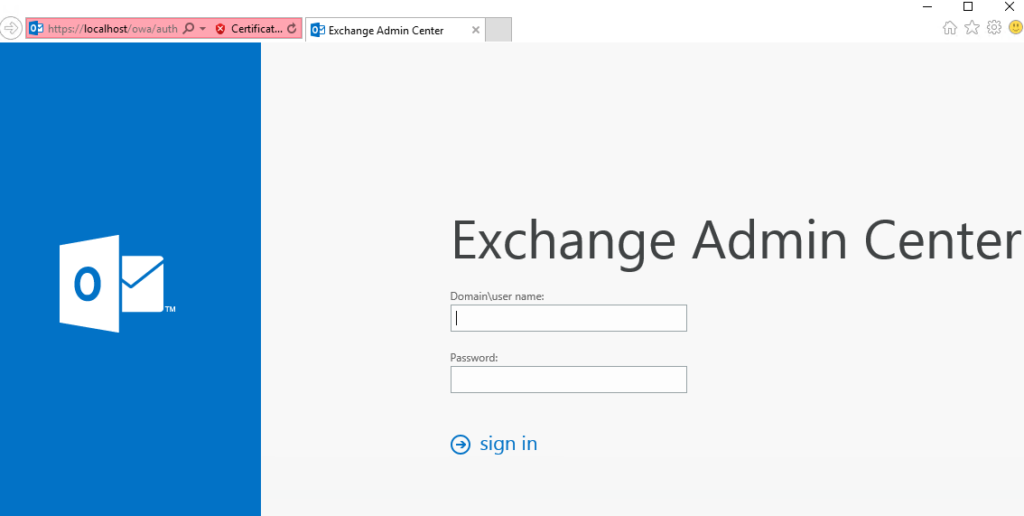
Enter your username and password and then click the sign-in button.
Once you have logged in, click on mail flow on the left and then send connectors at the top right as shown below:

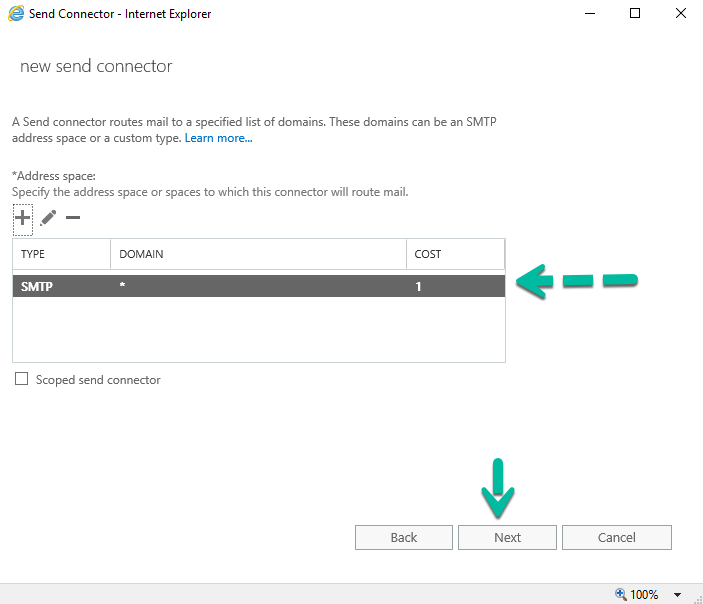
Click on the + button in the middle to add a new send connector. Once you have clicked the + button, a new page will appear as shown below:

On this page, you need to enter a name for your connector and then select the Type as Internet and then click the Next button. On the next page you will need to enter in your smart host information or leave the default setting “MX record associated with recipient domain” as shown below:

If you select smart host, you will need to click the + button below that and enter the details. Click Next to continue. On the next page, you need to specify an address space how this connector will route mail. As shown below you need to click the + button under address space.

Once you click the + button as per the above, you will be presented with another window as shown below.
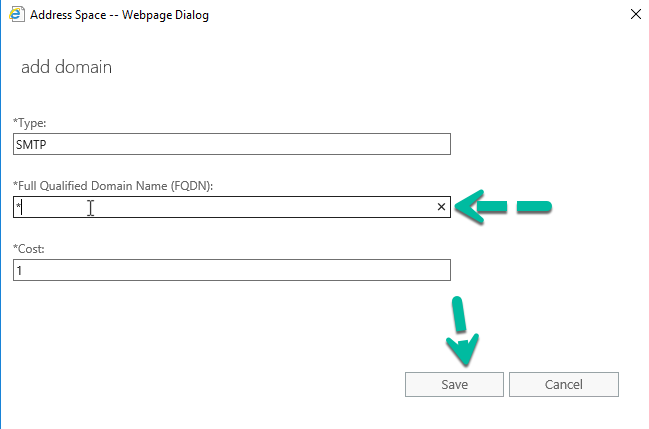
The FQDN field needs to be filled in. Here you can enter your domain name or use a * as I have and then click Save to be returned to the previous screen where it will show your address space.
Click next, on the final page you will need to click the + button to specify a source server, this can be a single server or all your servers.

On the new window that opens when you clicked the + button, you need to either double click the server or servers you want in the list or select them and click the add -> button and then click OK to be taken back to the final screen where you will see your servers.

Click Finish to complete your send connector config. You will now be taken back to the Exchange Admin Center and your connector will now show under send connectors.
Limiting Exchange Admin Center Access
The Exchange Admin Center should not be visible on the Internet. If you have Internet-facing servers handling OWA, AS, or OAB, turn off the EAC on them and then have it enabled it you need to on a locked-down server. To see if it is enabled, you can run the following command:
Get-EcpVirtualDirectory -Server Server1 | fl
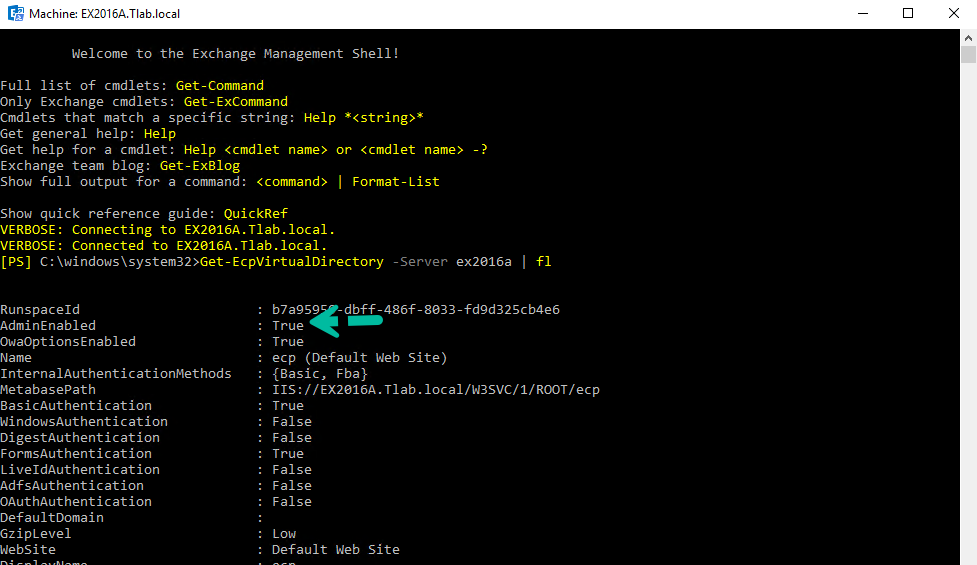
As you can see above, it is enabled. To disable access, you can run the following command:
Get-EcpVirtualDirectory -Server ex2016a | Set-EcpVirtualDirectory -AdminEnabled $false

As you can see above, it is now disabled. You need to either run an IISRESET or reboot your server for the changes to take effect immediately or you can wait the five minutes in the warning you get when you run the command.
Databases
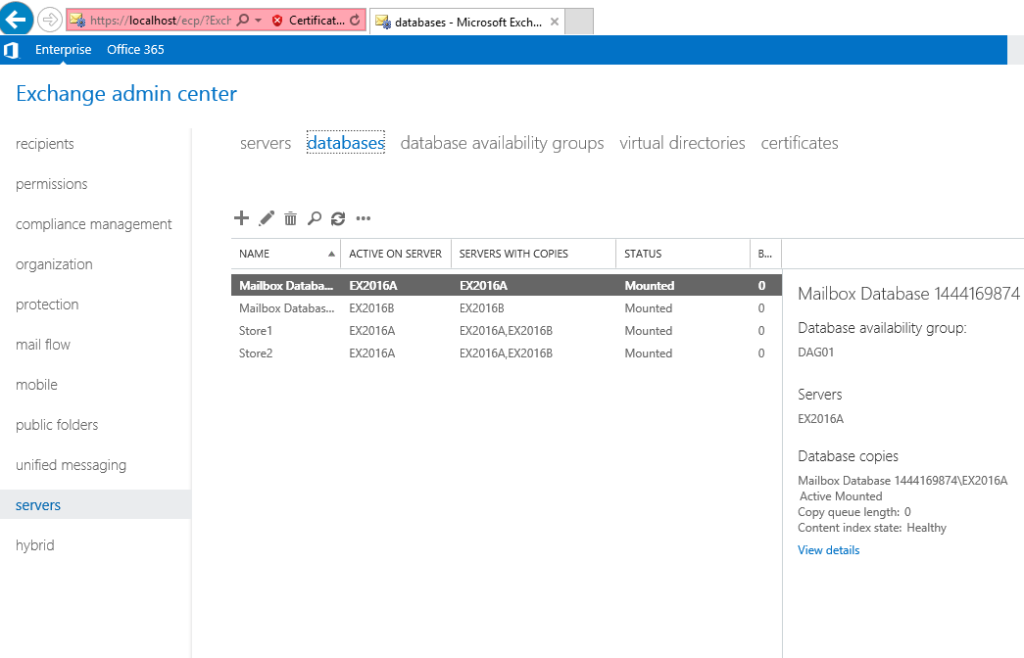
When you build any Exchange 2016 server, you will have a default database for each server, something like “Mailbox database 123456798.” Many admins stick with this one and you can too — there’s nothing wrong with it. I prefer to create new stores and then move the arbitration mailboxes and remove the default stores so that all servers are the same. In the example below, you can see the default databases and custom stores:
If you do decide to remove the default store, you need to restart the Information Store service or reboot your server.
Installing Exchange 2016: Next up
In Part 4 of this series on installing Exchange 2016, we will take a look at database availability groups (DAG) and talk about failover clustering that is installed when you add a server to a DAG. Stay tuned!
Featured image: Shutterstock


