If you would like to be notified of when Wilco van Bragt releases the next part in this article series please sign up to our VirtualizationAdmin.com Real Time Article update Newsletter.
If you would like to read the first part in this article series please go to Installing Microsoft Application Virtualization (Part 1).
Introduction
In part one of this article series, I began by describing the installation process for the App-V server. This article continues with the installation process of the App-V (TS) Client and the App-V sequencer.
App-V (TS) Client
In order to start the virtualized applications, you will need to have the App-V client installed on those machines that will be using the App-V infrastructure. There is a separate client for desktops (Windows XP, Windows Vista) and terminal Servers (both 2003 and 2008) on the 32bit platform. Unfortunately there is no 64-bit version of the App-V client. The installation of both clients is identical. In this article I will use the App-V TS client installation to guide you.
The Client requires Microsoft XML Parser 6, so you need to install this before you start the installation of the App-V Client.
You start the installation of the App-V client by using the setup.exe
The App-V client also requires Visual C++ 2005 and a modified Application Error Reporting component. The installation will install these software products itself.

Figure 1
When the supporting software is installed the actual installation of the App-V client starts by showing the welcome message.
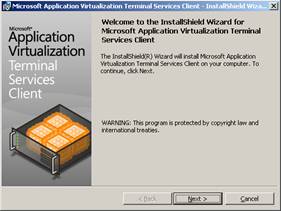
Figure 2
The next step takes you to the license agreement, which needs to be accepted before the installation can be continued.
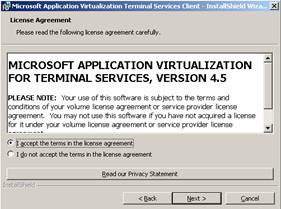
Figure 3
Next, you can select the setup type for the client. Using Default program settings, as the name suggests, involves the installation of the default setup as specified by Microsoft. Configure program settings allows you to change the installation options. I will use the Custom option to show all the possibilities.
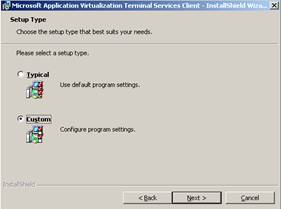
Figure 4
When needed, the location of the client can be changed.
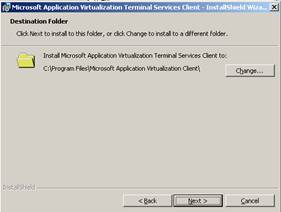
Figure 5
Microsoft App-V is storing two kinds of data. The first kind is the global data. This data is shared between the users on the same machine. User specific data is stored in a second location, by default in the user profile. The location can be changed to a location on the user home drive for example. Finally, the App-V drive letter should be specified. This drive letter should be the same on all machines. During the sequence process you will install the application on that drive by default.
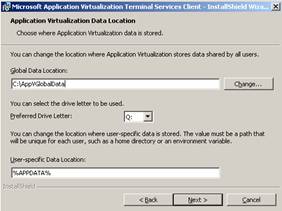
Figure 6
App-V stores the streamed virtual application data locally on the disk. You can specify how large this cache file may be. You have the possibility to set a fixed maximum size or use a dynamic value based on a value of minimum available disk space.
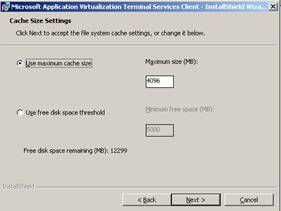
Figure 7
Within the startup file (the OSD file) of the virtualized application you will specify the location where the data file (SFT file) can be found. With the application Source Root you can override this setting with another location. This is useful when you have more locations with more App-V servers and you would like to connect specific workstations to a specific App-V server. In the same dialog window you can also configure the application authorization settings and the automatic load options.
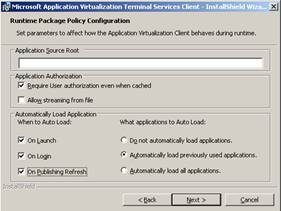
Figure 8
Next, you will need to configure the server connection to the App-V server. It is logically important to configure the client with the correct type App-V server depending how you installed your App-V server. You can choose between the HTTP streaming (port 80) and the standard application virtualization server (using port 554). Both can also be chosen using the secured connection (SSL, 443 or 332). Logically, you also need to fill in the host name or alias name and the port you configured (when using another port).
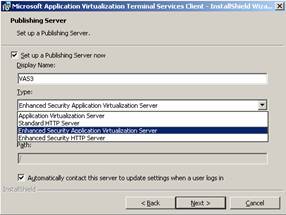
Figure 9

Figure 10
All the necessary information is now collected to install the client and the physical installation will start after this dialog window.

Figure 11
When the installation is finished this dialog window will be shown. The client is now installed and applications can be streamed from the server.
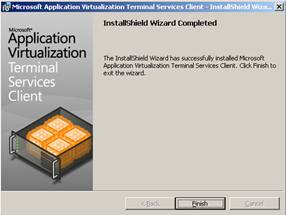
Figure 12
Unattended installation of the App-V Client
The App-V (TS) Client needs to be installed on a client on which you would like to use the virtualized applications. In larger environments you would not like to do these manual steps on every machine. The client can be installed unattended via the MSI parameters. Also, the required supporting components can be installed unattended. On this webpage you find the information you need to install the client unattended.
App-V Sequencer
We will now continue with the installation of the last component the App-V Sequencer. This component is being used to create the virtualized applications which can be used within the App-V infrastructure. The sequencer is normally installed on virtual platform, because after the creation of each virtualized application the sequence machine should be reverted to a clean state again. It is a best practice that the sequencer is installed on the operating system which is being used the most within the organization. The sequence machine should also have a second partition. This second partition should have the same drive letter connected to it as specified in the App-V client.
The App-V sequence installation is started using the setup.exe in the sequencer folder.
The sequencer has a prerequisite with Visual C++ 2005 SP1, which will be installed out of the installation wizard of the App-V Sequencer.
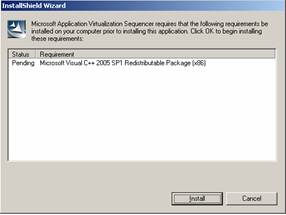
Figure 13
The welcome dialog is presented as the first step of the installation wizard.
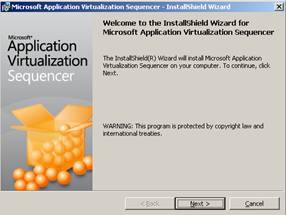
Figure 14
And again there is a license agreement that should be accepted before you can install the Sequencer software.
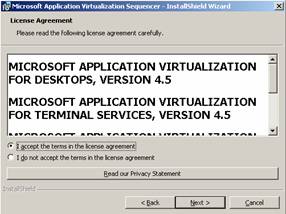
Figure 15
If necessary, the installation location can be changed, but normally there is no need to do that.
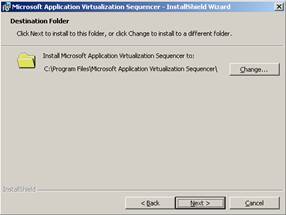
Figure 16
The installation wizard is ready to install the application.
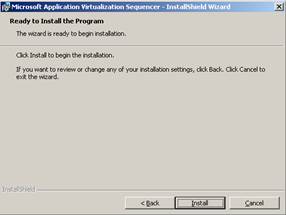
Figure 17
The installation is finished and the program is ready to be used for virtualizing applications.
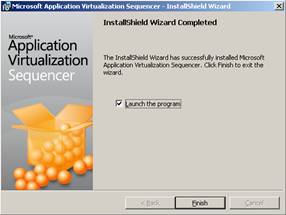
Figure 18
It depends on the type of applications and the installation steps of those applications if you join the Sequencer machine to the domain or a workgroup. If you decided to add the machine to the domain you should disable the machine account password changes between Active Directory and the workstation. This can be accomplished using the Local Security Settings or creating a Group Policy Object within Active Directory. Within Security Settings – Local Policies – Security Options the setting Disable Machine account password changes should be configured to Disabled.

Figure 19
Before using the App-V Sequencer you should create a snapshot of the current state of the virtual machine. This snapshot can be used to return to a clean state when you have finished the virtualization process (described in an upcoming article).
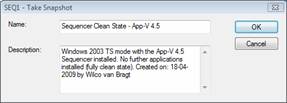
Figure 20
Conclusion
In this article series I described the installation steps for installing the App-V infrastructure components. In the first part I described the basic installation of an App-V server, while this second part describes the installation of the App-V client and App-V Sequencer. In an upcoming article I will describe the process of creating a virtualized application with the App-V Sequencer, how this virtualized application is added to the App-V infrastructure and how the client will be used to launch the application.
If you would like to be notified of when Wilco van Bragt releases the next part in this article series please sign up to our VirtualizationAdmin.com Real Time Article update Newsletter.
If you would like to read the first part in this article series please go to Installing Microsoft Application Virtualization (Part 1).


