Before you can deploy System Center Operations Manager (which will be showing you how to do in a future article), you must first make sure that you have a solid foundation to do it. The goal of this article is deploying SQL Server 2016 to support System Center Operations Manager 2016.
Although Operations Manager supports SQL versions 2012, 2014, and 2016, our decision was to use the latest SQL Server 2016 running on top of Windows Server 2016. The SQL is a crucial component for SCOM, and, to be entirely honest, for the entire System Center family. Operations Manager relies on SQL in four different workloads: Operational Database, Data Warehouse Database, ACS Database, and Reporting Services.
Operations Manager deployment is flexible and matches any company scenarios. We can start simple as a single server where all SCOM features and SQL Server are on the same server (which is going to be the focus of this SQL deployment on this article), or distributed where we could have a SQL High Available solution and SCOM servers in separate servers.
SQL requirements
There are a series of best practices and recommendations when deploying SQL Server to support Operations Manager. Here are some of the highlights from the design section of the official documentation.
- There is a Sizing Helper tool that based on the number of agents to be monitored (servers and network devices) will provide some guidance on the requirements. You can download the tool from here.
- Database and log files should be in different disks to improve performance.
- Storage subsystem is used intensively by SQL Server and must be designed well and enough IOps to support the workload must be measured and validated before moving into production.
- Disks partitions and volumes must be aligned to improve performance.
- 64KB allocation size for database, logs and TempDB folder.
- Reserve 20 percent free space at all times on the SQL volumes.
- Configure memory allocation on SQL. (We are going to perform that at the end of this article.)
SQL service accounts
There was a great improvement related to service accounts in Windows Server and SQL support in the last few years. In the past, we had the option to use built-in, local user, or domain user accounts, and each one of them would come with some challenges, such as too many privileges and a simple account causing an outage to the service due to password changes.
Microsoft introduced Managed Service Accounts (MSA) where the account does not have a password per se, at least not known by the administrator or any IT user, and it changes automatically. However, that works just for a single SQL server and it does not work with failover cluster.
Microsoft went one step further and introduced gMSA (Group Managed Service Accounts). These allow the use of failover clusters, and it is fully supported on SQL Server 2016. We are going to use them even on our environment, which will have just a single SQL Server.
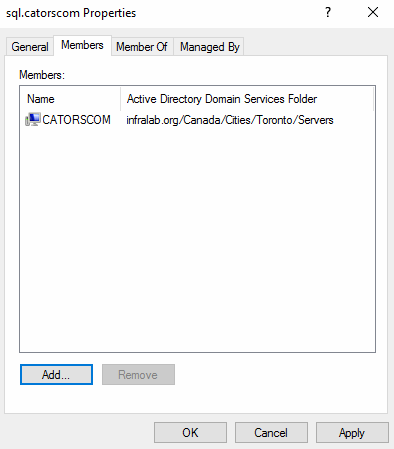
We will create a Security Group for the gMSA account that will represent one and all future server that could come up from this application. We will name this group as SQL.CATORSCOM, and we will add the SQL Server (computer object) as member of such group.
We need to create the gMSA using PowerShell and using the Active Directory module. Here is the command line to create a Group Managed Service Account for our SQL that will be used by Operations Manager. (For some background on PowerShell and SQL Server 2016, go here.)
New-ADServiceAccount -Name gMSA.SCOM -DNSHostname gMSA-SCOM.infralab.org -PrincipalsAllowedToRetrieveManagedPassword SQL.catorscom
Logged on the SQL Server, run the following cmdlet to install and test the Group Managed Service Account. We need Active Directory PowerShell module to execute these cmdlets.
Install-ADServiceAccount gMSA.SCOM
Test-ADServiceAccount gMSA.SCOM
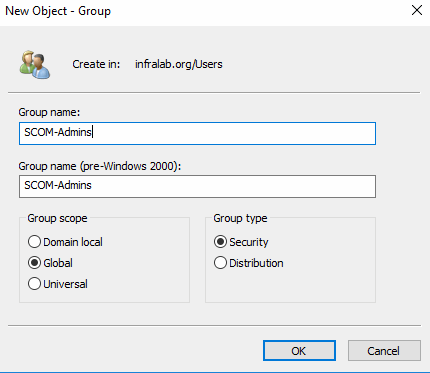
The final step before starting the installation process is to create a group called SQL-Admins in Active Directory and assign this group as SQL Server Administrators. Any new SQL administrators or consultants requiring access to the SQL Server can be easily solved by adding them to this group.
Download SQL Server 2016 bits
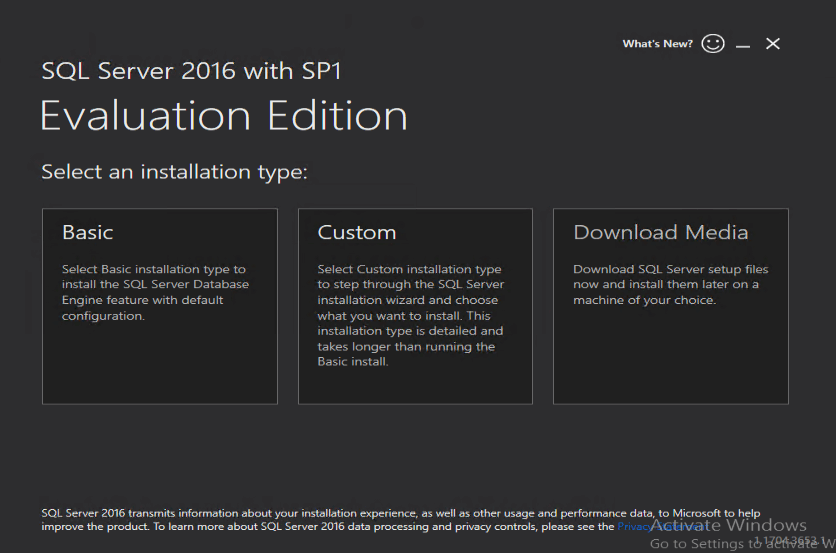
The first step is to download the evaluation version of SQL Server 2016 with Service Pack 1, which can be found here. The download will be extremely fast but that is not the installation bits yet. It is just a small installation wizard where the administrator can trigger a basic installation process, use a custom one or Download Media, which is going to be our option.
We will follow through and we will have the SQL Server 2016 SP1 media available for installation on the ISO format.
SQL Server 2016 with SP1 deployment process
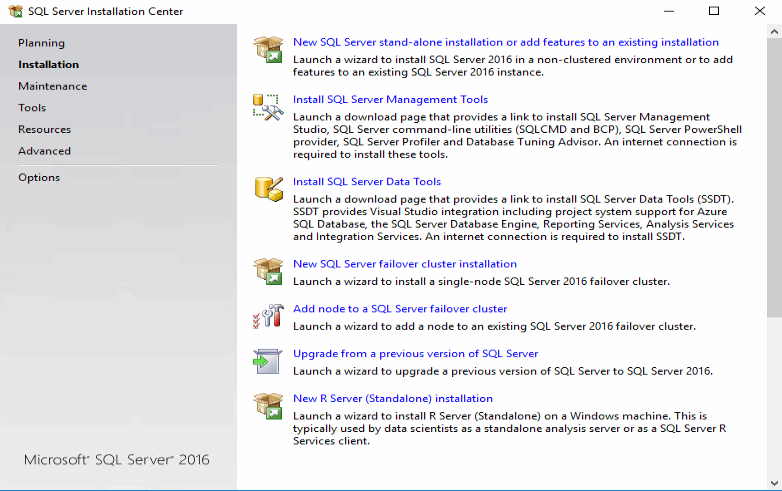
The first step is to mount the ISO that we downloaded from Microsoft in the previous step. Then, run the setup that can be found on the root folder of the new drive created by the mounting process.
In the SQL Server Installation Center page: Click on Installation tab and then on New SQL Server standalone installation or add features to an existent installation.
In the Product Key page: Leave Evaluation and click Next.
In the License Terms page: Read the agreement, and if you are in acceptance with the terms, select I accept the license terms and click Next.
In the Install rules page: The setup wizard will validate some key items that are required before starting the installation process. If it is all green (or at least yellow), click on Next.
Note: Any issues reported here should be fixed before continuing to the next step.
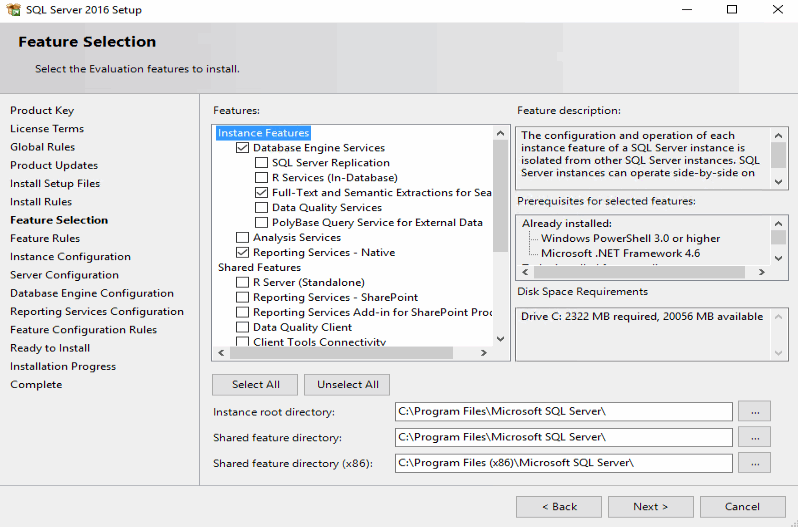
In the Features Selection page: Here we can select the features that will be part of this SQL Server 2016 deployment. These are the features required to run SCOM and SQL Server on the same server. If there is a need for a distributed environment, then the options can change based on your design.
- Database Engine Services: The SQL database engine, the actual SQL itself in all its majesty.
- Full-text search : Quickly creates full-text indexes on content and properties of structured and semi-structured data to provide document filtering and word-breaking for SQL Server.
- Reporting Services : Manages, executes, creates, schedules, and delivers reports.
In the Instance Configuration page: Leave default settings, which is MSSQLSERVER, and click Next.
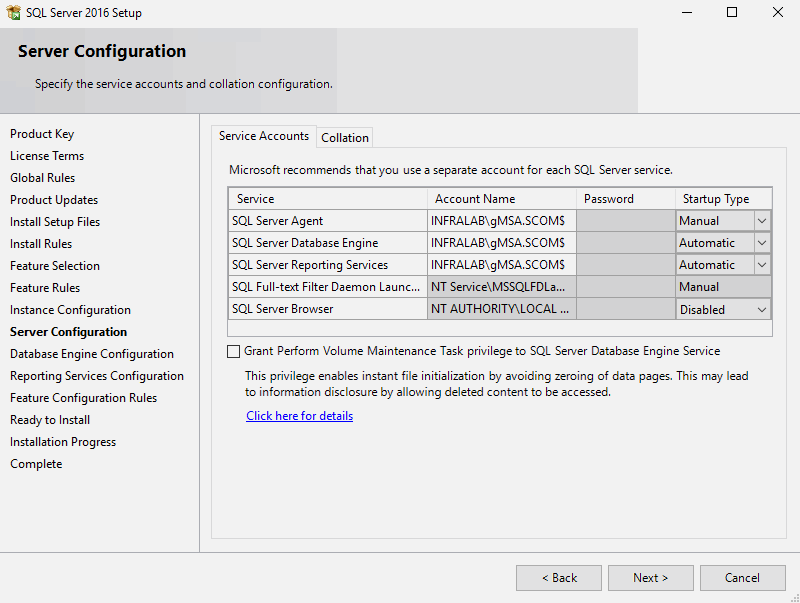
In the Server Configuration page: Here is an important point of the installation process. Let’s configure our Group Managed Service Account for SQL Server Agent, SQL Server Database Engine and SQL Reporting Services.
Also, click on Collation tab. Make sure that SQL_Latin1_General_CP1_CI_AS is selected, and then click on Next.
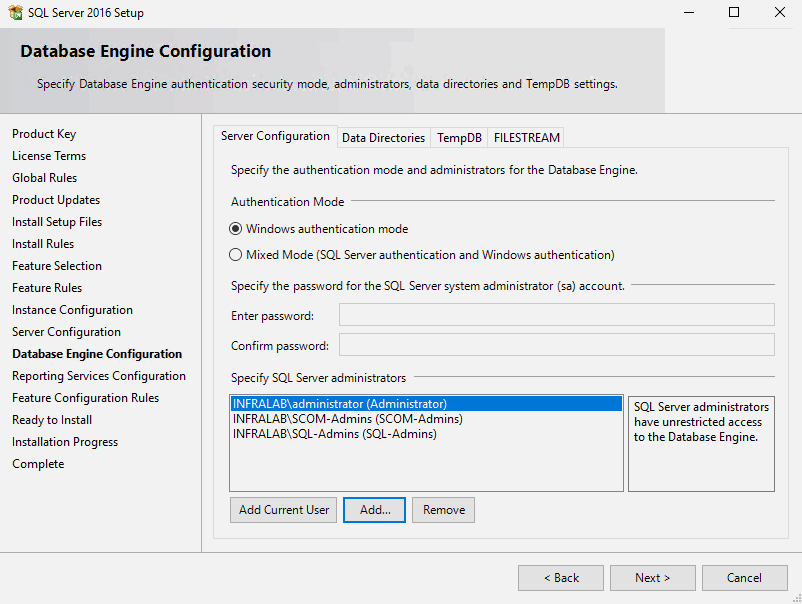
In the Database Engine Configuration page: Here we define the SQL Administrators of this new server. We are going to add the local administrator, and two groups created for SQL and SCOM admins for troubleshooting purposes.
In the Reporting Services Configuration page: Leave default setting, which is Install and Configure and click Next.
In the Ready to Install page: Last check to see all selections made so far in the deployment wizard. Click on Install to start the installation process. Note: it may take a while.
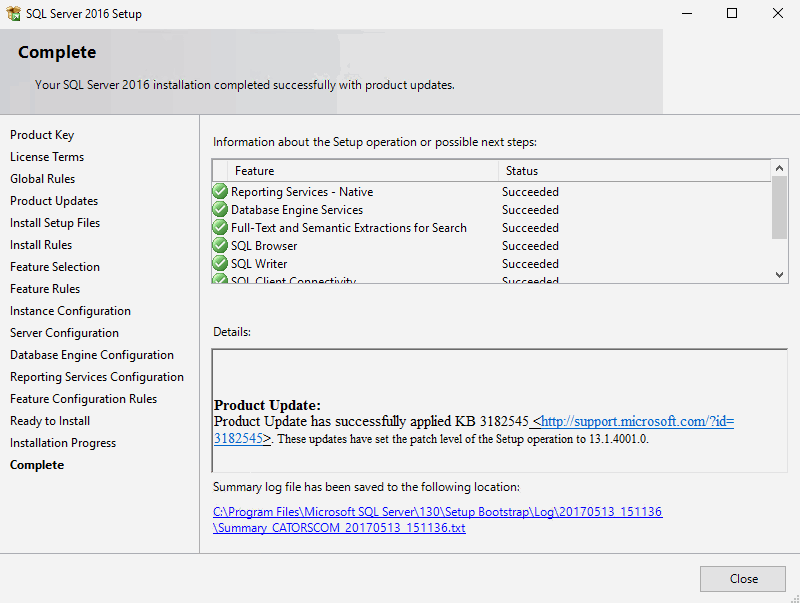
In the Complete page: We will have a summary of everything that was installed as part of the process and its status. If everything looks good, click on Close and we are complete with the installation process.
SQL Server 2016: First steps
After the installation process is complete, we can check the new services created. They should be like the ones depicted in the image below.
Note: When installing Operations Manager, which we will be showing you how to do in the near future, we will need to start the SQL Server Agent. So my recommendation is to configure that one as Automatic to save one step when deploying SCOM.

The second step is to download the SQL Server Management Studio (SSMS) from this link here. This tool allows the administration of SQL Server components from a single tool and it supports different versions.
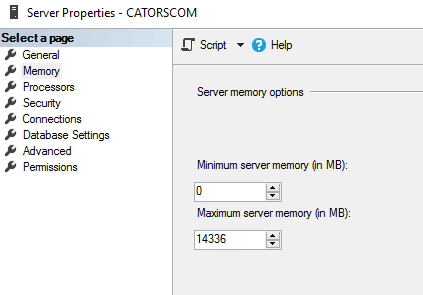
The final step before is to configure the memory. The recommendation is to reserve 2GB of memory for the operating system. So, define the maximum server memory to be the total memory: 2GB. In our example below, the server has 16GBs and we are setting up the maximum to 14GB.
More information:


