If you would like to read the other parts in this article series please go to:
- An Introduction to Network Access Protection (Part 1)
- An Introduction to Network Access Protection (Part 2)
- An Introduction to Network Access Protection (Part 3)
- An Introduction to Network Access Protection (Part 4)
- An Introduction to Network Access Protection (Part 5)
- An Introduction to Network Access Protection (Part 7)
In the previous article in this series, I showed you how to create authorization policies for both compliant and for non compliant computers. In this article, we will complete the server configuration procedure. The first step in doing so is to create a default authentication policy that can be applied to any machine that authenticates through the RRAS server.
Begin the process by opening the Network Policy Server console and navigating through the console tree to NPS (Local) | Authentication Processing | Authentication Policies. At this point, the details pane should display any previously existing authentication policies. Delete the existing policies by right clicking on them and selecting the Delete command from the resulting shortcut menu.
Now it’s time to create a default authentication policy. To do so, click the New link found in the Actions pane and then choose the Custom option. Windows will now display the New Authentication Policy properties sheet, shown in Figure A.
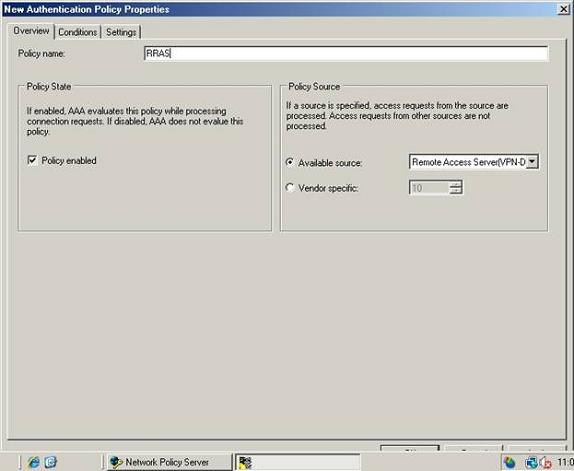
Figure A: Enter RRAS as the policy name and then verify that the policy is enabled
Enter RRAS as the policy name, and then verify that the Policy Enabled check box is selected. Next, make sure that the Available Sources radio button is selected, and then select the Remote Access Server (VPN-Dialup) option from the Available Sources drop down list.
Now, switch to the Settings tab and select the Authentication container from the console tree. Now, select the Override Authentication Settings from Authorization Policy check box. When you do, the details pane will display a variety of authentication methods, as shown in Figure B. Select the EAP check box, and then click the EAP Methods button.
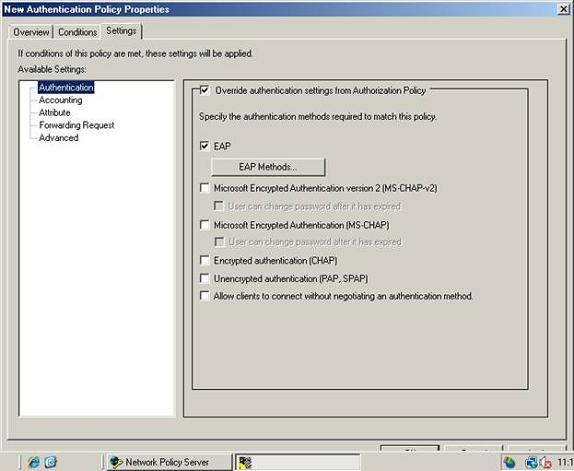
Figure B: Select the EAP check box and then click the EAP Methods button
Windows will now display the Select EAP Providers dialog box. Click the Add button to reveal a list of EAP authentication methods. Choose EAP-MSCHAPv2 and Protected EAP (PEAP) from the list and click OK. The selected EAP authentication methods should now be displayed in the Select EAP Providers dialog box, as shown in Figure C. Click OK to continue.
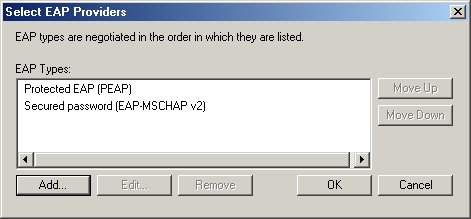
Figure C: You must enable MSCHAPv2 and PEAP authentication
Now go to the Conditions tab. You must select at least one condition that must be met in order for the policy to be enforced. You can set any condition that you want, I recommend navigating through the console tree to Connection Properties | Tunnel Type and then selecting the Point to Point Tunneling Protocol and the Layer Two Tunneling Protocol check boxes and clicking the Add button. That way the new authentication policy will apply to VPN connections. Click OK to save the new authentication policy that you have created.
RADIUS Client Configuration Policy
In this type of deployment, the Network Policy Server acts as a RADIUS server. Rather than clients performing a direct RADIUS authentication against the Network Policy Server, the RRAS server that is acting as a VPN server is going to be acting as the RADIUS client.
The last step in the server configuration process involves providing the Network Policy Server with a list of authorized RADIUS clients. Since the only RADIUS client is going to be the VPN server, you will simply enter the VPN server’s IP address. Since the RRAS services are running on the same physical server as the Network Policy Services, you will simply use the server’s IP address.
To create a RADIUS Client Configuration Policy, navigate through the Network Policy Server console tree to NPS (Local) | RADIUS Clients. Now, click the New RADIUS Client link found in the Actions pane. Windows will now launch the New RADIUS Client Wizard.
On the wizard’s initial screen, you will be prompted to enter a friendly name and an IP address for the new RADIUS client. In a real world deployment, you would enter RRAS as the friendly name and you would enter the RRAS server’s IP address into the space provided. As you will recall, this is a lab deployment, and RRAS is running on the same server as the Network Policy Services. Therefore, enter the server’s own IP address into the space provided and click Next.
At this point, the wizard will display the Additional Information screen. This screen asks you for a client vendor and for a shared secret. Select RADIUS Standard as the Client Vendor. For the purposes of this article, enter RRASS as the shared secret. Select the Client is NAP Capable check box, as shown in Figure D, and click Finish. You are finally done configuring the Network Policy Server!
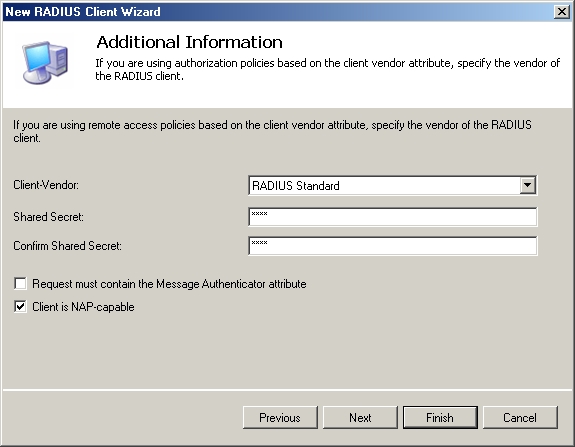
Figure D: Enter a shared secret and select the Client is NAP Capable check box
Client Configuration
Now that we have finished configuring the Network Policy Server, it’s time to configure a client to connect to the server. Keep in mind that the technique that I am about to show you will only work on clients that are running Windows Vista.
For the purposes of this article, I am assuming that the client machine is running Windows Vista, and that it is configured with a static IP address. As you may know, Windows Vista is designed to run IPv6 by default. Network Access Protection should eventually support IPv6, but being that Windows Longhorn Server is still in beta testing, it seems that IPv6 is currently unsupported when it comes to Network access protection. That being the case, you should disable IPv6 on the machine’s network configuration. When Longhorn Server is eventually released, I intend to write an update to this article series that addresses the use of IPv6, as well is anything that has changed since the beta.
The client computer should also be configured as a member of the domain that contains the Network Policy Server. In addition, the domain should contain a user account that you can use to log in to the Routing and Remote Access Server that you have created.
Now let’s create a Virtual Private Network connection that you will eventually be able to use to test the Network Access Protection server. To do so, open the Control Panel and click on the Network and Internet link, followed by the Network Center link. When the Network Center opens, click the Set up a Connection or Network link. You should now see a screen asking you what type of connection you want to create. Click the Connect to a Workplace option and then click Next.
Choose the option to connect through a VPN, and you’ll be prompted to enter a Internet address and a destination name. You should enter the IP address of the RRAS server into the Internet Address field. You can enter anything that you want into the Destination Name field. Select the Allow Other People to use this Connection check box, and click Next. You must now enter a user name and password for a user who has permission to logon to the RRAS server, as well as the name of the domain that you will be logging onto.
Click the Connect button and Vista will attempt to connect to your RRAS server. More than likely, the connection will fail. When you receive the message stating that the wizard cannot connect to your workplace, click the Setup a Connection Anyway icon. This will save your settings so that we can finish customizing them in the next part of this series.
Conclusion
In this article, we have completed the configuration of the Network Policy Server, and begun configuring a network client. In the next article I will conclude the series by showing you how to complete the client configuration.
If you would like to read the other parts in this article series please go to:
- An Introduction to Network Access Protection (Part 1)
- An Introduction to Network Access Protection (Part 2)
- An Introduction to Network Access Protection (Part 3)
- An Introduction to Network Access Protection (Part 4)
- An Introduction to Network Access Protection (Part 5)
- An Introduction to Network Access Protection (Part 7)


