The trick to effectively managing any virtualized environment is to control resource contention. Resource contention could be defined as the competition among virtual machines for hardware resources. The idea being that any virtualization host contains a finite amount of hardware resources (such as CPU cycles and memory.) and those resources must be shared among all of the running virtual machines. Resource contention is a nonissue if a host server has plenty of hardware resources to comfortably run all of the virtual machines hosted on it. As virtual machine workloads increase, resource contention can quickly become an issue. Usually, there is one particular resource in short supply and therefore limits the total number of virtual machines that the host can run. Storage IOPS are probably the resource that is most often in short supply, but I have also seen many real-world virtualization hosts that suffer from insufficient memory.
Virtual machines, resource contention, and CPU cycles
One resource that is rarely discussed with regard to resource contention is CPU cycles. The reason for this is very simple. Modern CPUs are extremely capable, and virtualization hosts are normally equipped with multiple CPUs. As such, virtualization hosts typically only begin to run low on CPU cycles if the virtual machines are running multiple CPU-intensive workloads.
Although having a host that is CPU constrained is somewhat rare compared to a host suffering from shortages of memory, storage IOPS, or network bandwidth, it does happen. Organizations should consider what they can do to make the best possible use of the available CPU resources. At the same time, a virtual machine that is running a CPU-intensive workload may need to be allocated CPU resources that cannot be consumed by another virtual machine. Thankfully, Hyper-V allows you to do both.
To access the Hyper-V CPU settings in System Center Virtual Machine Manager, go to the VMs and Services workspace, select a host group, and then right-click on the virtual machine whose CPU settings you wish to examine. Choose the Properties command from the resulting shortcut menu, and the virtual machine’s settings will be displayed.
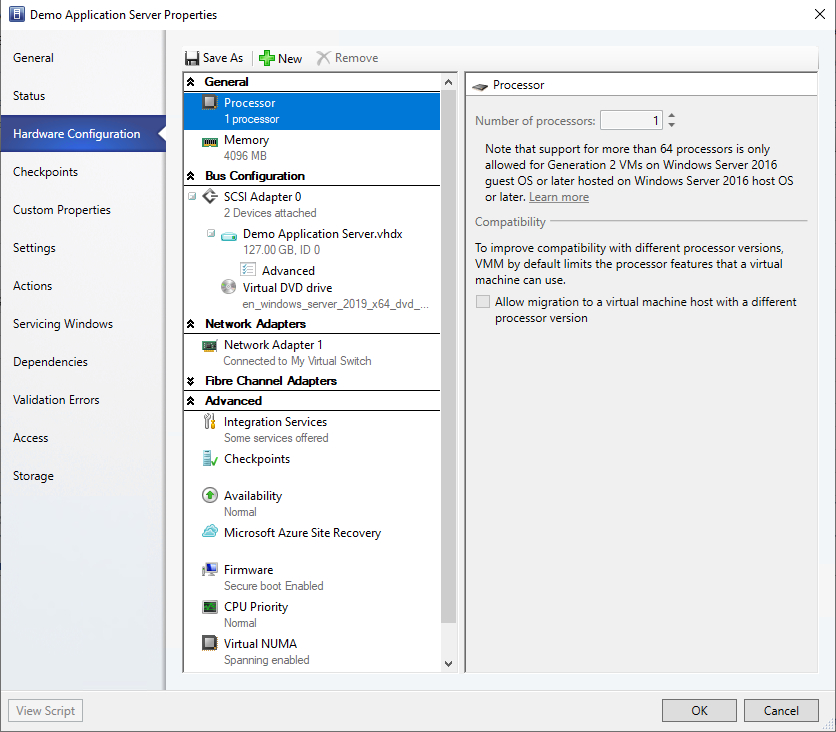
If your goal is to limit CPU usage, then the first thing you should look at is the Processor option, which can be found beneath the Hardware Configuration tab. As you can see in the image below, the Processor section allows you to specify the number of processors allocated to the virtual machine.
Now scroll down until you locate the CPU Priority section. As you can see in the next image, this screen allows you to assign a priority to the virtual machine when Hyper-V is allocating CPU resources. In other words, if Hyper-V is running low on CPU resources, then higher priority virtual machines will receive CPU cycles before lower priority virtual machines will.

Setting the virtual machine priority
You can set the virtual machine priority by selecting the High, Low, or Normal buttons. You can also set a custom priority if you like. As you can see in the screenshot, you also have the option of setting a custom priority. If you decide to create a custom priority, you will need to enter a number between 1 and 1,000. Higher values equate to higher priorities. Incidentally, a normal priority corresponds to a value of 100, while a low-priority machine receives a value of 50. A high-priority virtual machine is assigned a value of 200.
Just beneath the priority controls, you will find the Resource Control section. The first setting found within this section is the Reserve CPU Cycles (%) setting. As its name implies, this setting is used to reserve CPU resources for the virtual machine. The number that you enter here is essentially a percentage of a single logical processor. If, for example, you enter the number 25, then you are reserving 25 percent of one logical processor’s capacity for the virtual machine. This setting is set to zero by default, meaning no reservation exists unless you create one. You would normally only want to create a CPU reservation if the virtual machine is running a CPU-intensive workload and you are trying to guarantee that adequate CPU resources are available for the virtual machine at all times.
The Resource Control section also lists the percentage of total system resources reserved for the VM. In other words, if the virtual machine has been allocated a large number of virtual processors and has a CPU cycle reservation, then this number will reflect the overall percentage of the host machine’s total processing power reserved for the virtual machine.
The other setting within the Resource Control section is the Limit CPU Cycles (%) setting. This setting does exactly the opposite of the Reserve CPU Cycles setting. Whereas the Reserve CPU Cycles setting reserves CPU resources for the virtual machine to use, the Limit CPU Cycles setting acts as a barrier preventing the virtual machine from consuming an excessive amount of CPU resources. This setting is set to 100 percent by default, meaning no limitations are placed on the total amount of resources that the virtual machine can consume.
Just beneath the Limit CPU Cycles setting, you will see the percentage of total system resources that the VM is limited to. This setting reflects the overall percentage of the host server’s processing power that the virtual machine can access based on the number of logical processors that have been allocated to it and any limitations that have been put into place.
Limit or reserve CPU resources
So as you can see, Hyper-V makes it possible to either limit a virtual machine CPU resources or reserve CPU resources for the virtual machine to use. Although I have used System Center Virtual Machine Manager to demonstrate the configuration options that exist, the same settings are also available within the Hyper-V Manager. You can access them by right-clicking on a virtual machine and choosing Settings from the resulting shortcut menu. When the virtual machine’s settings window appears, just select the Processor tab to access the settings. You can see what this looks like below.

Featured image: Shutterstock


