
Source: Lukas on Pexels
Unattended scripts have always posed a problem for admins. That’s because these scripts typically require permissions to function. However, because these scripts run unattended, an admin can’t receive prompts to enter credentials. Historically, the solution to this problem was storing the credentials in a file or the script itself. Needless to say, this approach poses some major security risks. Thankfully, Microsoft has given us a better way of handling authentication for unattended scripts, particularly as they relate to Exchange Online.
In this article, I’ll show you how you can use certificate-based authentication to make Exchange Online management more secure.
Register the Application
You’ll first need to create (or register, as Microsoft calls it) an application in Azure Active Directory. This registration process is simple and doesn’t require you to write any code. Essentially, the process associates a certificate and a set of permissions with an identifier. To complete the initial registration process, follow these 6 steps:
- Log into your Microsoft 365 account and open the Azure Active Directory Admin Center
- Click on the App Registrations tab
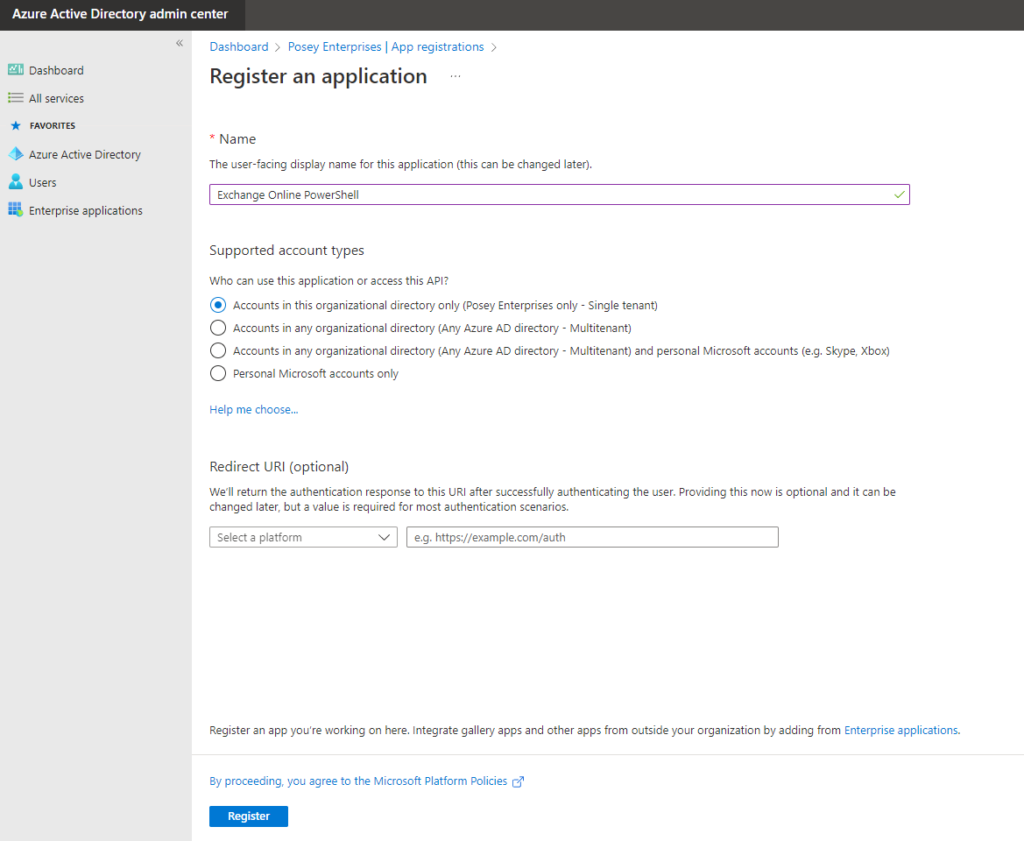
- Click on the New Registration button. The console will display the Register an Application screen
- Enter a name for the application you want to register. For this article, I’ll call the application “Exchange Online PowerShell”
- Choose the account type that you want to use. For most cases, you’d opt to go with the “Accounts in this organizational directory only” option
- Click the Register button to complete the registration process
Replace the Default Permissions
The next step is to replace the application’s default permissions with API permissions. This is what will allow scripts to run unattended. To complete this process, follow these 9 steps:
- Select the application’s Manifest tab. This causes the console to display the application manifest in JSON format
- Change the value for the ResourceAppID to:
00000002-0000-0ff1-ce00-000000000000
- Set the ResourceAccess ID to:
dc50a0fb-09a3-484d-be87-e023b12c6440
- Set the ResourceAccess Type to Role, as shown in the screenshot below
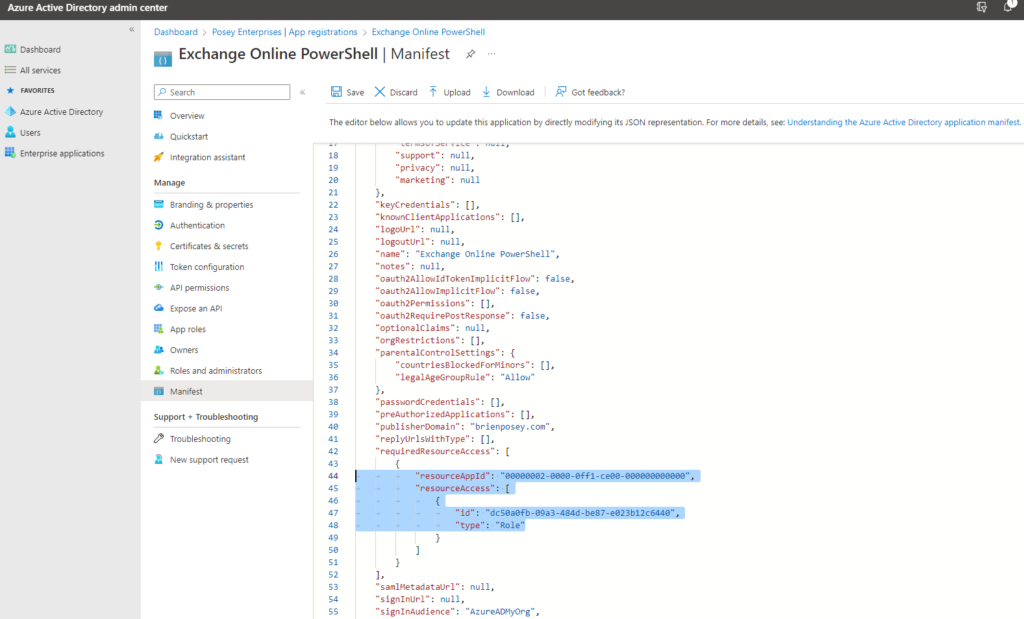
- Click the Save button to save your changes
- Select the API Permissions tab. When you do, you should see a status indicator suggesting that your organization doesn’t have permissions for Exchange.ManageAsApp
- Click the “Grant Admin Consent for” button for your organization, as shown below

- Click Yes when prompted to confirm that you want to grant admin permissions
- Verify that the Status updates reflect that your organization received the required permissions
Create a Self-Signed Certificate
Because this project aims to use certificate-based authentication in place of credential-based authentication, you’ll need to create a certificate that you can use for authentication purposes. While you can use a commercially provided certificate, a self-signed certificate works almost as well. To generate a self-signed certificate, complete these 6 steps:
- Go to GitHub and copy the contents of the Create-SelfSignedCertificate.ps1 file into Notepad
- Save the Notepad document as C:\Temp\Create-SelfSignedCertificate.ps. Make sure you set the encoding type to ANSI. Although I’m using the Temp folder in this example, you can use any folder you want
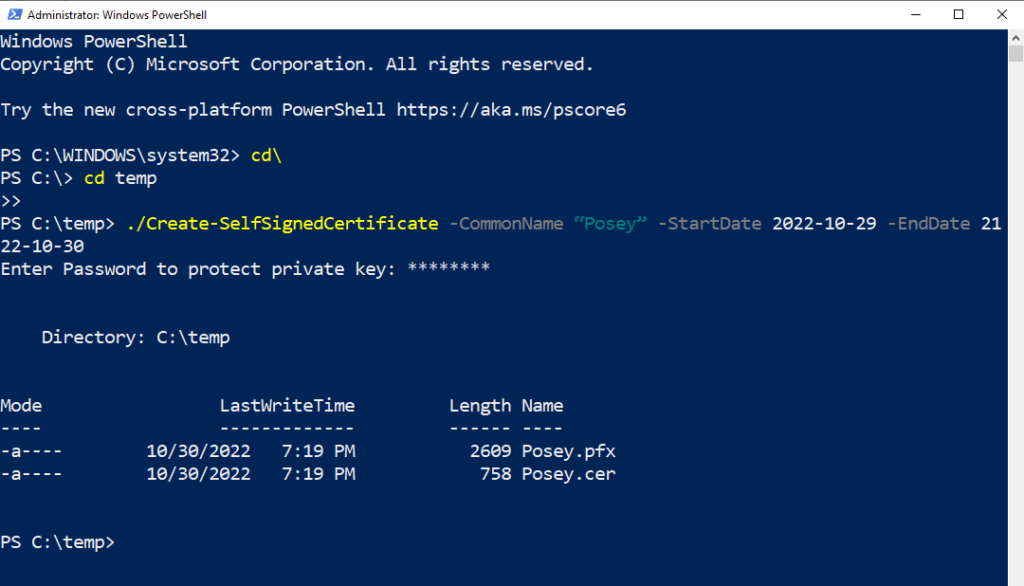
- Open an elevated PowerShell session
- Supply three parameters when running the script: CommonName, StartDate, and EndDate. The CommonName parameter stores the name you want to assign to your certificate. For this article, I’ll use Posey as the CommonName. The StartDate and EndDate reflect the dates of the certificate’s validity. You must enter these dates in YYYY-MM-DD format. Here’s an example of the full command:
./Create-SelfSignedCertificate -CommonName “Posey” -StartDate 2022-10-29 -EndDate 2122-10-30
- Enter a password when prompted. This password’s purpose is to protect the private key
- Find a PFX and CER file created by the script in your Temp folder.
Add the Certificate to the Registered App
Now that we have a certificate pair that we can use to authenticate PowerShell sessions, we need to associate the certificate with the registered application. To do so, follow these steps:
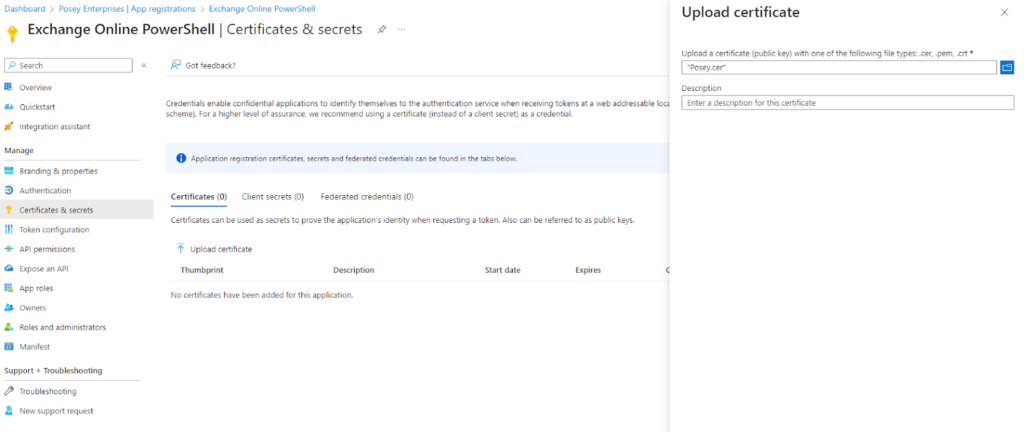
- Go back to the Apps Registration screen you used earlier and select the Certificates and Secrets tab
- Select the Certificates tab and then click on the Upload Certificate link, as shown below
- Click the Browse icon and select the CER file you created earlier
- Click the Add button
Add the Required Roles
The last step in the configuration process is to add the Exchange Administrator role to the application I registered earlier. To do so, follow these 6 steps:
- Click on the Azure Active Directory tab
- Select the Roles and Administrators tab. This differs from the Roles and Administrators tab on the App Registration page
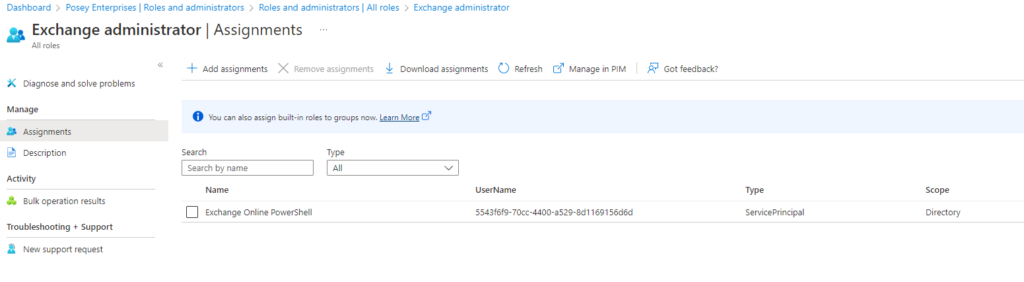
- Click on the Exchange Administrator role (not on the role checkbox)
- Click the Add Assignments link when the roles page opens
- Enter the app name that you registered into the search box
- Select your registered app and click Add
Connecting to Exchange Online
You can connect to Exchange Online using PowerShell through several different methods. The method you need to use will depend on whether or not you installed the certificate you’re using on your PC. If you did install it (which is the preferable option), use this command:
Connect-ExchangeOnline -CertificateThumbPrint “<enter the certificate thumbprint here” -AppID “<your application id>” -Organization “<your organization>.onmicrosoft.com”
If the certificate is present on your system (but not installed), use this command:
Connect-ExchangeOnline -CertificateFilePath “C:\Temp\<your certificate>.pfx” -CertificatePassword (Get-Credential).password -AppID “<your application id>” -Organization “<your organization>.onmicrosoft.com”
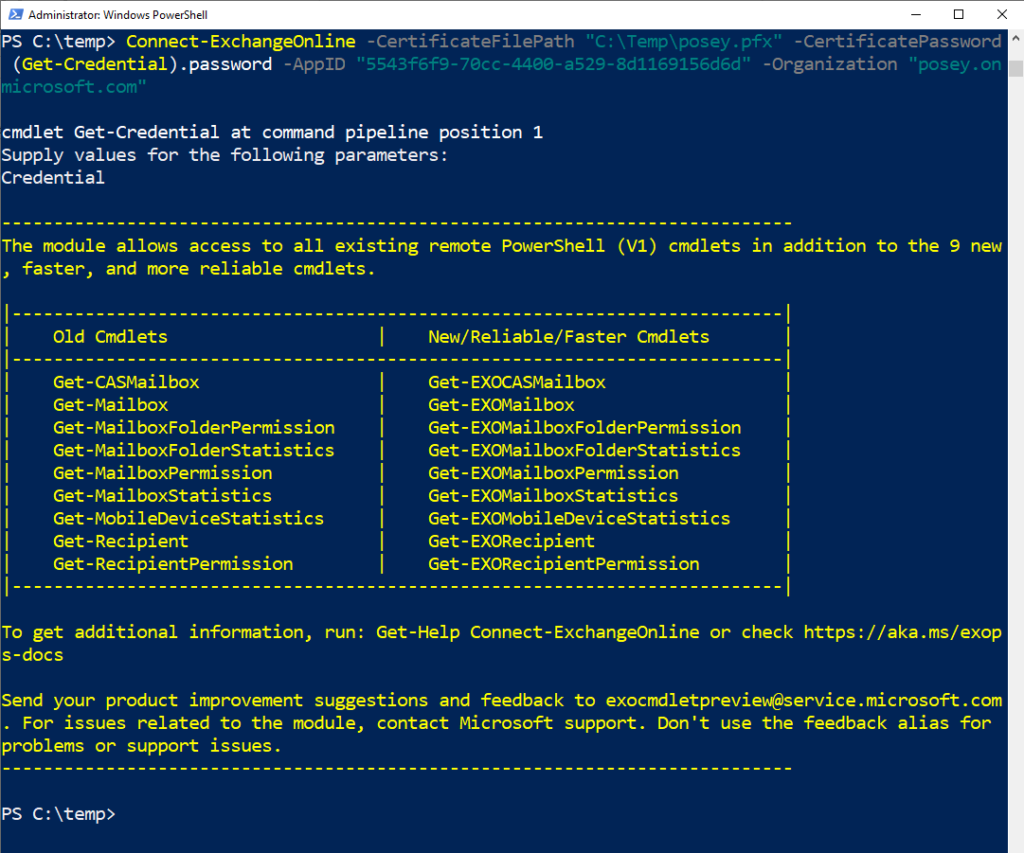
You can see PowerShell using certificate-based authentication to connect to Exchange Online in the screenshot above. That wasn’t too bad, right? Let’s recap!
The Bottom Line
Certificate-based authentication is far more secure than credential-based authentication, especially when it comes to unattended scripts. By using certificate-based authentication, you can eliminate the need to store passwords in PowerShell. As a result, you’ll receive improved security. If you found this article helpful, consider saving it as a reference for the future.
Do you have more questions about PowerShell or Exchange Online? Check out the FAQ and Resources sections below!
FAQ
Why is my organization name causing a problem when I try to connect to Exchange Online?
Even if you have a custom domain name associated with your Microsoft 365 environment, you’ll need to use your organization’s onmicrosoft.com name instead. Otherwise, an error will occur.
What is the difference between installing a certificate and the certificate simply being present?
Every Windows computer contains a certificate store that you can access through the Microsoft Management Console. You can consider a certificate installed if you imported it into the certificate store. In contrast, you can consider a certificate present (but not installed) if the certificate file resides on your computer but you didn’t import it into the store.
Where can I find the Application ID when connecting to Exchange Online PowerShell?
You can find the Application ID listed on the App Registrations screen. This screen displays a list of all the apps you have registered. Each app on the list has a unique application ID.
When I try connecting to Exchange Online PowerShell using the certificate file, I need to enter a username and password. What do I enter for the username since the certificate file has a password associated with it but does not have a username?
You’ll need to enter something in the username field, but it doesn’t matter what you enter since it only uses the password. In the demo illustrated in this article, I used Administrator as the username, but you can use anything you want.
Can I assign roles other than the Exchange Administrator Role to my registered app?
The Exchange Administrator role provides all of the necessary permissions for Exchange Online management. You could conceivably use a different role if you want to create a more restrictive management experience.
Resources
TechGenix: Article on Using PowerShell to Reveal Passwords
Learn how to use PowerShell to reveal your passwords.
TechGenix: Article on Managing Your Mailboxes with PowerShell
Find out how you can manage your Exchange mailboxes with PowerShell.
TechGenix: Article on Using PowerShell to Manage Credentials
Discover how PowerShell can manage cached user credentials.
TechGenix: Article on Office 365 PowerShell Cmdlets
Take a deep dive into Microsoft 365 PowerShell cmdlets.
TechGenix: Article on Automating AD Tasks with PowerShell
Read more on automating Active Directory tasks with PowerShell.