In a recent article in our Microsoft 365 administration series, I went through in detail how to set up email security policies. But there’s another aspect to email security, and that is the old-fashioned transport rule, known in Microsoft 365 simply as rules. There are three basic Exchange rules that everyone should have configured as a starting point for email security. These are:
- Block mail with executable content.
- Block auto-forwarding to external.
- Encrypt on demand.
Block email with executable content will stop the delivery of any email with an executable attachment. It’s an old technique, but one still used by the cybercriminals to get users to infect themselves. Block auto-forwarding to external addresses will prevent email from being automatically forwarded out an external email address. Cybercriminals use this technique to read all of your email, steal attachments, discover private information, and use the information gathered to target phishing attacks like the CEO scam or changing your banking information to their own. Encrypt on demand is a simple rule that defines a word to use when you want an email to be encrypted. Encryption is available in other ways in Microsoft 365, such as using the encrypt button in Outlook or through DLP rules, but I think that a keyword method is an easy way to start the use of encryption, and it is easily put into production and adopted by users.
Microsoft 365 email rules: Getting started
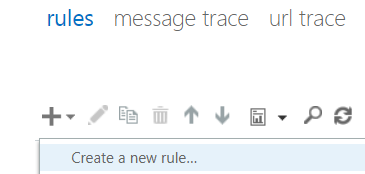
To configure all of these Microsoft 365 administration email rules, we’re going to using the Exchange Admin Console. Then in the Mail Flow section, to go Rules.
Each rule will start out exactly the same. You’ll click on the plus sign and choose Create a new rule… from the menu presented.
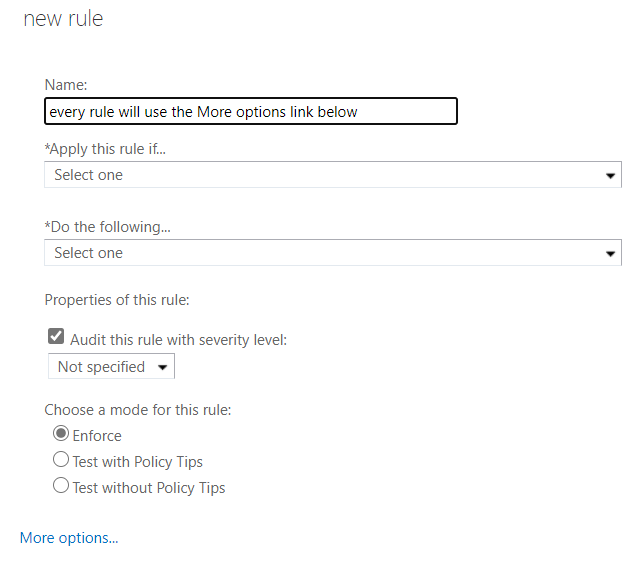
While creating each of these rules, we’re going to make use of the More Options link because that it is where Microsoft hides the most useful things. These are also the least-used options, unfortunately.
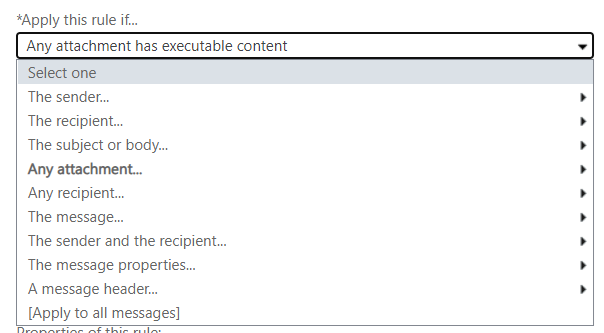
When you press that link, the options available to you in the drop-downs above expand significantly. In the first picture below, you see the options available and notice that there are no sub-options.
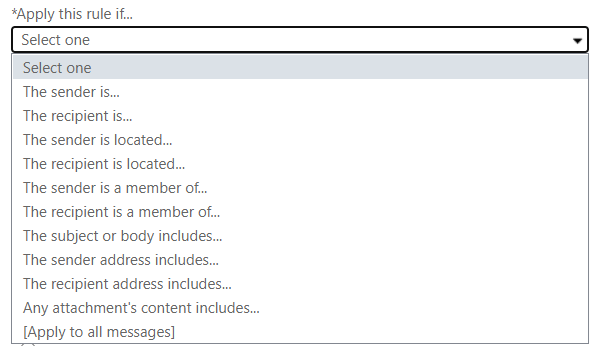
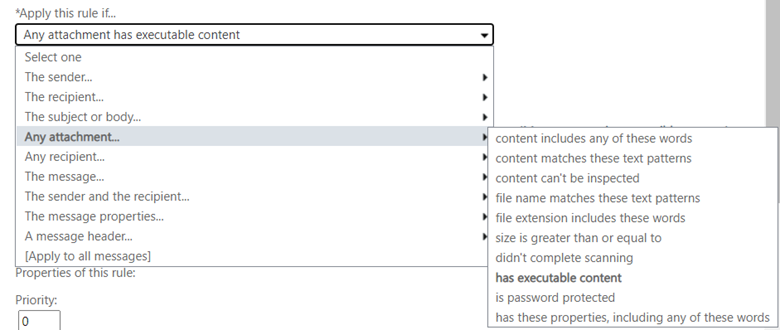
But after we press the More options link, we have not only different items in the menu but an arrow indicating that there are more options under each one. So now they are just options to select from but have really turned in to categories of options.
Now that you how to get set up to create a rule, let’s create the three basic rules. When we’re finished with the three basic rules, I’m also going to show you a single, very important setting that will protect your shared mailboxes.
Block email with executable content
Start a new rule following the procedure above. Give it the name Block email with executable content. Then in the Apply this rule if… drop-down menu choose Any attachment… then choose has executable content.
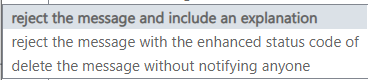
In the Do the following… box, choose Block the message.

And from the submenu, choose reject the message and include an explanation.
Click the link to write the explanation. This explanation will be visible to the end-user.

We are basically done with this rule. Now we just have a few housekeeping things to tidy up. In the Priority box, enter 0 or 1 or something very near to the top of your ruleset. These rules are process top down. Since this is a simple block message rule, I put it right at the top.

Finally, choose Enforce to activate the rules and check the box to Stop processing more rules because after we’ve blocked the message, there’s really no reason for Exchange to go any further.
Block auto-forwarding to external addresses
Start a new rule following the procedure above. Give this rule the name Block auto-forwarding to external addresses or something similar. This rule is a bit more complex, so we’re going to make use of the add condition button a few times.
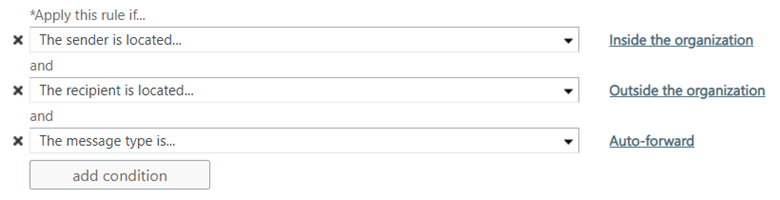
In the Apply this rule if… drop-down, choose The sender is located… option and then choose Inside the organization from the submenu. Then press the Add condition button and choose The recipient is located… and then choose Outside the organization from the submenu.

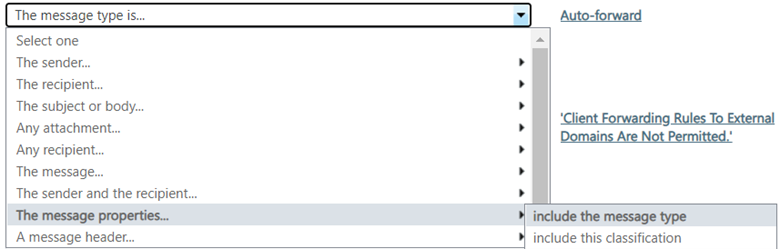
Now press the Add condition button again. This one is a bit tricky because what you’re going to choose and what the message will say in the rule we’re creating don’t match. Choose The message properties… from the menu, then include the message type from the submenu and finally pick the option auto-forward.
Once you’re chosen the correct options, your rule should, so far, look like the image below. What we’ve done here is told Exchange that there is a message whose type is auto-forward, and the sender is inside the organization, and the recipient is outside of the organization, so do something with that email.
The thing that we’re going to tell Exchange to do with that email is not to send it. In the Do the following… box, select Reject the message with the explanation… and then enter in the explanation that you’d like by clicking the link to do so.

This rule is now complete. We have found an occasional need to create an exception to this rule, most notably to send email alerts into a Microsoft Teams channel, and in that case, we simply click the add action button here and choose the Except if… option from the menu and choose the exception type you need.
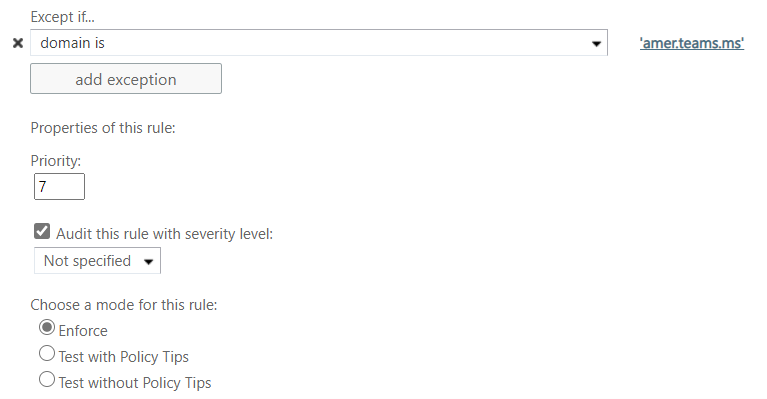
Finally, set the priority for this rule among your other transport rues and choose Enforce to activate it.
Encrypt on demand
While not technically a security rule (it’s more of a privacy rule), encrypt on demand is a critical one. There is so much correspondence that should be sent encrypted, but it’s often too difficult or lower on the priority list for admins that the deployment gets delayed. But it really shouldn’t be. Encryption is included in the 365 plans, and it is not difficult to configure. Microsoft has already done the hard part. All we have to do is set the parameters to allow our users to start using it.
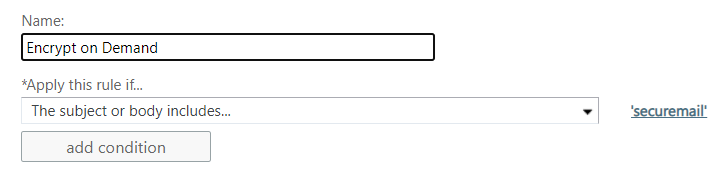
Start a new rule following the procedure above. Give this rule the name Encrypt on Demand. In this rule, we’re going to set a keyword that will trigger Exchange to encrypt the email and its attachments. In the Apply this rule if… box, choose The subject or body includes… option from the menu and then enter your keyword. Below you see that our keyword is securemail.
Now we need to tell Exchange what to do with the email that has the keyword. In the Do the following… box, choose Apply Office 365 Message Encryption and rights protection in the message with and then choose Encrypt from the submenu.

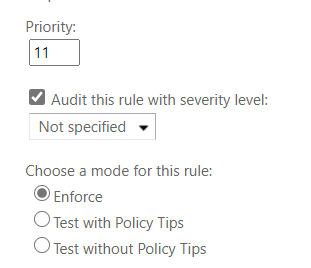
Set the priority for this rule among the others in your ruleset and then click Enforce when you are ready.
You’ll want to do a bit of training with your users so that they know what the keyword is, maybe even set up a Quick Step for them in Outlook, and then don’t forget to show them what the recipient experience is so in case they get any questions, they’ll be equipped to answer them. There are several options that the recipient will have to decrypt the email. If they are also a Microsoft 365 user, the decryption will happen automatically. If they aren’t, then usually the easiest option for them to choose to authenticate is the one-time password.
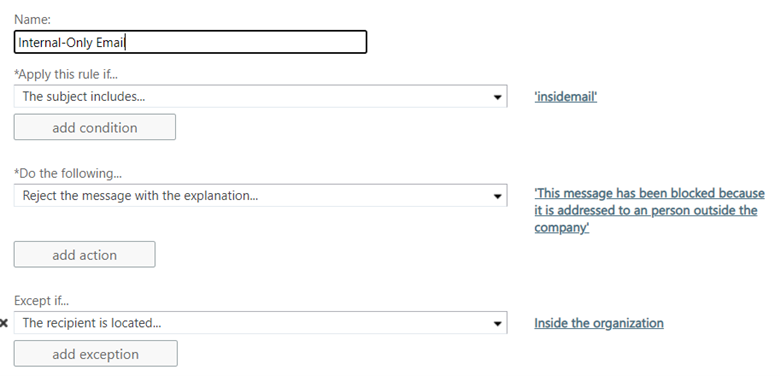
OK, one more useful Microsoft 365 email privacy rule
Start a new rule following the procedure above. Instead of me giving step-by-step directions for creating this one, see if you can make your way through it. The end result is that your end-users will have the ability to quickly make sure that an email doesn’t get outside of your company and into the hands of a competitor or customer inadvertently.
Now, the one thing you can do to improve the security of a shared mailbox
Drum roll, please… The way to improve the security of a shared mailbox is not to let anyone log into it. It seems counterintuitive — aren’t the users of shared mailbox logging into it? No, it turns out, not really. They are accessing the mailbox, but they never enter credentials for that mailbox as they do for their own account.
But wait, there’s no user account for shared mailboxes, you say. Oh, yes, there is. When you create a shared mailbox, an account is created, and a password is assigned to that account. Exchange handles that all in the background, and there it sits. Unchanged, not subject to your password rules or to MFA.
How we fix this problem is to forbid the logging on to the shared mailbox.

In the Microsoft 365 admin console, navigate to Users. The username for the shared mailbox will be the same as the mailbox itself. Click that user to open their properties. Then press the Block sign-in button. When you’ve done that successfully, it’ll look like the image above.
Microsoft 365 email rules: A foundation to build on
With just a few simple rules, we’ve greatly improved the security and added some privacy features to our Microsoft 365 mail environment. The work we did here today is what I consider to be the base standard from which you will then go forth and build upon. It’s a good foundation from which to grow.
Featured image: Business vector created by Freepik / TechGenix photo illustration