If you would like to read the next part in this article series please go to Moving Mailboxes in Exchange 2007, Part 2
There are many tasks that a typical Exchange administrator performs every day and some that aren’t performed often at all. Moving mailboxes is one of those tasks that some administrators perform more often than others. The most obvious example of when you move mailboxes is when users are moved from one Exchange server to another in the same forest, typically during a transition from Exchange 2000 or Exchange 2003 to Exchange 2007. However, there are other reasons when you’d do this, such as moving a mailbox to a new database that has a larger mailbox size limit, or perhaps a general balancing process whereby you want all your databases to be approximately the same size. Also, there’s the moving of mailboxes across forests to consider but this will be saved for another article.
One thing to consider that has tripped up many an administrator during mailbox moves is the fact that items in the deleted items cache, also known as the ‘dumpster’, do not get moved when the mailbox is moved. This can be frustrating to the users when they try to retrieve items that they knew were retrievable before the move occurred. Therefore, before you perform any mailbox moves it is always a good idea to inform the users that they should check their deleted items cache and retrieve any important emails before the mailbox move takes place.
Moving mailboxes from one server to another in the same forest is a really simple process that can either be achieved by using the Exchange Management Console or the Exchange Management Shell. If you are transitioning from Exchange 2000 or Exchange 2003, make sure you don’t try to move the mailboxes using Active Directory Users and Computers or Exchange System Manager, as that’s not the way to do it. As you may have read by now, Exchange 2007 no longer extends the Active Directory Users and Computers snap-in, meaning that recipient work is performed in the Exchange Management Console or via the shell. Let’s look at both procedures, starting with the Exchange Management Console first.
Moving Mailboxes via the Exchange Management Console
- Run the Exchange Management Console and in the console tree, navigate to the Recipient Configuration node and expand it.
- Under the Recipient Configuration node, select Mailbox.
- In the result pane you’ll now see a list of mailboxes within your Exchange organization. If this is the first time you are migrating user mailboxes, they will obviously still be located on Exchange 2000 or Exchange 2003 servers and thus will appear as a Legacy Mailbox as identified in the Recipient Type Details column. Mailboxes that have already been moved to Exchange 2007 servers will appear as a User Mailbox. The different types of mailboxes are shown in Figure 1 below where you can see that User3 is a mailbox still located on Exchange 2003.

Figure 1: Mailboxes Displayed in Exchange Management Console
- To move a mailbox, simply highlight the relevant mailbox, right-click it and choose Move Mailbox… from the context menu. Note that you can select multiple mailboxes at the same time. Choosing the Move Mailbox… option invokes the Move Mailbox wizard, the first screen of which is the Introduction screen as shown in Figure 2.
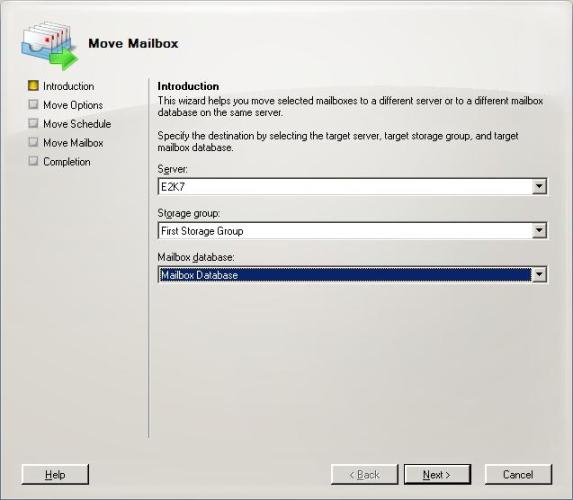
Figure 2: Move Mailbox Wizard Introduction Screen
- On the Introduction screen, select the target Exchange 2007 server, storage group and database that will house the mailbox that will be moved. When this is set correctly, click the Next button.
- Next, the Move Options screen is presented, shown in Figure 3. This allows you to control what happens if the move mailbox process encounters corrupt messages. Here you have a choice of skipping the mailbox and therefore not moving it, or skipping a number of corrupted messages. You can inform the move mailbox process how many corrupt messages you’ll tolerate skipping. In Exchange 2003, the maximum number of corrupt items you could specify was 100, but within the move mailbox wizard now, you can enter up to 2^31-1, or 2,147,483,647. If you ask me, 100 is more than enough since if you are seeing mailboxes with many corrupted items, you probably have a bigger problem on your hands. Once you’re happy with your choice, click Next.
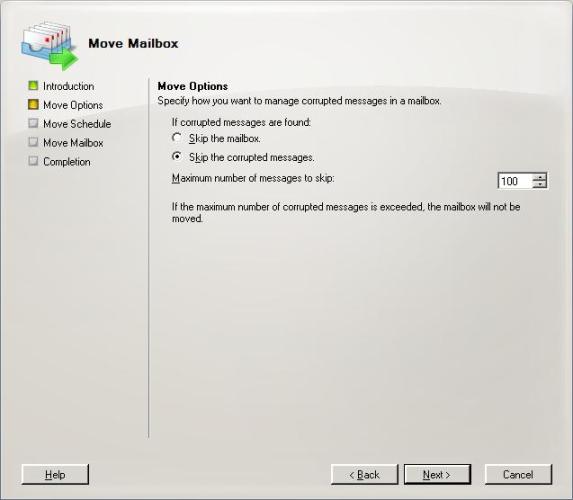
Figure 3: Move Mailbox Wizard Move Options Screen
- Next up is the Move Schedule screen, as shown in Figure 4. This allows you to begin the mailbox move immediately, or later at a scheduled time. This is invaluable during migrations, as it is likely you’ll want to move the mailboxes out of hours, perhaps in an unattended fashion. If you choose the At the following time option, the date and time is set to the current time, so you’ll have to choose your custom time when you want the move process to start. Also note the Cancel tasks that are still running after (hours) option, which allows you to specify how long the process will run before being cancelled. Again, this is particularly useful when moving large numbers of mailboxes overnight. For example, Figure 4 shows that mailbox moves will be cancelled after 8 hours, meaning that if they are started at 21:00, mailbox moves will stop at 5am, thus ensuring that any users that may arrive early for work are not affected. If a mailbox is in the middle of being moved at 5am in this case, this mailbox is moved back to the source server; all previously migrated mailboxes remain on the target server. Again, once you’re happy with your selections, click Next.
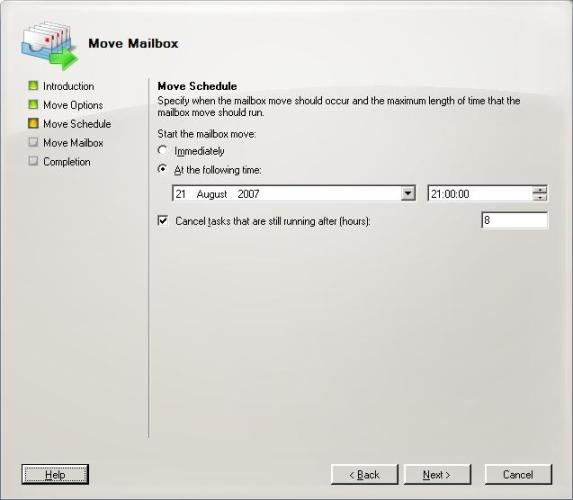
Figure 4: Move Mailbox Wizard Move Schedule Screen
- The penultimate screen to be displayed is simply a summary screen for the move operation that will be performed, giving you a chance to review the details of the move. Once you’re happy, clicking the Move button commences the mailbox move process. If you’ve elected to move the mailboxes at a scheduled time, the summary screen will then give you a countdown process as you can see in Figure 5. You can cancel the move process at any time by clicking the Cancel button.
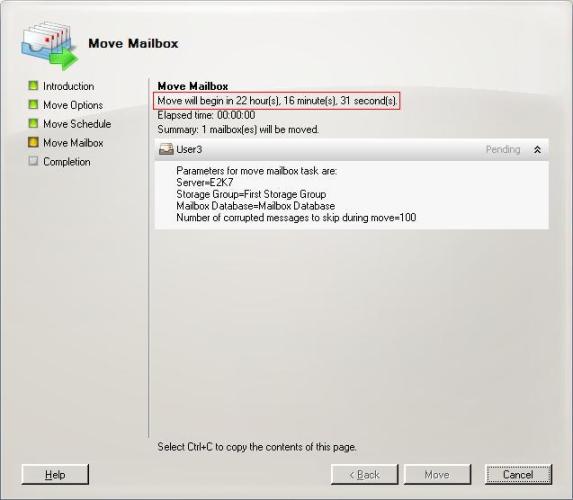
Figure 5: Move Mailbox Wizard Scheduled Countdown
- If you do choose to move multiple mailboxes at the same time, you’ll see a screen similar to the one shown in Figure 6 since the move mailbox wizard is multi-threaded. You can see that 4 mailboxes are being moved at the same time, with the 5th mailbox, User9’s mailbox, shown at the bottom with a state of Pending. Within the Exchange Management Console, it’s not possible to move more than 4 mailboxes at a time, although it is possible to change the number of threads when using the Exchange Management Shell, which we’ll look at in part two of this article.

Figure 6: Multiple Mailbox Moves
- If all has gone well, the final screen to be displayed will be a completion screen similar to the one shown in Figure 7.

Figure 7: Successful Mailbox Move
The Exchange Management Console cannot be used to move mailboxes across forests. To do this, you will need to use the Exchange Management Shell but as I said earlier we’ll only be looking at intra-organization moves in this article.
Exchange performs plenty of checks to make sure that the move mailbox process will be successful. For example, if you try to move a mailbox to an Exchange 2007 database that has a lower mailbox size limit than the actual size of the mailbox being moved you will see the error shown in Figure 8. As an example of another error check performed, you will see in Figure 9 that I managed to create a duplicate mailbox during some testing, resulting in the duplicate mailbox being deleted prior to another attempt to move the mailbox.

Figure 8: Mailbox Size Checking

Figure 9: Duplicate Mailbox Error
Diagnostics Logging
What do you see in the event viewer when the mailbox move process has been performed? Well, in my testing the same events are logged no matter whether the diagnostics logging is set to a low or high level. In the three event log entries below, you will see that all three have a source of Exchange Migration and a category of Move Mailbox. The first event to be logged is event 1006 as seen in Figure 10, where you can see that the process is getting underway. The source and destination databases are revealed as well as the Exchange DN attribute of the mailbox being moved which is out of view within the description area of the event.

Figure 10: Event 1006
Once the mailbox has been moved, event 1007 is logged as you can see from Figure 11. This is nice and self-explanatory.
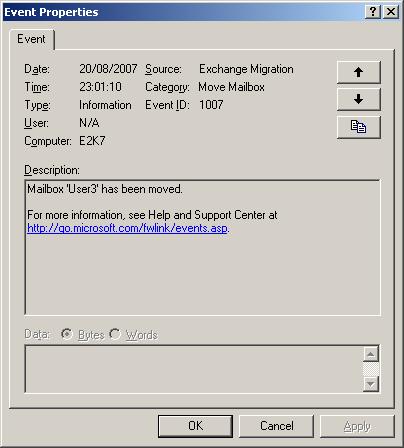
Figure 11: Event 1007
Finally, event 9354 is logged which informs you that the original mailbox has been deleted from the source database. This is shown in Figure 12.

Figure 12: Event 9354
Also, one other event log entry worth pointing out is something that was first introduced in Exchange 2003. It is generally considered a best practice to ensure that users are logged out of their mailbox when you move it. If the user tries to access their mailbox whilst it’s in the process of being moved, event 9660 is logged with a source of MSExchangeIS and a category of Logons. A sample of this event is shown in Figure 13.
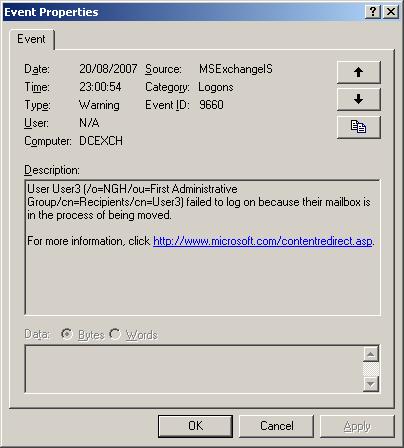
Figure 13: Event 9660
Summary
Moving mailboxes in Exchange 2007 is really easy when using the Move Mailbox wizard from within the Exchange Management Console. This wizard is largely the same in functionality as the one that came with Exchange 2003. In part two of this article, we’ll look at the log files generated by the process of moving a mailbox as well as using the Exchange Management Shell to move mailboxes.
If you would like to read the next part in this article series please go to Moving Mailboxes in Exchange 2007, Part 2


