Office 365 offers support for multifactor authentication (MFA) natively taking advantage of Azure Active Directory, and the entire process to enable and manage this feature will be described in this article.
Keep in mind that the most important point in the implementation is to establish the processes and procedures to enable the feature on existent and new users. Please make sure that you test and validate all possible scenarios before rolling multifactor authentication out to your users on a large scale.
Enabling multifactor authentication in Office 365
The process to enable MFA can be done from several places: Office 365 Admin Center, Microsoft Azure Active Directory, and PowerShell. For this article, we will use Office 365 Admin Center.
Logged in Office 365 Admin Center, click on Users icon, Active users and select the desired user. In the new blade, click on Manage multifactor authentication icon located in the More settings section. 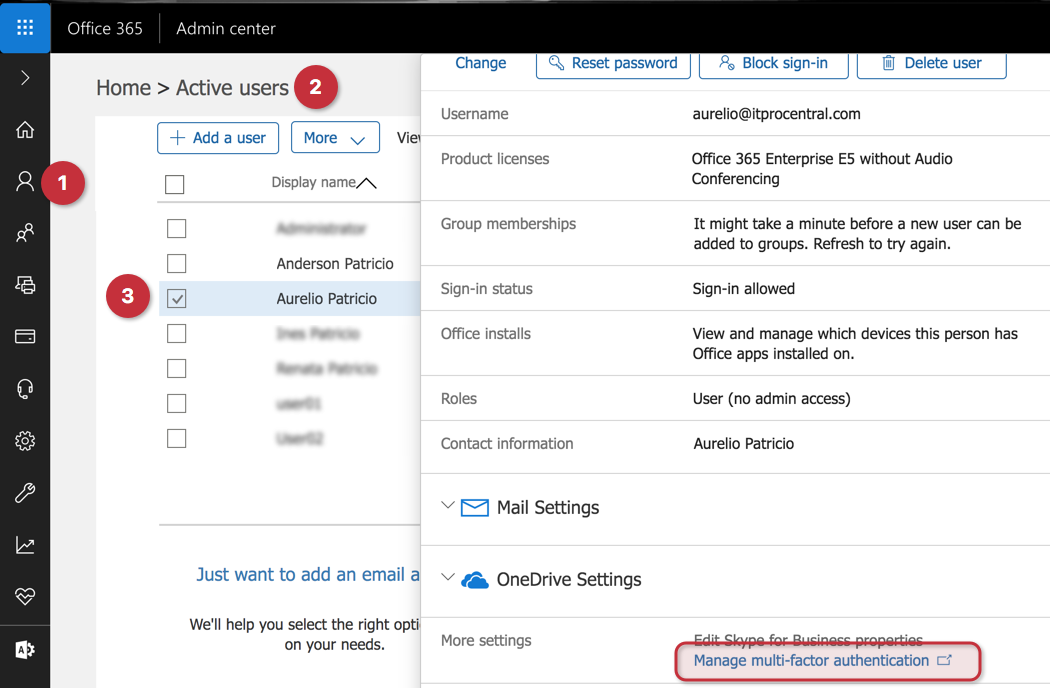
A new page will be open and that page is going to list all existent users with their current MFA status. Select the desired user and then select Enable on the right side.
A dialogue box will be displayed. Click on enable multifactor auth button, and another dialogue box will be displayed informing the result of the operation. The expected result is Updates Successful. Click on Close to complete the operation.
Note: The same page can be accessed when checking the users’ properties using Azure Active Directory in the Azure Portal.
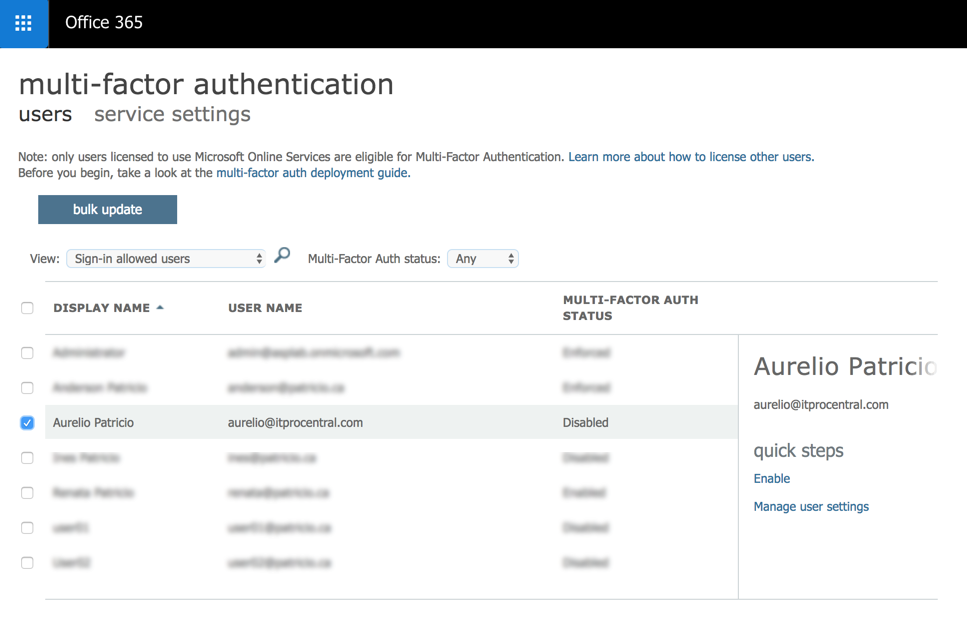
We can also manage specific settings of MFA for any given user by selecting the desired user and using the item Manage User settings.
Managing multifactor authentication service settings
Although we can configure individual settings related to MFA per user, the recommendation is to be consistent and use the same settings for all users. Only use individual settings when required.
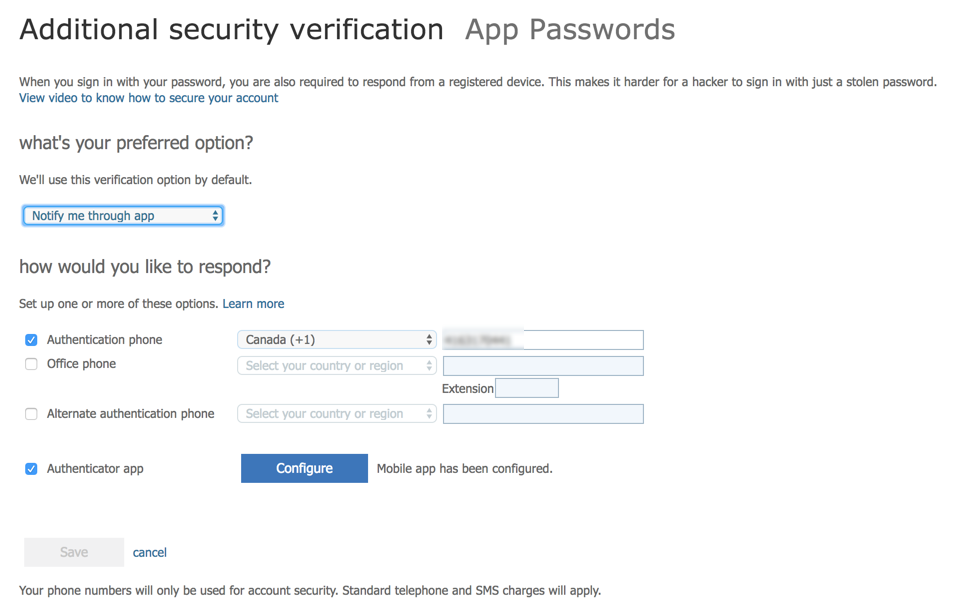
To configure global settings for MFA, click on service settings from the multifactor authentication page. In this page, we can define if app passwords will be used, and also which type of verification methods will be available for the end-user when configuring the service. The methods available are Call to phone, Text Message (SMS), Notification using Mobile app, and Verification code from mobile app or hardware token.
One last piece of information is how many days we can allow the user to authenticate without reauthentication (the process to use MFA again on a previously authenticated device).

End-User experience
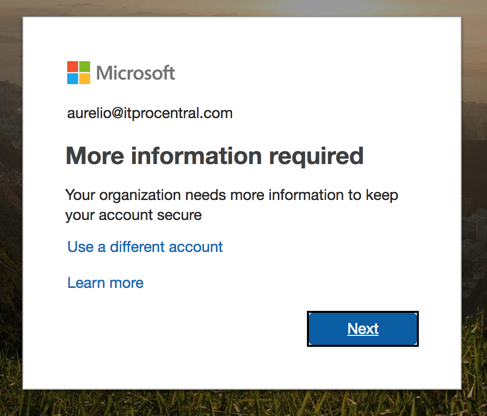
Click on Next to start the MFA configuration for the user. When you enable MFA for an end-user, the next time that user tries to log on a new warning saying More information required will be displayed.
The MFA process is simple to follow and it is comprised of a few pages where the end-user has to fill out the information to be contacted during the logon process.
In the Additional security verification page, the first step is to configure the primary method to establish the MFA. These are the options available: Mobile App, where we can configure if you want to receive the notification and accept/deny or type in a code; Authentication phone, where the user provides the phone number and has the option to receive a text or a call; the last but not least is Office phone, where we can define a number and extension. (This may be useful in some scenarios where the user must be inside of the company.)

In this article, we are using the Mobile App option and we want to receive the notification instead of typing a code, as depicted in the image above. Click on set up.
A new blade will be displayed with a QR code, which is the easiest way to configure the authentication on your mobile phone (we will get there in the next paragraph). If you don’t have support for camera on your phone (rare these days), you can use the code and URL informed on the same page to add to your app.
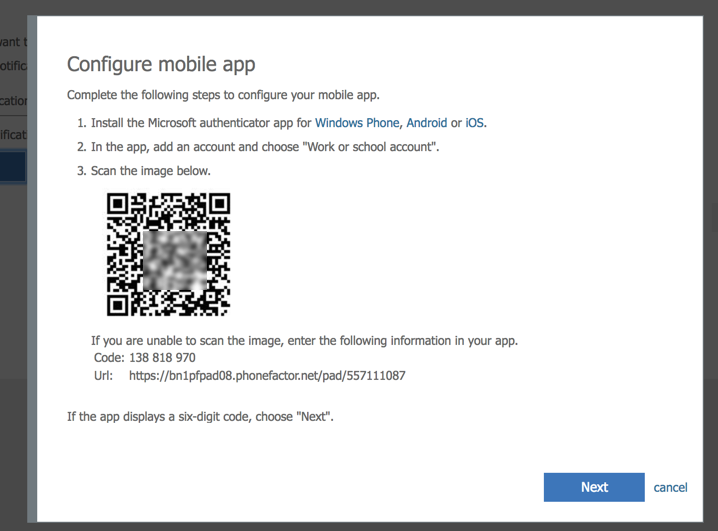
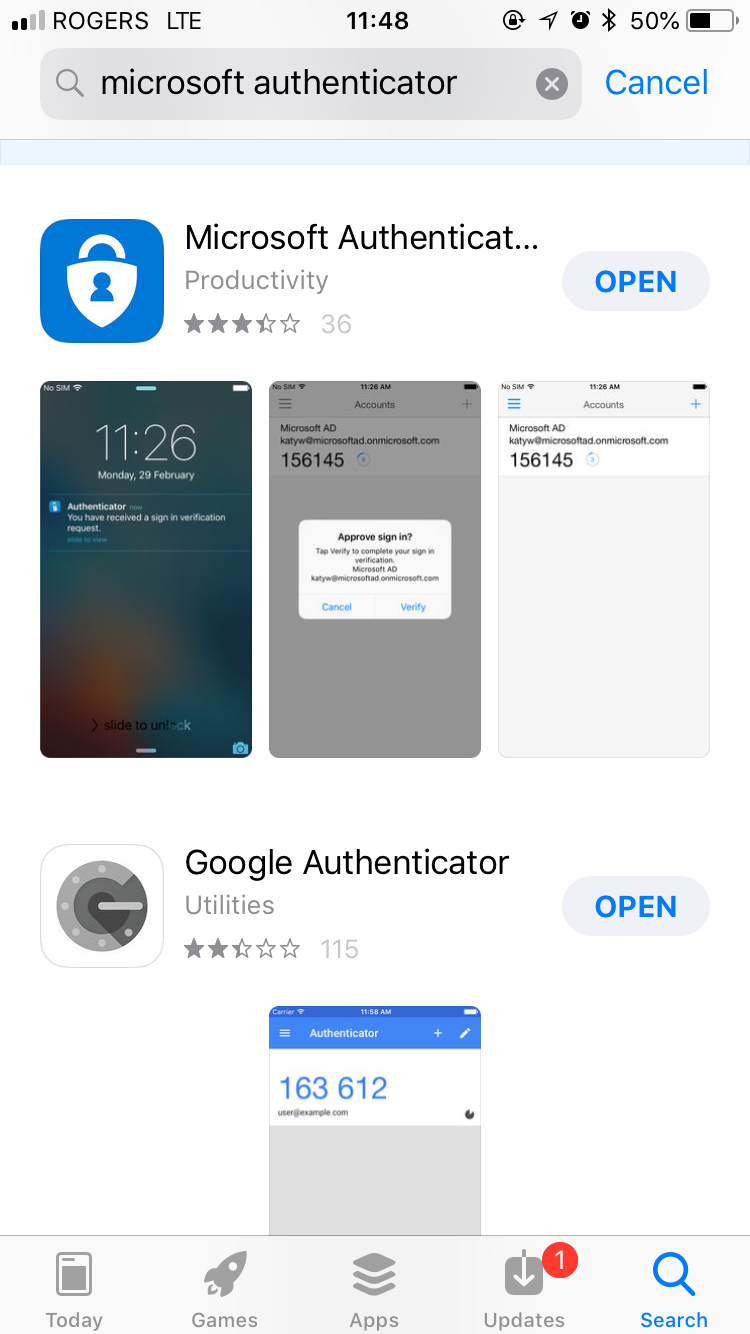
At the mobile side, the requirement is to have the Microsoft Authenticator installed. It can be found on your vendor’s store for free.
Open the Microsoft Authenticator, and click on + (Add), and from the list click on Work or School Account. The camera will be ready. Just point to the screen where the QR code is being displayed. That will be enough to add a new account to your authenticator. Yes, it is that easy!
After adding the account, the sign-in approval will require confirmation. Click on approve.

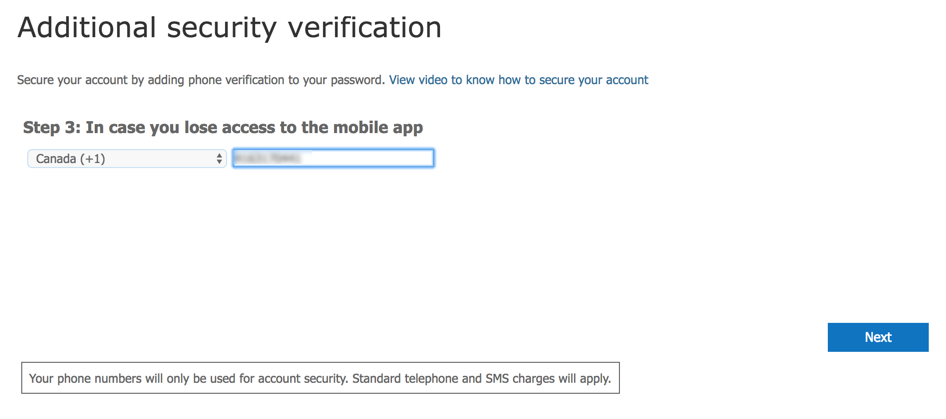
Going back to the webpage to complete the MFA, it is time to add a second method to avoid a single point of failure. Type in the phone number and click on Next.
The final page provides an app password where it can be used when using legacy applications that do not support native MFA.

Accessing end-user MFA settings after the initial configuration
You may be wondering, how I go back to configure the multifactor authentication? There are several ways to do that. An easy one is accessing this site or by clicking on the Profile icon (located on the upper right corner) to access the same page.
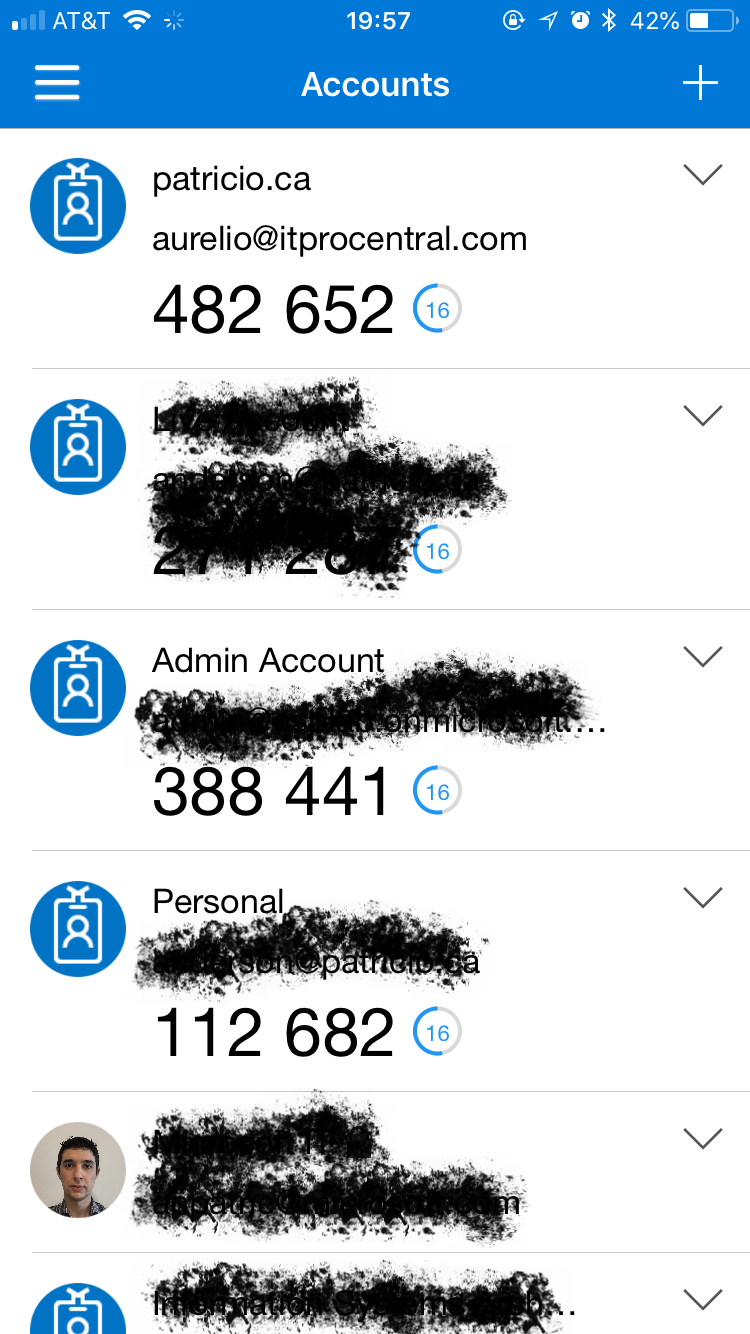
The initial page after the initial configuration has a summary of all authentication methods available and the ones already configured, as depicted in the image below.
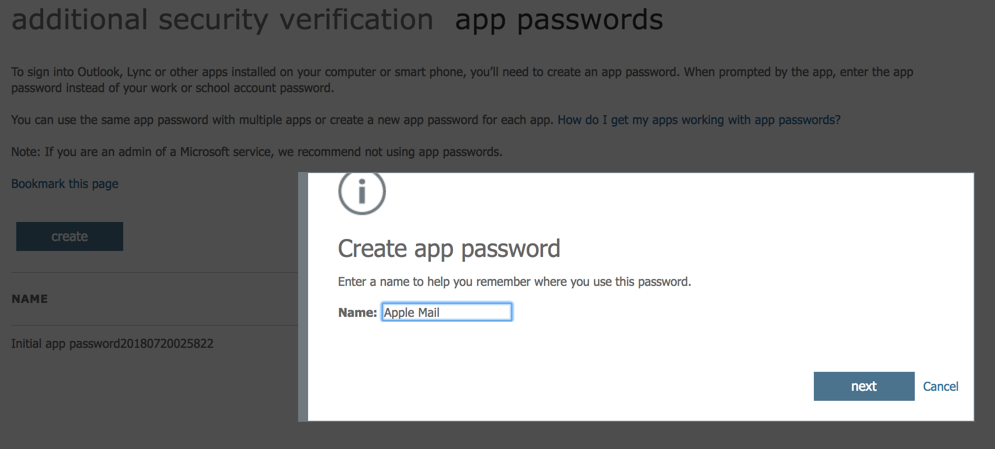
Another feature of this page is the ability to create app password. Using an app password, we can allow legacy applications to take advantage of the MFA, where users enter their username and the app password instead of the actual password to access the service.
We can have several app passwords in a single account. If you use a single one and if you have to change it, then all devices/software must be updated. In order to create a new one, click on Create and enter a description, click on Next. In the next page, the app password will be displayed copy it for future use. Click Close when complete.
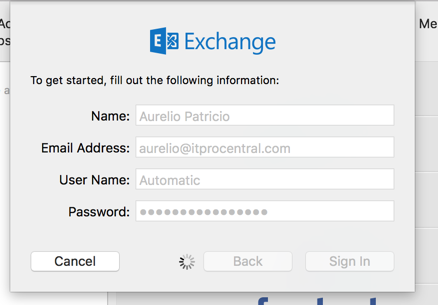
Be aware, when using a legacy application such as Apple Mail, we just need to enter that app password in the password field and the connection will be established.
Once you have followed these steps and enabled MFA, your company is more secure.
Featured image: Shutterstock


