Microsoft Exchange Online is a popular productivity suite, coming equipped with many advanced capabilities to improve your productivity and protect your information. Above all, its central admin and control interface provides complete visibility across all your apps. You can access this admin center through a web interface or with PowerShell.
PowerShell, though, is the better option to connect to Exchange Online. It’s the easiest and fastest way for you to manage daily tasks, apply settings across multiple accounts, change configuration values, etc.
In this article, I’ll give you a step-by-step guide on how to connect to Exchange Online with PowerShell. First, let’s touch on the basics: PowerShell’s added value.

Why Use PowerShell?
As I mentioned earlier, PowerShell is the easiest and fastest option to manage configurations and everyday administration tasks. Why? Consider these 3 main reasons.
1. Flexibility
First off, PowerShell gives a ton of flexibility compared to any web interface since you can control many parameters and their state of operations through code. You can even include programming logic, which changes the parameter’s state when a specific event occurs.
2. Bulk Execution and Automating Routine Tasks
A second reason is that PowerShell is the best choice for executing actions in bulk and automating routine tasks. When you implement these scenarios with PowerShell, you save a lot of time and effort.
3. Consistency
Lastly, PowerShell is consistent across user interfaces. Some browsers can render web pages differently than others. Despite the recent increase in standardization, some browsers still handle scripts differently. These inconsistencies don’t happen with PowerShell.
As you can see, you’ve got some compelling reasons to opt for PowerShell over most web interfaces. Now you know what PowerShell’s advantages are over web interfaces, so let’s move on and talk about the module that connects you to Exchange Online.
What Is the EXO Module?
The Exchange Online PowerShell module (EXO module) combines two PowerShell cmdlets: Connect-ExchangeOnline and Disconnect-ExchangeOnline. The combination prevents any memory leaks. You can also optimize it for bulk retrieval of records.
Currently, EXO module Version 2 (V2) is in use since it supports multi-factor authentication. The earlier V1 version will be retired soon, so I recommend you install V2. The V1 module also requires a more elaborate setup process. To add to this, the latest PowerShell doesn’t support all the cmdlets you use in V1. In summary, if you’ve been using V1, download and install V2.
Before you install V2, you need to make you have the minimum system requirements available.
System Requirements
PowerShell’s EXO module is what enables you to connect to Exchange Online. You’ll need the following system requirements to connect EXO with PowerShell.
Apple macOS
You’ll need:
- 11 Big Sur or later
- 10.15 Catalina
- 10.14 Mojave
Linux OS
The EXO module only works on:
- Ubuntu 18.04 LTS
- Ubuntu 20.04 LTS
Windows OS
The EXO module works on:
- Windows 10, 8.1 with the Win-10 Universal C Runtime (CRT)
- Windows Server 2019, 2016, 2012, 2012 R2 with CRT
Now that you’re all set, follow my step-by-step guide to connect to EXO.
How to Connect to Exchange Online with PowerShell V2?
Step 1: Prepare Your System for Exchange Online V2 Module
You have to install the EXO module V2 to connect to Exchange through PowerShell. Before you can install it, though, you need to prepare your system. Perform these 2 actions:
1. Change PowerShell’s Execution Policy
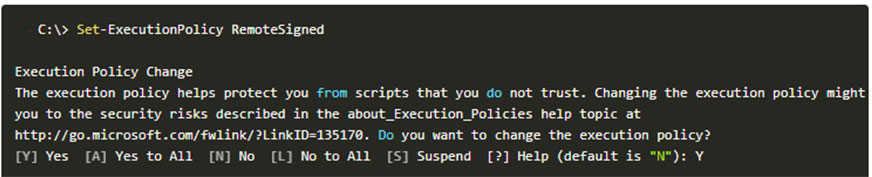
By default, you can’t execute scripts remotely in PowerShell. To run scripts, you can change the execution policy. To do this:
- Close your PowerShell window if it’s already open.
- Run PowerShell in admin mode.
- Execute this command:
Set-Execution Policy RemoteSigned
4. Press Y and Enter.
2. Install PowerShellGet
Next, you want to install the cmdlet: PowerShellGet. The syntax you need to use is available in the following screenshot:

You’re now all set to install the EXO module.
Step 2: Install EXO Module
Next, you need to install the EXO module. I mentioned the system requirements earlier, so double-check that your system meets them. My guide below includes steps for a new installation or version update, so feel free to jump to the relevant section.
New Installation
After preparing your system, install the EXO module. You can download this from the PowerShell gallery. Do note that the latest version runs only on PowerShell 7.0.3 or later.
Run the below command in an elevated (admin) mode to install EXO V2.
Install-Module -Name ExchangeOnlineManagement
If you want to install V2 for the current user only, add the scope parameter like this:
Install-Module -Name ExchangeOnlineManagement -Scope CurrentUser
Next, check if you’ve installed the module properly. Use the following code:
(Get-Module -ListAvailable -Name ExchangeOnlineManagement) -ne $null
If the result is empty, the EXO module isn’t installed properly. You’ll have to repeat the process or troubleshoot.
Version Update
Alternatively, if you already have an earlier version of EXO V2 installed, update it with the below command.
Import-Module ExchangeOnlineManagement; Get-Module ExchangeOnlineManagement
You can also restrict the scope to the current user using the scope parameter.
After finalizing the installation, you need to connect to Exchange Online with PowerShell.
Step 3: Connect to Exchange Online with PowerShell
We’re down to the last step. By now, you’ve installed the modules, but need to put them all together and connect to Exchange Online with your credentials.
- Use this code to connect to EXO:
Connect-ExchangeOnline -UserPrincipalName [email protected]
2. Enter your password in the sign-in window and click the Sign-in button.
If you’ve enabled multi-factor authentication, you have to go through some additional steps. Once approved, control goes to the PowerShell window. Here, enter your code to do whatever you want on Exchange Online through PowerShell.
As an admin, you can always check all the mailboxes in your Exchange Online. The code for this is:
Get-EXOMailbox | ft UserPrincipalName,DisplayName
Your result will look something like this:
| UserPrincipalName ————————– | DisplayName—————— |
| [email protected] | Techgenix Test |
| [email protected] | Techgenix Real |
| [email protected] | Techgenix Call |
After completing your work, make sure to disconnect Exchange Online. If you don’t do this, all your PowerShell sessions will expire, and you may have to wait for a new one. Run this command to disconnect:
Disconnect-ExchangeOnline
Now, you’ve completed your connection to Exchange Online through PowerShell. Most often, you don’t run into problems and the process moves smoothly. Yet, sometimes you encounter some common installation errors. I’ll now discuss 3 common errors and how you can mitigate them next.
3 EXO V2 Common Installation Errors
Installing the Exchange Online PowerShell module is easy. That said, the installation process can still result in some errors that prevent connection. This is especially due to outdated security versions and modules or depository errors. Consider these 3 common errors and how to address them.
1. Old TLS Connection
The PowerShell gallery only supports versions TLS 1.2 or later. This command checks your TLS version:
[Net.ServicePointManager]::SecurityProtocol

If you have an older TLS version, run the command below to update it. Ideally, run this command before you install EXO V2. If you didn’t do that, you have to uninstall the EXO V2 module, run this command, and install it again.
[Net.ServicePointManager]::SecurityProtocol = [Net.SecurityProtocolType]::Tls12
2. Outdated PowerShellGet Module
Are you getting this error?
The specified module ‘ExchangeOnlineManagement’ with PowerShellGetFormatVersion ‘<version>’ is not supported by the current version of PowerShellGet.
This error means your PowerShellGet module is outdated.
Use this code to install the latest version:
Install-PackageProvider -Name NuGet -Force
3. Wrong Default Repository
The error below means the default repository for PowerShell modules isn’t PSGallery.
“No match was found for the specified search criteria and module name ‘ExchangeOnlineManagement’.”
Use this code to set the default repository to PSGallery:
Register-PSRepository -Default
I’ve pinpointed some common errors you’ll get while installing the EXO V2 module, and the above solutions can fix them. After you fix these errors, try to connect to Exchange Online with PowerShell, and you should succeed.
In some cases, though, you might want to uninstall the EXO module. I’ll get into this next.
Uninstall the EXO Module
Finally, you can uninstall the EXO module at any time. Why would you want to do this? You may be getting repeated errors and can’t find their cause. Often, uninstalling the module and starting all over again does the trick. Sometimes, it makes sense to uninstall the module on incompatible devices, so it doesn’t affect other functions.
Use the command below to uninstall the module:
Uninstall-Module -Name ExchangeOnlineManagement
Final Thoughts
The easiest and fastest way to configure and maintain your Exchange Online is through PowerShell. Before you connect them, you have to change your PowerShell execution policy and install the PowerShellGet and EXO V2 modules. After installation, use your credentials to log in through PowerShell and execute your commands on Exchange Online. Follow my step-by-step guide in this article to easily install, troubleshoot, and uninstall the EXO V2 module. Need more Exchange Online and PowerShell guides? Check the Resources section at the end of this article.
FAQ
Can I connect Office 365 Exchange with PowerShell?
Yes, you can connect Office 365 Exchange with PowerShell using the EXO V2 module. This is a free module, but you’ll have to install it manually. You can download it from the PowerShell gallery and install it using the Install-Module cmdlet.
Does the EXO V2 module run on all Windows versions?
No, the EXO V2 module doesn’t run on all Windows versions. You must have the Windows 10 operating system. It also works on Windows 8.1, provided you have the Universal C Runtime. If you use Windows Server, it works on 2019, 2016, and 2012 releases. For Windows Server 2012 R2, you also need the Windows 10 CRT.
Can I install EXO V2 on Apple and Linux systems?
Yes, you can. EXO V2 works on Ubuntu 18.04 LTS and Ubuntu 20.04 LTS. For Apple macOS, it works only on macOS 11 Big Sur or later, macOS 10.15 Catalina, and macOS 10.14 Mojave.
Are there any prerequisites for installing the EXO module?
Yes. Your operating system must be compatible with the EXO V2 module. You also need the latest PowerShell version, and your default gallery must be the PowerShell gallery. You want to ensure you have the latest TLS and PowerShellGet versions. Lastly, change PowerShell’s execution policy to allow remote sign-ins.
What is the EXO V2 module?
The Exchange Online PowerShell V2 module, or the EXO V2, connects your PowerShell to Exchange 365. The advantage is that you can use PowerShell commands for quickly maintaining and performing daily administration tasks on Exchange Online. It supports multi-factor authentication as well.
Resources
TechGenix.com: Basic PowerShell Commands
Learn the basic commands in PowerShell to get started with this powerful scripting language.
TechGenix.com: PowerShell Wet-or-Dry
Click here to decide whether you prefer a wet or dry PowerShell.
TechGenix.com: Uninstalling Software Using PowerShell
Learn how to uninstall software using PowerShell.
TechGenix.com: Reading Text Files Using PowerShell
Click here to learn how to read text files using PowerShell.
TechGenix.com: Checking Windows Server Uptime with PowerShell
Explore 4 ways to check Windows Server uptime with PowerShell.
TechGenix.com: PowerShell for Microsoft Teams
Learn how to use PowerShell for Microsoft Teams.