Microsoft Azure and PowerShell are for everyone, including Microsoft, Linux, and, yes, even MacOS users. In this article we will be covering all required steps to get your MacOS ready to manage Microsoft Azure cloud using PowerShell! Microsoft is committed to cross-platform interoperability, and using PowerShell Core 6.x, which is based on the .NET standard library, they achieved that by introducing a new module that is supported on all platforms. If you are a MacOS user, there are plenty of tools for you, including Visual Studio, Azure CLI, Azure Storage Explorer, and of course, PowerShell!! So now you can socialize in Starbucks and manage Azure in your MacOS just fine.
Installing the basic requirements to support PowerShell in MacOS
There are some prerequisites that we need to install on the MacOS, and the first one is the command line tools, which we can do by running the Terminal application. There are several methods to find it: You can open Finder, and then double click on Terminal; you can always hit Command button and then hit the space bar, type in Terminal and select from the list that is being displayed.
The installation process doesn’t require any decision-making, just type in the command below and follow the wizard to complete the installation process.
xcode-select –install
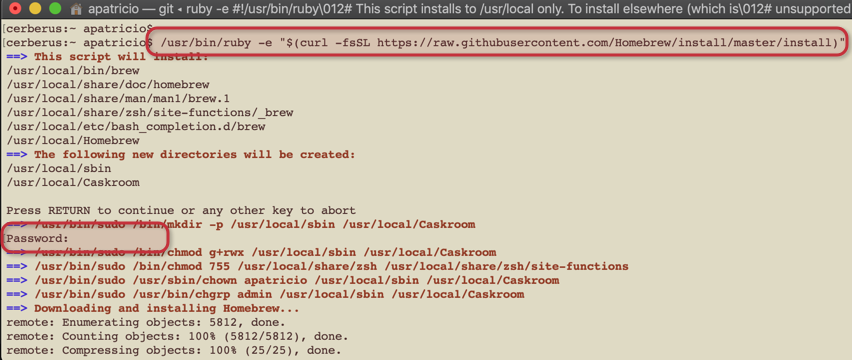
The second piece of software that helps a lot in the MacOS world is the homebrew utility, which is package manager for MacOs. The following command line can be used to install the homebrew on your MacOS using the Terminal application.
/usr/bin/ruby -e "$(curl -fsSL https://raw.githubusercontent.com/Homebrew/install/master/install)"
The installation process is depicted in the image below. (Yes, I do like the Novell Netware style that is available in the MacOS.) A password with administrator privileges will be requested. Type it in and hit enter.
Now that we have our package manager homebrew installed, we can install the openssl package, which is required to make the PowerShell remote work correctly. The following command line can be used to install it.
brew install openssl
Identifying your MacOS version
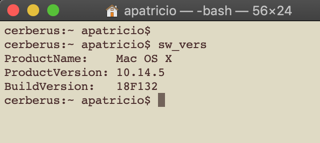
When running scripts and installation recipes from Microsoft, or any other site for that matter, they may require a specific version to install certain software based on your OS version. There are several ways to find out the version of your MacOS, and the first one is using Terminal running the sw_vers, as shown in the image below.
If you prefer the graphical user interface, not a problem — hit the “apple” on the top menu of your desktop, and click on About this Mac…

Installing PowerShell core
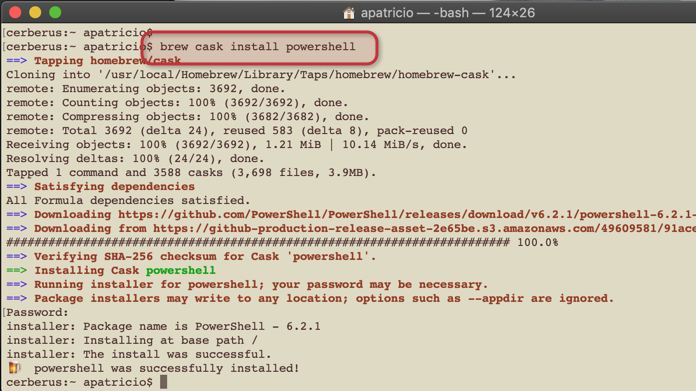
We have all the required prerequisites and some nice tools to help us to complete the process, which is the PowerShell installation. Using homebrew, we need to run this following command line. Your credentials to perform changes in the system will be required — make sure that you type them in and wait a few minutes to the installation to complete as depicted in the image below.
brew cask install powershell
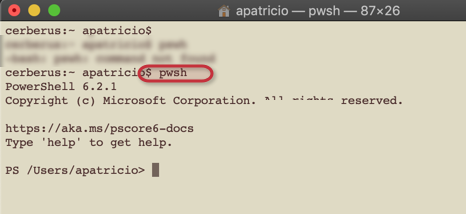
After the installation is complete, we can start PowerShell from the terminal by typing pwsh command, as shown in the image below.
In some circumstances, you will have to check the version of your PowerShell, and that can be accomplished easily by checking the variable $PSVersionTable

Getting Azure modules
Last December, Microsoft released the new AZ PowerShell module, and since then, that is the recommended way to connect to Microsoft Azure using PowerShell. When using MacOS and Linux, the PowerShell Core 6.x is the minimum requirement for that new module.
The new module introduces a naming convention change, instead of Verb-AzureRM<Something>, now we need to use verb-AZ<something>, which makes our lives more comfortable at the end of the day.
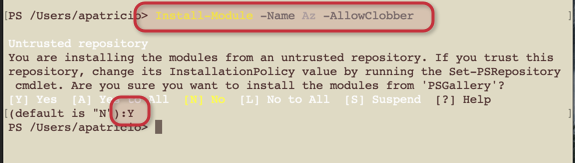
The installation process is simple. Logged on the terminal and with PowerShell running (you need to run pwsh), run the following cmdlet and when requested confirm by typing Y.
Install-Module -Name Az -AllowClobber
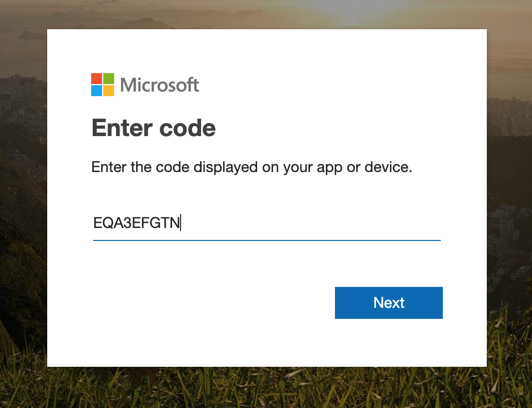
Now that we have the module in place, we can use Connect-AzAccount to connect to Microsoft Azure. The console will provide an URL, which we need to navigate in a browser session, and before opening our browser make sure to copy the code provided in the console.

Type in the code and click on Next. Now we are going to be requested to enter the credentials, and hopefully, you are using MFA, so make sure that you complete the entire authentication process.
After the authentication is complete, a page informing that “You have signed in to the Microsoft Azure PowerShell application on your device. You may now close this window” will be displayed. You can safely close that web browser session and return to the PowerShell console.
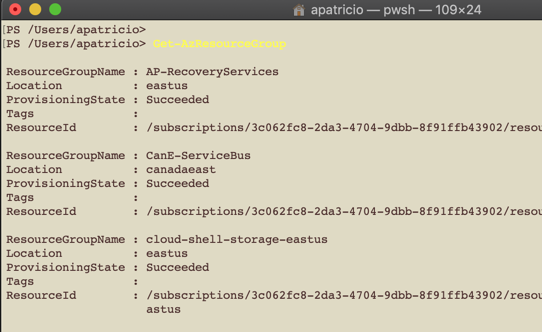
Now that we are appropriately authenticated and authorized in Microsoft Azure, we can run the same cmdlets that we run on Windows or Cloud Shell, and we will share the same experience to manage Microsoft Azure!
Using PowerShell in MacOS gives great flexibility to manage the Azure cloud. My personal preference is always PowerShell instead of Azure CLI for the simple reason to pipe and export data using PowerShell seems more natural to me than using Azure CLI.
Having the ability to Export-CSV, use my local editor to manage the files, and use the results is a game changer, at least for me.
If you are a MacOS user, give it a shot. You will be pleased for sure!
Featured image: Shutterstock


Hi, thanks for this guide. Quick read and to the point.
small note: on the way out, I noticed that your site is not https, and can’t be forced to be secure. You should grab a cert from a free provider
Thanks for the guide, it’s very helpful. Any plans on making one for Office365/Exchange?
After I install Powershell with this command: “brew cask install powershell”, I could not run powershell: “pwsh: command not found”
Looks like i need to add the symlink but i could not find where brew install powershell. Could you please help?
Have you tried opening another terminal window and trying to open pwsh again? Also you can just find it in finder to know exact path or (use “locate pwsh” from terminal).
Thanks. I managed to get it working, just uninstall and reinstall it
Hi Vitaly, great write up. I’m trying to run a powershell command “Revoke-AzureADUserAllRefreshToken” in mac. However, when I tab through the revoke commands there is only these four:
Revoke-AzDataShareSubscriptionAccess
Revoke-AzSnapshotAccess
Revoke-AzDiskAccess
Revoke-AzStorageAccountUserDelegationKeys
Any idea how to get the complete set of commands? Thanks!
Hello, when I try to export as csv to any temp directory like ~/Library/Caches/TemporaryItems/ and /tmp I get errors stating access is denied. I’ve tried creating a folder and giving read/write access to all users as well. How are you able to export csv’s?