If you missed the first part in this article series please read Public Folder Basics (Part 1).
Like mailboxes, public folders can also receive mail from the Internet. By default, public folders do not receive e-mail until you mail enable them.
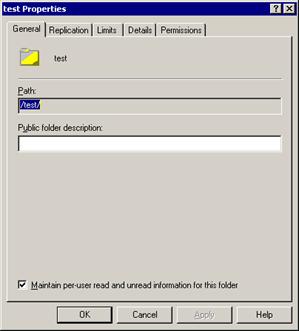
This is how the property pages of a public folder look when they are not mail enabled.
Figure 1
A public folder is mail enabled by using the Exchange System Manager.
Figure 2

Once a public folder is mail enabled we get additional property tabs, similar to those you might recognize from mailbox enabled users.
Figure 3
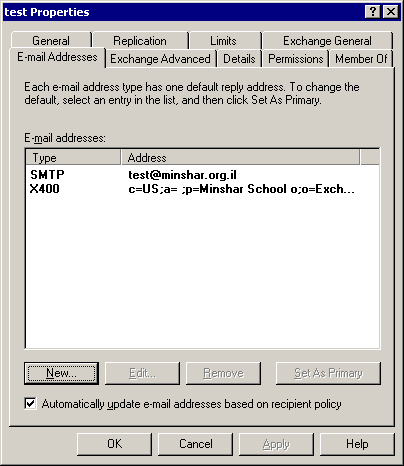
You can change or add e-mail addresses to suit your needs by editing the SMTP address or adding a new one.
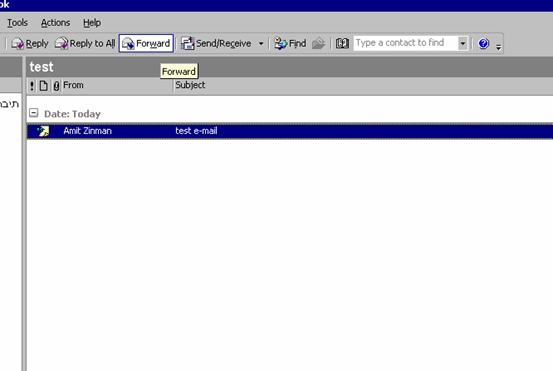
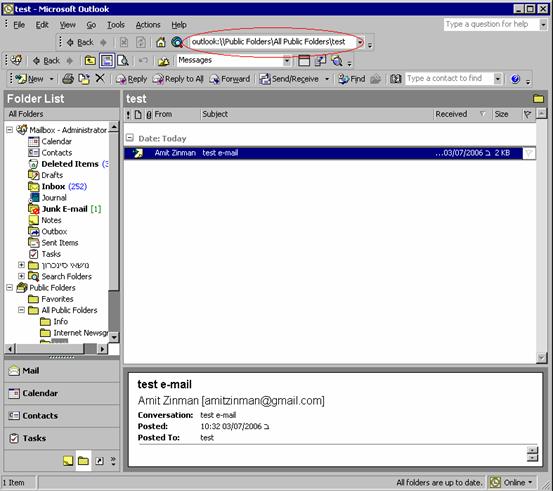
By going to the content tab of the public folder and entering an account with access to the folder you get a mini Outlook Web Access interface. I have sent an e-mail from the Internet to the public folder. Notice that instead of the envelope icon you get a post it icon, since Exchange treats e-mails sent to a public folder as posts.
Figure 4

This means you cannot reply or forward this e-mail. However, using the Outlook client, you can overcome this by using the Reply or Forward buttons in the toolbar without opening the post itself.
Figure 5
Folder Automation
While the word “automation” is generally associated with scripts and programming, Outlook and Exchange provide some surprisingly strong automation features that require no scripting at all.
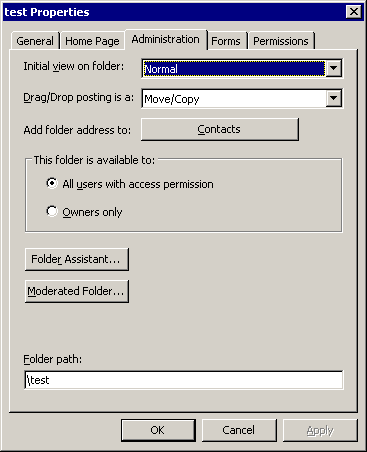
The Administration property page of a public folder is where this magic happens. When you press “Folder Assistant” you will be presented with a few automation options that you can create by using rules.
Figure 6
Figure 7

If this looks familiar to you, you might have seen a similar dialog box for it in the Out of Office options.
Figure 8

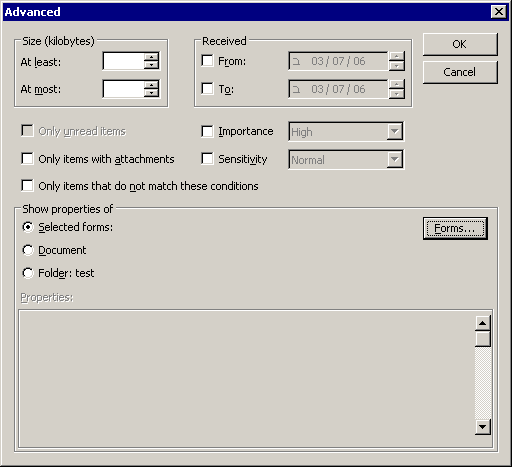
Don’t forget that you also have some Advanced options.
Figure 9
I’ve used the folder assistant many times in conjunction with other software automation. For example, a service on the Internet would send some data to the public folder and it would then, according to the subject, forward the information to the right person or group.
Another such scenario is a public folder which contains information that needs to be accessible to an outside contractor. Sure, you can set up some other forms of Internet access, or instead, simply forward relevant information to your outside contractor or field agents.
The “Reply with Template” option can be used in help desk scenarios where the customer needs to know that someone is taking care of him or her. Sure, this can also be done with a mailbox, but remember: public folders are cheaper and more accessible. Also, the rules run server-side even when Outlook is running.
Another way that this can be used is to help you better monitor backups. Most backup utilities will e-mail you the results. After a while, if you’re a busy administrator, there’s a chance you might start ignoring their sometimes cryptic messages which can get lost inside your mailbox, and sometimes even find their way to your Junk e-mail. Instead, why not set up a public folder for these messages, and have the folder just forward critical errors? On second thought, why stop there? Most applications these days will send you some kind of a notification, and monitoring applications, such as Microsoft Operations Manager, will send you even more. I find that using a public folder is more tidy while leaving you the option to forward important mail to your mailbox, or perhaps an Internet pager.
You might have noticed that a folder can also be moderated as well, by using the Moderated Folder button in the Administration tab of the public folder property pages. For more information about this you can read this excellent article.
Shortcuts
What happens if you wish to access a specific public folder?
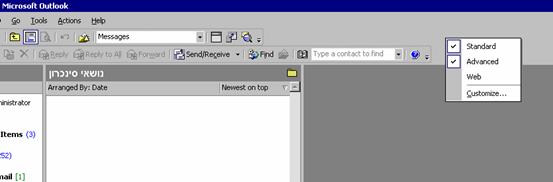
Inside Office you can use a hyperlink to access your folder. The easiest way of constructing such a link is by using the web toolbar in Outlook. To enable this toolbar right click the toolbar area and choose “Web”.
Figure 10
On the web toolbar you will now see the link to whatever folder you are using at the moment.
Figure 11
You can insert these hyperlinks to an e-mail message or any other office document by using brackets.
Figure 12

After pressing “Enter” the hyperlink will be created. Such hyperlink will also work in Internet Explorer but you will have to replace Spaces with “%2520”. In our example the URL will become:
outlook://Public%2520Folders/All%2520Public%2520Folders/Test
You will probably also get some security warnings too, for trying to launch an application from Internet Explorer. Alternatively, you can use an Outlook Web Access URL such as this: http://exchange/public/test. Unlike the Outlook client URLs, spaces are replaced by %20, like this: http://exchange/public/Internet%20Newsgroups/
Make sure to replace, in the above examples, “exchange” with the name of your own Exchange server. You can also drag an Outlook folder to your desktop or any other folder on your hard drive to create a shortcut. The shortcut is a special Office file with extension XNK. It can be copied to other machines or moved to one of the shortcut toolbars.
I hate to leave without leaving a piece of coding, so here is a code for accessing a folder with VBScript (or VBA):
‘ActiveateTempPublicFolder.vbs
Set myOlApp = CreateObject (“Outlook.Application”)
Set myNameSpace = myOlApp.Application.GetNamespace(“MAPI”)
Set myfolder = myNameSpace.Folders(“Public Folders”).
Folders(“All Public folders”).Folders(“Test”)
Myfolder.display
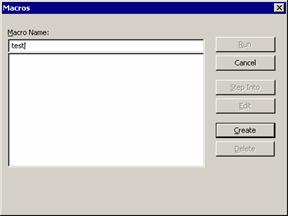
You can use this code to create an Outlook button. First create an Outlook macro.
Figure 13
Figure 14

Then place the code into the Microsft Visual Basic Editor.
Figure 15

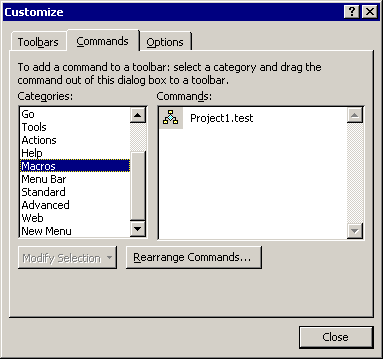
Now exit the editor and return to Outlook and choose Tools | Customize. From the list of categories select Macros.
Figure 16
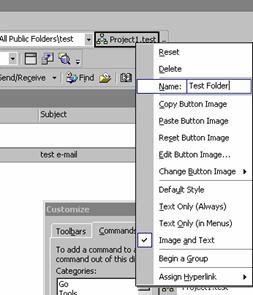
Then drag our macro to a tool bar.
Figure 17

Rename the button to make it more readable by right clicking it and choosing “Name:”.
Figure 18
Press “Close” button and now your button is ready to use. Please note that you can create your button in any Office application, not just Outlook.
Conclusion
As you can see the more you dig, the more possibilities you have for using and accessing Public Folders. With very little effort you can maximize the use of your investment in Exchange and while at it, tailor your system for ease of use.
If you missed the first part in this article series please read Public Folder Basics (Part 1).


