If you would like to read the other parts in this article series please go to:
- Publishing a Public Key Infrastructure with ISA Server 2004 (Part 2)
- Publishing a Public Key Infrastructure with ISA Server 2004 (Part 3)
Introduction
Security certificates are configured on ISA Server for a number of purposes, such as SSL in Web publishing rules or IPSec certificates in L2TP VPNs and IPSec tunnels. It takes just minutes to start up certificate services on a server and have this ad-hoc ‘Certificate Authority’ (CA) issue certificates for these purposes. But do they really work as they should?
Consider a scenario of asking a number of outside users to access your SSL protected site – let us say they work for a partner company on a shared project you have. You quickly get phone calls telling you their browser complains about not trusting your certificates. Okay, so you email everyone a copy of the CA’s certificate with instructions on how to install it. Later they’re ringing back saying their browser complains about ‘revocation’ lists. What now?
Certificates issued from a default install of Microsoft certificate services will have many settings or properties which make them work well within the confines of your network. Installing an ‘Enterprise’ CA provides well suited certificates for use within your Active Directory domain. But put these certificates on your ISA Server where they’ll be picked up across the Internet and some of the functions within the certificates become meaningless nonsense!
Figure 1: Opening a certificate will get you its properties sheets. Here is the details page of a root certificate created by a default install of Microsoft Certificate Services and showing information of little use on the Internet. You cannot edit these properties after the certificate is created

This article is about making those properties make sense when used externally with ISA Server. In Part 1 I’ll explain a little about certificates and what this article is attempting to accomplish before going on to do the groundwork of establishing a “distribution point” with ISA Server 2004.
Part 2 is dedicated to installing the “root” CA, the lynchpin of a Public Key Infrastructure or PKI.
Part 3 will cover installing an issuing CA and testing the result.
The AIA and CRL Distribution Points
A certificate is primarily a vehicle for distributing the ‘public’ key of a key pair used to encrypt data. The certificate also has properties stating who is using this certificate, for what purpose, for how long, who issued it and other data used to ensure no-one has been meddling with the contents. The two settings this article concentrates on are the ‘AIA’ and ‘CRL Distribution Points’ (CDP). Both are ‘extended’ properties and not found on all the certificates out there.
These two properties can both use the help of ISA Server 2004 to function as they should.
Authority Information Access
Less terrifying when abbreviated to ‘AIA’, it describes one or more network locations where you can find a copy of the certificate of the CA who issued this certificate. If that isn’t a root CA this next certificate may have an AIA describing the location of a copy of its issuing CA’s certificate, and so-on. Ultimately this ‘daisy-chain’ should lead to the root CA’s certificate.
The locations may describe an Internet URL (HTTP or FTP), an address within a directory such as Active Directory (LDAP) or even a file on a network share.
With this information a computer can fetch a copy of a root CA’s certificate and any certificates in between without you ever sending certificates to manually install.
Figure 2: You’ve accessed a SSL protected Web site and got this message! Go ahead and ‘View Certificate’

Figure 3: This certificate has no valid AIA field or the distribution point is inaccessible and as a result there can be no download of the certificate chain

Figure 4: This certificate has a valid AIA field pointing to an accessible location and as a result the computer has downloaded the entire certificate chain back to the root CA. View the root CA certificate and you have the option to install it from that certificate’s General properties page

Certificates from major certificate vendors may have no AIA field: Their CA certificates are so globally trusted your operating system came with them already installed!
CRL Distribution Points
The ‘Certificate Revocation List’ or CRL is what it says it is; a list of certificates that have been revoked and made invalid by the CA that issued them. This list is a security feature allowing certificates to be invalidated before their stated expiry date, and this is why browsers can be configured to complain if they can’t check a certificate they’ve received from a server against the CRL the certificate has specified.
The location of a certificate’s issuing CA’s CRL appears in a certificate much like the AIA property described above. Again, the field may contain more than one ‘distribution point’.
AIAs, CRLs and the Root CA
The root CA is the ultimate top level authority in any PKI. PKI, by-the-way, just describes a collection of CA servers with a single common root CA (okay, you can have more than one root CA in a PKI; but we will not be going there!).
Because the root CA is the top of the PKI tree, its certificate has no AIA field because there is no CA above it. You can have a CRL Distribution Point despite there being no CA above it to issue the CRL; a default install of MS certificate services as a root CA has one specified but in reality it has very little useful purpose.
Creating a Distribution Point
Before attempting to install your new PKI you should first consider where you are going to locate your AIA and CRL Distribution Points and the URLs that will be used. Because the certificates we wish to issue are to be used externally with ISA Server, locations that use the file system or LDAP are not much use, so an HTTP location is required.
Microsoft creates a default HTTP location for certificates issued from its certificate services, but this will be awkward to use and we will be changing it.
First consider the HTTP URLs. You can probably arrange to use the same URL externally as on the LAN even if you use different Web servers for each purpose: As you are using ISA Server you have probably already tackled this situation of ‘split’ DNS.
Example URLs are ‘http://certificates.company1.local’ or ‘http://www.company1.local/certificates’. One should be enough, but if you do need two URLs (e.g. you can’t arrange ‘split’ DNS) so be it.
Both IIS and your CAs will need access to the file locations that will store the AIA and CRL files. For the example in this article the location will be C:\InetPub\wwwroot\certificates on a server running IIS and the share will be named Certificate$. You will create locations that suit your network, possibly on established Web servers. One location may be enough, if not, create more.
Figure 5

Security on the distribution point should include the domain local Cert Publishers group with Modify access and the local Internet Guest Account with Read access. The share permissions will also allow the Cert Publishers group to have modify access.
Cert Publishers is a protected group in a Windows 2003 domain whose members are the machine accounts of servers with certificate services installed.
Creating the HTTP Distribution Point
Having created a folder share this now needs publishing using IIS. Note these steps apply to the example used for this article, and you may have elected to use existing Web servers, more than one distribution point or other alternative configurations, so adapt the following to suit.
In this article the HTTP distribution point URL will be http://certificates.company1.local which will require a separate virtual server in IIS. You might adapt the “Default Web Site” and use an URL such as http://www.company1.local/certificates. You’ll be using an Internet valid top-level domain in your URLs, not ‘local’ as used here!
Another option is to adapt the default URL created by installing certificate services to something like http://www.company1.local/certenroll which would save some of the configuration effort detailed later in this article. I rather doubt many people would be comfortable using a Web server for external access on a security sensitive CA server.
Configuring Internet Information Services (IIS)
To start, open the Internet Information Services console on the chosen server with the WWW services installed.
Right-click Web Sites and select New and Web Site. The Web Site Creation Wizard starts:
- Click Next to the Welcome page and enter something like CA Distribution Point Web Site in the Description box. Click Next.
- Under Host header for this Web site enter the DNS name in your distribution point URL (for this example that will be certificates.company1.local). Do not change the default TCP port. Click Next.
Figure 6

- Use Browse to locate the shared folder created earlier. Anonymous access is essential.
Figure 7

- Only the default Read access is required, so click Next on this page. Then click Finish on the final page.
Figure 8

The HTTP distribution point is complete, but there isn’t much in there at the moment. For the purpose of testing internally you may go into the properties of the new site and enable browsing.
Configuring Internal DNS
Open the DNS console and navigate to the appropriate forward lookup zone. Right-click the node for this zone and select New Host (A). Enter certificates under Name and the IP address of Web server. Click Add host and confirm.
Figure 9

Publishing the HTTP Distribution Point with ISA Server
The point of these articles is not only to create a flexible PKI, but also to have certificates that bear up outside your local network. For that we need ISA Server 2004 to publish the HTTP distribution point just created. We are probably all fairly familiar with creating Web server publishing rules, so I’ll only skip through the steps here.
On ISA Server 2004 start by creating a new Web server publishing rule.
Figure 10

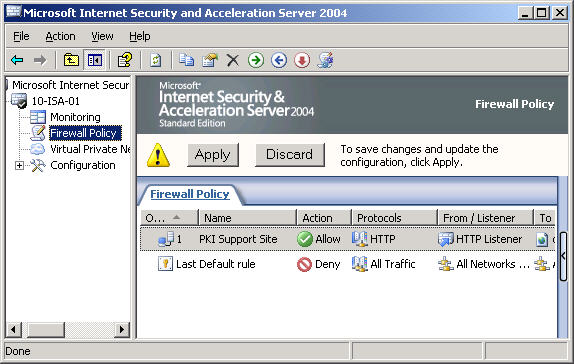
- Chose Web Server Publishing Rule from the right-click pull down menus of Firewall Policy.
- The New Web Publishing Rule Wizard opens on the Welcome page and requires a name: My choice is “PKI Support Site”. Click Next.
- The Select Rule Action page will want to be Allow of course. Click Next.
- The next page is Define Website to Publish.
Figure 11: The Web site created above was certificates.company1.local; you enter whatever you created. At this stage you can set the Path to everything by entering /*. Click Next

- Next is the Public Name Details page.
Figure 12: Accepts requests for is configured to This domain name (type below). The example here uses the same URL for external access as internal (split DNS). You may be making other arrangements. Click Next

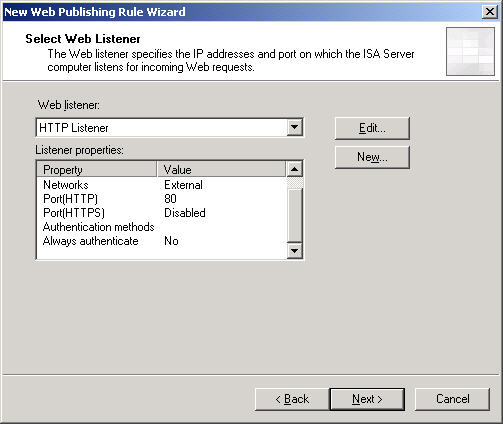
- There follows the Select Web Listener page.
Figure 13: You may need to create a new listener with the Add button. What is important is that this listener does not demand authentication and listens on port 80; nothing else will work. It will be listening on the External network. Click Next
- On the User Sets page leave the default All Users in place: this site must accept anonymous access by anyone. Click Next and the Finish on the final summary page.
Figure 14
Before clicking Apply you may wish to open the properties of the new rule and severely restrict what external anonymous users can access from this rule.
Figure 15

This is probably getting a bit ahead as we haven’t created these files yet. By listing the individual files here on the Paths page you will precisely limit what users can access with this rule. It is feasible to restrict by individual files because there will only be a very limited number of files (four here) to publish.
Configuring External DNS
On your external (Internet) facing DNS server add an entry pointing to the IP address of the configured HTTP listener on your ISA server. My example uses “Split DNS” so the name on the external DNS is the same as on the internal BNS (“certificates.company1.local”).
Conclusion
So far there’s been nothing ground-breaking in the example configurations demonstrated above. But this work prepares the foundations for the PKI that will be created in Parts 2 and 3. We now have three essential parts for our PKI: A folder share (here \\DC01.company1.local\Certificate$) to receive certificates and CRLs; a Web site to publish the files in the folder using HTTP (the example used being http://certificates.company1.local) and the ISA Server 2004 Web server publishing rule to publish the Web site out to the Internet.
Your names will of course be different, you may even have opted for two or more shared folder locations and maybe two or more Web servers to publish the folders. Whatever chose, you should establish these components before going on to the next steps because the names you use here are to become very important when establishing your PKI.
If you would like to read the other parts in this article series please go to:


