Recovering a deleted message from a channel conversation in Microsoft Teams isn’t a smooth process. When I first needed to do this, I thought, well, since I know that these are stored in Exchange, I’ll just go ahead and mount the mailbox. Seems logical. But no, turns out it doesn’t work that way. Instead, Exchange is storing these as IM messages, which is a technology in Exchange that I thought had died out years ago. I was wrong. But because they are stored as IM messages, we can’t simply mount the mailbox. Instead, we have to use Content Search to find the IM message, download it, and then manually place it back into Teams. After I wrote this all out, I thought to myself: read it and weep. There really needs to be a better process for recovering Microsoft Teams messages, and Microsoft should provide it. It won’t happen often than a message needs to be restored, but it will happen often enough. IT admins deserve a better process.
Here’s how that process works. When a post is deleted in a Teams channel it looks like this:

Supposedly, only the original poster can delete it but, in this case, the original poster was me and several of my posts recently went missing and I don’t recall deleting any of them. Unfortunately, there is no audit trail for conversations in Teams to be able to track activity. Just as sadly, the restore process is very manual and not a pretty result. The result that we’re able to achieve is to obtain a copy and post it in as a comment to the deleted post noting that it is the original. Like this:
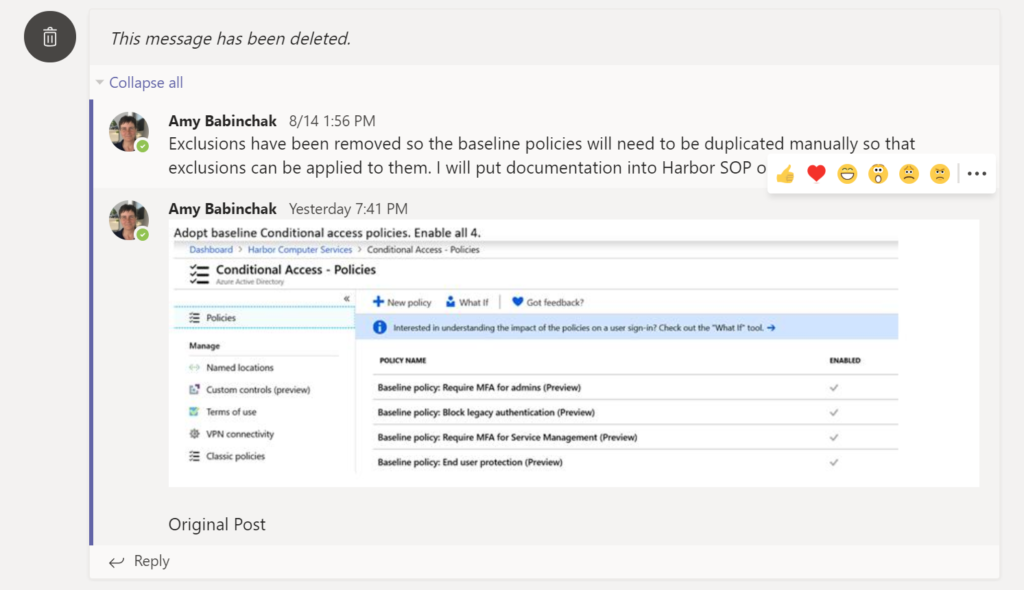
Note that I had to type the words “Original Post” to note that this is what it is. Your other option is to make it a new post. I think that adding it as a comment to the deleted post is the better bad choice because then at least the post is in the same place as the rest of the thread.
Performing the recovery
Go here to open the Security and Compliance Center. Then navigate down the menu to choose the Content Search item under Search. 
Create a content search by clicking the New search button 
The first condition that will be populated is the keyword. Enter keywords if you have an idea of what words you are looking for. Keywords are not required so you can also remove this condition. For my search, I did not need keywords but I still needed to narrow the search criteria to not get buried in results.
The conditions I suggest to add are as follows:
Date: This allows you to search within a specific date range. The date range you select should be the date when the original post was made. If you don’t know the date, you might be able to guess by looking at the replies. In Teams, most posts are replied to pretty quickly. Try to narrow the date range as much as possible. While I started with 15 days, in looking at the results I was eventually able to narrow it down to only seven days.

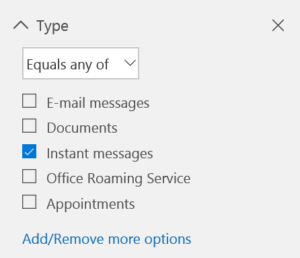
Type: Here you want to select Instant Messages because conversations are stored in Exchange as an IM.
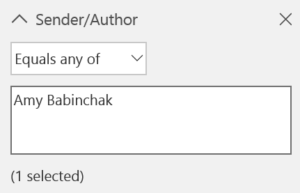
Sender/Author: Here you want to select a single person. I have had mixed results when selecting more than one although it does allow you to do so. It is supposed to work with multiple people selected so it may work for you.
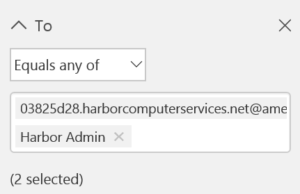
To: Here you will enter the address of the channel or group. Again, I’ve had mixed results adding more than one email address, so one is best. You can find the email address of a channel by clicking the … next to the name of the channel and choose Get email address from the menu.
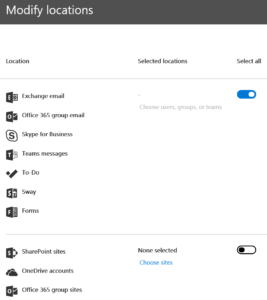
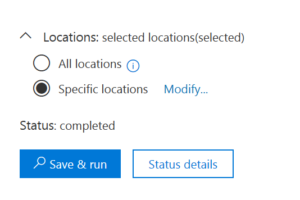
Finally, under Locations, choose specific locations and toggle the top switch to include Exchange.
Once you have everything set up, click the Save & run button.
It will take a very short amount of time for the request to be completed. A minute or two is normal. The larger the number of results, the longer it will take and the more difficult it will be for you to locate the information that you’re looking for.
Reading the search results
Once your search has been completed, you have an opportunity to preview the results to determine if the item that you’re looking for is likely in there or not. You should tweak your conditions to narrow the search as much as possible to receive the fewest most relevant results.
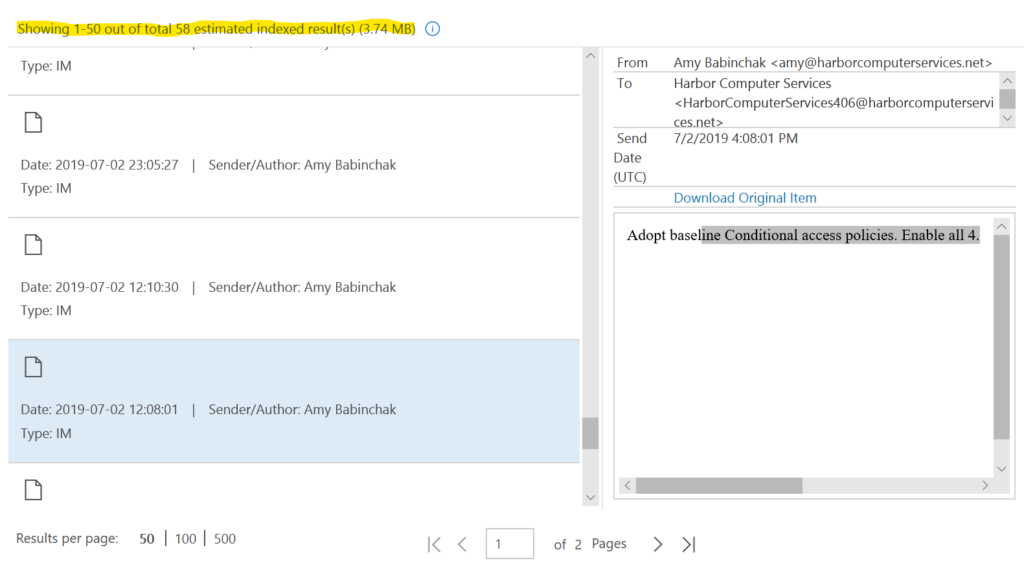
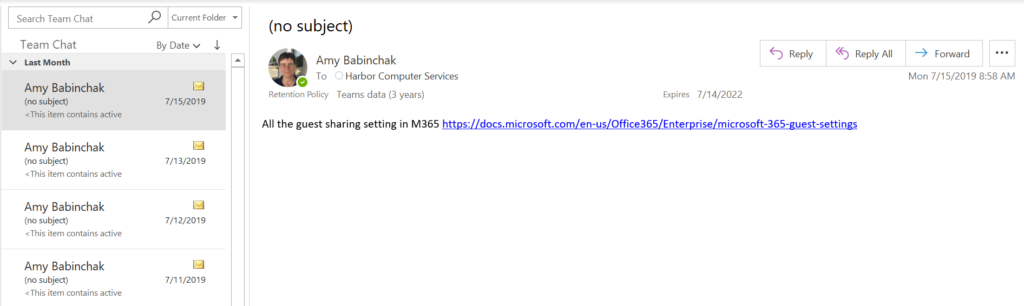
I’ve highlighted where it tells you how many results have been returned and how many are available to you in the preview. Below that in the left column are the items found. For the type we are looking for, IM, there’s not much useful information here. But when you select the item as I have you can see the content of the item in the right column.
Here I can see that it’s from Amy and to Harbor Computer Services, the date, and the content of the message. If this is the message I want, I can click Download Original Item and will it open in Outlook as an email message. From there I could copy and paste the content into Teams as I showed above or send that email into the Teams channel using the email address we gathered earlier.
In no case do I have the option to restore the message back into its original place as if the deletion never happened. This is where IT admins might weep, for surely users of Teams are not going to be 100 percent pleased with the result.
Exporting the results
If I have several messages to restore or a large number of results to go through, then I will want to export the results instead of slowly going through the preview screens here. At the top of the screen where we started our search process, under the More menu item is our Export results option. Click that to begin.

On the Export results screen, we have several options. Choose the ones that are best for you. If this is not a compliance issue then the items that I have selected in the screenshot below work well. Click the export button to have your PST file generated.

Once you’ve kicked off the export process the wheels will spin and then go away. You’ll have a moment of wondering what happened. What happened is that the process moved onto another screen. You’ll need to click Exports at the very top of the page to see your export request in action.
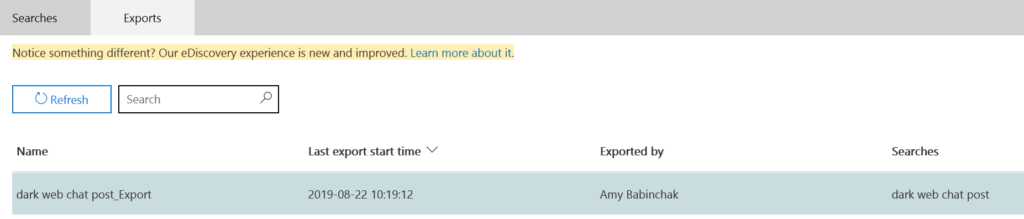
In the list, you’ll see your export request. If it isn’t there right away press refresh and when it’s done it will show up.
Click your export to open yet another export screen.
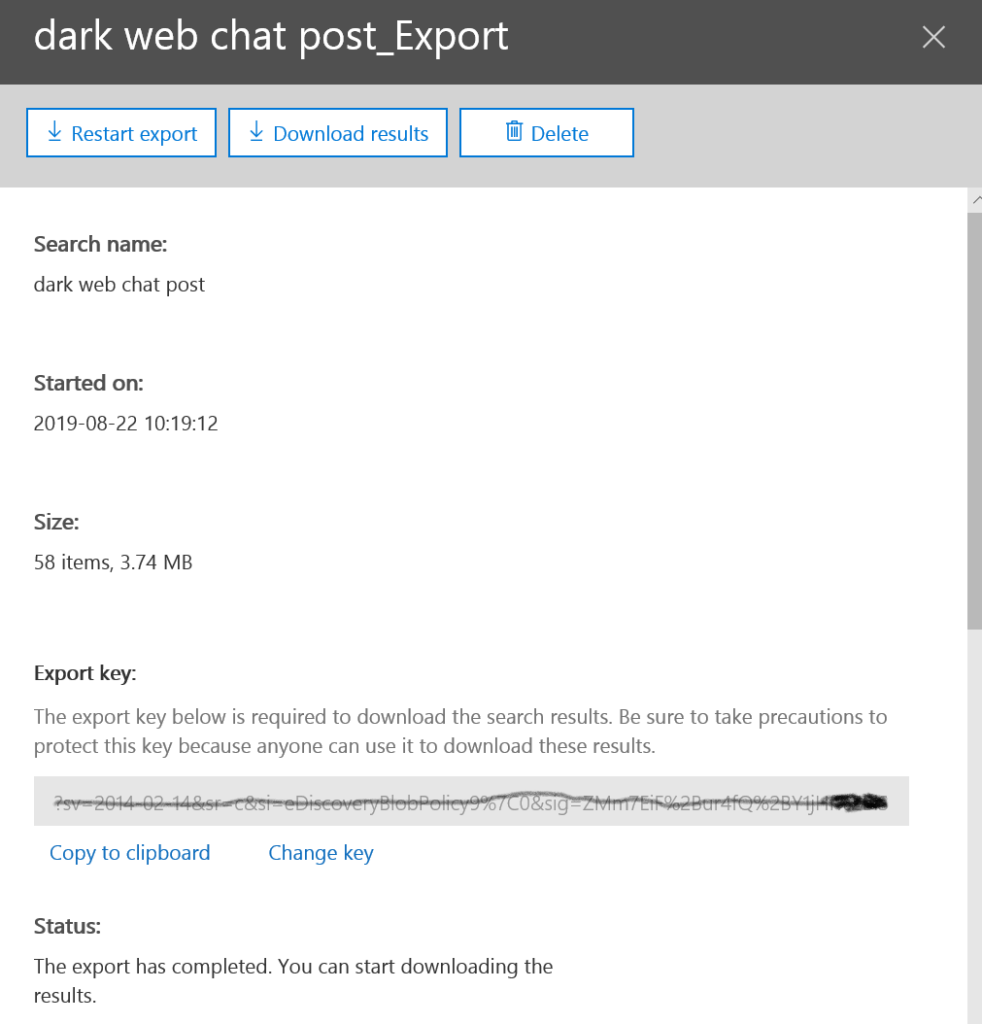
Click Copy to clipboard to copy your export string. Then click the Download results button at the top of the page. Shouldn’t we be done by now? No, not quite. Now it’s downloading an application.
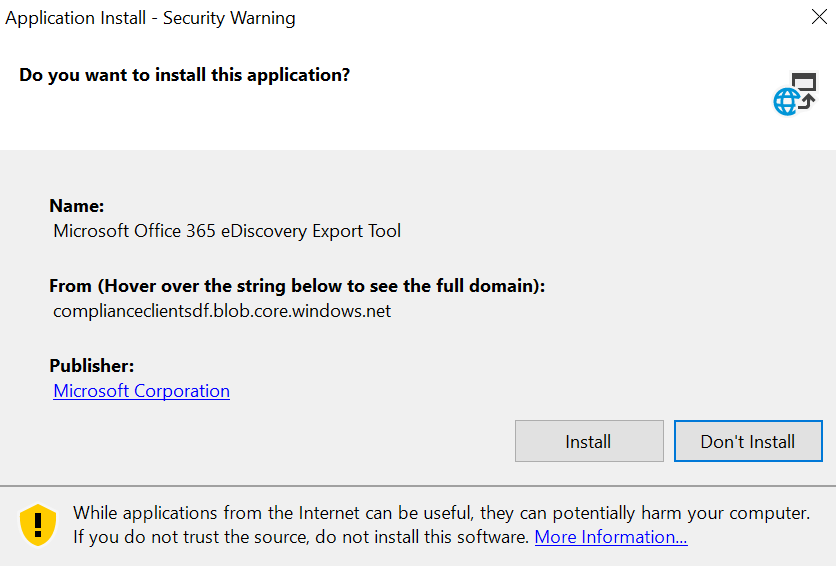
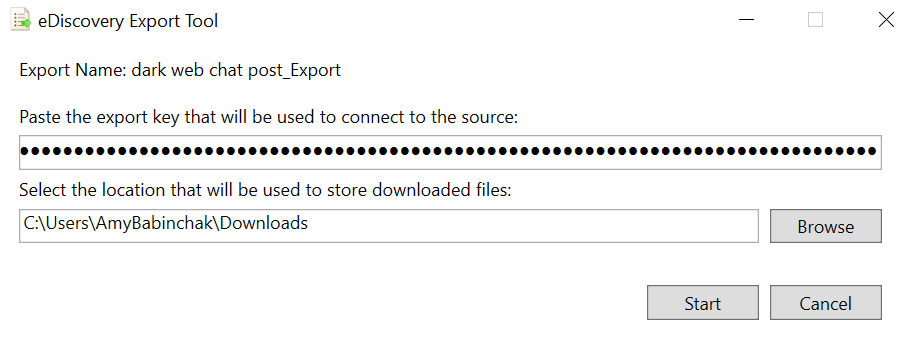
Click Install to install the eDiscovery Export Tool. Here is where you paste in the key we copied earlier and also browse to a location where the PST will download into. Then click Start.
The exported file will be found in a folder with the name of your search.

Inside of that a folder is another with the export date and time. And inside of that, finally, the files you’re looking for along with some unexpected ones that might be useful to you like the summary report or the results spreadsheet.

What you probably really want, though, is the PST file in the Exchange folder. Use Outlook to browse to the folder to import it for viewing, searching, and sending items back into Teams.
In Outlook, click on the File menu, then choose Open & Export and then Import/Export.

This will start the import wizard. This wizard hasn’t changed in many years so if you’re familiar with importing PSTs in Outlook, then you’re ready to follow along.
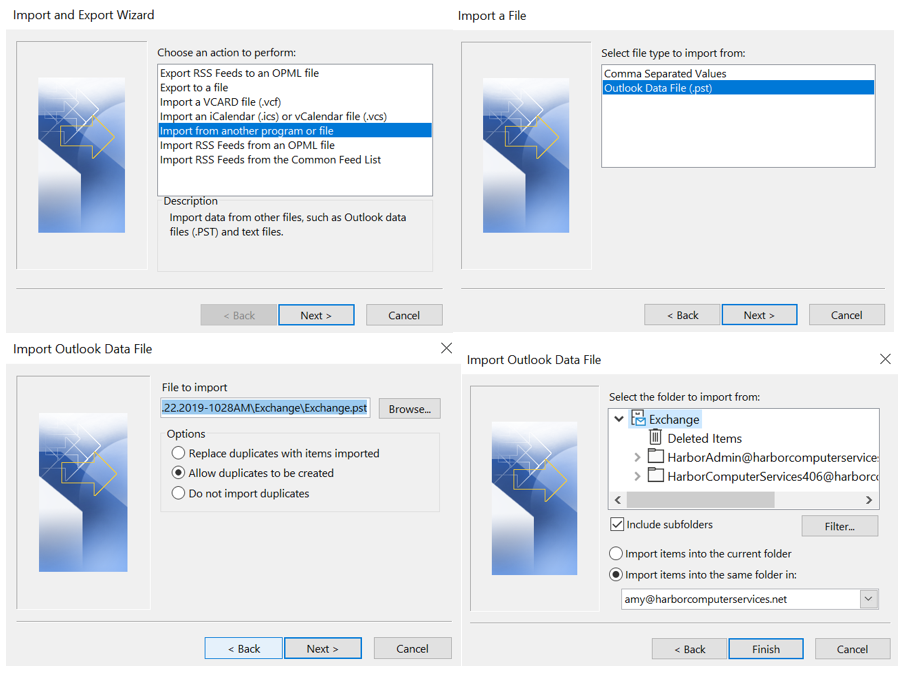
Once that has completed, I will have a new folder under my Inbox in Outlook. Browse down until you’re in the Team Chat. Then wait a moment for the items to populate. 
I can now see all of the items that the search returned organized by Teams and browse through them with some speed in Outlook. From here I can decide to email the missing items back into the Teams channel or copy and paste them in as I did in the figure at the top of this article.
Recovering Microsoft Teams messages: It shouldn’t be this hard
And that is the long, slow, manual process of recovering Microsoft Teams messages. Maybe Microsoft will someday give us an easier way.
Featured image: Shutterstock


Great write up, Amy!
Life saver.. Thanks Amy
umm amy do you think you can help me get some of my messages back