One of the most commonly used methods for migrating Hyper-V VMs to Microsoft Azure involves replicating the virtual machine to the Azure cloud and then performing the migration on the virtual machine replica. However, the replication process itself sometimes causes a bit of confusion. As such, I wanted to show you how to replicate a Hyper-V virtual machine to Azure. The first thing you need to know about the process is replicating a virtual machine to Azure works totally differently from replicating a VM from one Hyper-V server to another. In fact, the Hyper-V replication feature is not even used. Instead, you will need to install a special component onto your Hyper-V server that makes the replication process possible.
To get started, log into the Azure portal and then go to the list of services. From there, scroll to the Migrate section and click on Azure Migrate. You can see Azure Migrate’s Get Started screen in the figure below.
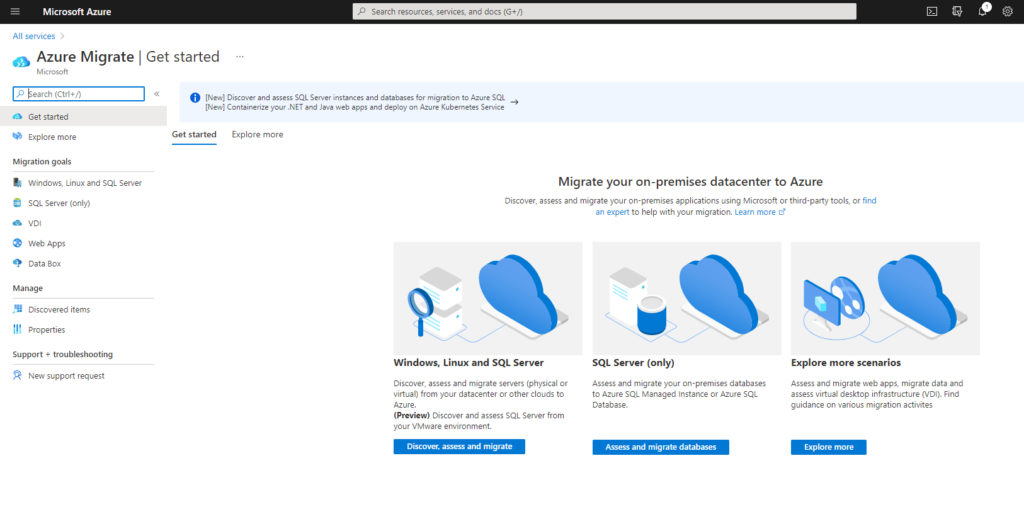
Click on the Windows, Linux, and SQL Server tab on the left side of the screen and then click the Create Project button. This will cause Azure to open the Create Project screen. Begin the process by selecting your Azure subscription and choosing the resource group that you want to use. You will also need to provide a name for the migration project you are creating (even if your goal is only to create a replica) and choose the region you want to use. When you are done, click Create to create a new project.

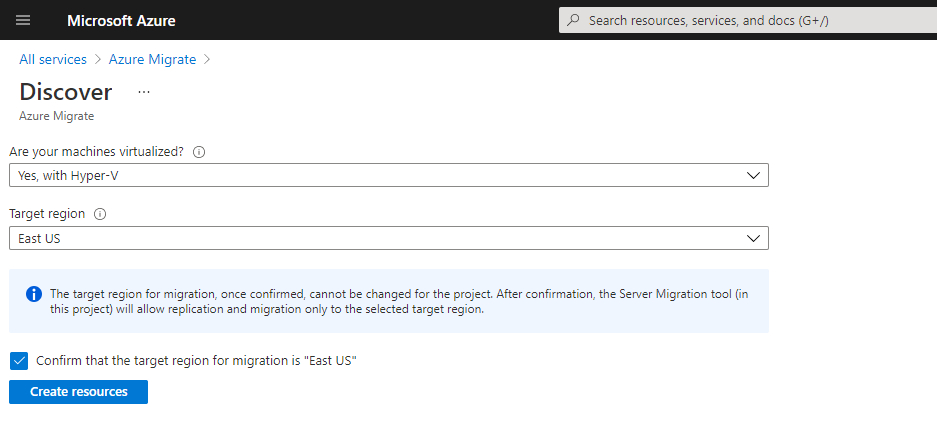
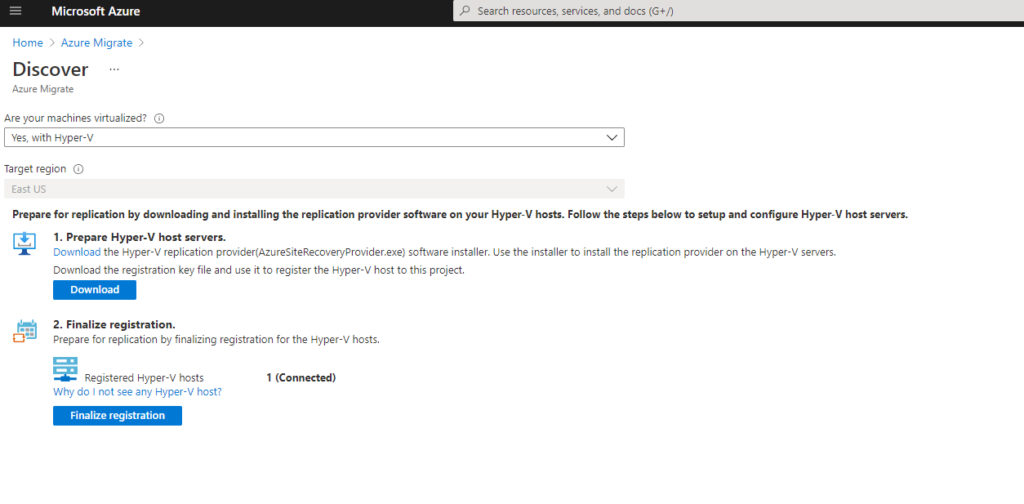
At this point, Azure will open a screen related to your migration project. Scroll down to the Migration Tools section and click the Discover icon. You will now see a prompt asking if your machines are virtualized. Choose the Yes With Hyper-V option. You will also need to select your target region, as shown in the following image.
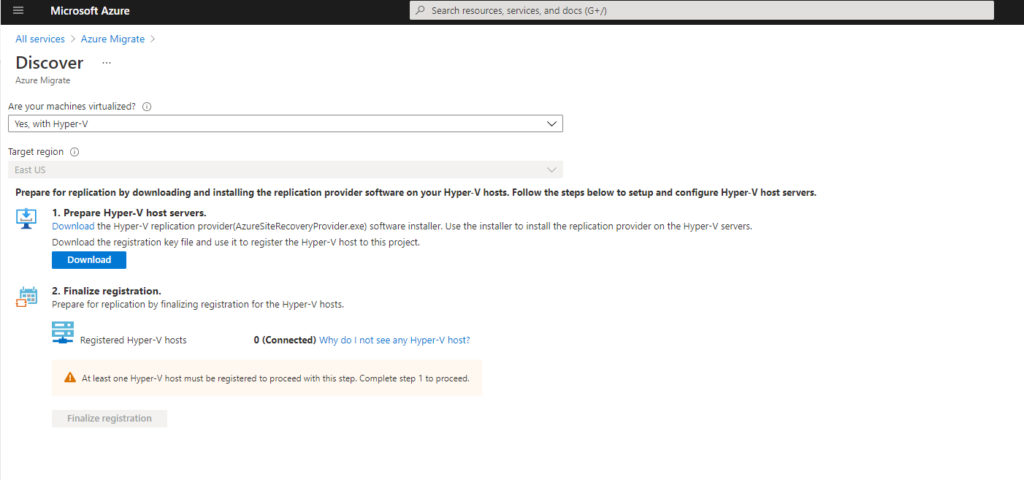
Click the Create Resources button, and you will be taken to the Discover screen. The first thing that you will probably notice about this screen is the big, blue Download button. In actuality, however, there are two different things that you will have to download. If you look at the descriptive text beneath Step 1 in the screen capture below, you will notice that the word Download is hyperlinked. Clicking on this link downloads the Azure Site Recovery provider. You will need to install this provider onto your Hyper-V server. The installation process is GUI-based and is super simple to complete.
Once the installation finishes, you will be taken to the Microsoft Azure Site Recovery registration wizard’s vault settings screen. This screen asks you to provide a key file. This is where the big blue Download button within Azure comes into play. You will need to use the button to download the key file needed by the wizard.
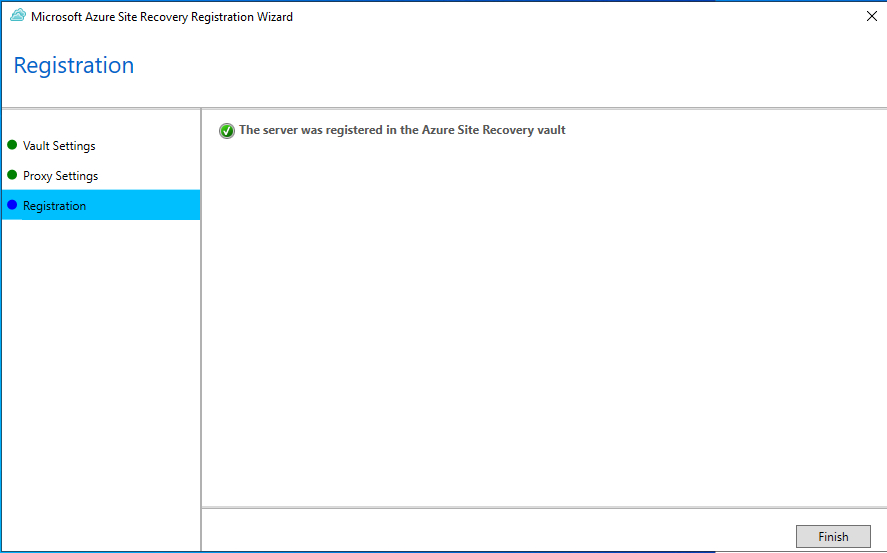
Click the wizard’s Browse button and then supply the key file that you downloaded. Now click Next a few times, and your Hyper-V server will be registered with Azure. This process takes several minutes, but you should eventually see a message indicating that the server was registered with the Azure Site Recovery vault.
Now go back to the Azure portal and refresh the screen. At this point, you should see an indication that your Hyper-V server is connected. Click the Finalize Registration button to continue.
After about a 15-minute wait, you should see a message indicating that the registration has been finalized.
Now, go back to the main Azure Migrate screen and click on the Replicate button. This will take you to the Replicate screen. The Replicate screen is divided into a series of tabs that you can navigate using the Previous and Next buttons at the bottom of the screen. The first tab is the Source Settings tab. This tab requires you to specify whether your machines are virtualized. Once again, choose the Yes With Hyper-V option.
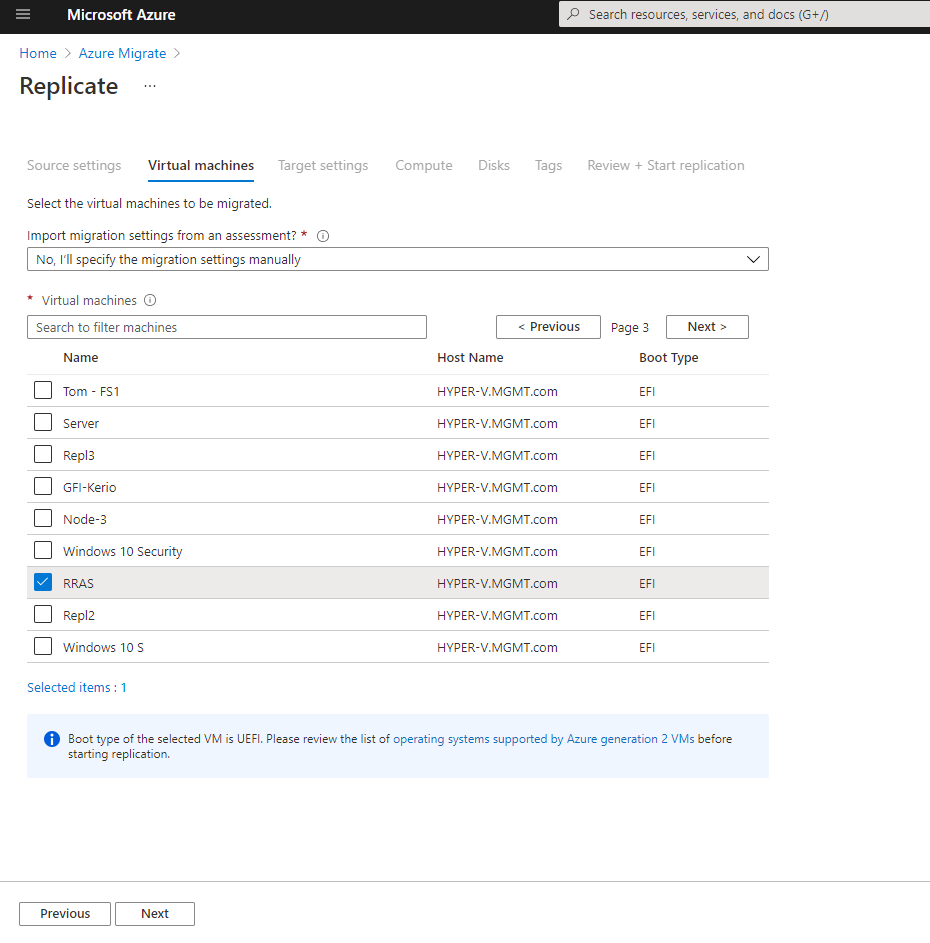
Click Next, and you will be taken to the Virtual Machines tab. Here you will need to choose the option to specify the migration settings manually. Select the VM you want to replicate (you can select up to 10 VMs) and then click Next.
Click Next, and you will be taken to the Target Settings screen. You will need to specify the resource group, replication storage account, virtual network, and availability options that you want to use.
Click Next, and you will be taken to the Compute tab. This tab is the place where you go to select your Azure VM size and OS type. You can see what this looks like below.

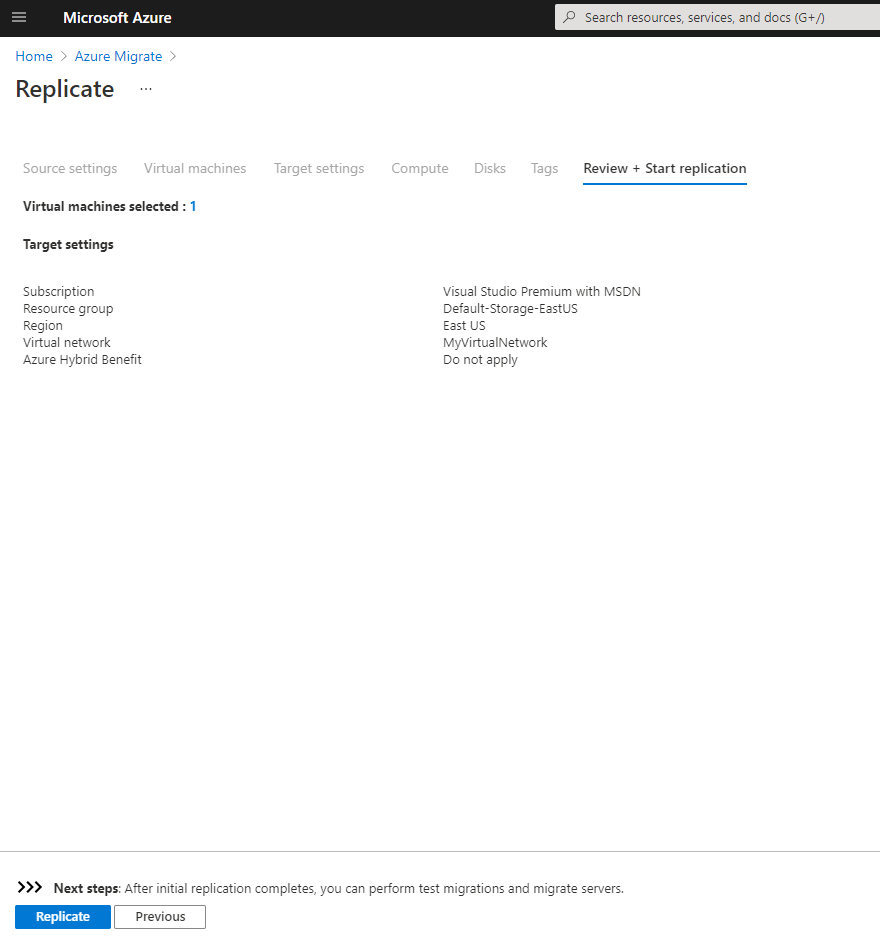
Click Next, and you will be asked which of the virtual machine’s disks you want to replicate. After doing so, click Next, and you will be taken to the Tags screen, where you will have the option of applying tags to the Azure VM. Click Next one more time, and you will be taken to the Review + Start Replication screen. Take a moment to make sure that everything looks good, and then click the Replicate button.
Depending on your Internet connection’s upload speed, the replication process can take a long time to complete. Additionally, there isn’t a clear indication that the initial replication cycle has finished. I recommend waiting for a while and then clicking on the Replicating Servers link. This will take you to a screen like the one below, showing whether or not the replica is healthy. More importantly, there is a menu, which is also shown in the screen capture, that gives you options for performing test migrations or for stopping the replication process, or resynchronizing the replica.
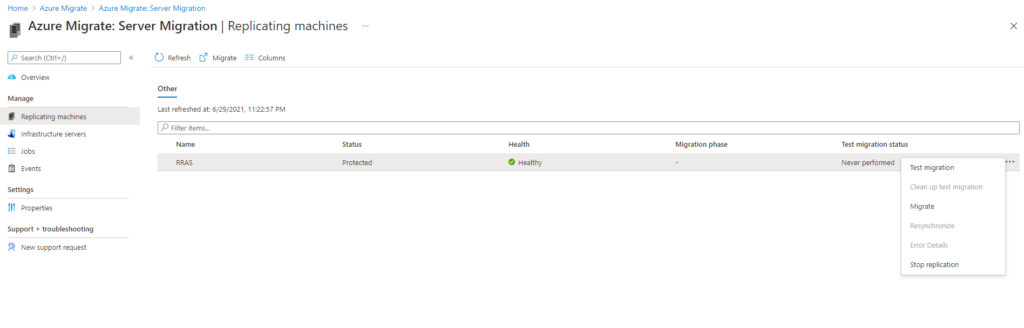
And finally, as you can see in the image above, the virtual machine’s menu contains an option to test the migration process.
Featured image: Shutterstock


