If you would like to read the next part of this article series please go to Running Windows Server 2008 R2 – Installing and Creating the Lab Domain Controller (Part 2).
Introduction
It has been a long time since I have done one of those “old school” articles that starts from the beginning and does not assume that you are already a Windows Server pro. Over the last few years I have written hundreds of articles on much of the arcane of Windows computing. In most of these articles, I take a lot for granted in terms of what I expected you to know. I did that because there was some little trick, some hard to configure feature, or some obscure issue in configuration that I wanted to demonstrate. While all that stuff is pretty interesting to the three people who are interested in those issues, it sort of leaves everyone else out.
A long, long time ago, in a world far away, this site was called “World of Windows Networking” or WOWN. During those days, the site was filled with a lot of articles that showed you how to get common Windows networking tasks done. This was a lot less of the Active Directory, Group Policy, installation and other non-networking complexities covered at that time. While the site has matured and focused more on experienced IT professionals, there is still some value in providing content for people entering into the business and who want to learn the basics.
That got me to thinking about doing an article and perhaps a series from the ground up. What better time to try something like this than with the recent release of Windows Server 2008 R2? OK, so I thought I would do a basic “let’s install Windows Server 2008 R2” article—but then I thought “how about using this as a launch point for a broader series?” The more I thought about it, the better it sounded. Since there is a ton of great new networking and security features in Windows Server 2008 R2, why not start with building the lab network first, and then take you into all the cool features? That way we can be working with the same basic lab network and go through the long trip together.
Let us do it. The first step is to pick the virtualization software of your choice. For this kind of lab network I prefer VMware Workstation. I do not have strong technical reasons for preferring VMware Workstation, I just prefer to use it because I have been using this application for almost a decade and know how it works. I do not have to learn a new language like I do with Hyper-V and it works nicely for me. However, if you want to use Hyper-V or ESX, those are good options too.
As this series builds, I expect that we will need to be running up to 8 virtual machines at a time. Because of this, I recommend that you have a computer that can support at least 8 GB of RAM and has a quad core processor. For all the articles I will be writing in this series, I will be using a workstation that has 12 GB of DDR3 triple channel memory and a quad core Core i7 processor. If you are using any quad core Xeon or quad core Core 2 processor, you’ll be in good shape. Of course, AMD equivalents are good too.
We will start with installing the first machine on our lab network. This is going to be a Windows Server 2008 R2 machine using one virtual processor and 512 MB of virtual memory. During the installation, I am going to use bridged networking on my virtual NIC. Some people like to use NAT, and that should be fine. The point is that you will want to be able to connect a live network so that you can access updates during the initial installation. After the initial installation is complete, we’ll move this virtual machine to another virtual network, since we want it to be placed behind a virtual TMG firewall. The TMG firewall VM will have the live network connection and all the other VMs will be located behind it.
In VMware Workstation 6.5 I will create a new virtual machine and bind the Windows Server 2008 R2 .iso file to the CD drive so that it boots that .iso. When the machine first starts up, you will see the first page of the installation wizard that asks for what Language to install, Time and currency format and Keyboard or input method.
Click Next after making your selections.
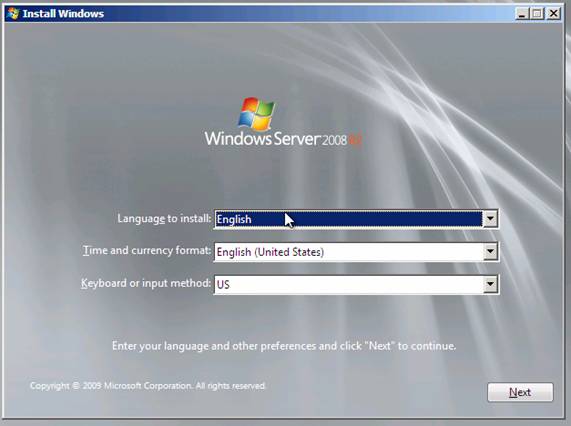
Figure 1
So much for introductions! The installer gives you the option to Install now. Let’s do it.
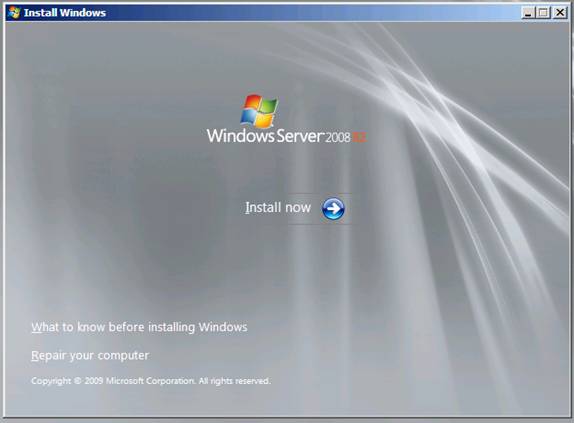
Figure 2
The .iso file actually has all the versions of Windows Server 2008 R2 on it and we can choose the option we want to install here. Note that you can even install the Server Core versions from here. I would rather pull a bobcat’s tail while in a phone booth with that cat, so we would not be doing a core installation. Let us choose the Windows Server 2008 R2 Enterprise (Full Installation) option and click Next.
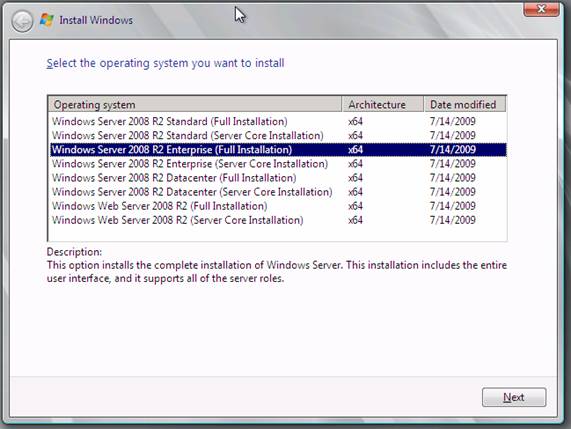
Figure 3
Put a checkmark in the I accept the license terms checkbox on the license terms page and click Next.
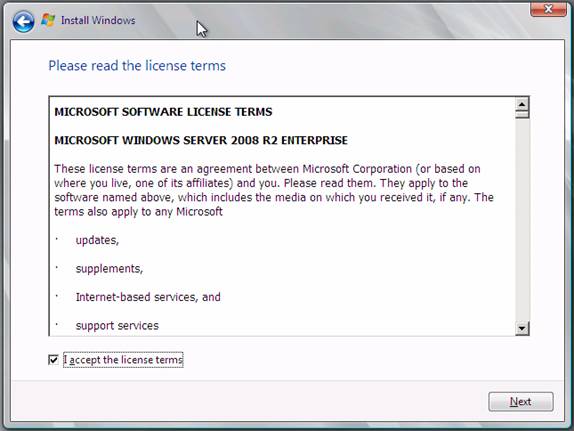
Figure 4
Which type of installation do you want? Honestly, I want one that works and does what I tell it to do, but that is not a choice here. This is a clean install, so the upgrade option does not make sense. Click the Custom (advanced) option. Notice that there is no “Next” option on this page, just to throw you off a little bit.
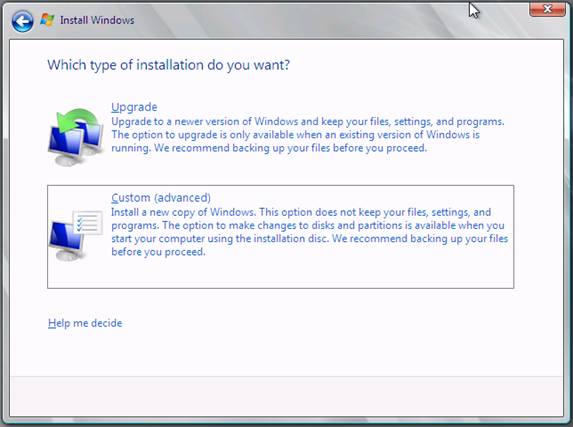
Figure 5
Here you decide where you want to install the system files (which used to be called boot files in the past, but the new crew of Microsoft engineers did not take the Windows NT 4 MCSE training, so they do not know that with Windows NT based system and above, you boot the system files and you “system” the boot files). I created a 24 GB dynamic virtual disk file for the OS which will be more than enough room. Remember, with dynamic disk files they only use the space they need – they do not fully allocate all the space until it is needed.
Click Next.
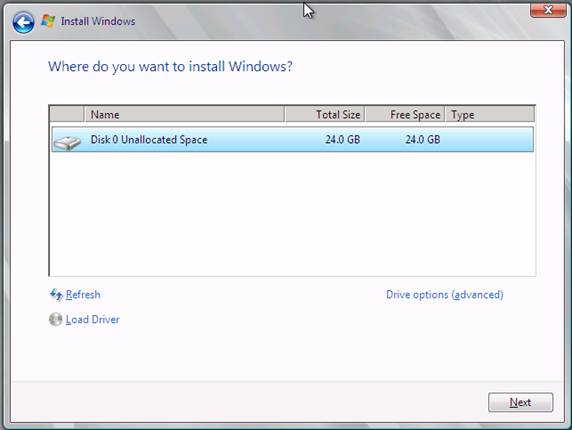
Figure 6
Yay! Installation is starting – and it is going to take a very long time. Give it an hour or two and come back and see what happened on your own installation.

Figure 7
During first log on the installer will ask you to create a password. Click OK when you see the display as it appears below.
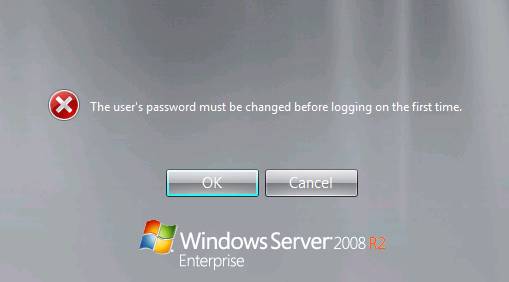
Figure 8
Enter a password and confirm the password and do not click OK (because there is no OK to click). Instead, click that “arrow thing” that does not have a name, which sits to the right of the confirm password text box.
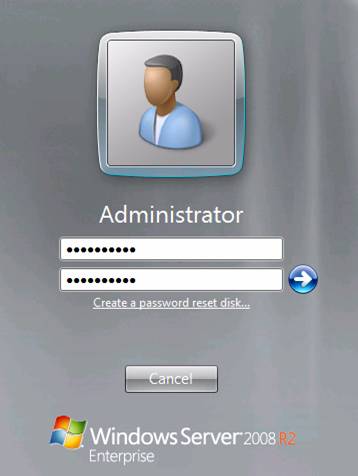
Figure 9
Very good! The password has been changed. Click OK.
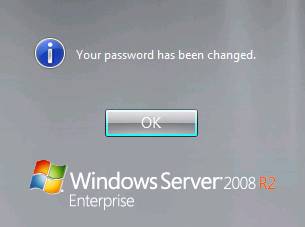
Figure 10
You might remember the Initial Configuration Tasks windows if you used Windows Server 2008. If you have not used Windows Server 2008 and are moving up from Windows Server 2003, the Initial Configuration Tasks window provides you access to many of the things you need to do once the operating system software is installed. After looking at some of the options in this window, you might notice that many of the options that you configured during installation for earlier versions of Windows are now configured here. The goal was to make for fewer inputs during installation and leaving them for the end. Very nice!
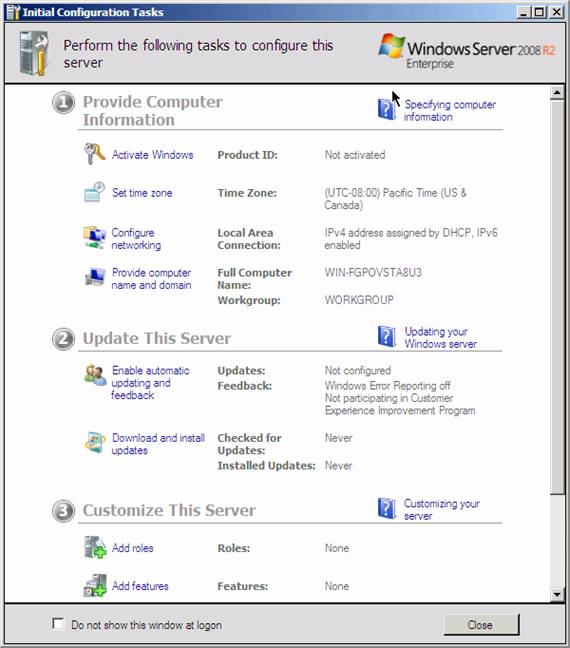
Figure 11
From the Initial Configuration Tasks window, I will set the following:
-
Set time zone
-
Configure networking
-
Provide computer name and domain
I will take care of the other stuff once I get this machine an IP address on the network. I will rename this computer FFWIN2008R2DC, since this is going to be a domain controller in my FFLAB domain. FF is short for “Forefront” as we’ll be doing a lot of Forefront testing on this lab network. The IP addressing information is:
-
IP address – 10.0.0.2
-
Default Gateway – 10.0.0.1
-
DNS – 10.0.0.2
-
WINS – 10.0.0.2
Sure, we probably will not need WINS much, but you never know, and it is not like it is going to suck up a lot of memory or processor cycles in the lab environment. The default gateway will be a TMG 2010 firewall – which we will install in a later article.
Promoting the Windows Server 2008 R2 Virtual Machine to a Domain Controller
The next step is to make this machine a domain controller. If you are coming from the Windows Server 2003 world, you will find this step to be a lot different. Yes, you will still need to run dcpromo from the Run command, but there is a little twist here – you need to install the Active Directory Domain Controller role. Server roles are sort of a new concept in Windows Server 2008 – where major server services are considered “roles”. The Active Directory Domain Controller role is a bit different, because it is actually a two-step process to get the Active Directory DC installed: first you install the role and second you run dcpromo.
Enter the Server Manager and click the Roles node in the left pane of the console. Then click the Add Roles link in the right pane.

Figure 12
This brings up the Before You Begin page. If this is the first time you have installed a role using the Server Manager, then go ahead and read the information on this page. If you are an old pro with the Server Manager, go ahead and click Next.
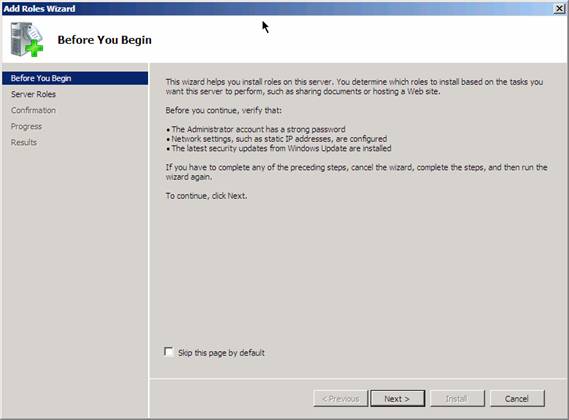
Figure 13
Here you select what Server Roles you want to install. We will install other Server Roles later, but we want the DC role installed first. Select Active Directory Domain Services by putting a checkmark in the checkbox. Notice that the wizard will show you a number of features that will be installed along with the Active Directory Server Role. Click the Add Required Features button to get those features installed with the Active Directory Server Role.
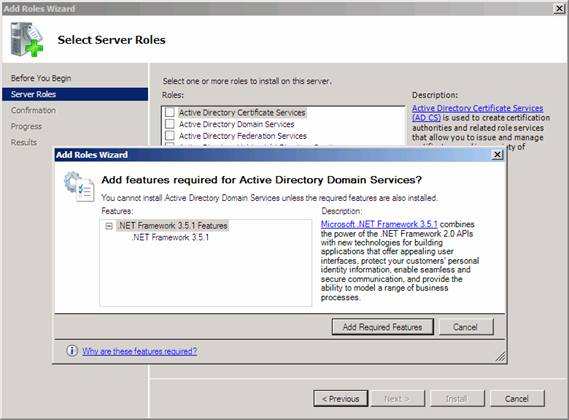
Figure 14
After selecting the Active Directory DC Server Role, you will see information about that Server Role. Some interesting things to note here:
-
You should install at least two DCs on your network for fault tolerance. Installing a single DC on a network is an invitation for disaster. However, since this is a lab network and we can take snapshots of our DCs, we’re not so concerned about this requirement.
-
DNS is required. However, when we run dcpromo, we will install the DNS server role to support Active Directory services.
-
You need to run dcpromo after installing the role. You won’t have to go through extra steps like this when installing other server roles, as the entire role installation can be done through the Server Manager. The Active Directory Domain Services role is the only one that takes two steps to get it installed.
-
Note that installing the Active Directory Domain Services Role also installs DFS Namespaces, DFS Replication and File Replication Services – all of these are used by Active Directory Domain Services so they’re automatically installed.
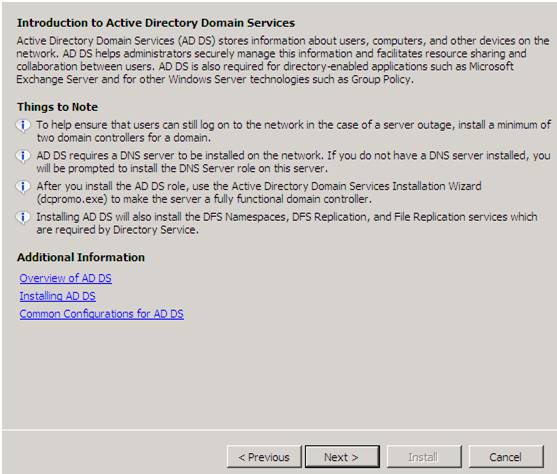
Figure 15
Click Install to install the files required to run dcpromo.
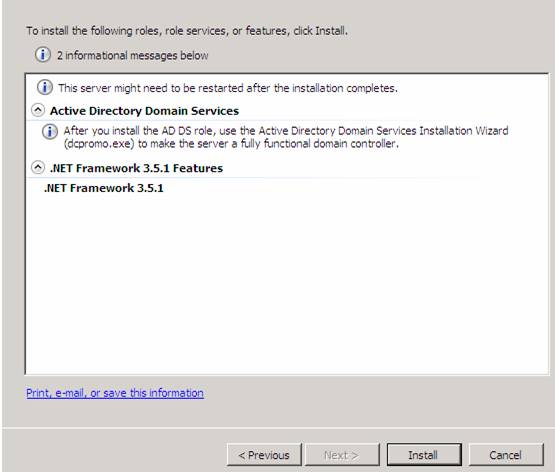
Figure 16
Yay! Installation was successful. Click Close.
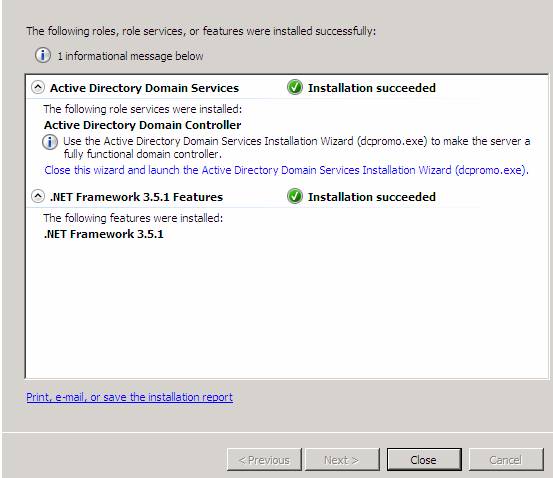
Figure 17
Now go to the Start menu and type dcpromo in the search box. You will find it in the list as shown in the figure below. Click dcpromo.

Figure 18
This starts the Welcome to the Active Directory Domain Service Installation Wizard. We do not need advanced options in this scenario, so just click Next.
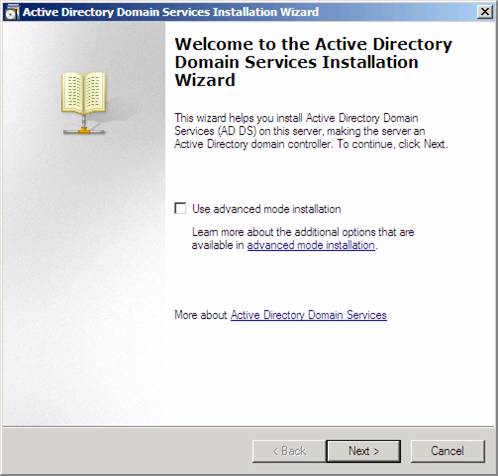
Figure 19
On the Operating System Compatibility page, you are warned that your NT and non-Microsoft SMB clients are going to have problems with some cryptographic algorithms used by Windows Server 2008 R2. We don’t have this problem on our lab network so just click Next.
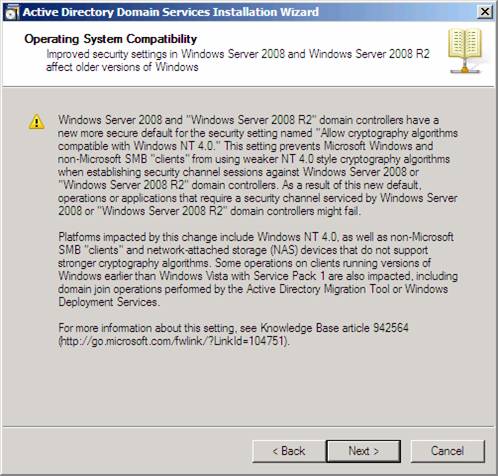
Figure 20
On the Choose a Deployment Configuration page, select the Create a new domain in a new forest option. We do this because, of all reasons, this is a new domain in a new forest 🙂
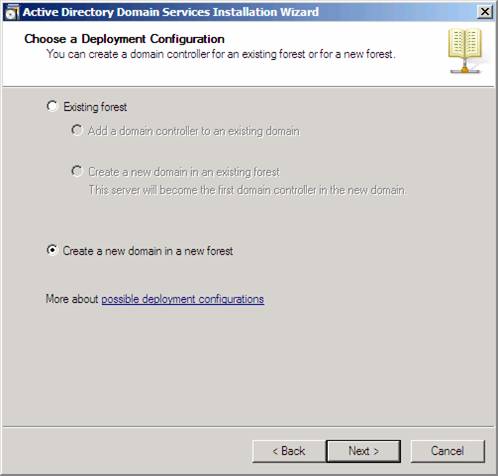
Figure 21
On the Name the Forest Root Domain page, enter the name of the domain in the FQDN of the forest root domain text box. In this example we are going to name the domain fflab.net. That is short for “Forefront Lab”. You can name it whatever you like, but if you use a name that is already in use on the Internet (that is to say, a name that has already been registered, then be aware of potential split naming issues). Click Next.

Figure 22
On the Set Forest Functional Level page, select the Windows Server 2008 R2 option (not the Windows Server 2003 option you see in the figure below). We want to select the Windows Server 2008 R2 option so that we can take advantage of all the cool new features included in Windows Server 2008 R2. Click Next.
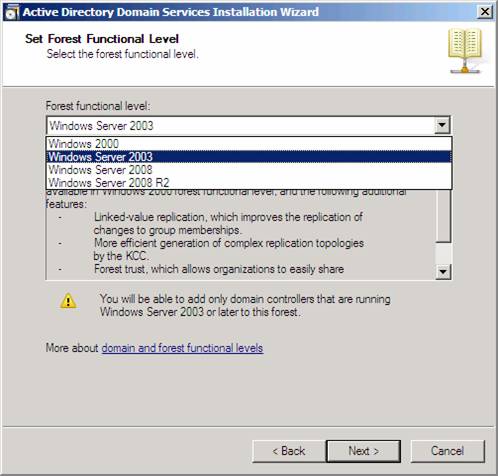
Figure 23
On the Additional Domain Controller Options page, we have only a single choice: DNS server. The Global catalog option is checked and not an option because this is the only DC so far in this domain, so it has to be a Global Catalog server. The Read-only domain controller (RODC) option is deselected because you have to have another non-RODC on the network to enable this option. Select the DNS server option and click Next.
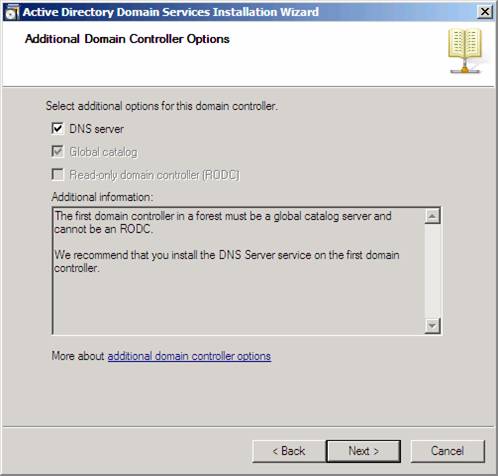
Figure 24
A dialog box will appear that says that a delegation for this DNS server cannot be created because the authoritative parent zone cannot be found or it does not run Windows DNS server. The reason for this is that this is the first DC on the network. Don’t worry about this and click Yes to continue.
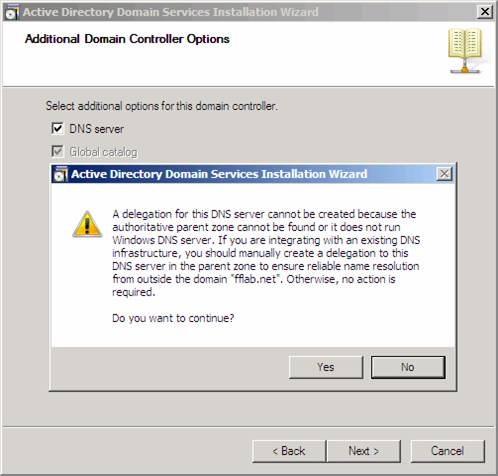
Figure 25
Leave the Database, Log Files and SYSVOL folder in their default locations and click Next.

Figure 26
On the Directory Service Restore Mode Administrator Password, enter a strong password in the Password and Confirm password text boxes.
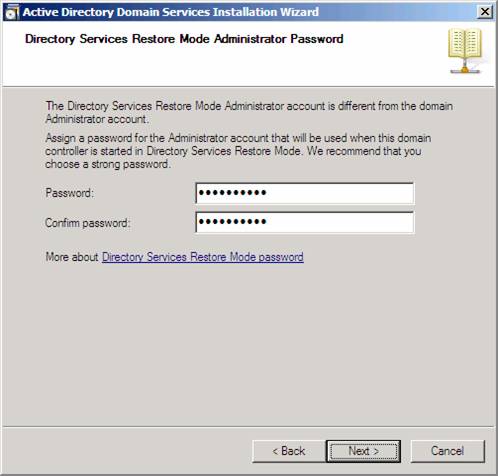
Figure 27
Confirm the information on the Summary page and click Next.
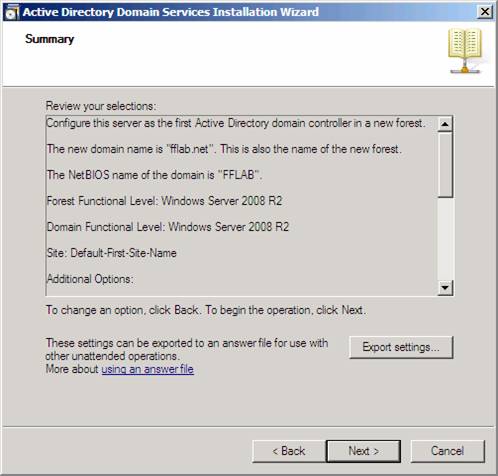
Figure 28
Active Directory will install. The first DC installs pretty quickly. Put a checkmark in the Reboot on completion checkbox so that the machine automatically reboots when DC installation is complete.
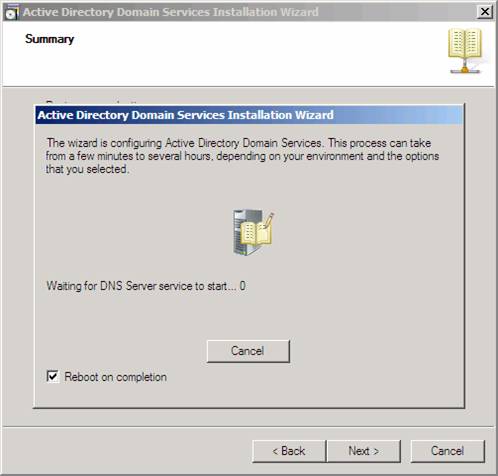
Figure 29
The machine will automatically restart since we selected that option. The installation will be complete when you log on. If I recall correctly, with Windows Server 2008, there was some configuration that took place after you logged on, but that is not happening with Windows Server 2008 R2.
The DNS service was installed during Active Directory installation, so we do not need to worry about that. There are several other services we want to install on this domain controller. These include:
-
DHCP
-
WINS
-
Enterprise Certificate Services
Unfortunately, only DHCP and Certificate Services are considered “roles”. The WINS service is considered a feature. I suppose they had a reason for this, but I was not at that meeting and did not get the memo.
If you would like to read the next part of this article series please go to Running Windows Server 2008 R2 – Installing and Creating the Lab Domain Controller (Part 2).


