If you would like to read the other parts in this article series please go to:
- System Center 2012 Virtual Machine Manager (Part 1) – Introduction
- System Center 2012 Virtual Machine Manager (Part 2) – Installation
- System Center 2012 Virtual Machine Manager (Part 3) – Introduction to the Console – Segment A
- System Center 2012 Virtual Machine Manager (Part 4) – Introduction to the Console – Segment B
- System Center 2012 Virtual Machine Manager (Part 5) – Introduction to the Console – Segment C
- System Center 2012 Virtual Machine Manager (Part 5) – Introduction to the Console – Segment D
- System Center 2012 Virtual Machine Manager (Part 5) – Introduction to the Console – Segment E
- System Center 2012 Virtual Machine Manager (Part 8) – Introduction to the Console – Segment F
- System Center 2012 Virtual Machine Manager (Part 10) – Introduction to the Console – Segment H
- System Center 2012 Virtual Machine Manager (Part 11) – Introduction to the Console – Segment I
Quick recap
Before we get started, let’s do a quick recap to gain our bearings. In Figure 1, you can see the main window that is seen when you start the VMM 2012 console. We’re continuing our exploration of the Library workspace. In the previous part of this series, we went through all of the high level options that are available in the Library. Here, we’ll go through each and every menu item so that you have a handy reference in case you’re not sure what something does.
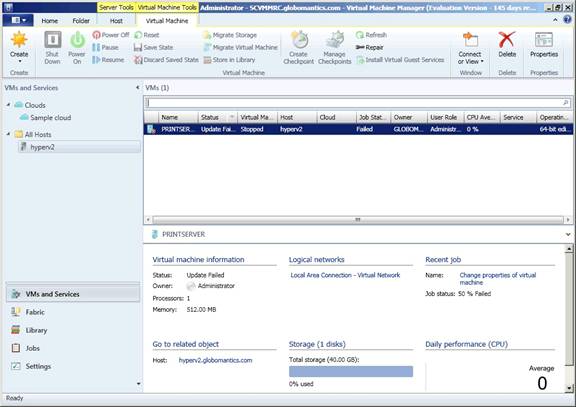
Figure 1: The big picture
Home tab: Templates (Library)
As we usually do with a new wunderbar, we’ll start with the Home tab and explore what’s at our disposal. The Home tab for the Library item is shown in Figure 2.

Figure 2: The Library Home tab
Create Service Template
A Service Template can be used to streamline the deployment of single or multi-tiered applications. Bearing in mind that we’re moving more and more to an application-centric world, this is a step in the right direction. You can see in Figure 3 what results when you choose to create a new service template.

Figure 3: Creating a new service template in SCVMM
Create VM Template
In many organizations, there is a standard configuration that is used for as many virtual machines as possible. This is particularly true when VMs host clustered services and such. Using the Create VM Template button, you can create a new VM template using either an existing virtual hard disk or template or you can choose an existing virtual machine and create a template from it. During this process, you can make modifications to the hardware configuration, establish operating system defaults, manage application deployment information and more.
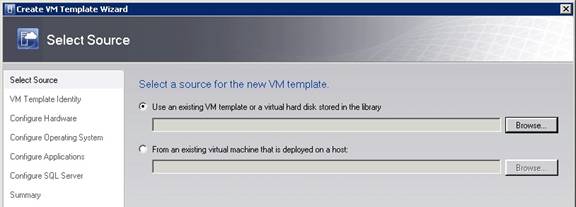
Figure 4: Create a VM template
Create
From the Create menu option, you can create a number of different kinds of profiles that can be re-used to streamline the process of deploying new virtual machines. Here is a look at the various types of profiles that can be created:
- Application Profiles. Allows an administrator to automate the deployment of Server App-V applications, web applications, or SQL Server data tier applications. You can also use an Application Profile to run scripts.
- Capability Profiles. Used to define the sets of capabilities that are allowed in a particular item. VMM 2012 ships with three capability profiles already defined—Hyper-V, Xen Server, ESX Server. For example, the Hyper-V and vSphere capability profiles help administrators understand the kinds of limits that are in place.
- Guest OS Profiles. A guest OS profile enables an administrator to specify OS-level elements that should be assigned to a machine. Such elements can include the computer name, administrator password, product key, roles, features and more.
- Hardware Profiles. Every virtual machine has a unique hardware configuration, just like any physical machine. You can create a hardware profile that specifies the virtual hardware that should be included in the virtual machine in order to meet the needs of the intended workload. This profile can include the number of virtual CPU, amount of RAM, networking configuration and more.
- Host Profiles. A host profile is used to automate the deployment of new hosts (converting a bare-metial server to a Hyper-V host). Host profiles can include the location of the operating system image to use as well as hardware and operating system configuration settings. Host profiles can be used to deploy only operating systems that support using VHD files, so you need to use Windows Server 2008 R2 or higher.
- SQL Server Profile. A SQL Server application profile enables quicker SQL Server deployment and includes information including the SQL Server instance name, SQL Server administrator accounts and security mode (Windows or SQL or both).
Add Library Server
Your VMM environment can include multiple library servers. Use this button to add an additional library server to the environment.
Import Template
Import a new template into VMM. A template is an XML file that contains all of the information necessary to create the new service or virtual machine template.
Import Physical Resource
There are times when you’ll need access to the same resources that you require in the physical world. One such instance comes when you need to access an ISO file to, for example, install an operating system or application. This is where the ability to import a physical resource into VMM comes in handy. Although an ISO file is hardly a physical resource, VMM treats it as one and allows you to add it to the library for shared and easier use across the managed environment.
The use of such resources is also of value in self-service activities related to VMM.

Figure 5: Import a physical resource into VMM 2012
Export Physical Resource
Sometimes, you may have a resource in the library that you’d like to use elsewhere. In this case, you can export the resource and place it at a location of your choosing.

Figure 6: Export physical resources from VMM
Library Settings
Most objects in VMM 2012 have associated settings that can be adjusted based on need. For the library object, you can set the interval at which the files on a library server are indexed, as shown below in Figure 7.
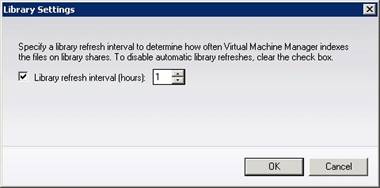
Figure 7: Set library refresh interval settings
PowerShell
A few years ago, Microsoft released PowerShell and has extended this scripting language to just about all of their new products. PowerShell allows administrators to write scripts that can automate administrative functions. Click the PowerShell icon on the Home tab to open a PowerShell command window.
Jobs
VMM works by creating jobs that are carried out with the results eventually reported to the administrator. In Figure 8, you can see what happens when you click the Jobs button. It does exactly what it should!

Figure 8: A list of currently running and recently run jobs
PRO
If you’ve enabled Performance and Resource Optimization (PRO) in VMM 2012, then you’ve successfully connected your VMM implementation with a running System Center 2012 Operations Manager instance to unlock additional capabilities. With earlier versions of VMM and SCOM, PRO was necessary to perform what many would consider basic operations, particularly those that come from VMware. In VMM 2012, when PRO is configured, you’ll see PRO tips that help you do things better.
Application Profiles (Home tab: Profiles)
When an application profile is selected, the Application Profiles tab appears at the top of the screen and provides you with some simple management tools related to application profiles. Of most interest is the Properties button.
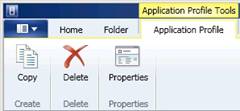
Figure 9: The Application Profile Tools tab
When the Properties button is clicked, the properties for the selected application profile will open for editing by an administrator.
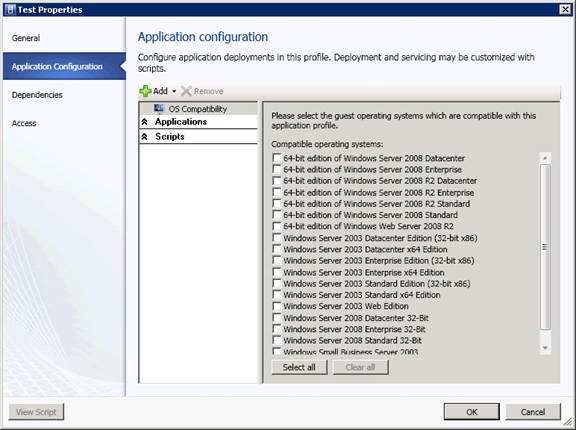
Figure 10: Configure an application profile
Capability Profiles (Home tab: Profiles)
When you have the Capability Profiles option selected, you’ll note that another menu tab appears at the top of the screen. This tab has options on it for managing capability profiles.
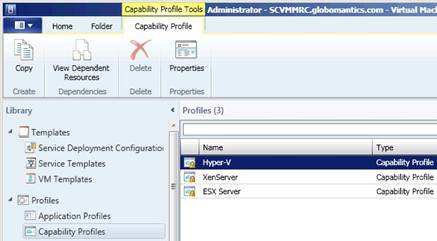
Figure 11: Capability Profile tab
The Properties item is the one of real interest here. When you choose that item, the Capability Profile editor opens up, as shown below.

Figure 12: Capability Profile editor for the Hyper-V profile
I’m not going to go over every single profile tab that is added to the window when a profile is selected. You will see all of the profile options in action in other parts of this series.
If you would like to read the other parts in this article series please go to:
- System Center 2012 Virtual Machine Manager (Part 1) – Introduction
- System Center 2012 Virtual Machine Manager (Part 2) – Installation
- System Center 2012 Virtual Machine Manager (Part 3) – Introduction to the Console – Segment A
- System Center 2012 Virtual Machine Manager (Part 4) – Introduction to the Console – Segment B
- System Center 2012 Virtual Machine Manager (Part 5) – Introduction to the Console – Segment C
- System Center 2012 Virtual Machine Manager (Part 5) – Introduction to the Console – Segment D
- System Center 2012 Virtual Machine Manager (Part 5) – Introduction to the Console – Segment E
- System Center 2012 Virtual Machine Manager (Part 8) – Introduction to the Console – Segment F
- System Center 2012 Virtual Machine Manager (Part 10) – Introduction to the Console – Segment H
- System Center 2012 Virtual Machine Manager (Part 11) – Introduction to the Console – Segment I


