We are taking a trip to the Terraform world today.
This article will explain how Terraform works and how it can help us manage our infrastructure resources in Azure (and other platforms/products) using their HLC (HashiCorp Configuration Language). This humble author has been using ARM templates for several years now. The goal is to introduce you to Terraform and get you started writing your first code. As part of the first steps in this journey, we will explore some of this product’s cool features.
Preparing your desktop to use Terraform
We are going to keep it simple by working locally. In future articles, we will explore a more collaborative way by having source code control and corporate solutions provided by HashiCorp.
To get a good start with Terraform, we need to make sure that we have Visual Studio Code, Azure CLI, and Terraform installed on your desktop. I wrote an article here at TechGenix that introduces Visual Studio Code installation and the integration with Azure DevOps. You can find it here.
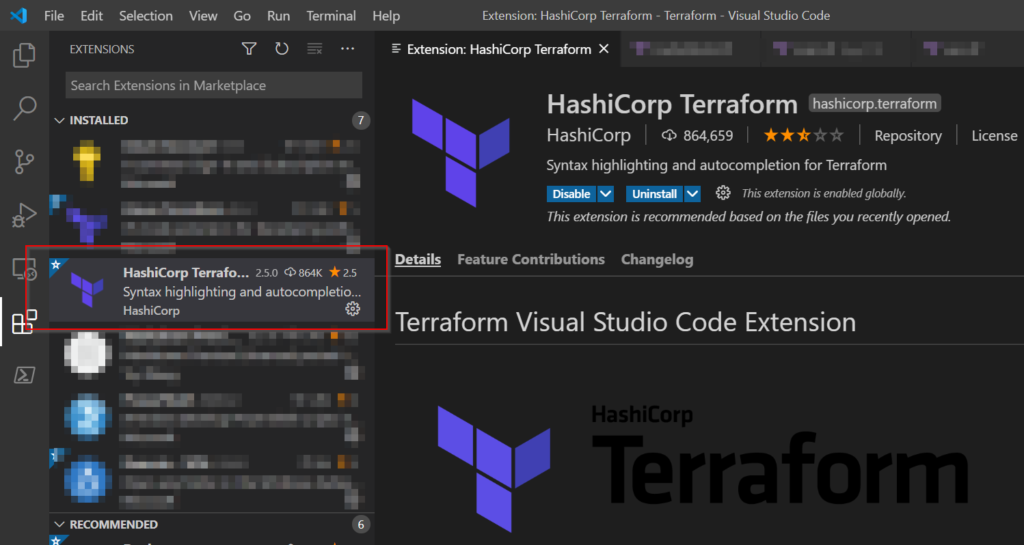
After having Visual Studio Code installed, make sure that the HashiCorp Terraform extension is installed. There are two versions available in the Marketplace, and they are authored by Terraform and Microsoft.
Our next requirement is to have Azure CLI installed on your desktop or server to manage your Azure. You can download it here.
If you like PowerShell as much as I do, you can save the process of checking the link and execute the following cmdlet:
Invoke-WebRequest -Uri https://aka.ms/installazurecliwindows -OutFile .\AzureCLI.msi; Start-Process msiexec.exe -Wait -ArgumentList '/I AzureCLI.msi /quiet'; rm .\AzureCLI.msi
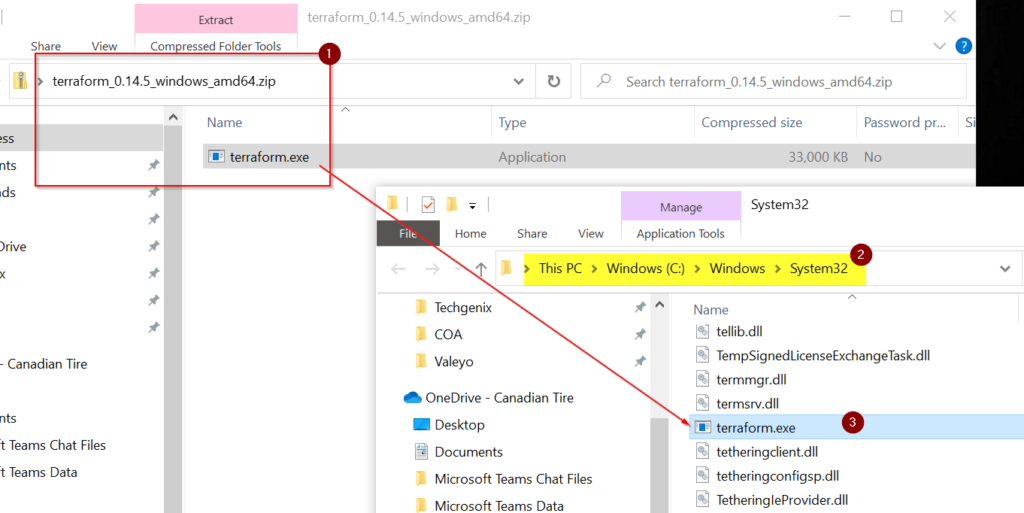
The final step to prepare our workstation is to install Terraform, a simple exe file that must be placed in a folder that is already defined to the PATH to be accessible from anywhere. The latest version of Terraform executable can be found here.
The download is a zip file. In my case, I’ve just placed it in \Windows\System32, as depicted in the image below.
Those are the basic tools that you need to start using Terraform locally and perform the first deployments in Microsoft Azure (or any other cloud, for that matter).
Bear in mind that all the tools described in this section can be installed on your chosen platform: Windows, Linux, or macOS.
Terraform basics
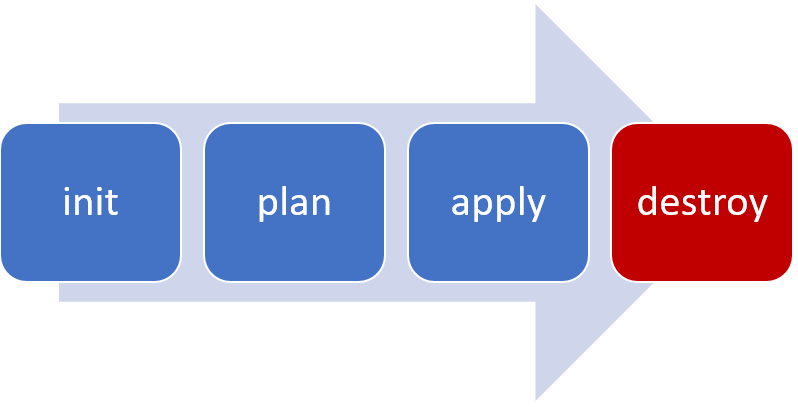
When using it locally on your desktop for testing or building a solution with a team, Terraform will have mainly four switches that you need to be acquainted with before learning the language and writing your first code. They are: init, plan, apply, and destroy.
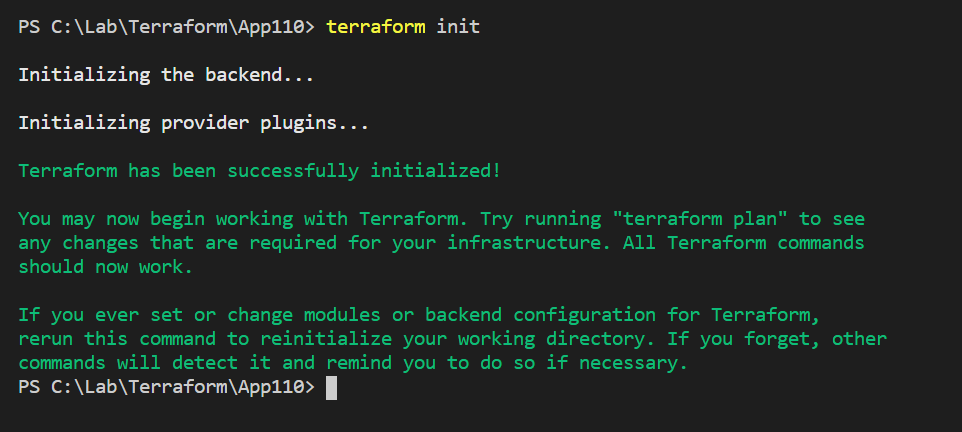
When using terraform init command, we are initializing the current directory based on the existing Terraform configuration files (*.tf files). This command will initialize required backends, copy modules, and plugins.
The ideal scenario is to run this one after you defined your code. However, there is no harm in running this command several times, and if Terraform detects that it needs to be executed, it will prompt to do so.
In the example below, our code uses AzureRM provider, and by running the init, the plugin was downloaded to a local folder structure in the current working directory (C:\Lab\Terraform\app110).
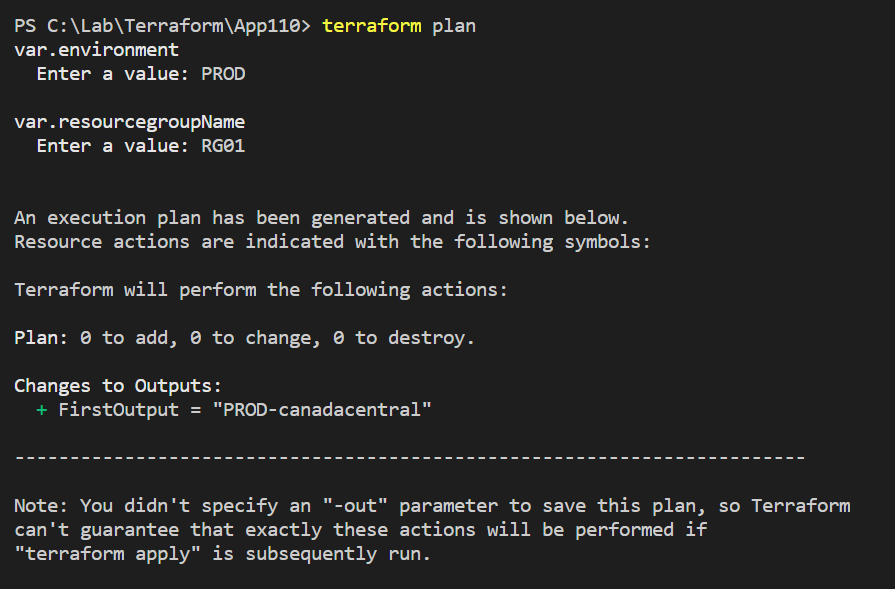
The second command that we will use way more often is terraform plan. This command will compare what we have defined in the configuration files with the real infrastructure, and it will provide a summary of the changes required to achieve the desired state.
It is important to mention that this command is not intrusive in any shape or form, and it won’t change the actual infrastructure. The command can use parameters (-out PlanName) to save the plan to a file as an artifact that can be used with the next Terraform command to apply that specific defined settings to the target infrastructure.
In the example below, we can see the Terraform plan asking for values required and providing the output of our code (defined in the output area and great for troubleshooting) and if changes are expected (additions, changes, or even deletions).
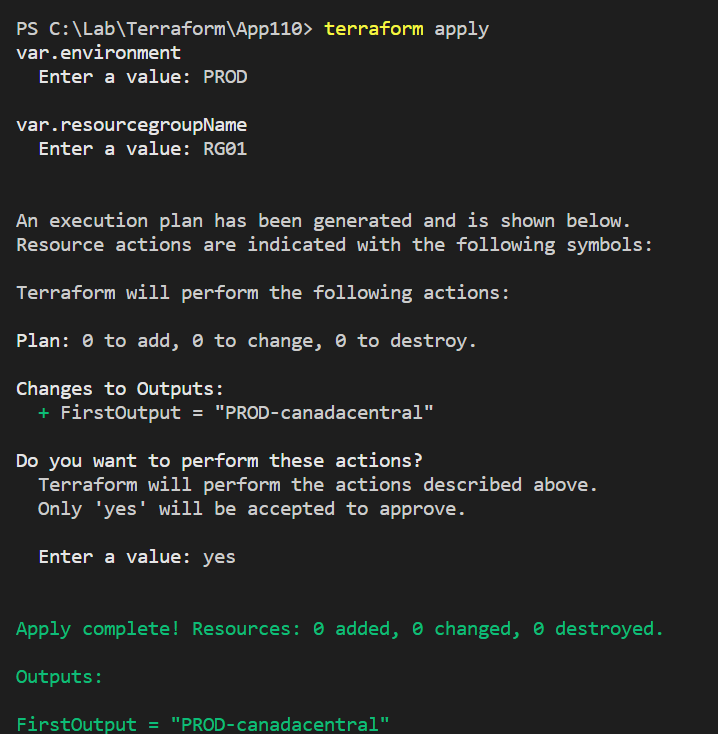
The third command is terraform apply, and this is the one that will make changes in the real-world infrastructure. We can pass a previous generated plan as a parameter, and if we do not pass, the command will use the current configuration and generate a plan on the fly and ask for approval.
All changes documented in the plan will be set in motion in your infrastructure. In the example above, we haven’t passed any plan, so confirmation was required.
The additional command that may be useful is terraform destroy, and this one will destroy anything that was previously configured using Terraform.
The slight problem with running that one is that it will delete the whole thing defined in the configuration files. A better way to see the impact of destroying is using terraform plan -destroy . This one will evaluate the damage that will occur if the terraform destroy is used in the current scenario.
The good, the bad, and the ugly
This section reflects my opinion on Terraform to manage Azure. Terraform is being used for larger corporations, and using infrastructure-as-code (IaC) is always better than manual processes and scripts — no room for discussion here.
The good: Terraform has several providers that allow easy integration with other products, making it compelling in the enterprise world. They also provide Terraform cloud and some corporate tools like Sentinel to evaluate and increase the security and governance as part of the pipeline even before deploying the infrastructure.
The bad: It is a language to deploy things in Azure (or different clouds and platforms), but you don’t have that experience with the platform itself. For example, creating a storage account in ARM helps you understand how Azure works behind the scenes. You can always export the template and see it firsthand and apply the changes. Terraform does not provide that feel (at least for me). We have their documentation and community to support you, but it is not the same thing.
The ugly: You are using a different vendor to support your IaC endeavors. Using ARM, you can easily open tickets with Microsoft, check the Azure Portal, and have similar code to compare. Terraform is a complete abstraction of code to deploy in Azure. Although it has some advantages to manage different platforms, at the end of the day, you are stuck with Terraform and its limitations (Azure is just one provider on their ecosystem). Your learning curve in the product that you are using Terraform to manage (Azure, in this example) will be shorter than using native tools.
Microsoft is working in a new language similar to Terraform to deploy resources in Azure. The name is Bicep, and you can find more information here.
Featured image: HashiCorp


How does Terraform compare to MS DSC? Something concept? One better than the other in Azure?