If you would like to read the other parts in this article series please go to:
- TMG Back to Basics – Part 1: Server Publishing Rules
- TMG Back to Basics – Part 2: Using the TMG Firewall Log Viewer
- TMG back to Basics – Part 3: Protocol Definitions
- TMG Back to Basics – Part 4: Network Objects
- TMG Back to Basics – Part 6: Reports
- TMG Back to Basics – Part 7: SharePoint Server Publishing
- TMG Back to Basics – Part 8: SafeSearch, URL Filtering and Certificate Revocation Options
Intorduction
In the first part of this two part series on TMG Firewall Network Objects, we went over the different Network Objects and what they represent. We also saw how you can create simple new Network Objects.
Don’t let that word scare you. Here’s the good news: Each of the “complex” Network Objects can be created by using a wizard. Wizards are available to create the following types of Network Objects:
- Network
- Network Sets
- URL Category Sets
- Web Listener
- Server Farm
Let’s take a look at the information that you’ll need to know in order to create each of these.
The New Network Wizard
You can begin the process of creating a new Network by clicking on the Network entry in the New menu. Remember that in TMG Firewall nomenclature, a Network represents a collection of IP addresses that are directly reachable from a particular interface on the TMG firewall.
The first thing you’ll see is the Welcome to the New Network Wizard page. On this page, you enter a name for the Network in the Network name text box. In this example, we’ll name the Network DMZ 2, as shown in Figure 1.

Figure 1
On the Network Type page, which you can see in Figure 2, you are given several different Network types to choose from:
- Internal Network. This is typically a Network that contains servers or clients that you want to be protected by the TMG firewall. When you create an Internal Network, the Properties dialog box of the Network will have all the options you see in the default Internal Network.
- Perimeter Network. A Perimeter Network is similar to an Internal Network. In fact, there is no practical difference between a Perimeter Network and an Internal Network – both provide the same options in their Properties dialog boxes. However, for accounting purposes, you will want to choose the Perimeter Network option to make it clear that this is a DMZ network, and not an Internal Network. The key difference here is that DMZ Networks typically will include Internet facing devices.
- VPN Site–To-Site Network. This is a special Network type that is used when you want to create a site to site VPN connection between your TMG firewall and another firewall. Note that while you can create the remote site Network from this wizard, you would more typically do it from within the wizard that is used to create the site to site VPN.
- External Network. An External Network is considered an unprotected Network and represents a collection of IP addresses that reside outside of any of the TMG Firewall Protected Networks. You would create an External Network if you want to add additional external interfaces on the TMG firewall and then create routing table entries for specific destinations that can be reached through the NIC that form the root of the External Network you created.
In this example, we’ll select the Perimeter Network option.

Figure 2
On the Network Addresses page, which is shown in Figure 3, you configure the addresses that define the Network. You can add the addresses in three different ways: by adding an adapter, by adding a private address range, or by adding a custom address range. We’ve found that in most cases, the best way to create a new Network is to base it on a specific NIC. In this example, we’ll click the Add Adapter button. That brings up the Select Network Adapters dialog box. In this dialog box, you need to put a checkmark in the checkbox next to the NIC that is the root of your new Network.

Figure 3
Once you’ve done all this, you can then review the settings of the new TMG Firewall Network on the Completing the New Network Wizard page, which you see in Figure 4. (Note that the IP addresses are different because I already used the Guest Network for another TMG Firewall Network).

Figure 4
You can then go to the Networking node in the left pane of the console and double click the new Network. There you’ll see the Properties dialog box that’s shown in Figure 5. Notice that this Perimeter Network’s Properties dialog box is the same as what you would find if you had created an Internal Network.

Figure 5
The New Network Set Wizard
Next, we’re going to find out how to create a new Network Set. A Network Set is just a collection of TMG Firewall Networks that you can use in your Access Rules and Publishing Rules. When you click Network Set from the New menu, you’ll see the Welcome to the New Network Set Wizard that’s shown in Figure 6. On this page, enter a name for the new Network Set. In this example, we’ll name the new Network Set Secure Networks.

Figure 6
On the Network Selection page, which is shown in Figure 7, you have two options: Includes all selected networks and Includes all networks except the selected networks. After making the selection that works best for your purposes, depending on the number of networks you have and the number you want to include in the set, put a checkmark in the checkboxes that are next to the Networks that you want to participate in your Network Set (or not participate, depending on the option you selected above the list of Networks).

Figure 7
Okay, we’re all done! Click Finish on the Completing the New Network Set Wizard page that’s shown in Figure 8.

Figure 8
Success! You should now be able to see the new Network Set in the Network Sets section of the Network Objects, as shown in Figure 9.

Figure 9
The URL Category Set
A URL Category Set is a collection of URL categories that are used for filtering (examples of URL categories include alcohol, gambling, and pornography). There are a number of built-in URL Category Sets (for example, the Liability Category Set includes the above categories, among others). However, the built in Sets may not precisely fit your needs. That’s okay, because the URL Category Set Wizard also enables you to create your own custom URL Category Sets. From the New menu, click URL Category Set. This brings up the Welcome to the New URL Category Set Wizard page that’s shown in Figure 10. Enter a name for the new URL Category Set on this page. In this example, we’ll name the new URL Category Set Temp Employees, with the intended purpose being to use this Category Set to define a rule later which will control which sites temporary employees can visit.
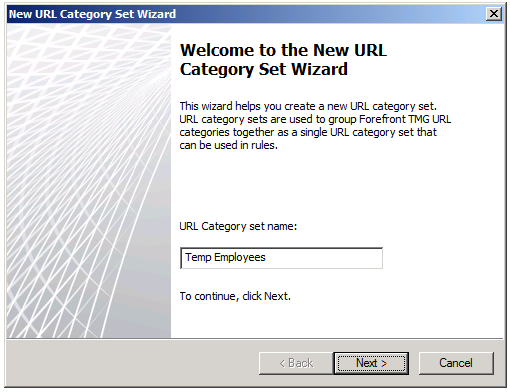
Figure 10
On the URL Category Selection page, shown in Figure 11, you have two options similar to what we saw with Network Sets: Includes all selected URL categories and Includes all URL categories except the selected URL categories. After making the selection that best fits your purposes, put a checkmark in the checkbox next to the categories you want to include (or exclude, depending on the option you’ve selected).

Figure 11
Review your selections on the Completing the New URL Category Set Wizard page that you see in Figure 12. Note that you can scroll to the right to see the full list of the URL Categories you included in the URL Category Set. Then click Finish.

Figure 12
Now the new URL Category Set appears in the list of URL Category Sets and can be used in an Access Rule to control which sites temporary employees are allowed to access.

Figure 13
The New Web Listener Wizard
As you probably already know, a Web Listener is a software component that is used by Web Publishing Rules. The Web Listener accepts incoming connection requests for published Web servers. Web Listeners define the authentication methods that can be used by the TMG firewall to authenticate users before the connections are allowed to the published Web server. This is often referred to as “pre-authentication”. There are many security advantages to pre-authentication and if your site requires authentication, you should always take advantage of this option.
Typically, you will create new Web Listeners when you’re publishing a web site, using the Web Publishing Wizard. However, if you want to create a Web Listener outside of the Web Publishing Wizard, you can do it here. On the New menu, click the Web Listener option. This brings up the Welcome to the New Web Listener Wizard page that’s shown in Figure 14. Enter a name for the Web Listener here. In this example, we’ll name the Web Listener HTTP Listener, with the intent that this Web Listener will be used for accepting incoming connections to unencrypted web content that will not require authentication.

Figure 14
On the Client Connection Security page, shown in Figure 15, you will need to define whether or not the external client will be required to establish an SSL connection with the TMG firewall before the firewall forwards connections to the published Web server. You have two options, and they’re pretty self-explanatory:
- Require SSL secured connections with clients
- Do not require SSL secured connection with clients
Note the warning message; if you used HTTP, you should not require authentication to the TMG firewall, since the credentials will move over the Internet in the clear and could easily be picked up by intruders.

Figure 15
On the Web Listener IP Addresses page that you can see in Figure 16, you select the Network on which the Web Listener should be listening for incoming connections. In most cases, you’ll want the Web Listener to listen for incoming connections from the default External Network, so we’ll select External in this example. If you select this option, the Web Listener will listen for incoming connections on all IP addresses that are bound to the external interface of the TMG firewall. In general, you don’t want to do that; instead, you want the Web Listener to accept connections on specific IP addresses so that you can create multiple Web Listeners with different characteristics that support different authentication and encryption scenarios. To select a specific IP address, click the Select IP Addresses button. That brings up the External Network Listener IP Selection dialog box. From there, you can select the Specified IP addresses on the Forefront TMG computer in the selected network option and then choose the IP address on which you want the Web Listener to listen.

Figure 16
On the Authentication Settings page, which is shown in Figure 17, you set the type of authentication you want this Web Listener to support. You have three options:
- HTTP Authentication
- HTML Form Authentication
- No Authentication
Depending on the selection you make from the drop down box, you will have different authentication methods available to you. For example, if you select Network Object Authentication, then no authentication methods will be available to you. If you select HTML Form Authentication you’ll have all the authentication methods available to you. However, you should never enable authentication at the TMG firewall if you’re not using SSL, and that is especially the case with HTML Form Authentication, since the credentials are based in clear text and not even encoded as they are with Basic authentication (not that it makes much practical difference, since most network analyzers are going to automatically do the decode). The point is this: if authentication at the TMG firewall is required, the connections to the firewall should be an SSL connection. In fact, if you try to enable unencrypted connections to the TMG firewall, you’ll receive a warning.
All of this reminds me that I should emphasize to you that these authentication methods are for the external user to authenticate to the TMG firewall itself, as part of the pre-authentication process. The TMG firewall can also perform authentication delegation, where the credentials the firewall received can be forwarded to the published server after the TMG firewall has successfully authenticated the user. This prevents the user from having to present credentials a second time (to the published server itself).

Figure 17
In this example, we’ll select No Authentication. Notice in Figure 18 how all the options become grayed out when we select this option.

Figure 18
On the Single Sign On Settings page, which is shown in Figure 19, you can configure the Web Listener to support Single Sign On. Since the user isn’t going to authenticate with the TMG firewall when using this Web Listener that we’ve created in this example, there is no reason to enable SSO because there is no sign on in the first place 🙂

Figure 19
On the RADIUS Servers page, shown in Figure 20, you add the RADIUS servers you want to use if you choose to use RADIUS based authentication for the Web Listener. However, since we chose to not support authentication with this Web Listener, there’s no reason that we should even see this page. I suspect this might be a minor bug in the Web Listener wizard – but not enough of a bug to fix since you can just click past it. In this case, we’ll do just that: click past this page since there’s no reason to define a RADIUS server if you’re not using authentication for the Web Listener.

Figure 20
On the Completing the New Web Listener Wizard page, shown in Figure 21, you can review your settings and then click Finish.

Figure 21
When you’re done, you’ll see the new Web Listener in the Web Listeners list, as shown in Figure 22.

Figure 22
The New Server Farm Wizard
You can use the TMG firewall to publish a web farm. A Web Farm is typically a collection of Web servers that host the same content or services and the farm is used for high availability and fault tolerance. When you publish a Web Farm using the TMG firewall, you don’t need to use NLB or an external hardware load balancer to publish the Web Farm. The TMG firewall will handle connection assessment and automatically load balance connections to the published Web servers, and it will also remove downed Web servers when the TMG firewall determines that a member of the Web Farm is offline.
On the Welcome to the New Server Farm Wizard page, shown in Figure 23, you enter a name for the Web Farm. In this example, we have named the Web Farm CAS TAC.

Figure 23
On the Servers page, which is shown in Figure 24, you can click the Add button and enter the name or IP address of a member of the Web Farm in the Server Details dialog box. You can add as many servers to the farm as you like; there are no hard coded limits.

Figure 24
You can see the list of IP address or names of the servers in the Web Farm in the list of Servers included in this farm on the page shown in Figure 25.

Figure 25
The TMG firewall needs to test all members of the farm to make sure they’re online. If it detects that a member of the farm is offline, it will remove that server from the list of servers among which it will load balance connections. On the Server Farm Connectivity Monitoring page, which is shown in Figure 26, you can choose the method used to confirm connectivity. Your three options are: Send an HTTP/HTTPS GET request, Send a PING request and Establish a TCP connection. If you choose the Establish a TCP connection, you need to enter a TCP port number for the port on which you want to establish the socket.
Note that if you choose PING or TCP connections, this only tells the TMG firewall that the server can respond to a PING request or establish a TCP socket with the TMG firewall. However, it doesn’t really tell the TMG firewall anything about the viability of the published service. If you want to know more about service viability, you should select the Send HTTP/HTTPS Get request option. If the servers in the farm need a specific host header, you can click the Configure button to set that header.

Figure 26
You can review the settings on the Completing the New Server Farm Wizard page, as shown in Figure 27, and then click Finish.

Figure 27
After you click Finish, you’ll see an informational dialog box like the one shown in Figure 28, which informs you about connectivity verifiers and asks if you want to automatically configure System Policy to support the connectivity verifiers. You should click Yes so that the connectivity verifiers will work correctly.

Figure 28
The new Server Farm now appears in the Server Farms list, as shown in Figure 29.

Figure 29
Summary
In this article, which is part 2 in of our two-part discussion of Network Objects, we went over the more complex Network Objects and the Wizards that are used to create these Network Objects. As with the simple Network Objects, these complex Network Objects can be used in Access Rules and Publishing Rules to define sources or destinations. I hope you learned something useful from this article, and if you have any question about Network Objects and how to use or create them, let me know! Thanks! -Deb.
If you would like to read the other parts in this article series please go to:
- TMG Back to Basics – Part 1: Server Publishing Rules
- TMG Back to Basics – Part 2: Using the TMG Firewall Log Viewer
- TMG back to Basics – Part 3: Protocol Definitions
- TMG Back to Basics – Part 4: Network Objects
- TMG Back to Basics – Part 6: Reports
- TMG Back to Basics – Part 7: SharePoint Server Publishing
- TMG Back to Basics – Part 8: SafeSearch, URL Filtering and Certificate Revocation Options


