If you would like to read the next part in this article series please go to Uncovering the new Exchange 2007 SP2 Volume Snapshot (VSS) Plug-in (Part 2).
Introduction
Ever since Exchange 2007 SP1 was released and Exchange admins and consultants began to deploy Exchange 2007 on Windows Server 2008 based servers, there has been a lot of frustration and complaints about the impossibility of performing Exchange-aware backups and restores using Windows Server Backup. Small and medium organizations (SMORGs) were the ones who were mostly affected by the decision to not provide a native backup solution for Exchange 2007 SP1 on Windows Server 2008. LORGs (large organizations) were not really affected as they typically use backup solutions such as Microsoft Data Protection Manager (DPM) or one provided by a 3rd party vendor.
The Exchange Product group took the negative feedback on this topic very seriously and explained that unlike Exchange 2007 RTM and previous versions of Exchange Server, they decided not to include an Exchange-aware backup plug-in with Exchange 2007 SP1. Judging from threads and posts all over the Exchange communities, this explanation was not enough. A solution had to be found. Just look at all the comments on this blog post on the MSExchange.org Team blog.
At the TechEd IT Pro conference in North America back in June 2008, Scott Schnoll form the UE team within the Exchange Product group made a very interesting announcement. He informed the attendees of his Exchange 2007 SP1 Tips and Tricks session that Microsoft had decided to provide a VSS-based plug-in for Windows Server Backup in Windows Server 2008 that will enable customers to take Exchange-aware VSS backups on Windows Server 2008. Scott also announced this on his blog.
That was back in June 2008. Fast forward to May 2009. After many questions from the different Exchange communities around the world regarding the expected date for the new VSS plug-in, this blog post was posted over at Scott Schnoll’ s blog. The blog post explains that the VSS plug-in would be included with Exchange 2007 Service Pack 2. The Exchange Product group also posted this information on the MSExchange Team blog, which generally speaking, spoke about Exchange 2007 SP2 but also mentioned that an Exchange-aware VSS plug would be included with this service pack.
So now that the Exchange 2007 SP2 RTM date is right around the corner, let us take a tour of the feature set of the new Exchange–aware VSS plug-in that integrates directly with Windows Server Backup in Windows Server 2008.
In this first part of this two part article series, we will specifically look at how you perform a backup using the new Exchange 2007 SP2 VSS plug-in.
Test environment
For the purpose of this article I used a single Exchange Server 2007 SP2 (Enterprise edition) server running on top of Windows Server 2008 SP2.
As shown in Figure 1, a total of six storage groups exist on the server and they hold one database each.
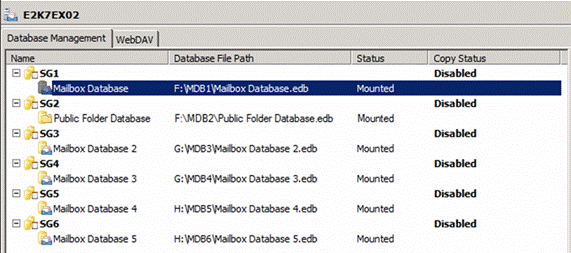
Figure 1: Exchange 2007 Storage Groups and Databases
As shown in Figure 2, there is a total of three storage group LUNs and three database LUNs, which means that each SG LUN holds two storage groups and each DB LUN holds two databases.

Figure 2: Storage Group and Database LUNs
As you may have noticed, each LUN has been presented to the Windows Server using drive letters. My orginal intent was to use mount points, but I found a bug that causes the initial database consistency check to fail when SG/DB LUNs are presented via mount points (Figure 3). I have informed the Exchange Product group about this issue and I was told that they will look into it.
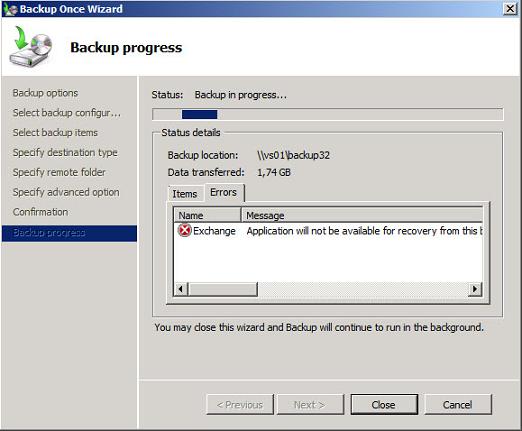
Figure 3: Consistency check fails when using mount points
Limitations
Limitations you should be aware of are listed below:
-
The plug-in can only perform VSS-based backups. Streaming backups are not supported with this plug-in.
-
Backups occur at the volume level. This means that all data on a particular volume will be backed up. For instance, in my test environment, I had more than one database (DB) or storage group (SG) stored together on the same LUN, both SGs or DBs will be backed up in this case. You cannot select to only backup one SG or DB stored on a LUN with multiple SGs or DBs present.
-
The plug-in does not support remote VSS backups. The backup must be run locally on the respective Exchange 2007 Server.
-
The backup can be created either on a local drive or a remote network share. There is no support for backups made directly onto a tape library. If you want to backup to a tape, you must use the disk to disk to tape model. I will show you how to perform backups to both a local disk and remote network share in this first part of this multi-part article.
-
You must take full VSS backups. If you do not log, truncation will not happen. I will show you this in the first part of this multi-part article.
-
Because the VSS plug-in does not support the Exchange Replication VSS Writer, you cannot perform SG/DB backups via a passive Exchange 2007 cluster node. So if you want to backup SGs/DBs on a Single Copy Cluster or Clustered Continuous Replicated based cluster, you must perform the backup from the active node.
-
When performing a restore, you can choose to restore directly to the original location or to an alternate location. When restoring to the original location, the recovery process is fully automatic. This means you do not need to check “This database can be overwritten by a restore” or dismount the database(s) before performing the restore. I will show you how this is done in the second part of this multi-part article series.
-
The VSS plug-in does not support Recovery Storage Groups. That means that you cannot restore directly to an RSG. You must instead restore to an alternate location and then create the RSG, then mounting the restored DB in the RSG. I will show you how this is done in the second part of this multi-part article.
-
When performing a restore, you must restore all SGs and DBs located on the same LUN together. If you have multiple SGs or DBs on a given LUN, it is all or nothing. I will show you how this is done in the second part of this multi-part article series.
Installing the Window Server 2008 Backup Features
So, now that you have upgraded your Exchange 2007 Server to Service Pack 2, the first thing you want to do is to enable the Windows Server Backup features in Windows Server 2008. You can do this using ServerManagerCMD.exe or the Server Manager console. When using the Server Manager console, click “Add Features” and check “Windows Server Backup Features” as shown in Figure 4.

Figure 4: Installing Windows Server Backup Features
Click “Next” and then “Install”.
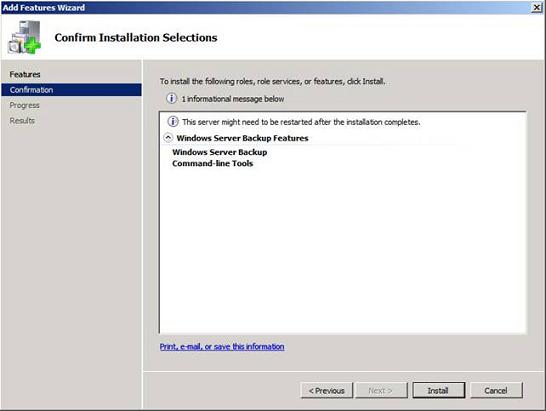
Figure 5: Confirm Installations Selections
When the Windows Server Backup Feature have been installed, click “Close” and then exit the Server Manager console.
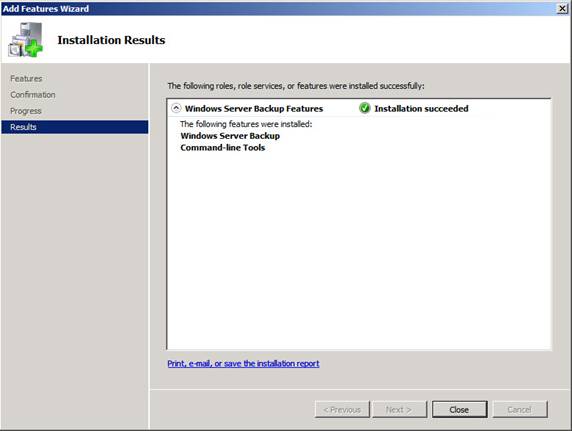
Figure 6: Windows Server Backup Features installed successfully
Performing a backup
Now that Exchange 2007 SP2 has been installed and the Windows Server Backup features have been enabled in Windows Server 2008, let us launch Windows Server Backup. You do this by clicking Start > Administrative tools and selecting “Windows Server Backup” as shown in Figure 7.
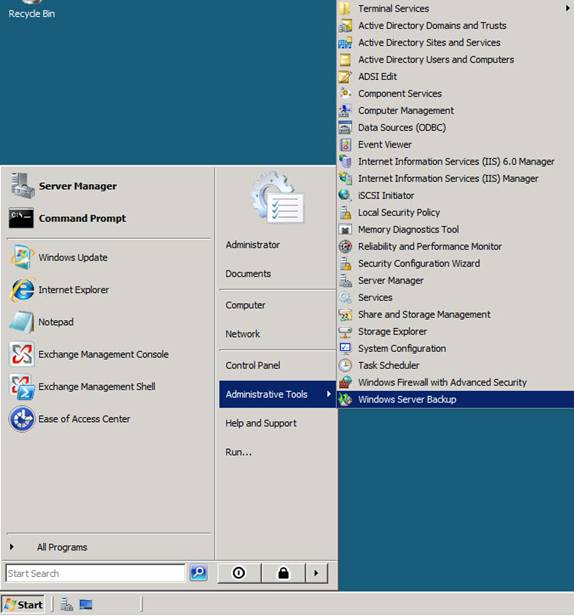
Figure 7: Launching Windows Server Backup
In the Windows Server Backup console we can choose to create a backup schedule or just take a backup once. In this article we will to the latter, so click “Backup Once” in the Action pane as shown in Figure 8.
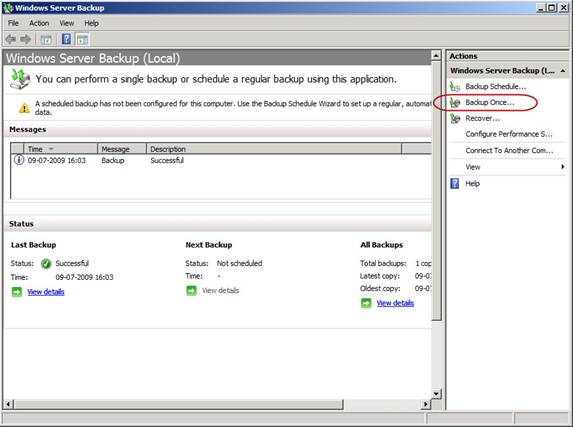
Figure 8: Selecting “Backup Once” in the Windows Server Backup Console
On the “Backup Options” page, click “Next”.
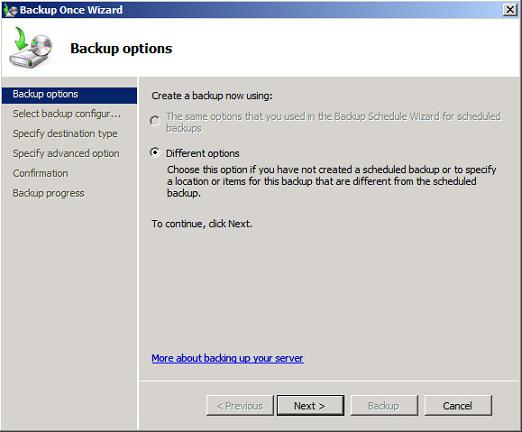
Figure 9: Backup Options page
Since we do not want to back up the System volume in this backup job, choose “Custom” and then click “Next”.
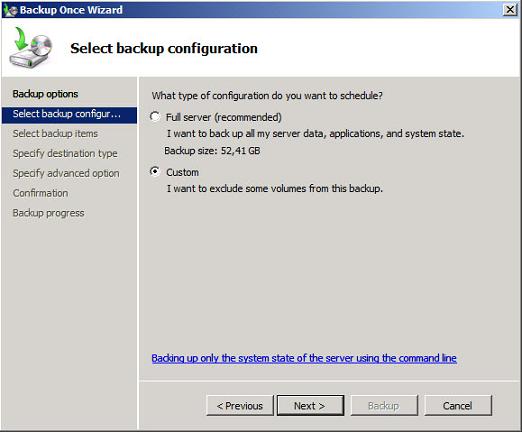
Figure 10: Selecting “Custom” on the backup configuration page
Now de-select “Enable system recovery” and then check all the SG and DB LUNs you want to backup.
Click “Next”.
Note:
Make sure you check both the SG and DB LUNs, otherwise log truncation will not occur.
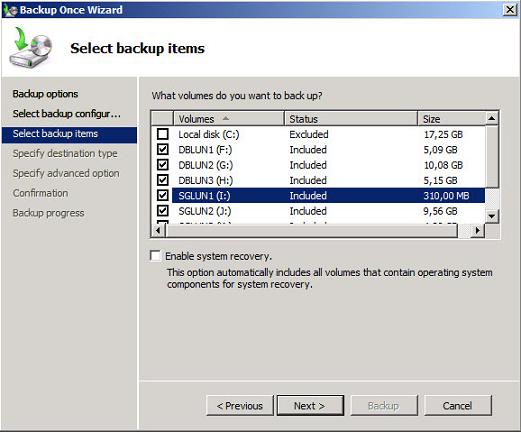
Figure 11: Selecting DB and SG LUNs
We now need to specify where you want to store the backup. As mentioned earlier, we can either store it on a local disk or on a remote network share. In this article we will use a remote network share as shown in Figure 12.
When ready click “Next”.
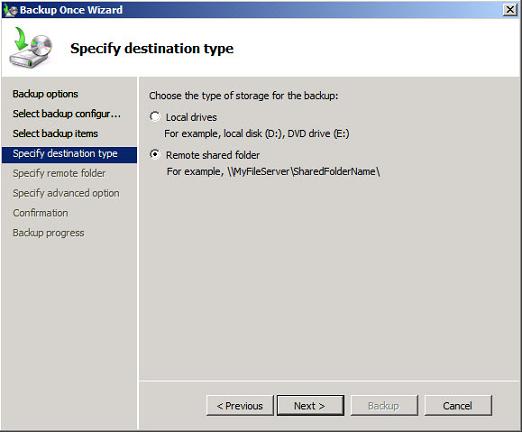
Figure 12: Selecting to back up to a remote network share
Now specify the path to the remote network share and click “Next”.

Figure 13: Specifying the path to the remote network share
On the “Specify advanced option” page, select VSS Full Backup and click “Next”. If you choose “VSS copy backup”, the log files will not be truncated.
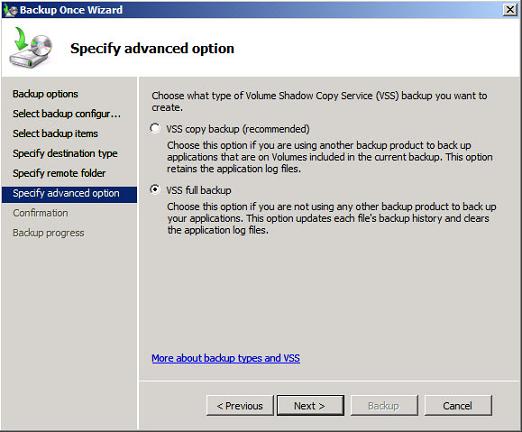
Figure 14: Selecting VSS full backup
On the “Confirmation” page, click “Backup” in order to begin the backup.

Figure 15: Confirmation page
Windows Server Backup will now to a consistency check of the databases.
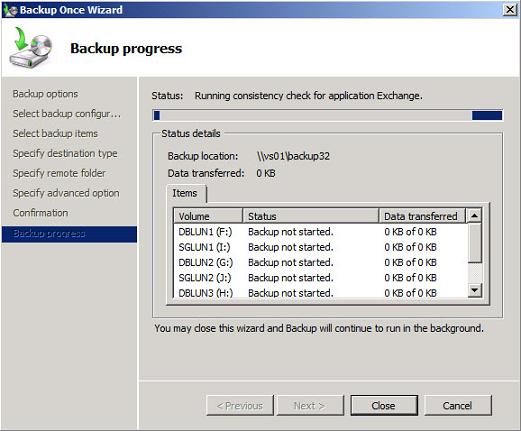
Figure 16: Running consistency check for Exchange
When the consistency check has been completed, the backup of each LUN will begin.

Figure 17: Backup in progress
When the backup is complete, you can click “Close”. Well actually you can close the” Backup Once Wizard” windows while the backup is occurring without interrupting the backup job. In order to follow the progress of the backup, we will leave it open.
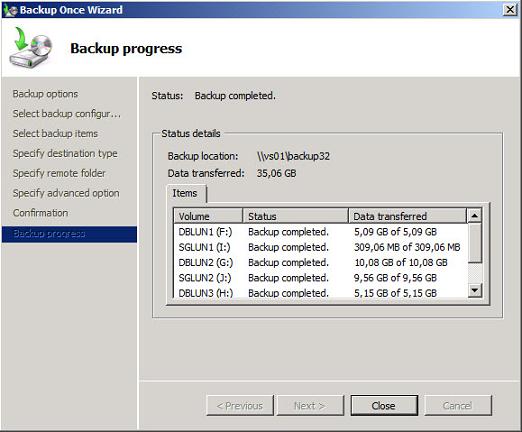
Figure 18: Backup completed
Let us now verify that the log files have been truncated and the last full backup property of the databases has been updated.
As you can see in Figure 19, the log files for SG1 have been truncated.

Figure 19: Log files truncated
By opening the property page of DB1, we can also see that the last full backup property was updated.
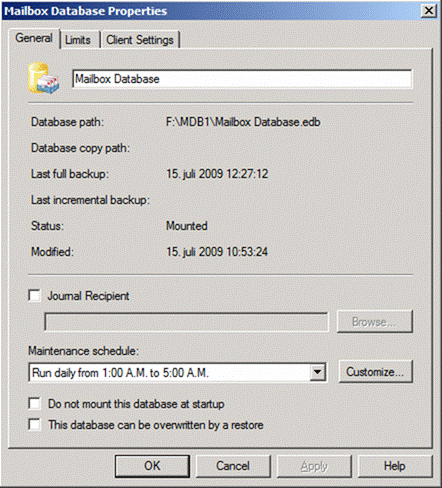
Figure 20: Database property page with last full backup property updated
Note:
If you want to check the “Last full backup” property via the Exchange Management Shell, you can do so by using; Get-MailboxDatabase –Identity “DB name” –Status | FL. Just remember to include the Status parameter, as this property field otherwise will be blank.
The last thing I wanted to show you before we move on to the next section was the backup image files. As you can see in Figure 21, backups are stored in VHD files with associated XML files.
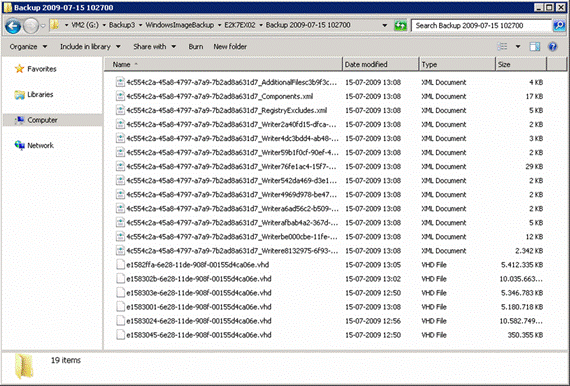
Figure 21: Backup image files
This concludes this first part of this multi part article series uncovering the new Exchange-aware VSS plug-in included with Exchange 2007 SP2. In the next article, we will take a look at how you perform a restore, both to the original location as well as an alternate location, in case you want to recover specific mailbox items for one or more mailboxes in a restored database.
Hope you enjoyed it so far.
If you would like to read the next part in this article series please go to Uncovering the new Exchange 2007 SP2 Volume Snapshot (VSS) Plug-in (Part 2).


