Some companies, typically smaller ones, still use software that sends messages. For example, it may be custom applications or older CRM systems. These systems send messages without a user or unauthenticated. The same problem can occur with older multifunctional devices. These have a scan-to-mail functionality but use it without authentication. In on-premises Exchange environments, we were able to configure the appropriate connector to allow the systems or devices to do this. After such companies have made a migration to Exchange Online, and this migration has been implemented without a hybrid, these devices and systems can no longer send messages. The reason for this is that Exchange Online does not allow the sending of unauthorized messages.
Depending on the software or device, the configuration can be adapted with a release update. However, it is often the case that the product no longer has support, or even worse, the manufacturer no longer exists. Often, the device can be replaced by a new one, but this usually takes a few days or cannot be implemented so easily for cost reasons. To ensure that these devices or software can continue to be used, we should reconfigure the Exchange organization as hybrid, according to Microsoft’s best practice. I have described why this is a Microsoft best practice in another article.
Companies may not have a hybrid installation for several reasons. On the one hand, it may be that the company was badly advised by its IT partner. On the other hand, it may be that this was done for cost reasons. In this tutorial, I will show an alternative so these existing devices or software can still be used.
The alternative is to use the SMTP server that is provided by the IIS (Internet Information Service). This article refers to the Microsoft documentation on the topic of how to set up a multifunction device or application to send email using Microsoft 365 or Office 365 (specifically, option 2).
Mail relay server requirements for Exchange Online
To use the SMTP service of the IIS, the following requirements must be complied with. Since this is an IIS (Internet Information Service) service, a Windows Server is required. It is recommended to use a common version like Windows Server 2016. However, Windows Server 2012 R2 and Windows Server 2019 are also supported. In common practice, a dedicated server does not necessarily have to be set up. Often an existing server, for example, the print server, is used for this service.
Another important point is that the server being used has Internet access and port 25 is enabled for sending emails to the Internet. Optionally, an SSL certificate is also required if the connection should be configured via TLS. This point is not covered in this article.
Installation roles and features
In the first step, we need to define an on-premises server that will provide the relay functionality to Exchange Online. Depending on the reason for which it is needed, we can decide which on-premises server this will be. In my example, I will use the local print server for this purpose, since my example is primarily concerned with multifunction devices.
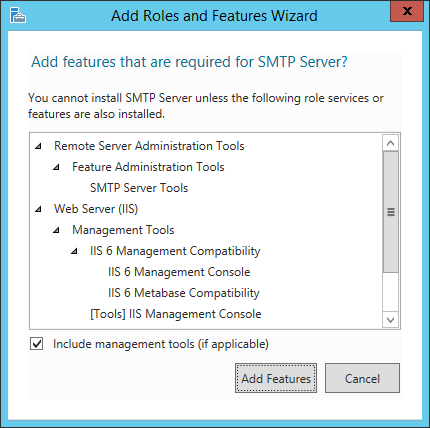
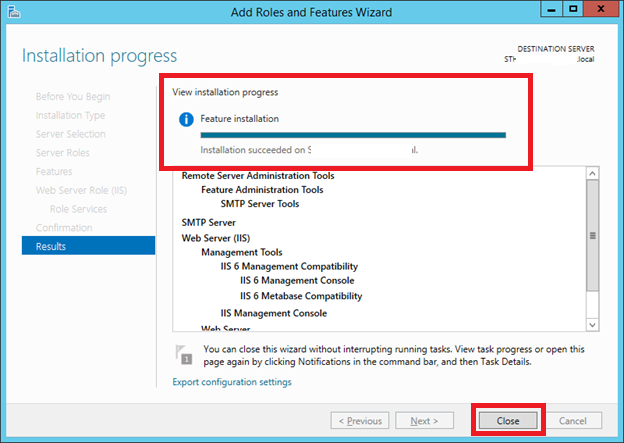
We have to select the SMTP Server under Add Roles and Features.

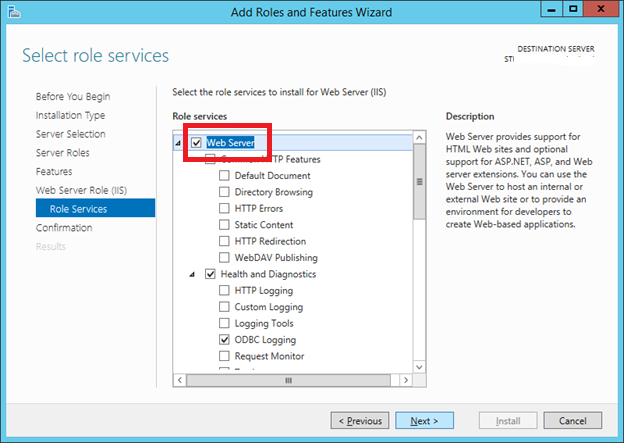
In the next step under Roles, we select the webserver for our installation.
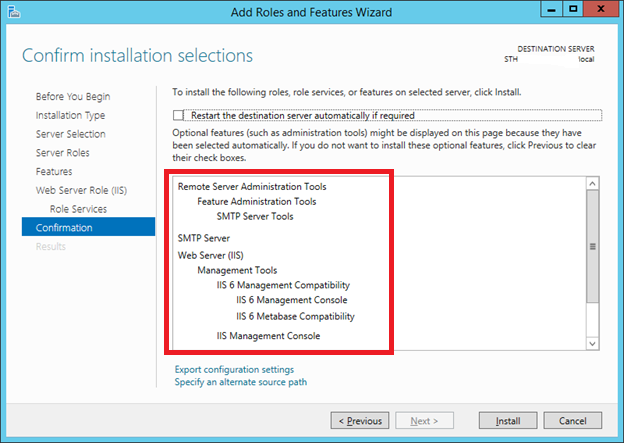
Under Confirmation, we check our settings again.
Afterward, we install them.
Configuration
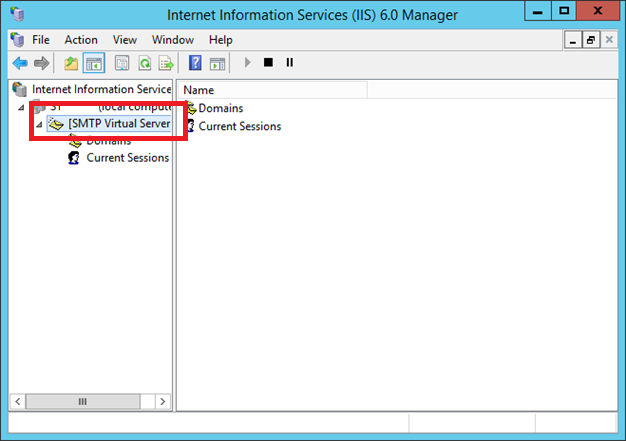
After opening the IIS 6.0 Manager, right-click on [SMTP Virtual Server].
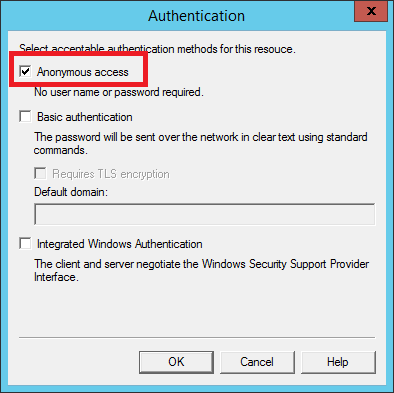
After opening the settings, switch to access.
 Click Authentication.

Now we can define the appropriate settings. Since the main reason for this setup is the unauthenticated sending of messages, we need to enable anonymous access.
Now we switch to Connections in the same tab. There are two options here: One, we can select the option Only the list below. This means that we have to enter all Device IPs here for which sending is allowed. I recommend this option because we can never be sure which other devices or software are trying to send messages.

The second option is that we allow sending for all IPs in our network. For this, we select the option All except the list below. This means that all IPs that are entered now have no permission to send messages via this relay.

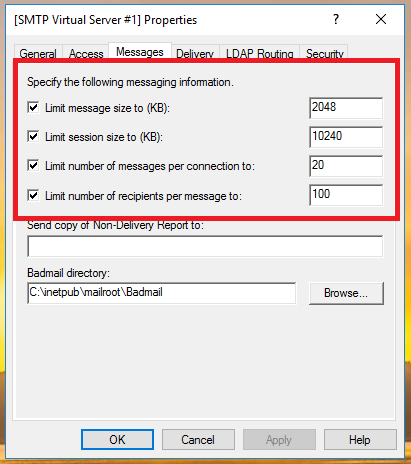
Remember also to set the limits as defined by your guidelines. If nothing is defined here by your company, I recommend the following settings:
Limit message size to (KB): 8192
Limit session size to (KB): 40960
Limit number of messages per connection to: 20
Limit number of recipients per message to: 100
These can, of course, be adapted individually. The basic recommendation is that the session limit is usually five times higher than the message limit.
The next step is to control the outbound security. This is also set on the tab page Delivery > Outbound Security. Alternatively, you can also work with a login to Office 365. A mailbox must then be configured in Office 365. This is also the method recommended by Microsoft.

You can see my example in the image below. You have to adapt this to your environment.

Exchange Online inbound connector for SMTP relay
After the on-premises server is prepared, a corresponding connector must be created on Exchange Online.
With this connector, we ensure that Exchange Online receives and processes the messages sent by the SMTP server.
To do this, you must log on to the Exchange Admin Center using this link and follow the steps below.
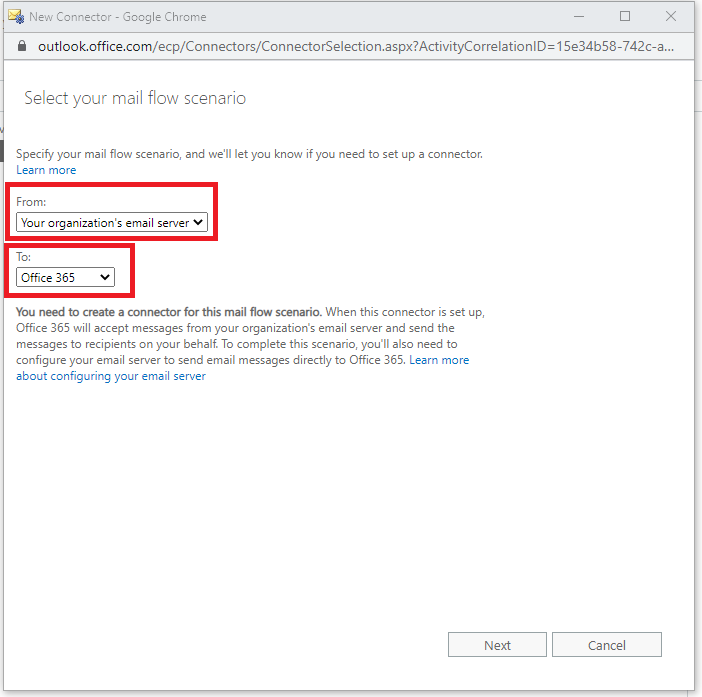
On the page of Exchange Online, we now have to create a new connector. To do this, we have to browse in the EAC (Exchange Admin Center) to mail flow > connectors and create a new connector with the “+.”

In the next step, we select “Your organization’s email server” from the first dropdown menu. In the second dropdown menu, we select the option Office 365. Click Next to continue.
In the second step, we define a name for our connector. If desired, a description can be entered. Click Next to continue.

Now we have to enter the public IP of our on-premises server. This is important so Exchange Online knows from whom it can receive messages. Alternatively, you can also enter whole networks or several IPs as described in the next step.

As already mentioned, the IPs can be adjusted or changed here.

Finally, we have the summary. Confirm with Save. Now the configuration is completed. From now on, you can define in the IIS SMTP — if not already preconfigured — which on-premises systems or programs can send messages online via Exchange.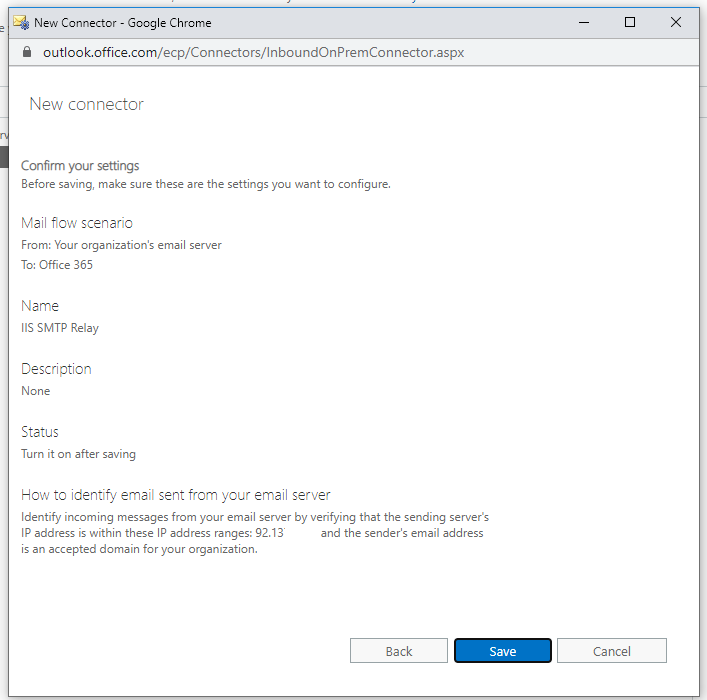
Featured image: Unsplash / Jean-Frederic Fortier