Does your organization run Windows 10 on Hyper-V virtual machines that you plan to upgrade to Windows 11? You will need to modify some of the virtual machine settings before performing the upgrade. While you can do this using the Hyper-V Manager or System Center Virtual Machine Manager, these tools tend not to scale well when making bulk changes to virtual machine settings. In most cases, the best way to modify the virtual machine settings in bulk for Windows 11 will be to use PowerShell. In this article, I will show you how to use PowerShell to modify a Windows 10 virtual machine to prepare it for a Windows 11 upgrade.
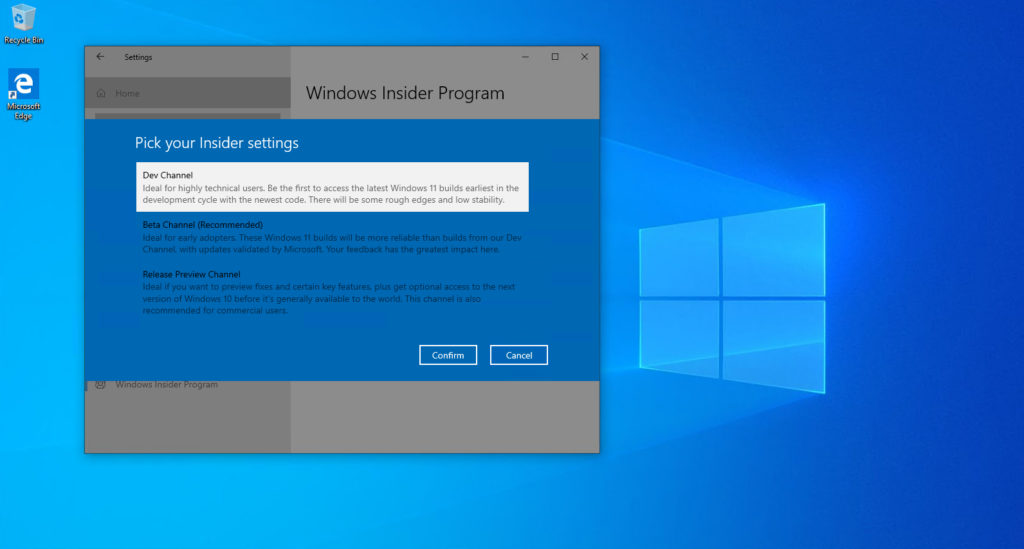
As it stands now (before the official Windows 11 release, which is scheduled to start rolling out Oct. 5), upgrading to Windows 11 means joining the Windows Insider Program and then selecting a channel that allows an upgrade to Windows 11. Once Windows 11 is released, you will be able to upgrade by using Windows Update. In either case, the VM will need to meet the Windows 11 hardware requirements, or the upgrade will not be allowed.
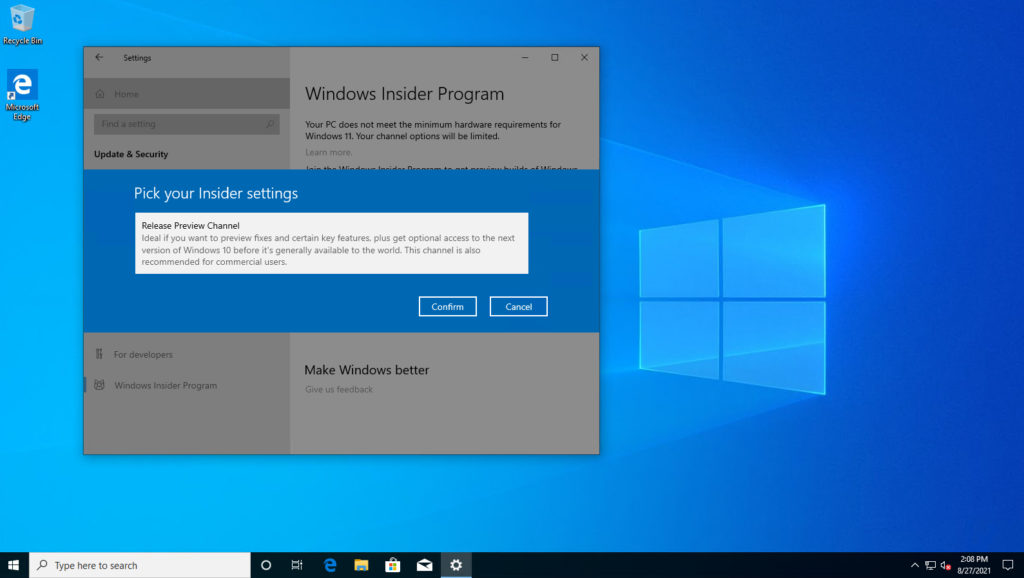
As you can see in the image below, this particular VM, which is running a typical Windows 10 configuration, is not eligible for an upgrade to Windows 11 because it does not meet the minimum system requirements.
Firing up PowerShell to prepare for Windows 11
So, with that said, let’s delve into PowerShell and prepare the VM for a Windows 11 upgrade. Before I get started, it is worth noting that even though I am working with a single VM for the sake of simplicity, the technique that I am about to show you can be easily scaled to accommodate a large number of virtual machines.
The first thing that you will need to do is to shut down the virtual machine. To do so, open an administrative PowerShell prompt on the Hyper-V host and enter the following command:
Shutdown-VM -Name <virtual machine name> -Force
As you can see in the image below, the shutdown process will fail unless you append the -Force switch.

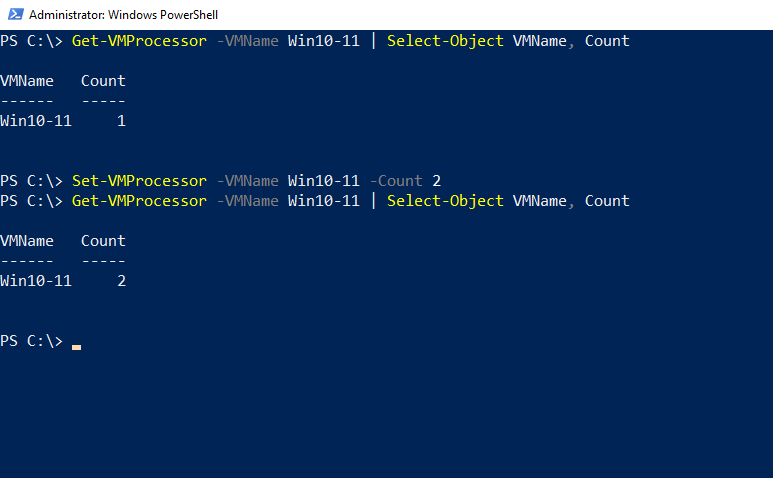
Now that the virtual machine has been shut down, we can prepare it for the Windows 11 upgrade. The first thing that we will need to do is increase the number of VM processors allocated to the virtual machine. When you create a new Hyper-V virtual machine, the Hyper-V Manager automatically provisions the virtual machine with a single virtual processor. However, Windows 11 cannot be installed unless the virtual machine has at least two virtual processors assigned to it.
To determine the total number of virtual processors that are currently allocated to a virtual machine, you can use the following command:
Get-VMProcessor -VMName <virtual machine name> | Select-Object VMName, Count
If you determine that a virtual machine only has a single virtual processor assigned to it (or if you just want to increase the virtual processor count, you can do so by using the Set-VMProcessor command. Here is the command:
Set-VMProcessor -VMName <virtual machine name> -Count <the number of virtual processors that you want to allocate>
You can see how this command works in the image below.
Is Secure Boot enabled?
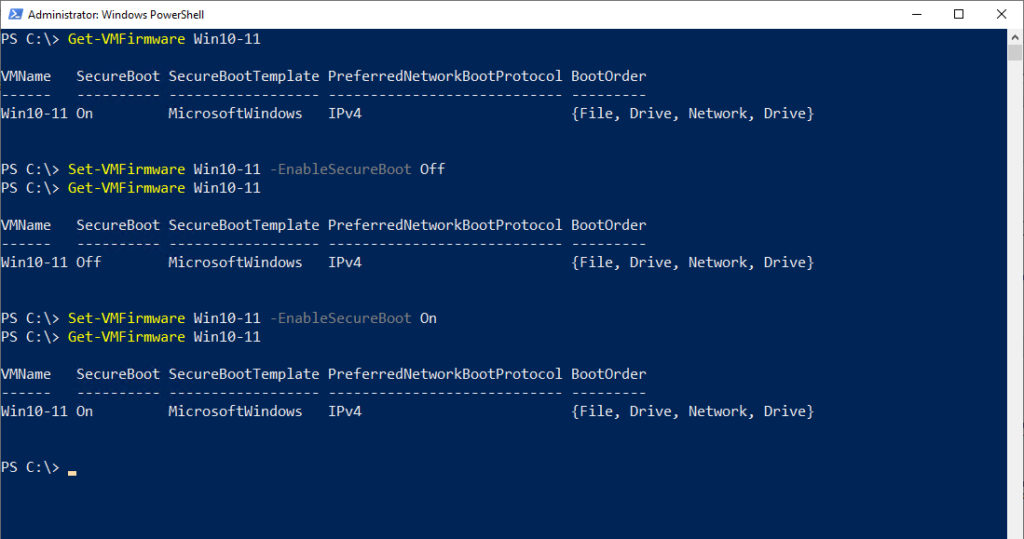
The next thing that you will need to do is to make sure that Secure Boot is enabled for the virtual machine. Secure Boot is normally enabled by default, but since it’s a Windows 11 requirement, it’s important to check to be sure. You can check Secure Boot’s state by entering the following command:
Get-VMFirmware <virtual machine name>
You can enable or disable Secure Boot by using the Set-VMFirmware cmdlet in conjunction with the EnableSecureBoot switch. In the image below, I have checked the state of Secure Boot, disabled Secure Boot, and then reenabled it, just so that you can see how the process works. Normally though, Secure Boot is enabled by default, so you won’t typically have to do anything beyond just verifying that it is enabled.
Enable TPM
The next step in the process is to enable the virtual machine’s virtual TPM chip. This is necessary because Windows 11 requires TPM 2.0 or higher. Enabling TPM from PowerShell is a bit of a hassle, so before you do so, I recommend using the Get-VMSecurity cmdlet (followed by the virtual machine name) to verify that TPM is not yet enabled.
You can enable the virtual TPM by using the Enable-VMTPM cmdlet. However, when you do, you will receive an error message stating that you cannot do so without a valid key protector. You can see an example of this in the next image.

Here are the commands used to get the key protector and enable the virtual TPM. Keep in mind that this procedure assumes that you aren’t using the Host Guardian Service to require the use of a trusted host.
$HGOwner = Get-HgsGuardian UntrustedGuardian
$KeyProtector = New-HgsKeyProtector -Owner $HHSOwner -AllowUntrustedRoot
Set-VMKeyProtector -VMName Win10-11 -KeyProtector $KeyProtector.RawData
Enable-VMTPM <virtual machine name>
You can see how this works in the screenshot below.

When you are done, use the Start-VM cmdlet to boot the VM. You should now be able to upgrade to Windows 11, as shown below.
Windows 11 prep: One more PowerShell command
In this article, I have explained how to perform the most common setting modifications necessary to upgrade a Hyper-V virtual machine to Windows 11. Keep in mind that there are other system requirements that you might also wish to address. For example, Windows 11 requires at least 4GB of RAM. You can check to see how much RAM is installed in a VM by using the Get-VMMemory PowerShell cmdlet.
Featured image: Shutterstock