If you would like to read the other parts in this article series please go to:
- Virtual Networking for Hyper-V (Part 1)
- Virtual Networking for Hyper-V (Part 2)
- Virtual Networking for Hyper-V (Part 3)
- Virtual Networking for Hyper-V (Part 4)
- Virtual Networking for Hyper-V (Part 5)
Introduction
In my previous article, I began discussing the concept of VLANs as they relate to Hyper-V. In this article, I want to conclude the series by showing you how to configure VLAN support in a Hyper-V environment.
Before I get started, I want to quickly remind you that using VLANs will only be an option if your network switches offer VLAN support. As I explained earlier in the series, both the parent partition and the child partitions connect to a virtual network switch. As you would probably expect, this virtual switch does provide VLAN support. However, for any communications that go beyond the boundaries of the physical hardware, you must have a physical switch that supports VLAN traffic.
In other words, if a virtual machine needs to communicate with another virtual machine that is hosted on the same physical server, then the VLAN traffic passes through the virtual switch, so VLAN communications are fully supported. Likewise, if a virtual machine needs to communicate with the parent partition, that machine too is connected to the virtual switch, so VLAN traffic is supported. If however, a virtual machine needs to communicate with another guest machine that is hosted on a different physical server (or if it needs to communicate with a physical machine other than its parent), then the packets will flow across the physical network, and any switches carrying the traffic will be required to provide VLAN support.
Just as your network switch must support VLAN traffic, so too must your server’s network adapters. Not all network adapters can handle VLAN traffic, so it is important to check to make sure that your servers’ adapters offer VLAN support prior to actually moving forward with VLAN configuration. Near the end of the article, I will show you how you can tell whether or not a network adapter supports VLAN traffic.
The Three Types of VLAN Configuration
In a Hyper-V environment, there are three different places in which you can enable VLAN communications. Keep in mind though, that you are not required to enable VLAN support in all three places. You only have to configure VLAN support where you actually need it.
The Parent Partition
The first place where you can configure VLAN support is at the parent partition. Doing so does not automatically configure VLAN support to the virtual machines. It simply ensures that any traffic flowing through the adapter is tagged with the VLAN ID that you specify.
To enabling VLAN support for the parent partition is done through the Hyper-V Management Console. To do so, open the Management Console, and then click on the Virtual Network Manager link. When the Virtual Network Manager opens, you will see a list of all of the virtual networks that have been configured on this machine.
At this point, you should select the virtual network that you want to configure. When you do, you will notice that the right side of the window provides various configuration options, as shown in Figure A. This section contains a check box that you can select to enable Virtual LAN Identification for the parent partition. If you enable this check box, you will also have to provide a VLAN ID number that the parent partition can use.
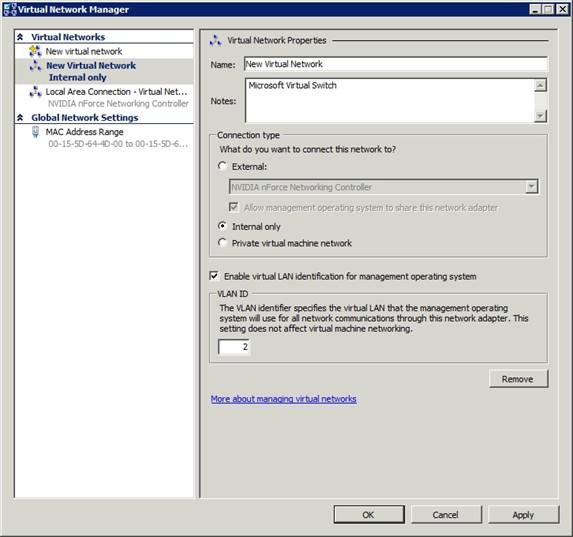
Figure A: Select the Enable Virtual LAN Identification for the Parent Partition check box, and provide a VLAN ID number.
Virtual Machines
Just as you can configure the parent partition to support VLAN traffic, you can also enable VLAN support on a per virtual machine basis. Once again, this is done through the Hyper-V Manager console.
To enable VLAN support for a virtual machine, open the Hyper-V Manager, and right click on the virtual machine that you want to configure. Choose the Settings command from the shortcut menu, and you will be taken to the virtual machine’s Settings page.
Now, choose the network adapter on which you want to enable VLAN support. As you can see in Figure B, you can enable VLAN support by selecting the Enable Virtual LAN Identification check box, and providing a VLAN ID.
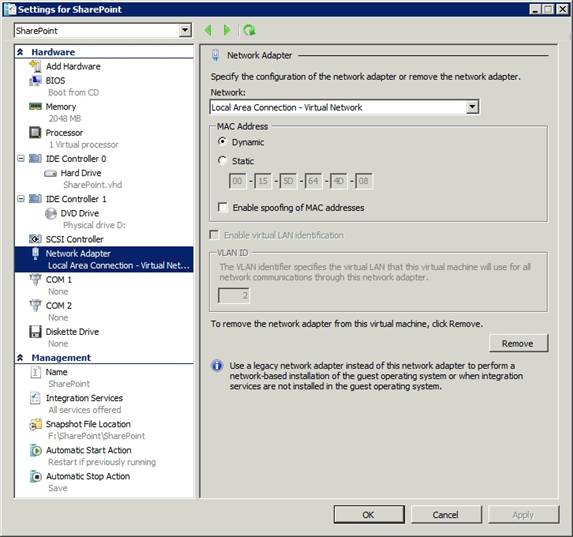
Figure B: The process for configuring VLAN support on a guest machine is very similar to the method used to provide VLAN support to the parent partition
As you look at the figure above, you may notice that the option to Enable Virtual LAN Identification is grayed out. There are two things that can cause this. The VLAN configuration options are unavailable if the physical network hardware does not support the use of VLANs. These options might also be grayed out if the virtual machine is currently running.
Supplemental Connectivity
When we enabled VLAN support for the parent partition, we did so by selecting a network adapter that was attached to a Hyper-V virtual network, and then configuring the settings for that adapter. While this is certainly the primary method for enabling VLAN support at the parent partition level, it is not the only method.
It is very common for Hyper-V hosts to contain multiple physical adapters. In such cases, at least one adapter is usually dedicated solely to the parent operating system. This allows for remote management, patching, etc. Because this adapter is not connected a virtual switch, you will not be able to use the Hyper-V Manager console to enable VLAN support for the adapter.
Before I show you how to enable VLAN support for the adapter, I need to point out that you should only use this technique for network adapters that are not connected to a Hyper-V virtual network. If an adapter is being used by Hyper-V then you need to use one of the configuration methods that I have already discussed.
With that said, open the Control Panel and click on the Network and Internet icon. Next, open the Network and Sharing Center, and then click on the Change Adapter Settings link. This will cause Windows to display all of the physical network adapters that are installed in the server. Right click on the adapter that you want to configure, and choose the Properties command from the resulting shortcut menu. When you do, you will be taken to the adapter’s properties sheet. Next, click the Configure button, and Windows will display another properties sheet. Go to the properties sheet’s Advanced tab, shown in Figure C.

Figure C: You can enable VLAN support at the network adapter level.
As you can see in the figure above, you will have to use the Priority and VLAN option to enable VLAN support for the adapter. After doing so, use the VLAN ID option to specify the VLAN ID, and click OK. If these options are not available, it means that your network card does not offer VLAN support.
Conclusion
This has been a fairly long series, and I have talked about many different aspects of virtual networking in a Hyper-V environment other than just VLANs. Obviously, there is a lot of material to take in, and given the length of the series it will be easy to forget some of the things that I have talked about. If you remember nothing else from this article series though, you should try to remember that any physical network adapters that are connected to a virtual switch should only be bound to the Microsoft Virtual Network Switch Protocol. Enabling TCP/IP or any of the other networking components that are typically enabled on Windows servers can cause network connectivity to break.
If you would like to read the other parts in this article series please go to:


