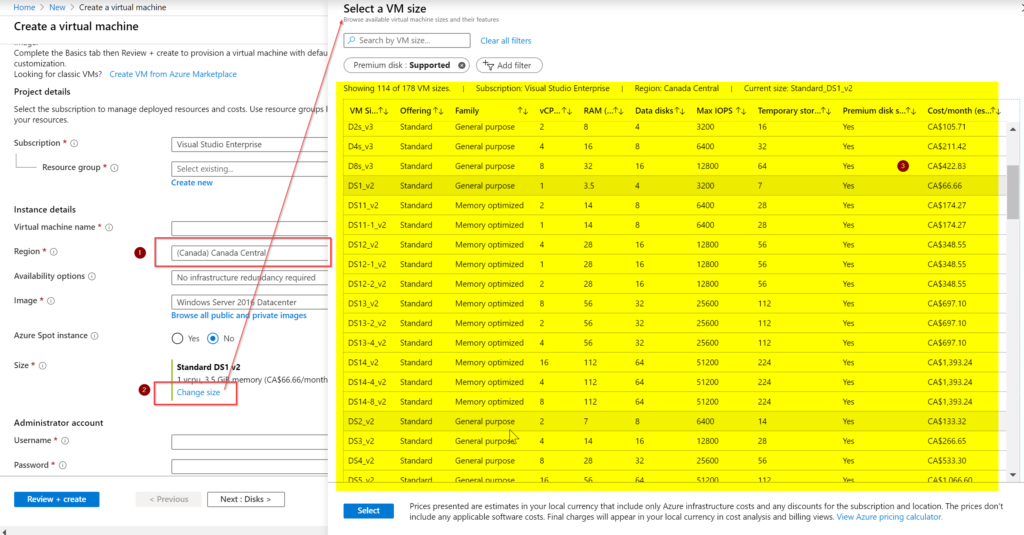
When planning your infrastructure-as-a-service (IaaS) VMs, there are a couple of ways to check the VM sizes available to any given region. The most orthodox way is provisioning a new VM in Azure Portal, and after selecting the Region (Item 1), we can click on Change Size (Item 2). The result will be a list of all available VM types for that region will be displayed (Item 3).
The cloud administrator can create filters to narrow down based on their requirements.
The second approach to check VM sizes is using PowerShell. We can execute the cmdlet Get-AZVMSize -Location <AzureRegion> and a list containing all available VM sizes, including vCPUs, memory, data disk, OS disk size in MB, and resource disk size in MB will be listed.
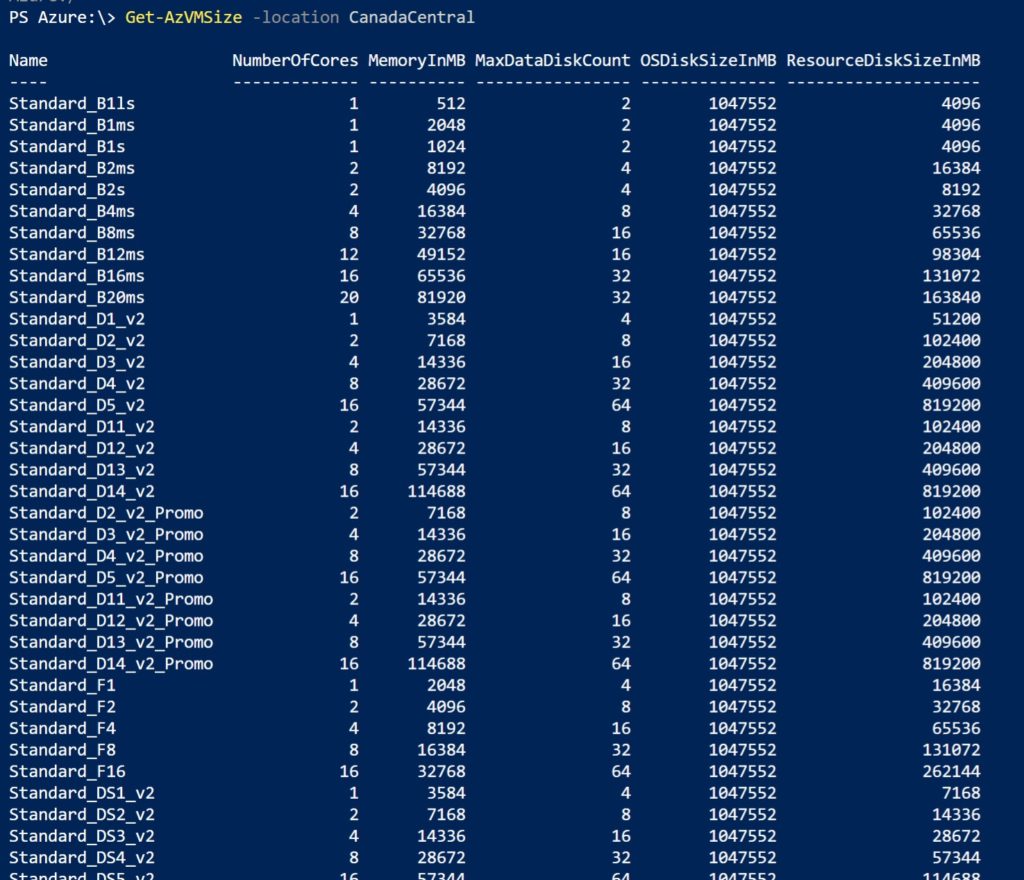
Since we are in PowerShell, we can take advantage of and create a filter on the fly. In the example below, we are listing all the VM sizes that support more than 64 vCPUs.


NumberOfCores in some sizes are not equivalent to number of vCPUs. Be mindful.