When using Azure DevOps to manage your infrastructure-as-code (IaC) or regular application CI/CD (continuous improvements/continuous development) pipelines, the cloud administrator should spend some time configuring the pipelines to authenticate against Microsoft Azure to perform the desired deployments. Sometimes, the process is overlooked because it seems trivial when you have all the privileges in place. Let’s create a simple release pipeline with one ARM template deployment task, as depicted in the image below, to understand how the Azure DevOps service connections are configured.
When editing or creating a new release pipeline, click on Tasks (Item 1), and a list of tasks will be listed underneath. In our case, we added a couple of ARM template deployments (Item 2). By default, when added, an ARM template deployment task will require some attention. It is related to the connection between Azure DevOps and the Azure platform (subscription or management group).
Select one of the available subscriptions under Available Azure Subscriptions and click on Authorize.
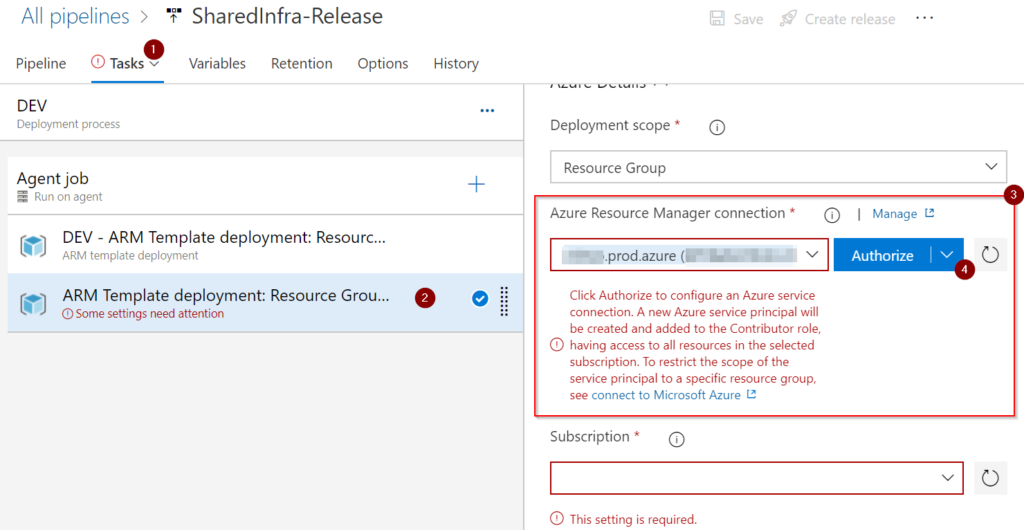
A service principal will be created behind the scenes in the Azure Active Directory tenant. The name will have, by default, the prefix starting with the Azure DevOps organization name, followed by a dash “—” and the Azure DevOps project name.
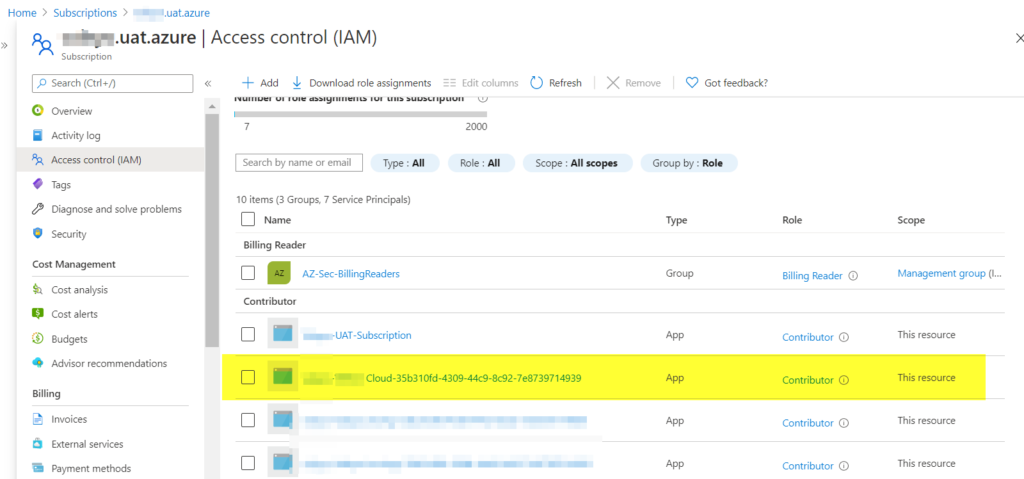
The same service principal will be added as a contributor role at the subscription level, as depicted in the image below.
Notes from the field: If you open a subscription and see a lot of entries that match your Azure DevOps organization and project names, you know where those entries are coming from.
Service connection design
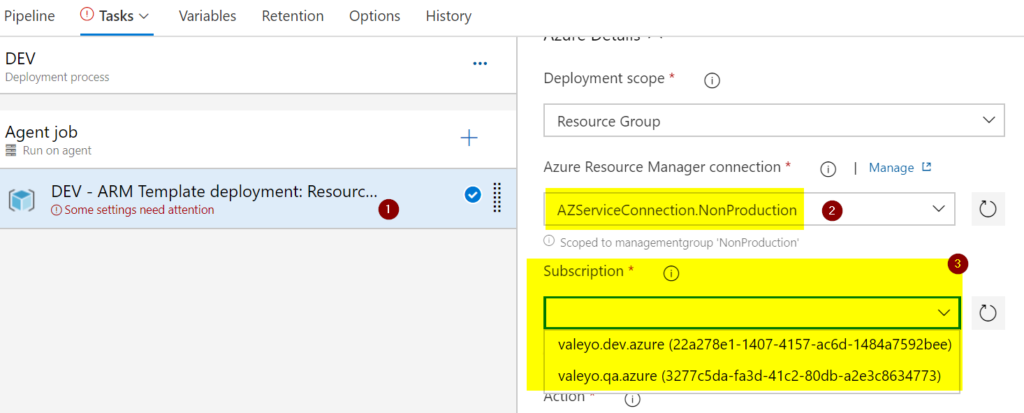
The design has to meet your organization requirements. When using management groups, we can assign a service connection to a specific level, and all subscriptions underneath will automatically have the permission assigned.
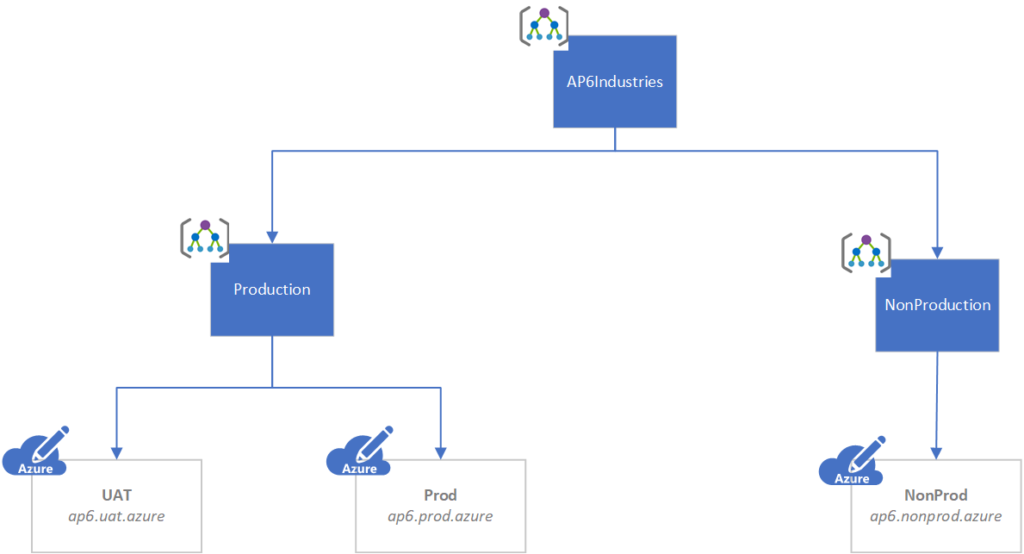
Some companies prefer to create service connections per subscription. It helps control the exposition of any given service principal to a specific subscription. When configuring the pipeline, we need to pick and choose the ones that match the environment/subscription.
Having a proper design saves time and solves the problem of too many service connections. I always try to keep the number as low as possible. This way, it is easy looking for logs and finding out which Azure DevOps process deploys any given resource in Microsoft Azure.
Managing service connections
The goal from any Azure DevOps pipeline is to reduce the number of service principals and permissions on your subscription or Management Group level that are not required. We can take advantage of service connections in Azure DevOps to keep the number of permissions entries in any given subscription low.
Every time we Authorize a new pipeline in the Azure DevOps, a new service connection will be created as part of the process.
To understand service connections, we can start by creating our first one. Here’s how: Logged in to the Azure DevOps portal, go to any given project, and click on Project Settings. In the new Project Settings area, click on the service connections item, and a list of all available service connections will be listed. To create a new one, click on the New service connection button, located in the right-upper corner.
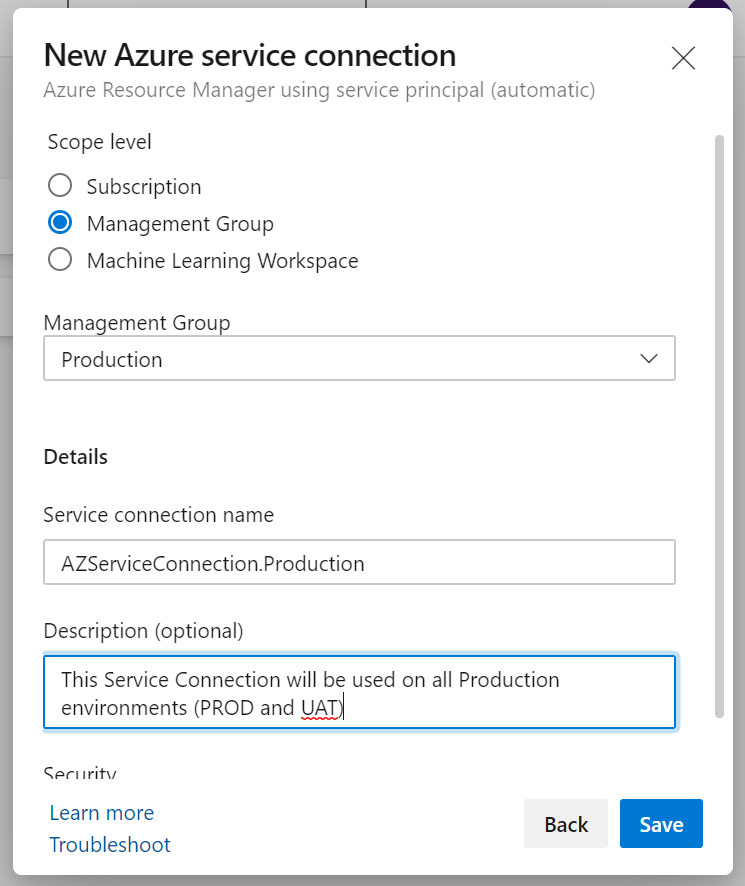
On the new page, select Azure Resource Manager, and click Next. In the new page, select Service Principal (automatic), and click Next.

We can configure the scope (Subscription, Management Group, or Machine Learning Workspace), select the desired Management Group, and define a name and description on the new page. Finally, we can allow this service connection to be used by all pipelines in the current project by selecting Grant access permission to all pipelines checkbox (please do so). When complete, click on Save.
Note: If your approach uses the Subscription scope, then make sure to select Subscription and select the desired subscription.
After creating the service connection, we can click on it and two important links to maintain it. The first one is Manage Service Connection Roles, which will redirect us to the RBAC (role-based access control of the given subscription to check the permissions), and the second one, which is the Manage Service Principal, will open a new page with the service principal blade that is being used for this service connection.
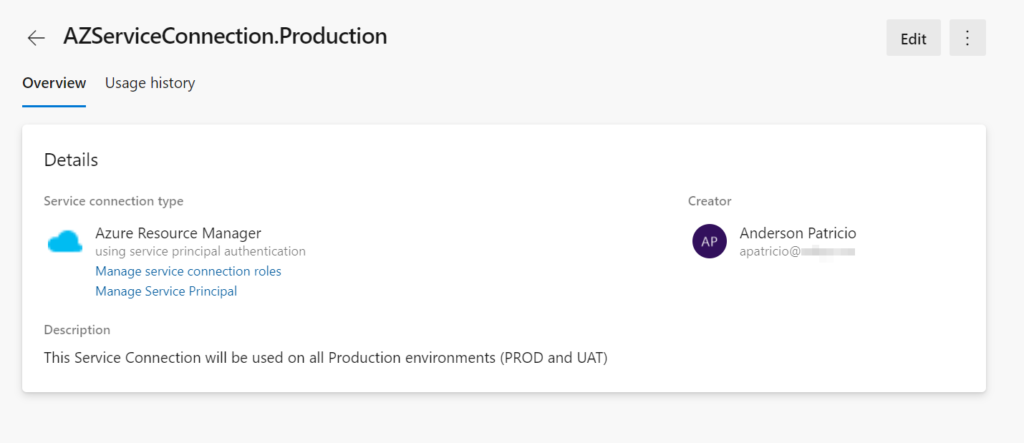
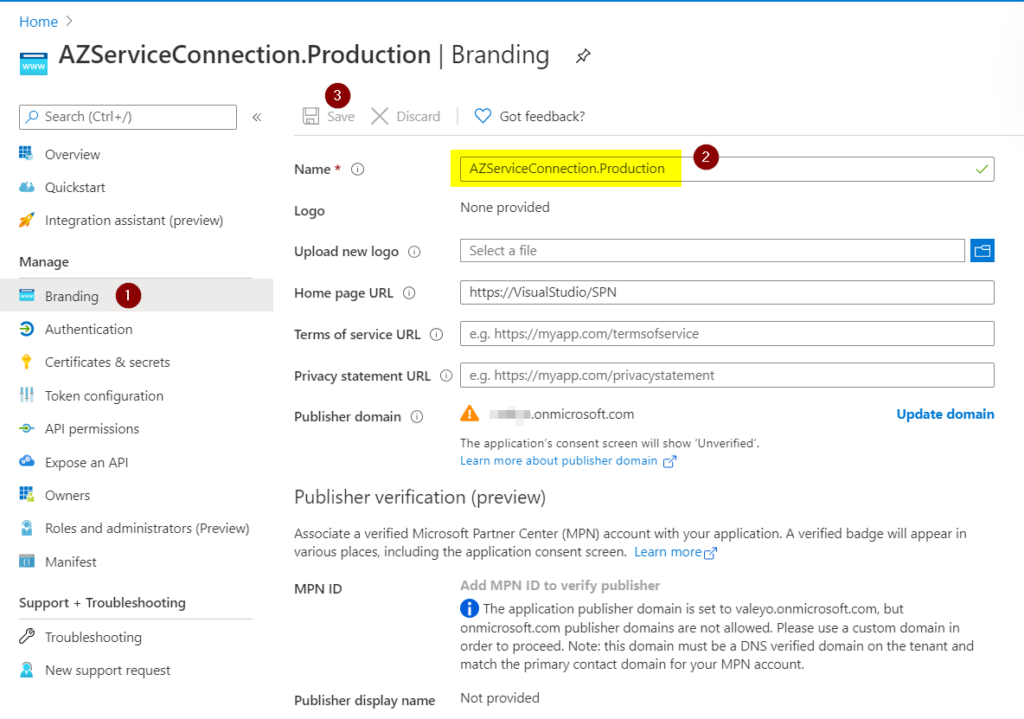
The most important thing is to be able to identify the service connection in the RBAC and logs. We can configure that by clicking on Branding (Item 1), typing the new name (Item 2), and Save (Item 3).
Testing a new service connection
Now that we created a new service connection at the Management Group level and managed the new name (Item 2), we can leverage the new service connection. As a result, we can see all subscriptions that service connections have access (Item 3) with a single entry.
Sharing Azure DevOps service connections
We have defined a service connection that meets our security requirements. We labeled accordingly, and the team that is consuming it on the pipelines is happy. However, you will notice that a service connection, by default, lives within a specific project, which kind of sucks if we try to use this beautiful service connection that we worked so hard it won’t be displayed.
Azure DevOps has a feature to share service connections. It comes in handy in Azure DevOps organizations with several projects requiring the same permissions to deploy code in Azure. The process is simple, go to the desired service connection, click on the … button, and select Security.
On the new page, go to the Project permissions, click on the + button, and select the project from the list. After that, the service connection will be displayed as Shared, and it will be available on all projects you defined.

Azure DevOps service connections make your life easier
In this article, we covered a simple but fundamental feature, which is the Azure DevOps service connections. If used right, it makes your RBAC permissions at the subscription/management group level a breeze and chances are that you are not going to see a lot of funky names when reviewing your permissions.
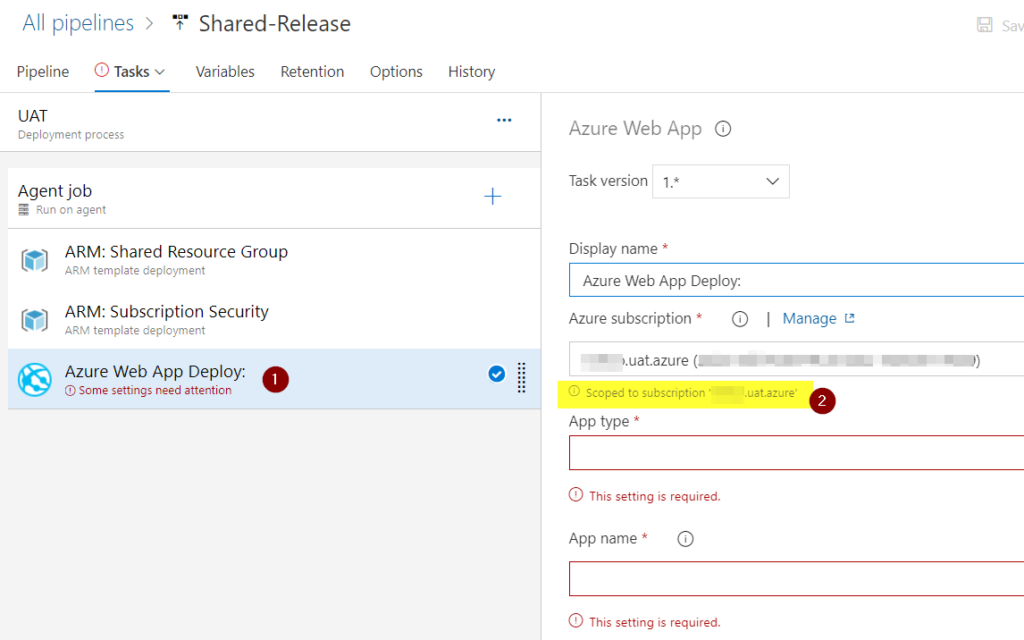
One important note: When I wrote the design section of this article, the use of management groups for some can be the silver bullet to solve all problems, right? Unfortunately, there are a couple of caveats. It works great for ARM deployments. However, some pipeline tasks like Key Vault, web app, etc. are scoped at the subscription level. By design, they don’t see management groups.
In the image below, we are looking at a web app (Item 1), and we can see that the scope does not have an option as we do in ARM deployments. Thus, we may have to create a new service connection to use with this type of resource.
Featured image: Shutterstock


Hi, I just have a small doubt. I invited a person to my devops portal for a particular project with basic access level and project contributor permission. After he logged into azure devops, inside the project he has given access to, He couldn’t find the service connections which are created by me. So does it mean, every time I invite a user to my project in azure devops, does he needs to establish service connection once again?