Azure Automation is a cloud solution that helps organizations meet their infrastructure and security requirements by automating tasks, providing desired state configuration for your servers, and configuration management. By default, when Azure Automation is created it will allow execution of scripts in Azure. But some organizations want to be able to automate tasks in other clouds and on-premises environments, and the Hybrid Worker tool is the key to deliver such solution.
The Hybrid Runbook Worker Group is a set of one or more VMs configured to act as Hybrid Runbook Worker. Servers configured with this role query the Azure Automation cloud service through port 443 to check if there is any job available. If there is a job, then the Hybrid Worker will execute the runbook.
When using Hybrid Worker, the scripts will be executed on those VMs and we must make sure that future Runbooks have all pieces of software available, including Azure Modules. If we have more than one server, we must make sure that they are configured consistently.
Creating the Azure Automation account
The first step in this article is to create the Azure Automation account, and that account will be responsible to run our script on an interval basis. Logged on to Microsoft Azure Portal, click on Create a resource, type in automation and select Automation. In the new blade click on Create.
Make sure to select Yes in the Create Azure Run As account field. Basically, that will create a Service Principal in your Azure Active Directory.
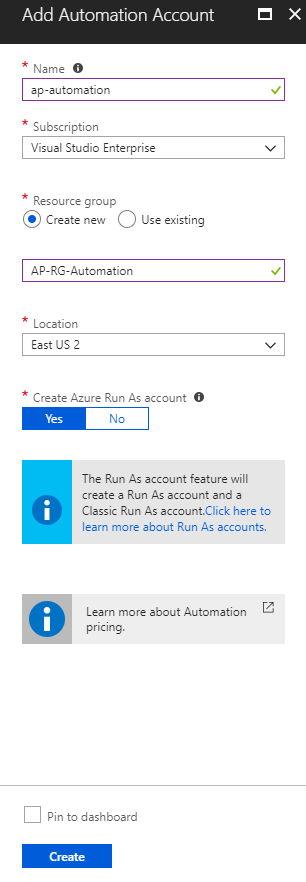
Note: If you want to find out the Service Principal name created during this process, after the creation process, click on the Automation Account, and then click on Run as accounts item on the left side of the blade. Click on the desired Run As account. In the new blade the Azure Active Directory Application field will have the name which this account was registered.
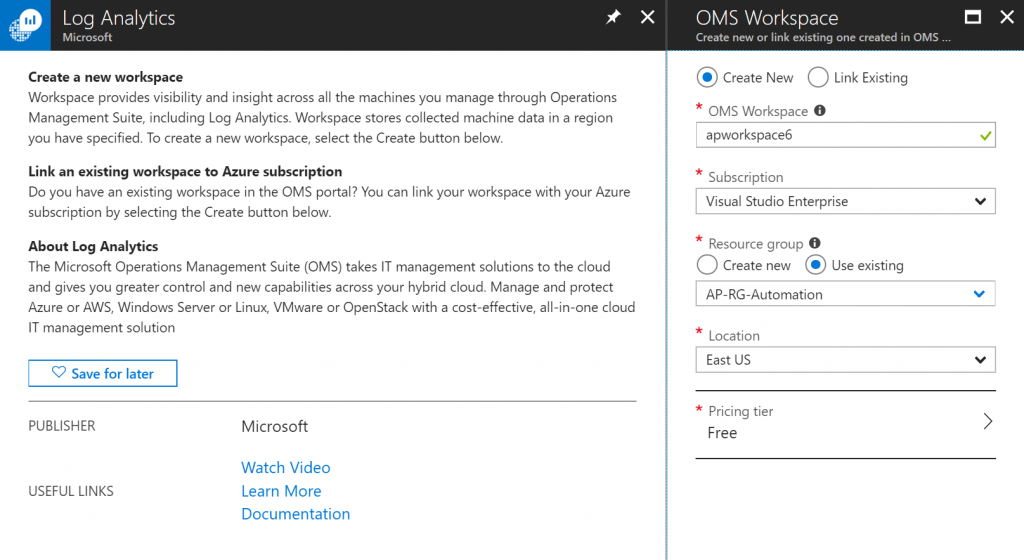
The next step is to create a new Log Analytics resource. Basically, we need to define a unique name, resource group, and location.
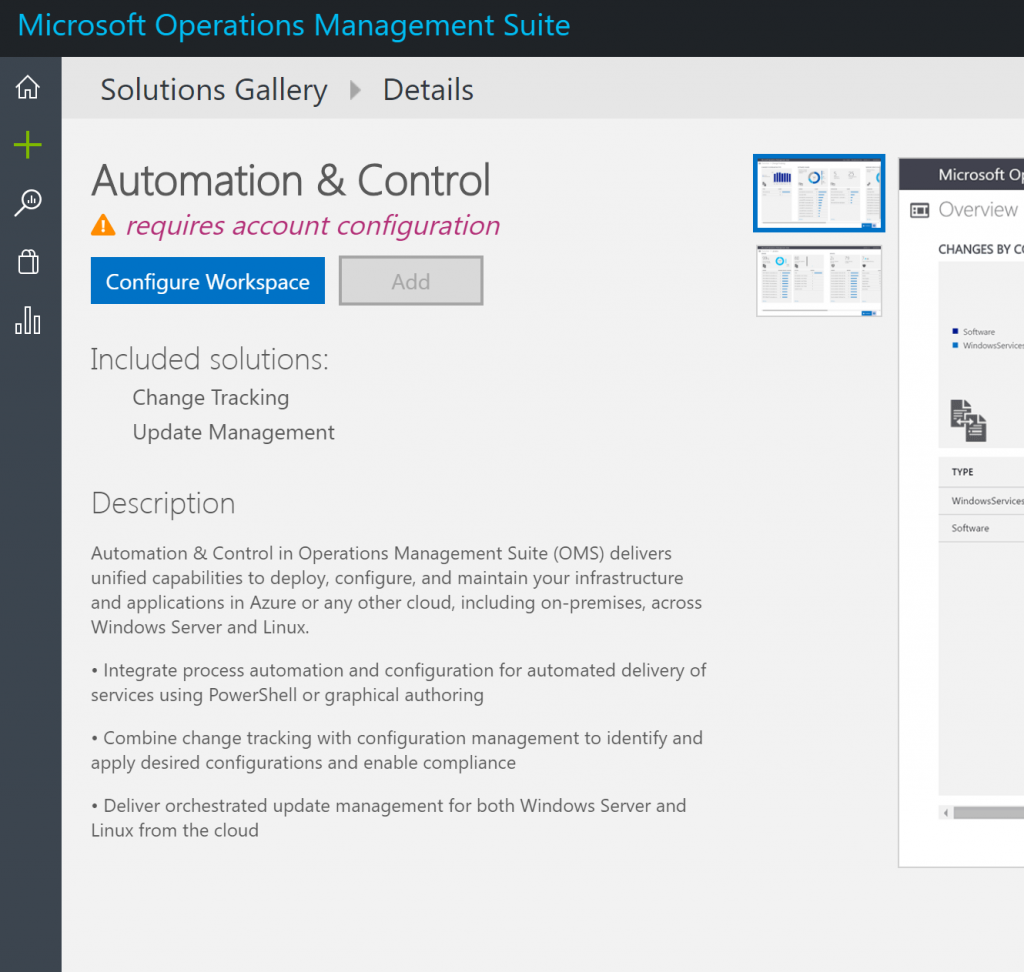
After creating the new workspace, open the OMS portal by selecting the Log Analytics item in the Resource Group that you defined during the creation of the resource. In the main page (OMS Workspace), click on OMS Portal, and a new page with OMS main page will be displayed. Click on the Store icon, and then click on Automation & Control, and then click on Configure Workspace.
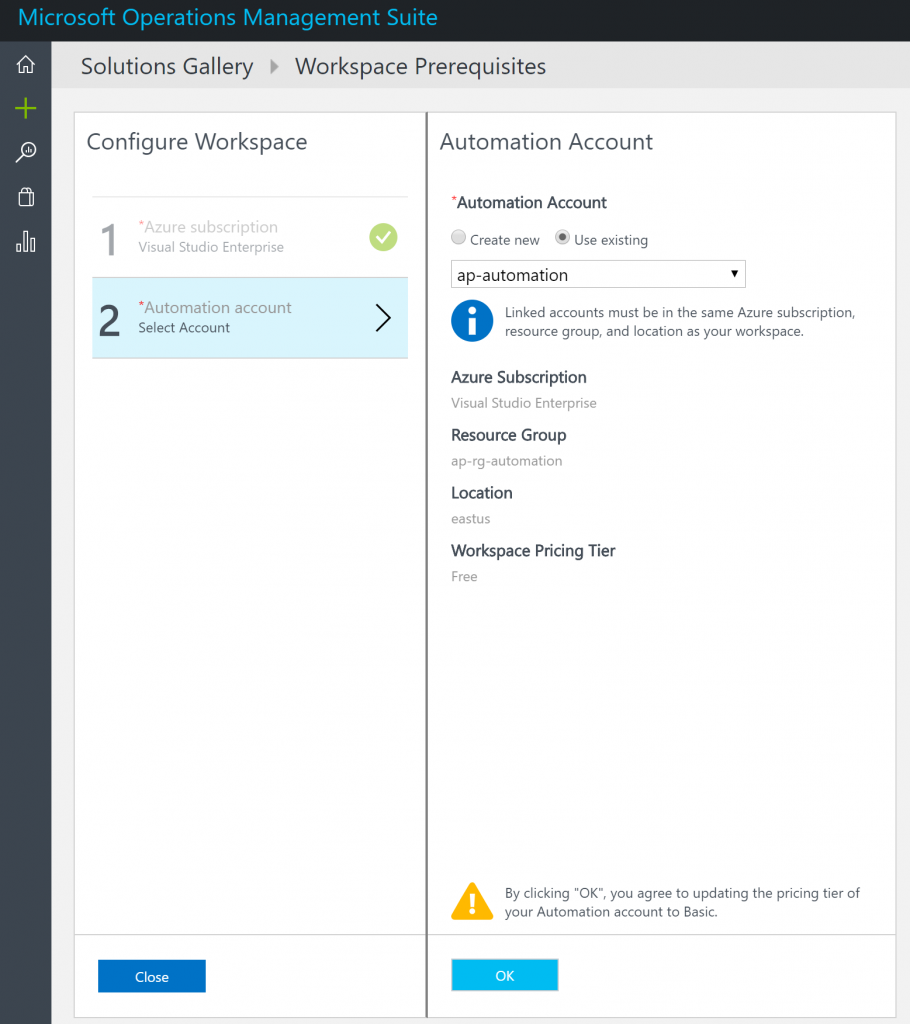
In the new page, select the Automation Account that we have just created and click on OK.
Note: To check if any given OMS has an Automation Account, click on Settings, Accounts, and then Automation Account.
Creating and configuring Hybrid Worker
The Hybrid Worker is a regular Windows Server 2016 VM that we provisioned using Azure Portal using default values, and all Azure Automation scripts that are configured to run on Hybrid Worker mode will be executed on this virtual machine.
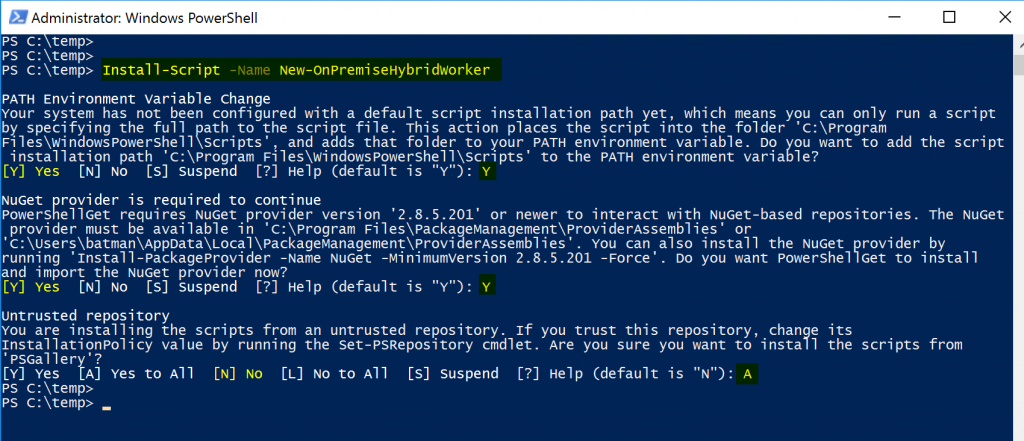
After provisioning the server, our first step is to install the script that creates the integration between the VM and the Azure Automation Account. To install it, run the following PowerShell cmdlet. The process will configure the current server to support all the requirements to download and install the desired script.
Install-Script -Name New-OnPremiseHybridWorker
The next step is to run the PowerShell script below. As you can see, there is some information that we need to provide. Before running the script to install the Hybrid Worker, we should run these following cmdlets to retrieve all required information:
Get-AzureRMOperationalInsightsWorkspace
The above cmdlet provides values for these following parameters: WorkspaceName and OMSResourceGroupName.
Get-AzureRMAutomationAccount
The above cmdlet provides values for AutomationAccountName and AAREsourceGroupName
Get-AzureRMSubscription
The above cmdlet provides the value for the SubscriptionID parameter
Having all those values ready helps when running the cmdlet below. The only parameter missing is the HybridGroupName and we will define it during the execution of the cmdlet. In our article we are going to use HybGroup01. The script will take some time to execute, and it will require authentication. Modules will be installed and loaded, and the Microsoft Monitoring Agent will be installed as well.
New-OnPremiseHybridWorker.ps1 -AutomationAccountName <NameofAutomationAccount> -AAResourceGroupName <NameofResourceGroup> -OMSResourceGroupName <NameofOResourceGroup> -HybridGroupName <NameofHRWGroup> -SubscriptionId <AzureSubscriptionId> -WorkspaceName <NameOfLogAnalyticsWorkspace>
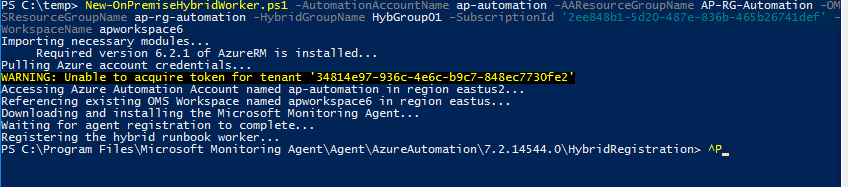
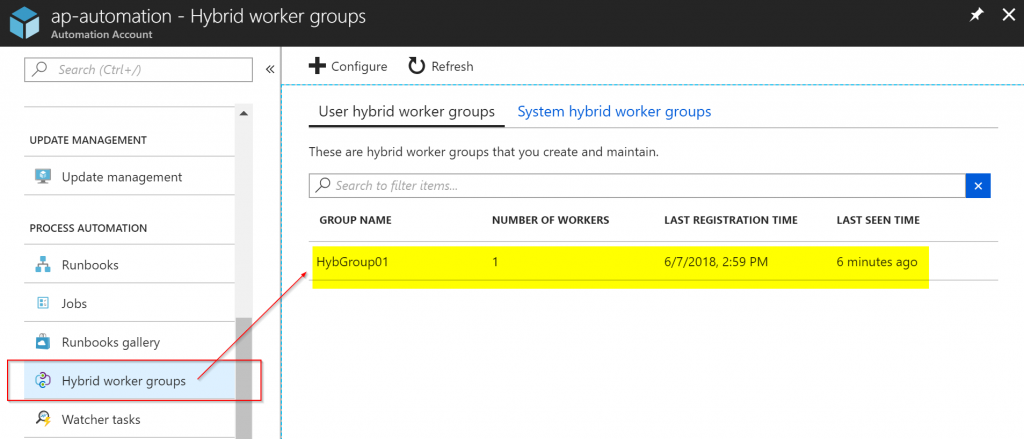
The result of a successful run will be similar to the image above, where the final step is the registration of the Hybrid Runbook Worker in Microsoft Azure. We can check in the Azure side to see the changes performed by the script. Click on the Automation Account and then click on Hybrid Worker groups, and in the User Hybrid Worker Groups, we will have a new entry as depicted in the image below.
Executing Runbooks
Now that we have the Hybrid Worker groups in place, we can select where we want to run the desired Runbook. We can select Azure or Hybrid Worker.
Logged on the Azure Portal, select the Automation Account and then click on Runbooks, select a Runbook from the list or create a new one. After having the desired Runbook being listed on the right side, click on Start. In the new blade, select Hybrid Worker and select the group. In our article we have only the one that we have just created.

These are the basic steps to get the Hybrid Worker configured. In future articles here at TechGenix, we will be exploring more features available in Azure Automation. Stay tuned!
Featured image: Shutterstock


Thank you! This guide was very helpful.