Sharing files between devices is one of those things that seems so simple and yet is often a pain. If your current situation makes transferring files in the usual way impractical, there are a couple of different ways to use Windows 10 to perform wireless file transfers. In this article, I will show you two different file transfer methods. Neither method is suitable for every situation, but collectively the two methods should address most file transfer needs.
Wireless file transfers using Bluetooth
Windows 10 has long included native Bluetooth file transfer capabilities. The advantage to using this method for wireless file transfers is that it works across device types and operating systems. In writing this article, for example, I used this method to transfer files between a Windows 10 PC and a smartphone. The disadvantage to using this technique is that it requires Bluetooth pairing between the source and destination devices.
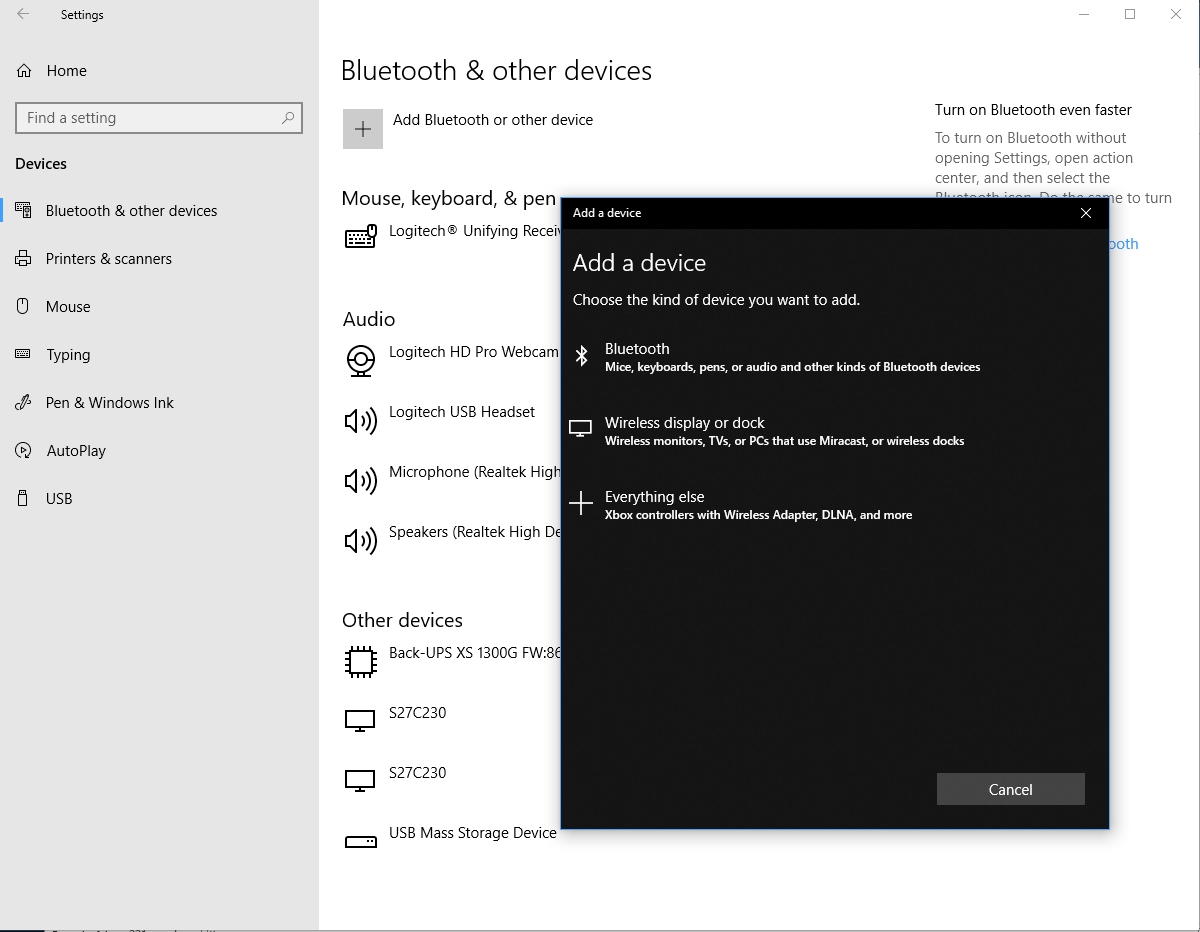
In Windows 10, you can pair a Bluetooth device by clicking on the Start button, and then clicking on the Settings icon. Once you are in the Settings window, click on Devices, followed by Bluetooth and Other Devices. Now, click on the Add Bluetooth or Other Device link and choose the Bluetooth option, as shown in the figure below.
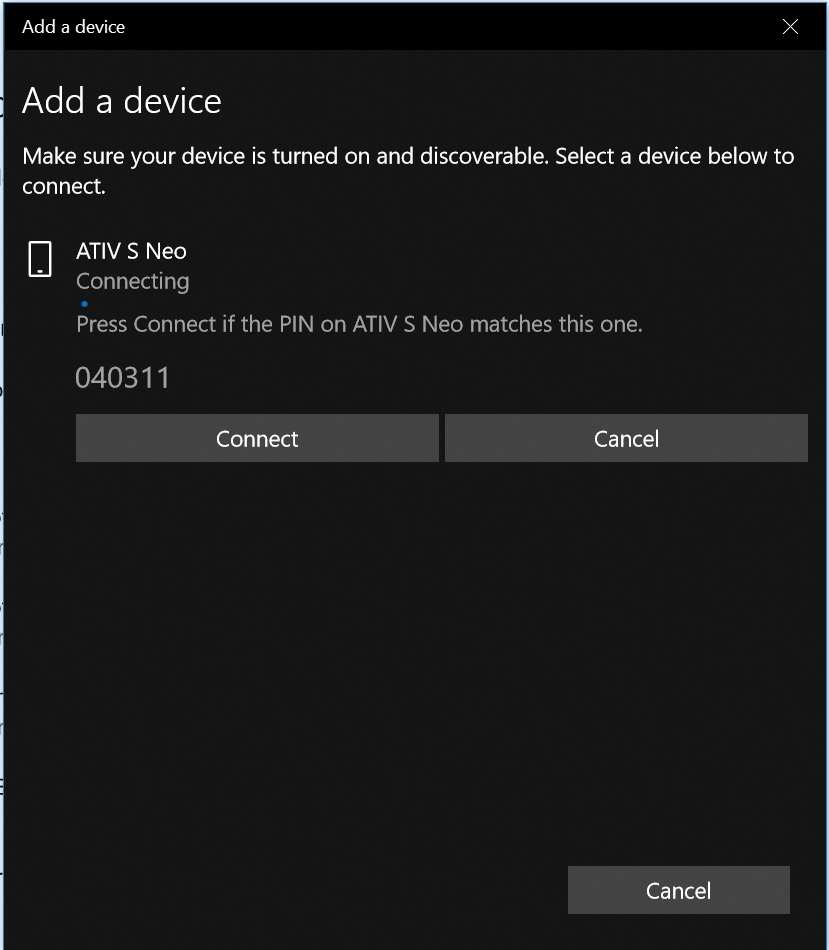
After a few seconds, your Windows 10 PC should detect the device that you are pairing it to. Simply click Connect, as shown in the figure below, to establish Bluetooth connectivity between the devices.
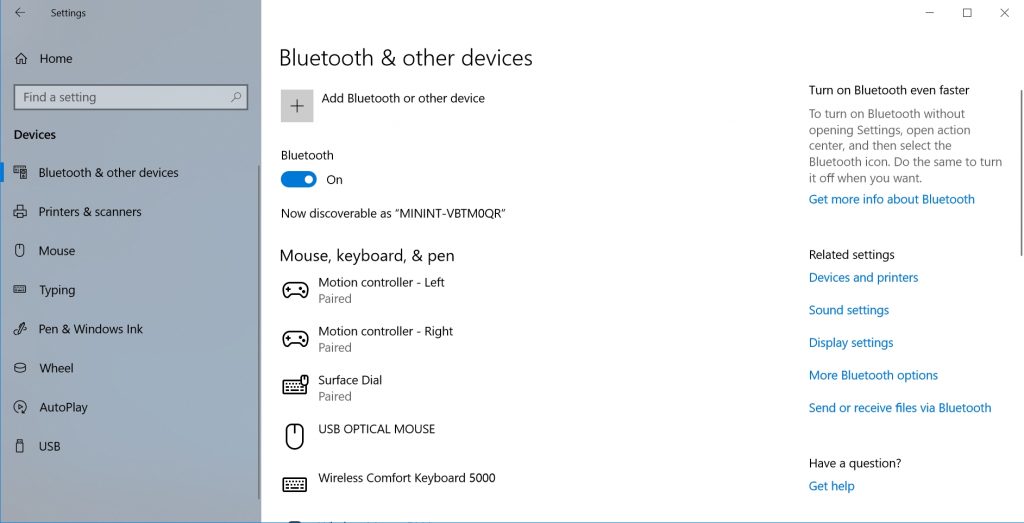
Once the two devices have been paired, you can transfer files by using Bluetooth. To do so, go to Settings, and then click on Devices, followed by Bluetooth and Other Devices. Next, click on the Send or Receive Files via Bluetooth link, shown in the figure below.
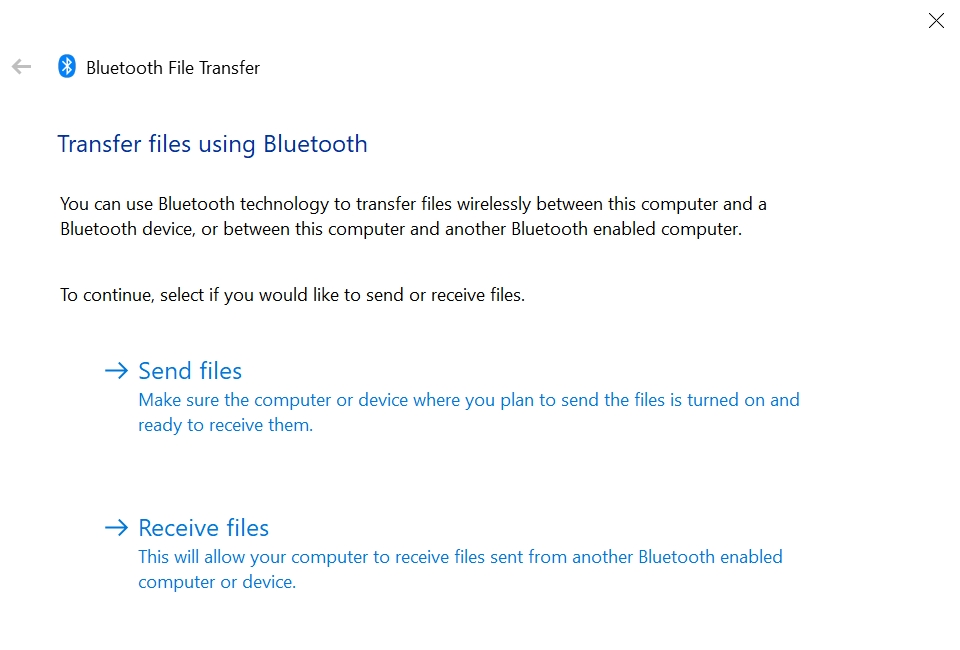
At this point, Windows will launch the Bluetooth File Transfer Wizard. The wizard’s initial screen asks if you want to send files or receive files, as shown in the figure below. Click on the Send Files option, and click Next.
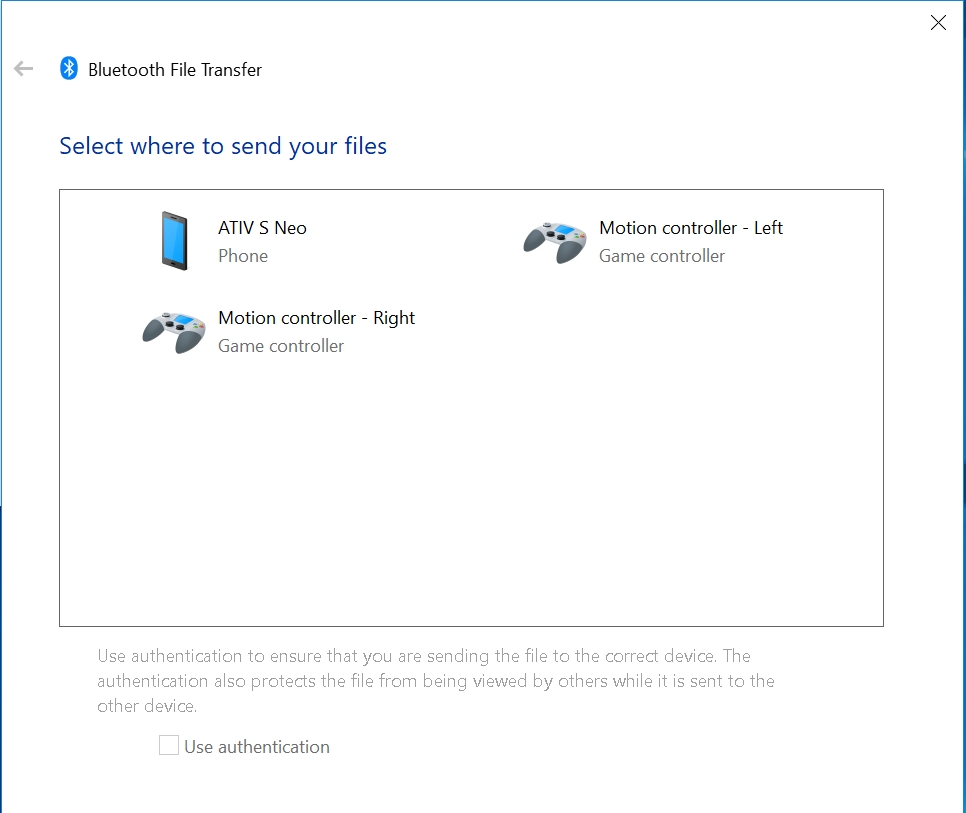
The wizard will now ask you where you want to send your files. Choose the destination device from the list of paired devices, as shown below. In this case, I am sending a file from a Windows PC to a smartphone.
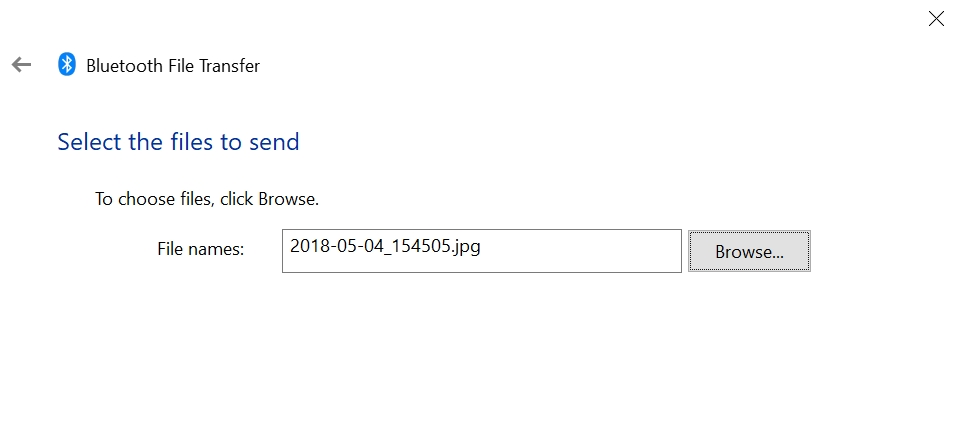
Click Next, and you will be prompted to specify the file that you want to send, as shown in the next image. Make your selection, and click Next.
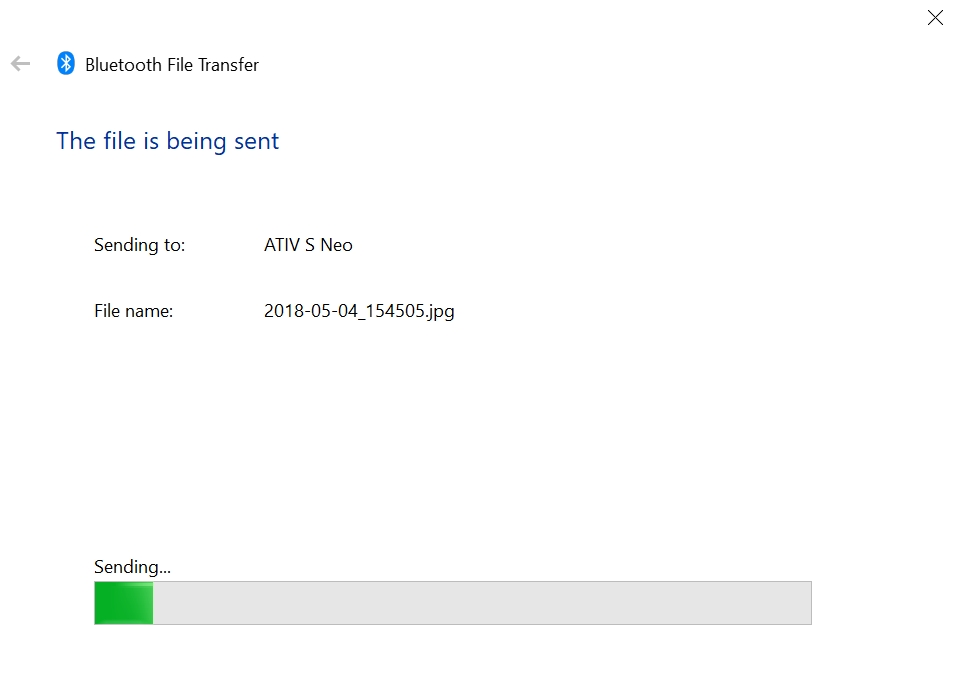
At this point, the file transfer will begin, as shown in the next image.
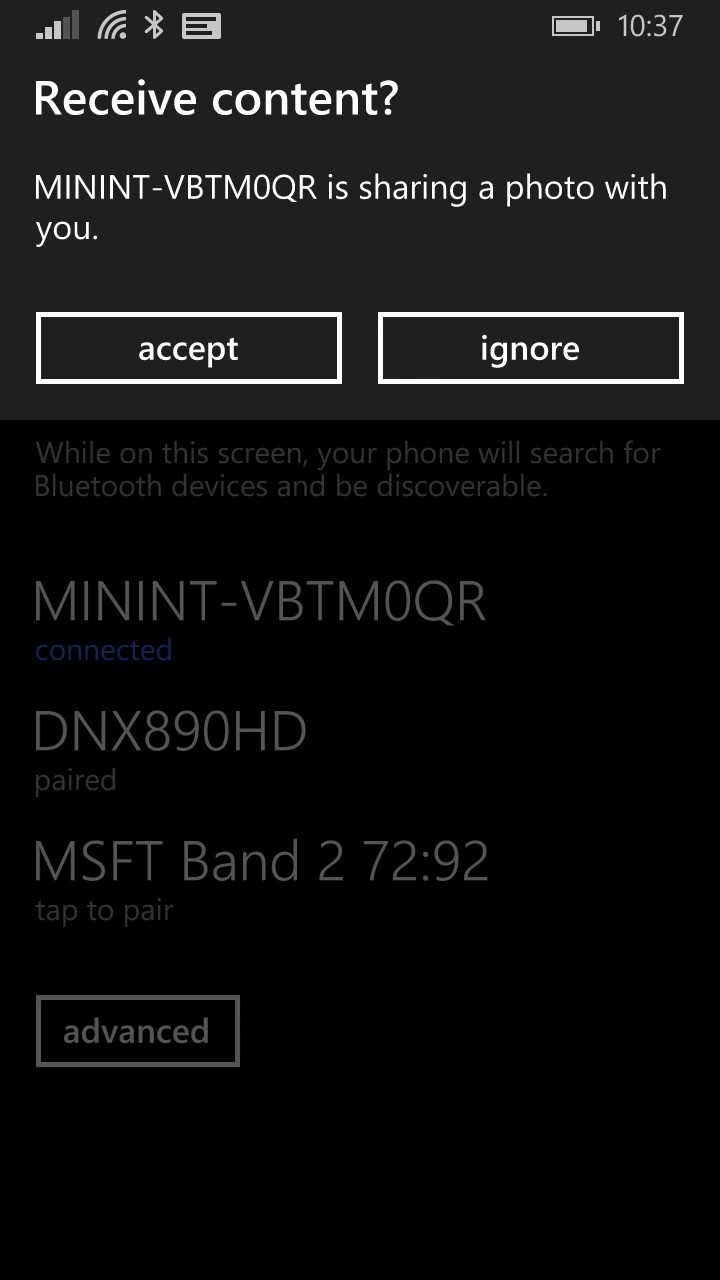
It is worth noting that the file must be accepted on the paired device for the transfer to be successful. The method for doing so varies depending on the destination device type. In the case of my smartphone, for example, I received a popup asking if I want to accept the shared file. You can see what this looks like in the image below.
Nearby Sharing
In the April 2018 update for Windows 10, Microsoft introduced a new feature for wireless file transfers called Nearby Sharing. Like the Bluetooth File Transfer feature, Nearby Sharing lets you transfer files between two PCs that are located in close proximity. The advantage to using this feature is that it does not require Bluetooth pairing between the two devices. The disadvantage, however, is that Nearby Sharing only works with Windows 10, so you won’t be able to use it to transfer files to and from your other devices. On a side note, Nearby Sharing can use Bluetooth or WiFi, and works similarly to Apple’s AirDrop.
To get started, the first thing that you will need to do is to enable the Nearby Sharing feature. To do so, go to Settings, and click System, followed by Share Experiences. Now, turn on the Nearby Sharing option, as shown in the next figure. Nearby Sharing must be enabled on both the source and destination devices.

As you look at the image above, there are two things that are worth paying attention to. First, once enabled, Nearby Sharing defaults to sharing content with any nearby device, but you can limit it to sharing content only with your own devices. The other thing to pay attention to is the path to which shared files will be saved.
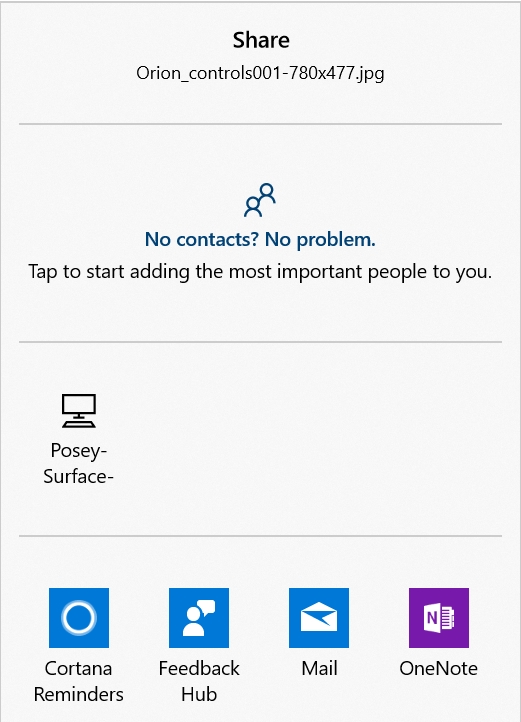
Once you have enabled Nearby Sharing, sharing content between PCs couldn’t be easier. All you have to do is to right-click on the file that you want to share, and then choose the Share command from the shortcut menu. Normally the share option prompts you to share the file using things like email or OneNote. If configured, it also gives you the option of sharing files with your contacts. Once you enable Nearby Sharing, however, Windows also gives you the option of sharing the selected file to a nearby device. In the image below, for example, you can see that the Share window gives me the option of sharing the file to my Surface Book 2 device. If I click on the device (which is called Posey-Surface in the screen capture), then a prompt is displayed on my Surface Book asking if I want to accept the file that is being shared with me. It’s that easy.
Pros and cons
Neither Bluetooth File Transfer nor Nearby Sharing is ideal for every situation. Both options have their pros and cons. Collectively, however, these two technologies should meet most of your requirements for wireless file transfers and file sharing. Even so, there are countless third-party tools available for wireless file transfers if you find that the native Windows file sharing features do not adequately meet your needs.
Featured image: Shutterstock