If you would like to read the first part of this article series please go to Uncovering the new Exchange 2007 SP2 Volume Snapshot (VSS) Plug-in (Part 1).
Introduction
In the first part of this two part article series, we specifically looked at how to perform backups using the new Exchange 2007 SP2 VSS plug-in.
In this second part, we will take a look at how to perform a restore, both to the original location as well as an alternate location, in case you would like to recover specific mailbox items for one or more mailboxes in a restored database.
Restoring Exchange 2007 Databases to original location
Now that we have been through the backup process, let us look at the options available when it comes to restoring Exchange data using the new Exchange VSS plug-in included with Exchange 2007 Service Pack 2.
As mentioned in the beginning of this article, there are two restore options available; you can restore to the original location and thereby overwrite the production databases, alternatively, you can restore to an alternate location.
To begin a restore process, you should click on “Recover” in the Action pane as shown in Figure 1.

Figure 1: Selecting Recover in the Windows Server Backup Console
The Recovery Wizard is launched. On the “Getting started” page, make sure “This server (servername)” is selected and then click “Next”.

Figure 2: Selecting this server on the “Getting started” page
Now specify the date you want to restore the Exchange data (Figure 3), and then click “Next”.
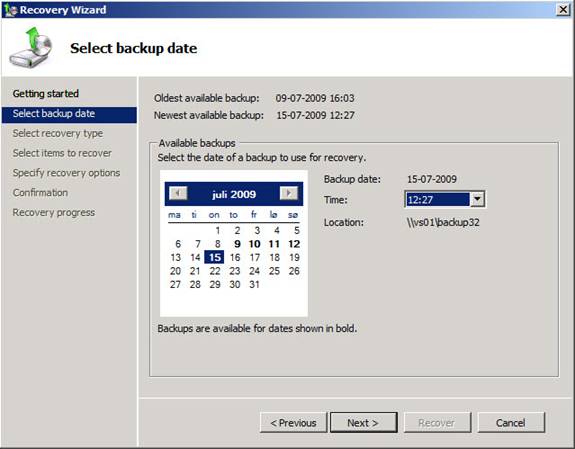
Figure 3: Selecting backup date from which we want to restore
On the “Select recovery type” page, select “Applications” (since you want to restore application data) and click “Next”.

Figure 4: Selecting the recovery type
On the “Select application” page, select Exchange and click “View Details”.
Note:
If you are restoring the latest backup and for some reason you do not want to perform a roll-forward recovery of the databases, make sure you check this option.

Figure 5: Selecting the Exchange application
In the “Details – Exchange” window, you can see the six storage groups and databases that were backed up in this volume snapshot.

Figure 6: Details window listing Exchange Storage Groups/Databases
Click “OK” and then “Next”.
The “Specify recovery options” page is where you can specify whether you want to restore directly to the production storage groups and databases or if you want to restore to an alternate location. In this first example we will restore to the original location. To do this, select the first option and then click “Next”.
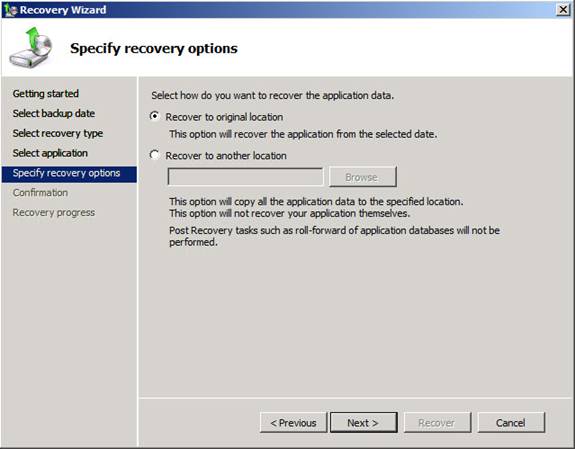
Figure 7: Selecting to recover to original location
On the “Confirmation” page, click “Recover” in order to begin the restore process.

Figure 8: Recovery Confirmation page
Depending on the number of storage groups and databases that are being restored as well as the size of each database, the restore can take a while.

Figure 9: Restoring Exchange Storage Groups and Databases
As you can see in Figure 10, the databases are dismounted and mounted automatically during the restore process.
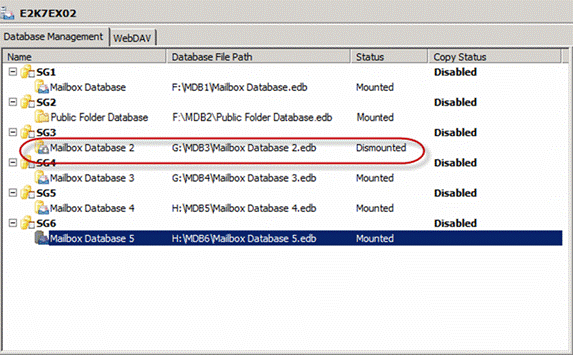
Figure 10: Windows Server Backup automatically dismounts and mounts databases as necessary
Also, any log files in the backup will be restored (Figure 11).
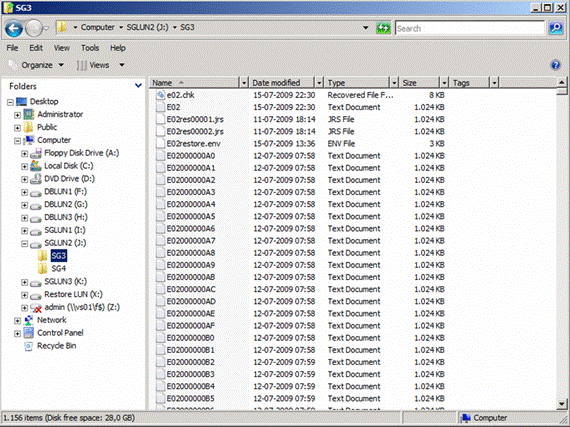
Figure 11: Restore log files
When the restore process has completed, click Close to exit the “Recover Wizard”.
Restoring Exchange 2007 Databases to an alternate location
In this section we are going to do another restore, but this time to an alternate location so that after the restore we can mount a database to a recovery storage group (RSG) and merge required Exchange data with the respective production database.
So, the first thing you need to do is to start another restore session by clicking “Recover” in the “Action” pane. In the “Recovery Wizard” follow the previous steps until you get to the “Specify recovery options” page. Then select “Recover to another location” and then specify to which LUN volume you want to restore the databases and associated log files then click “Next”.
Note:
On my Exchange 2007 SP2 lab server, I have a dedicated restore LUN presented to mounted via drive X.

Figure 12: Restoring to an alternate location
On the “Confirmation” page, click “Recover” in order to begin the restore process.
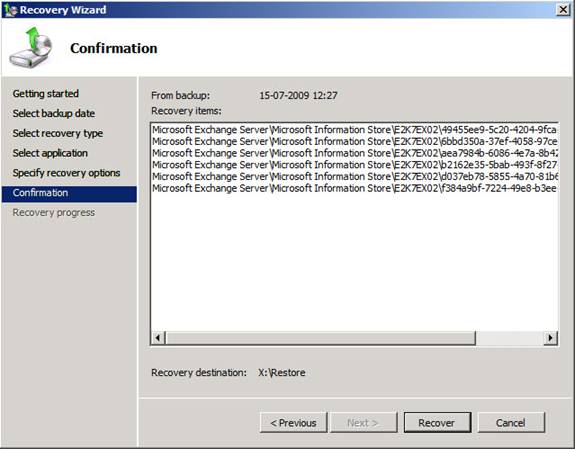
Figure 13: Restore Confirmation page
The recovery process begins and can take a while depending on the amount of storage groups and databases as well as the database sizes.

Figure 14: Restoring Exchange Storage Groups and Databases
When the recovery job has completed, click “Close” to exit the Recovery Wizard.

Figure 15: Restore completed
We now have all databases and log files from the recovery job at the, in the recovery wizard, specified location as can be seen in Figure 16, 17 and 18.
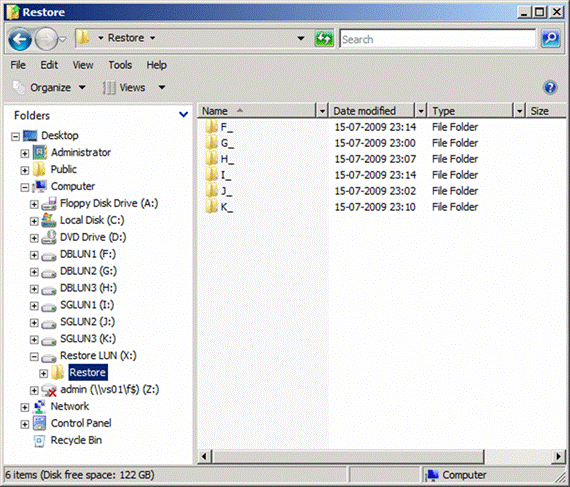
Figure 16: Listing folders restored to the Restore LUN
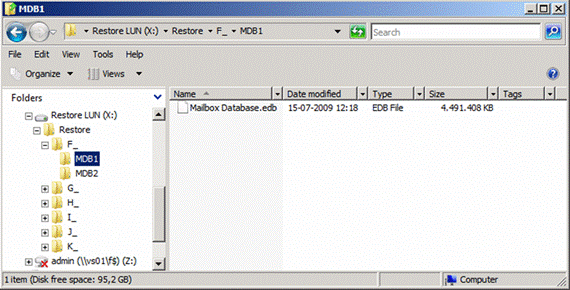
Figure 17: Showing one of the restored EDB files

Figure 18: Showing restored log files
Before we begin creating the RSG and mount the respective database (in this case the Mailbox Database stored in SG1), let us check the state of the database. We can do this with the Eseutil utility run with the /MH switch.
The easiest thing to do is to open a command prompt window and change to the directory holding the database. From here simply run the following command:
Eseutil.exe /MH “Mailbox Database Name.edb”
Notice the state of the database? Yes it is in a dirty shutdown state, which means we cannot mount it in a RSG before bringing it to a clean shutdown state.
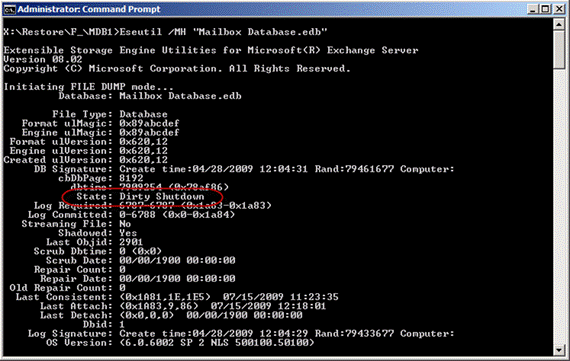
Figure 19: Database in dirty shutdown state
To bring the database to a clean shutdown state, we need to run following command from the log file folder:
Eseutil /R E00 /I /dX:\Restore\F_\MDB1

Figure 20: Changing database to a clean shutdown state
Now let us run Eseutil with the /MH switch again. As you can see in Figure 21, the database is now in a clean shutdown state.

Figure 21: Database in clean shutdown state
Now let us open Outlook Web Access and deleted some data. In this example, we will delete the six last messages received in a user mailbox stored in the database we want to recover data from via an RSG.

Figure 22: Deleting messages in the Inbox via OWA
As you can see the messages have now been deleted from the mailbox.
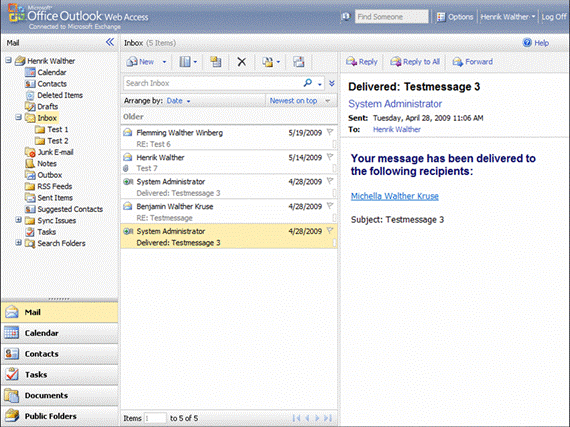
Figure 23: Items deleted
It is time to open the “Exchange Management Console”. In here, select the “Toolbox” work center in the navigation pane, and then open the “Database Recovery Management tool”.

Figure 24: Launching the Database Recovery Management tool
Click “Go to Welcome screen”.

Figure 25: Going to the Welcome Screen
Enter a name for the activity and then click “Next”.

Figure 26: Entering a label for the activity
Under the “Manage Recovery Storage Group”, click “Create a recovery storage group”.
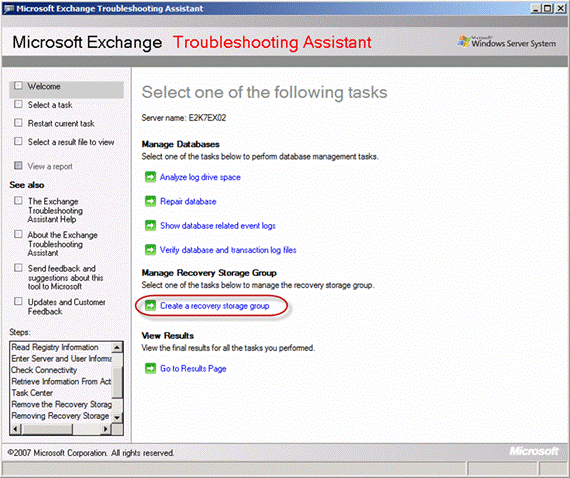
Figure 27: Clicking “Create a recovery storage group”
Now select the storage group you want to link to the recovery storage group. In this case this is SG1.
Click “Next”.

Figure 28: Selecting the Storage group to link to the RSG
On the “Create the Recovery Storage Group” page, specify the recovery storage group log, system and checkpoint file folder paths as well as the database path. This is the path to where you restored the SGs and DBs.
Now click “Create the recovery storage group”.

Figure 29: Specifying the log, system, checkpoint and database path to the restore Exchange data
When the recovery storage group has been created, click “Go back to task center”.

Figure 30: RSG created successfully
The next step is to mount the dismounted database stored in SG1. To do so click “Mount or dismount databases in the recovery storage group”.
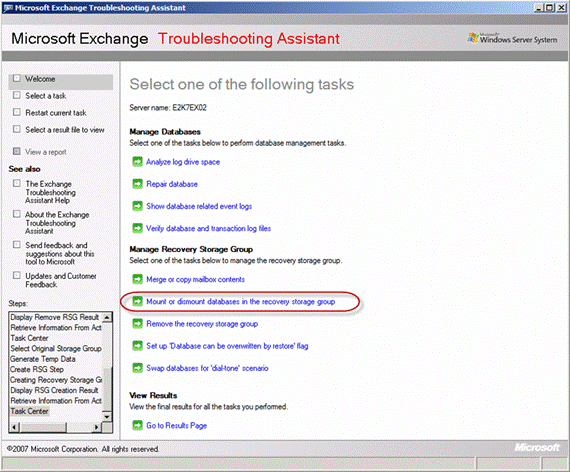
Figure 31: Time to mount the database in the RSG
Check the Mailbox database and click “Mount selected database”.

Figure 32: Check the Mailbox Database to be mounted
When the database has been mounted, click “Go back to task center”.

Figure 33: Database mounted successfully
The typical scenario for restoring a SG/DB to an alternate location exists in order to recover mailbox content for one or more users who accidentally deleted large amounts of data, or mailbox users who need something restored that no longer exist in the mailbox dumpster (by default items that have been deleted more than 14 days in the past). In this case it is the messages we deleted via OWA earlier on in this article.
In this article I want to recover all items that were deleted in a mailbox since this backup was taken.
To recover mailbox data, click “Merge or copy mailbox content”.

Figure 34: Time to merge Mailbox content to the production mailbox
Click “Gather merge information”.

Figure 35: Gathering merge information
On the “Select Merge Options” page, we specify the alias of the mailbox we wish to recover items for and click “Perform pre-merge tasks”.
Note:
We can also specify a folder to which the content should be recovered. Doing so means that all recovered items will be recovered to a folder in the mailbox (such as Recovered data).
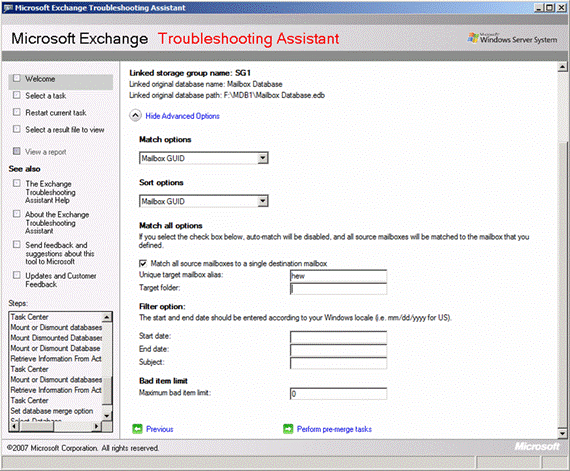
Figure 36: Specifying the alias of the mailbox for which to restore mailbox data
On the “Select Mailboxes to Copy or Merge” page, check the respective mailbox and click “Perform merge actions”.

Figure 37: Selecting the matched mailbox
After a little while you will get the result of the merge process as shown in Figure 38.
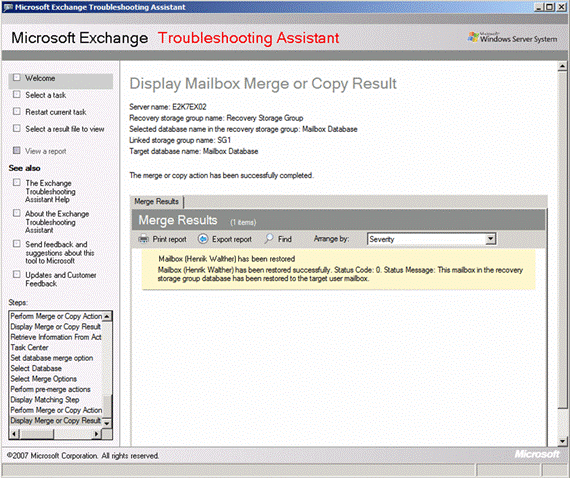
Figure 38: Mailbox data has been merged
Now let us try to open the mailbox again. Voila the messages we deleted before performing the above merge process are now back in the Inbox.

Figure 39: Deleted messages restored to the Inbox
This concludes this multi part article. Hope you enjoyed it.
Summary
Many frustrated Exchange admins and consultants working for or with SORGs and MORGs have been screaming for a native Exchange-aware backup solution for Exchange 2007 SP1 installed on Windows Server 2008 based servers. Although it took some time, the Exchange Product group has now delivered such a solution as Exchange 2007 SP2 which includes an Exchange VSS plug-in that integrates directly with Windows Server Backup.
In this multipart article we uncovered what the Exchange VSS plug-in included in Exchange 2007 SP2. We took a look at the backup and restore options available with this plug-in as well as highlighted its limitations.
We then went through the steps necessary in order to backup storage groups and databases to a remote network share as well as how you restore backed up storage groups and databases to the original location as well as to an alternate location, so they could be mounted in an RSG.
If you would like to read the first part of this article series please go to Uncovering the new Exchange 2007 SP2 Volume Snapshot (VSS) Plug-in (Part 1).


